
 Member
So I did this on my car a few weeks ago, and wanted to do a DIY on it, but didn't have the camera handy at the time. Redfive had a broken door handle, and between the driver's door I saved from my parted out e32, and the e34 parts car, we had enough handles laying around to do both cars. We did the red car this weekend, and finally took the pics to do a DIY writeup. For those formerly afraid of taking apart a door handle, fear no longer.
Step one, have a really sick turbocharged 535 with a broken door handle. I suppose any normal e34 will suffice, but really, what's the point?
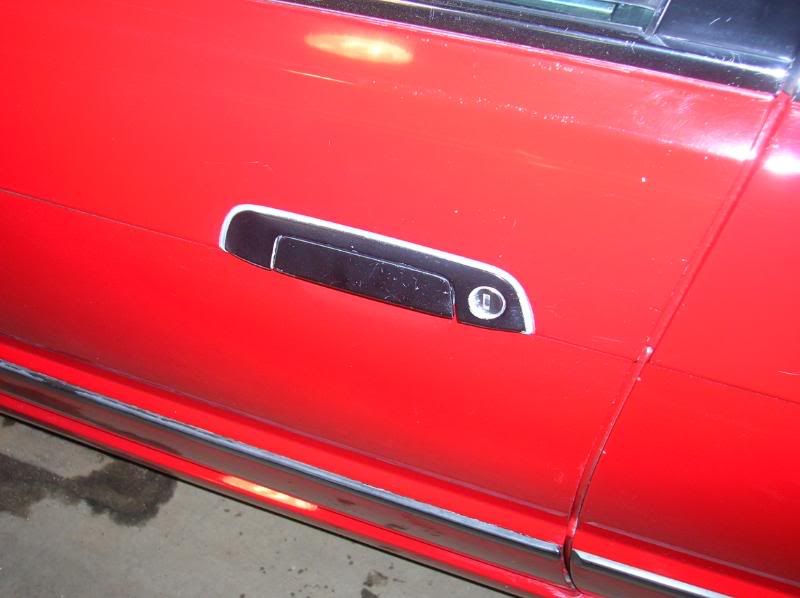
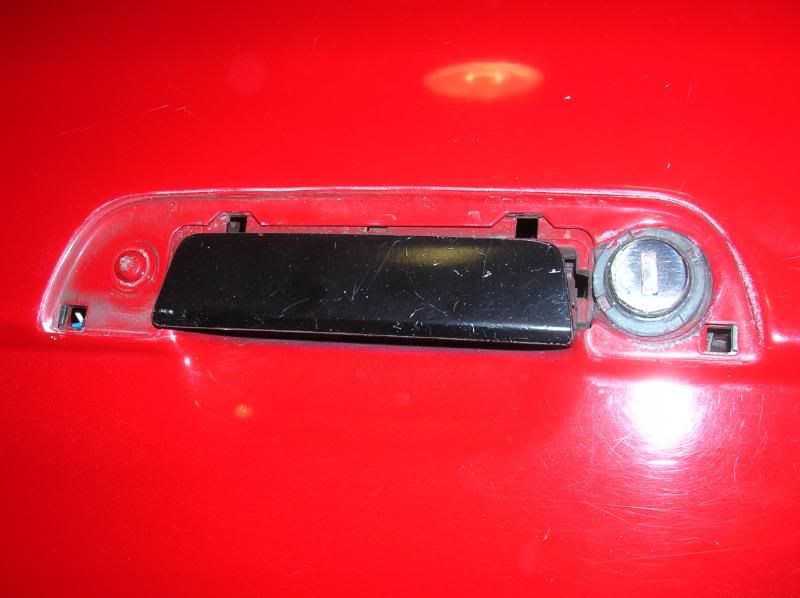
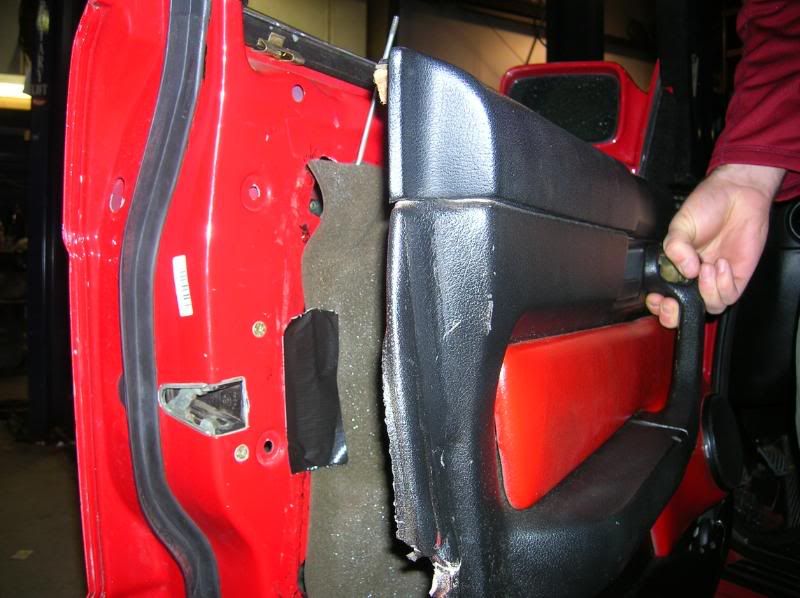
Door unmolested by my grubby hands. That's not gonna last.
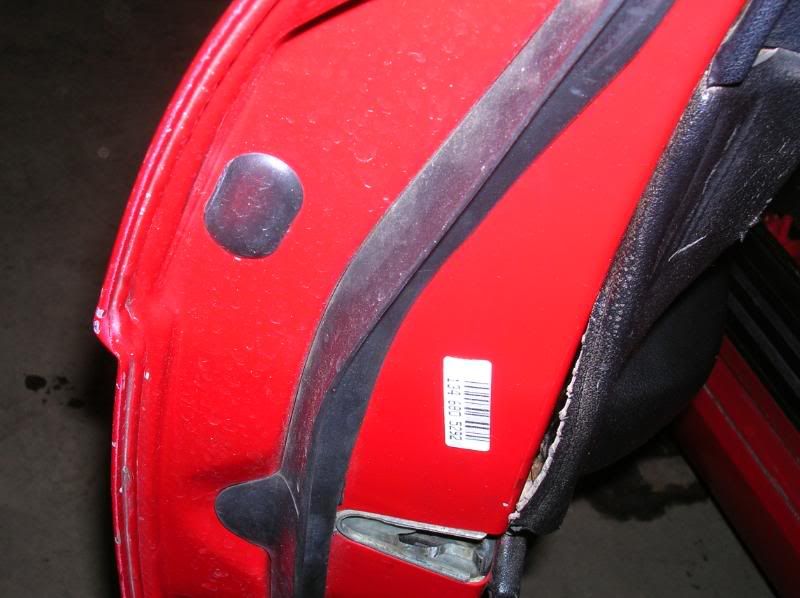
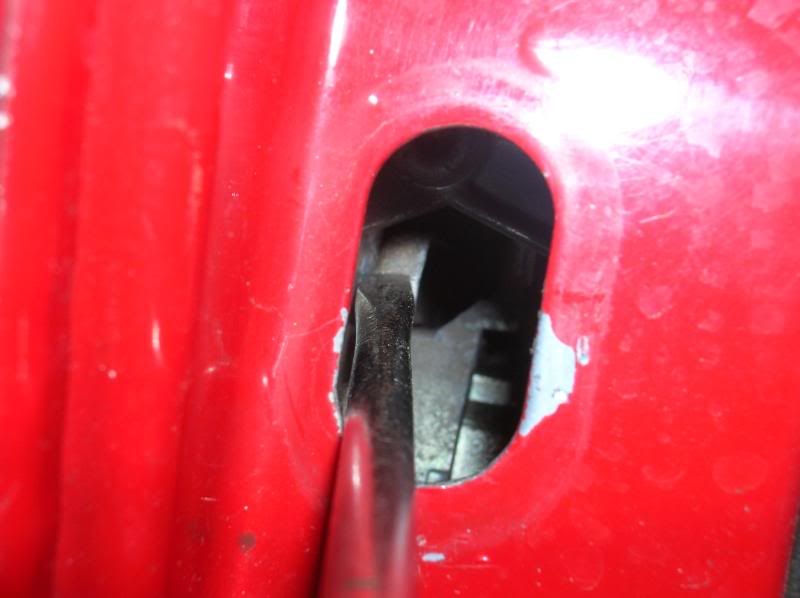
Pull the black plastic plug out.
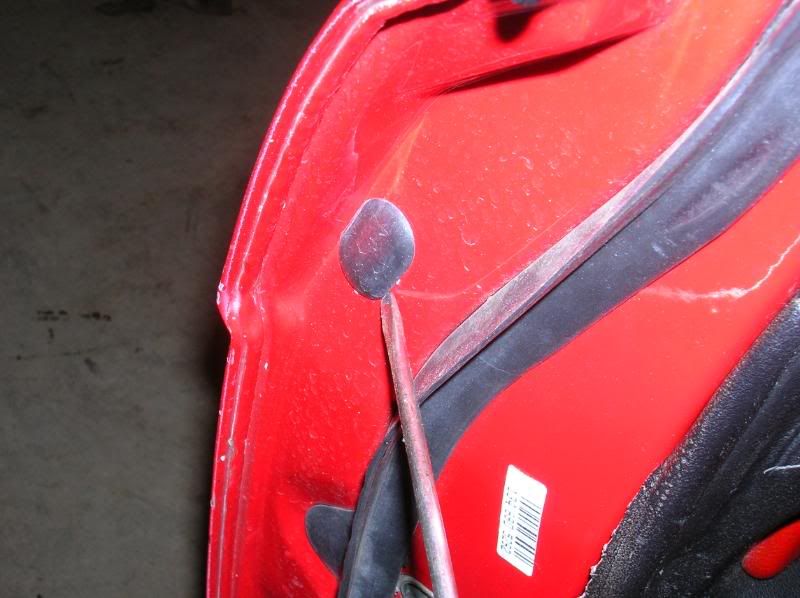
Once that's out, use the screwdriver to push the metal tab in, towards the front of the door.
Once the tab is pushed, you can remove the door handle trim. The tab is the only thing holding it on, once pushed you can just pull the trim off.
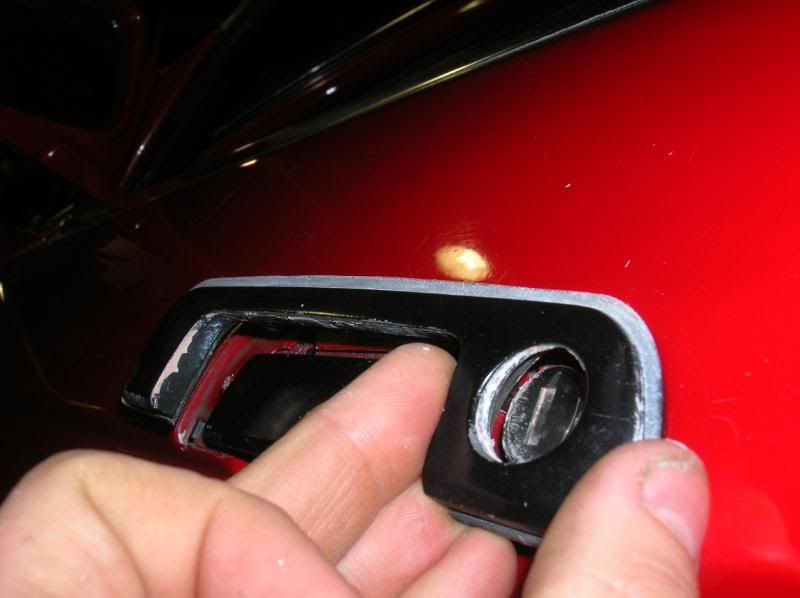
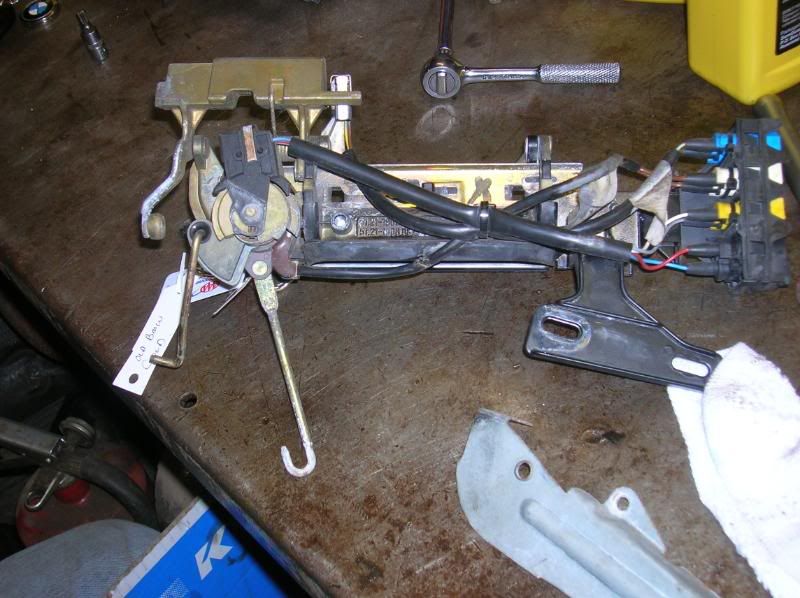
Once you have the handle off, you can see the torx screw and retaining nut that hold the handle in place to the door.
Remove them.
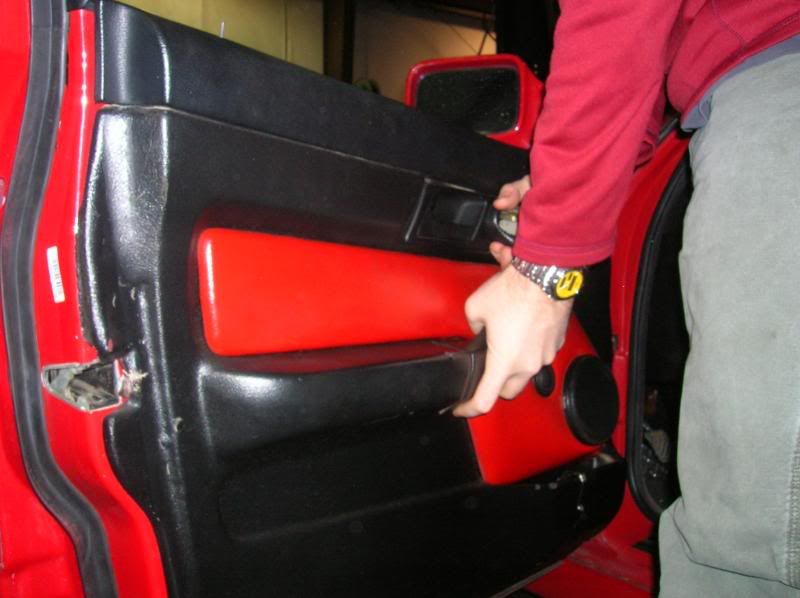
Next have Redfive remove the door panel while you take pictures. He brags about having had to remove them so many more times than I have, so I made him do it. It's hard work taking pics. Plus he's better at taking door panels off than I am, so he's got that going for him too, which is nice.
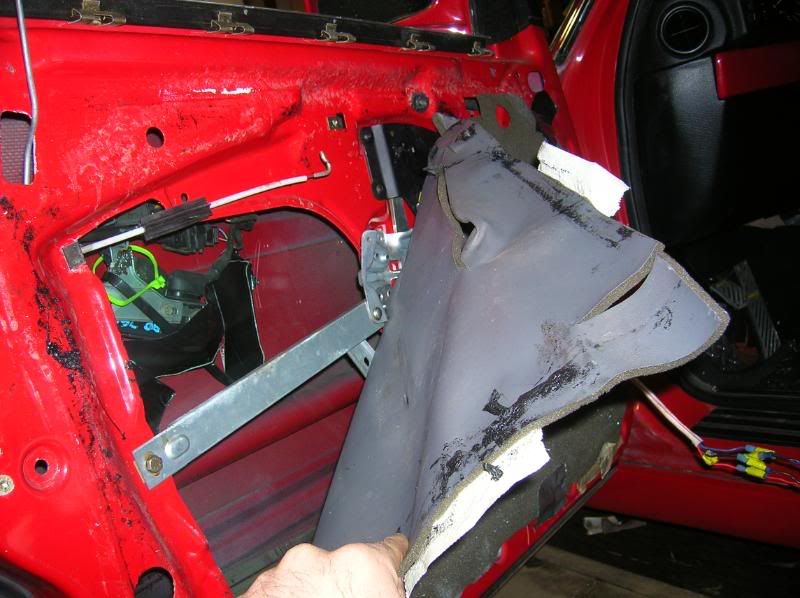
Once the door panel is removed, remove the foam sound dampening thing.
At this point you should chastise whomever it was that didn't tell you to remember to put the window up first.
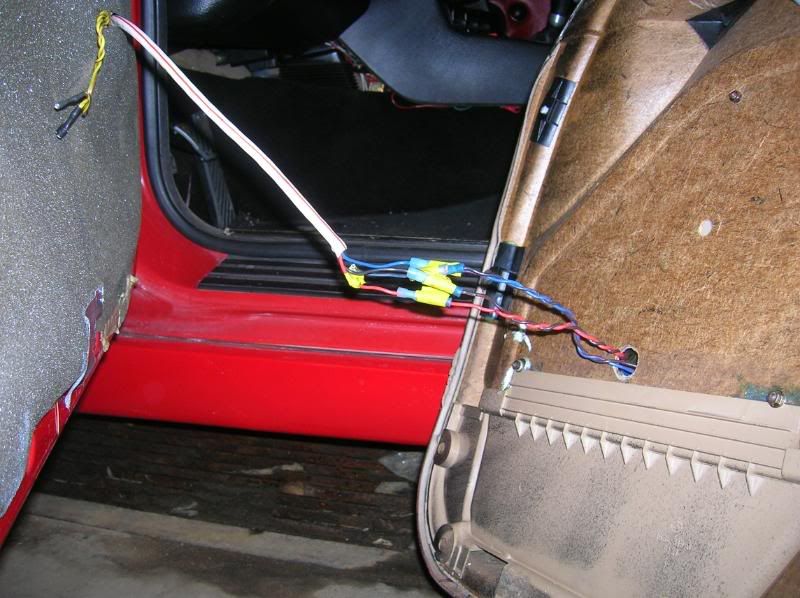
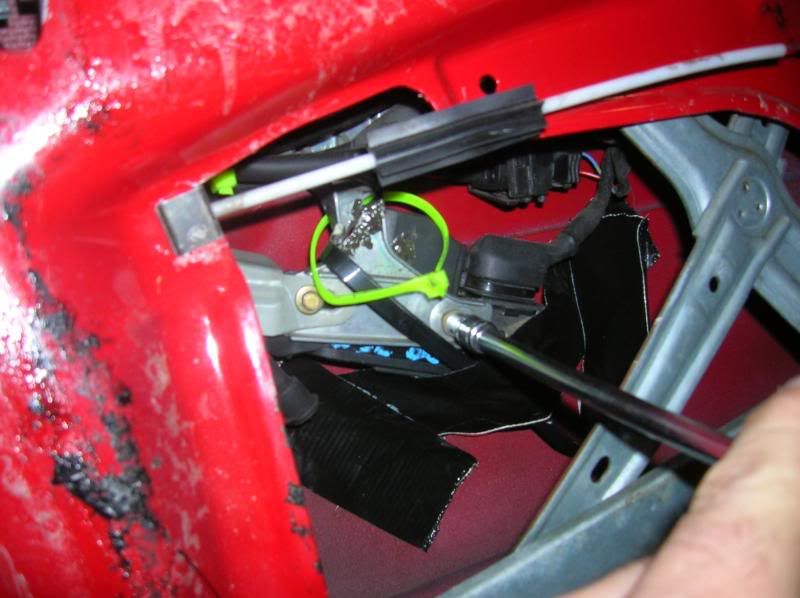
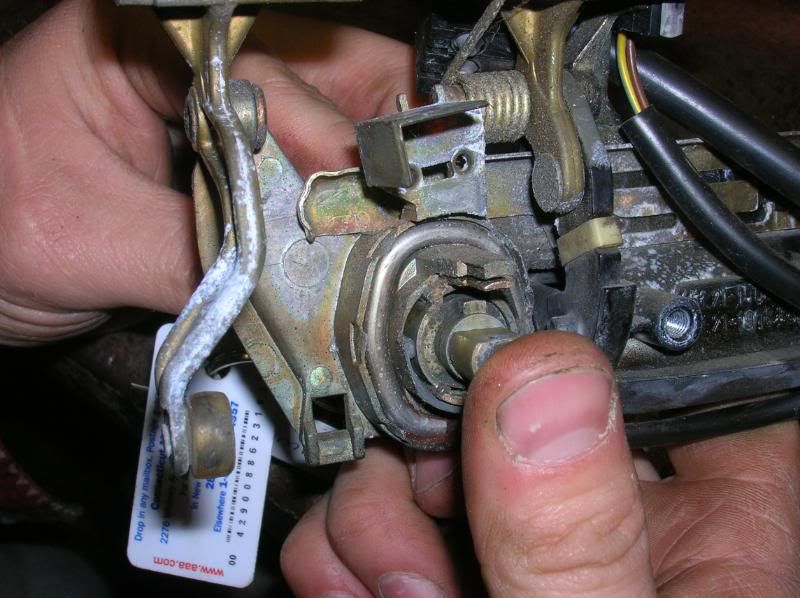
Remove the door lock actuator, two bolts, an electrical connector on the back, and the hook it hooks into.
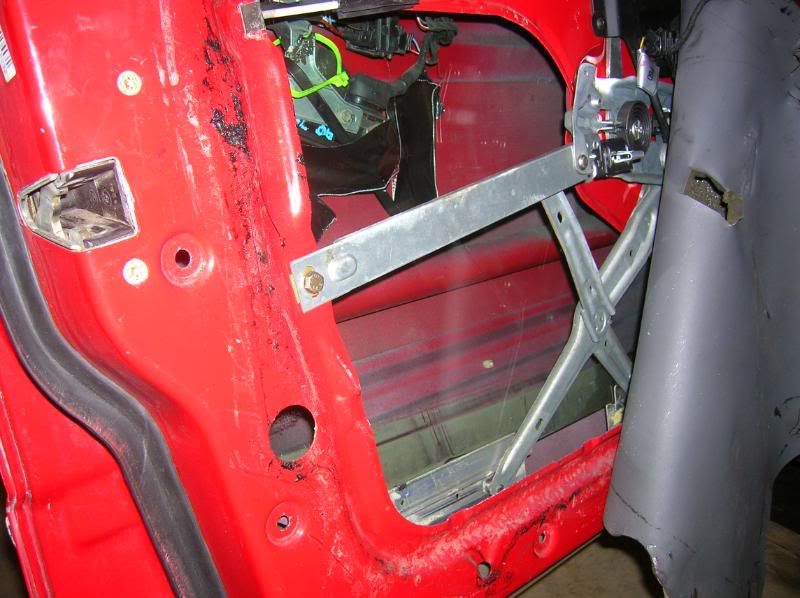
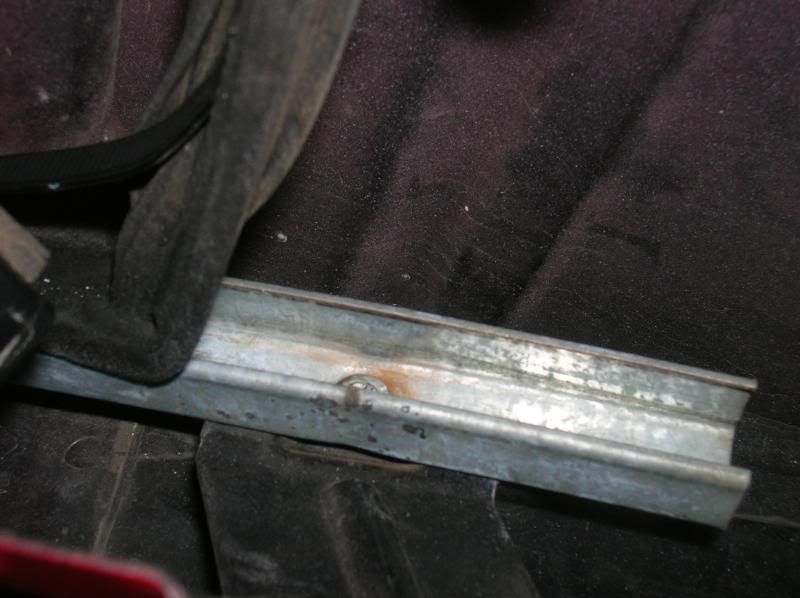
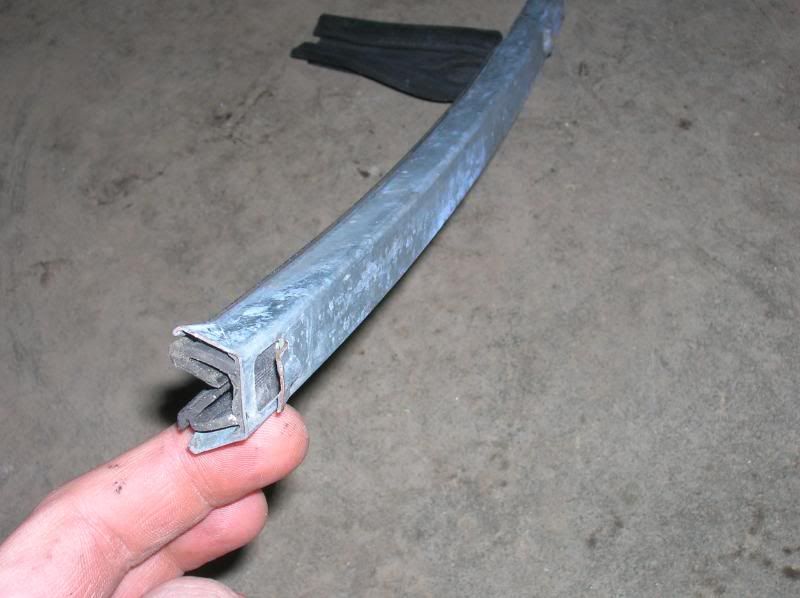
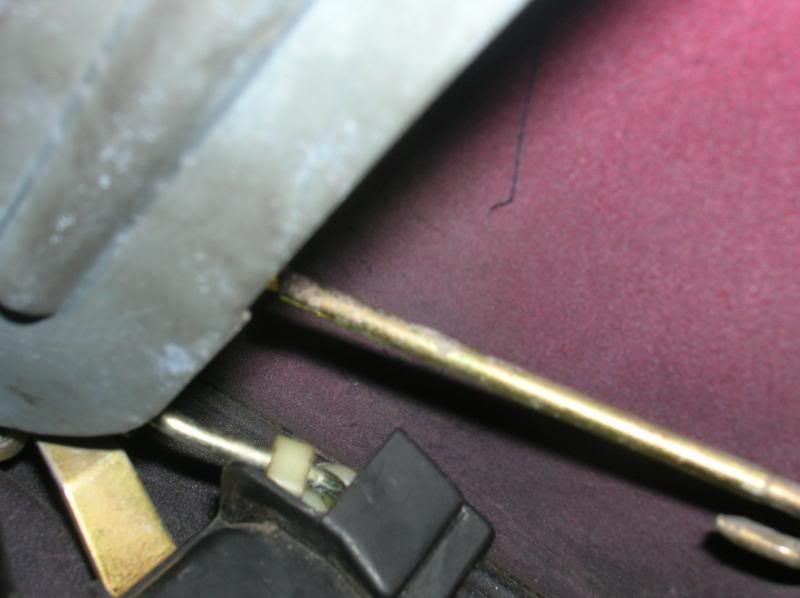
Now, if you look inside the rear of the door, you can see the window track. If you pull the bottom felt rubber part out (don't pull the whole thing, just enough to find the bolt) you will find a torx bolt. Remove it. The top of the track is slotted, so once the bolt is out you can just tug the thing and it will come out.
This is the slotted end.
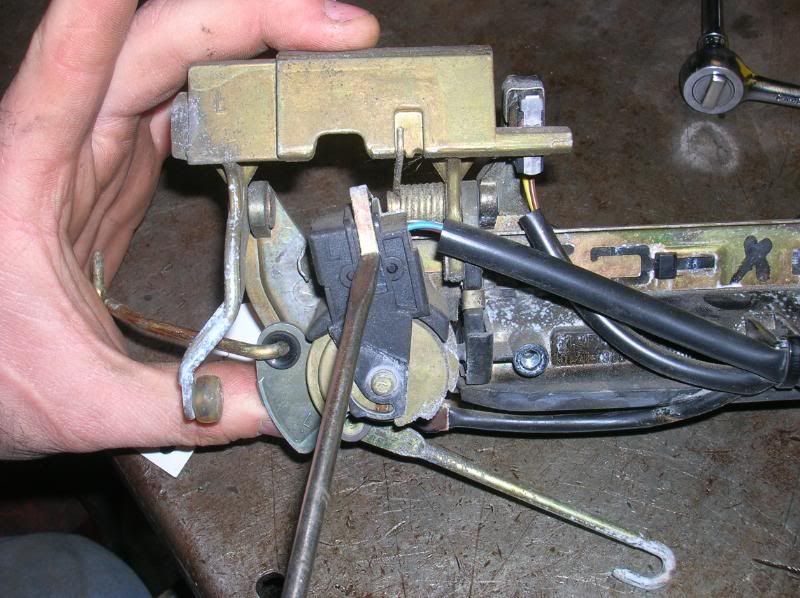
This next part is fun. You can see two rods in this pic, one of them is clipped into a white plastic clip. You need to rotate the clip towards the outside of the door, you may be able to do it with your fingers, you may need a flathead screwdriver, I guess it depends on whether or not you're a total Nancy. I think I needed a screwdriver.
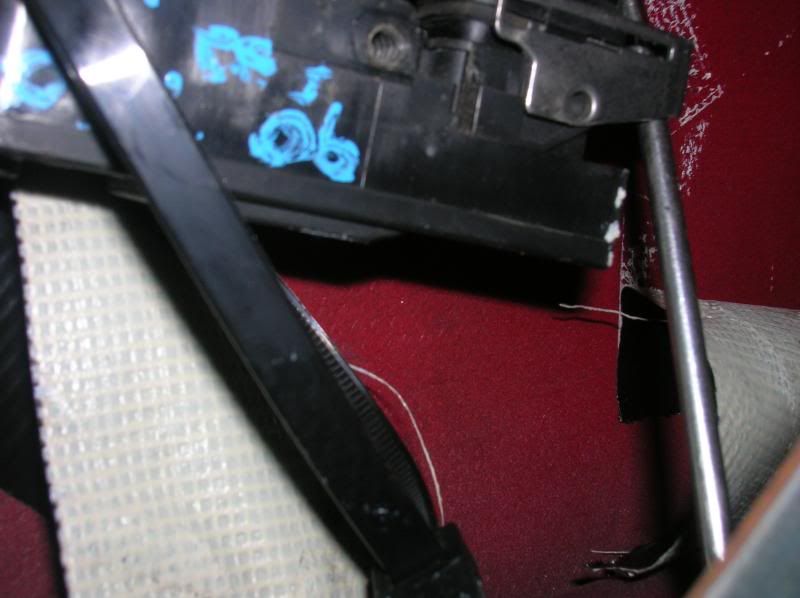
Next remove all electrical connectors.
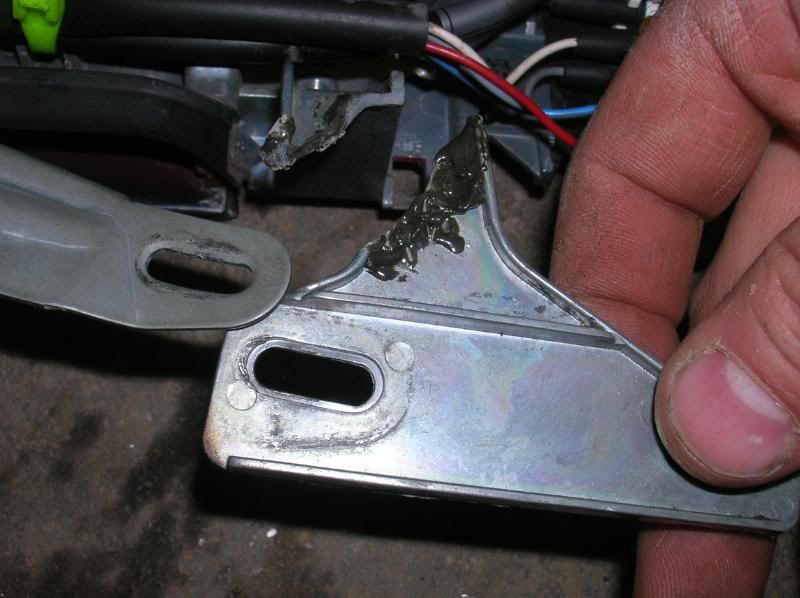
Here you can see why Redfive's door wouldn't lock. It's because it was broken. You can tell this by the broken off piece in my hand.
Last edited by Binjammin; 01-21-2008 at 11:33 PM.
Go ahead and bite. Plenty for everyone.
Member
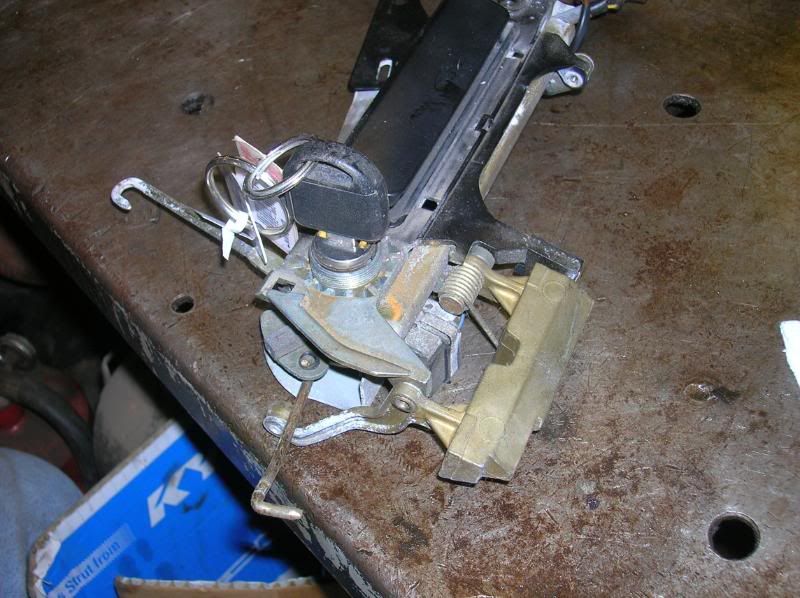
Part two.
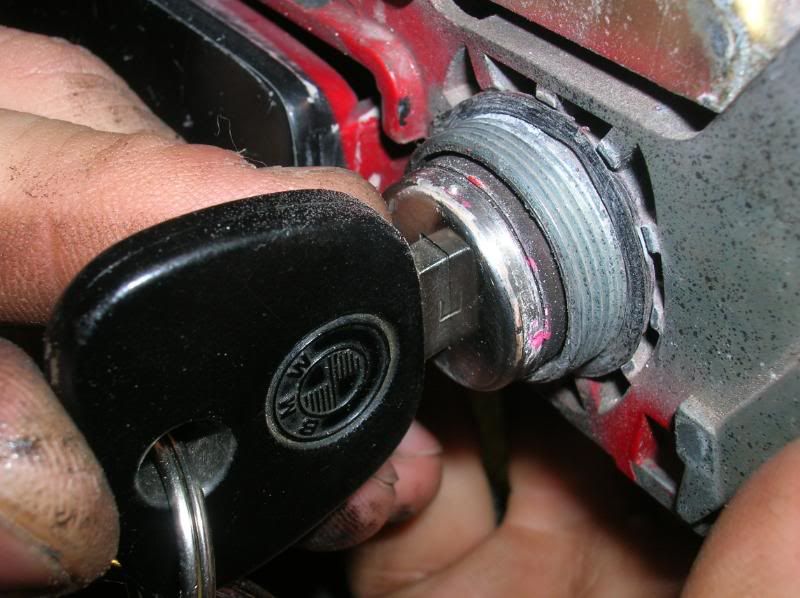
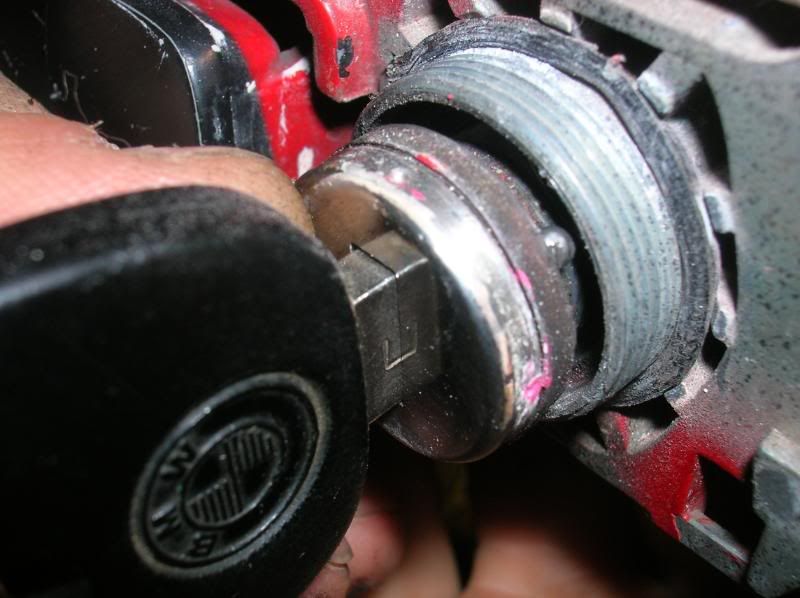
Make sure when you're doing this that you leave the key in the cylinder at all times. I suppose I could phrase this like "If you pull the key out of the cylinder you risk losing small parts like lock tumblers or springs that will be impossible to put back together without pulling another cylinder to compare it to, or going to a locksmith." But what I going to tell you is: If you pull the key out of the cylinder you WILL LOSE small parts like lock tumblers or springs that will be impossible to put back together without pulling another cylinder to compare it to, or going to a locksmith."
Trust me. They go flying. I spent an hour trying to get them back together. It's fun, if you're Rain Man or something, otherwise you'll tear your hair out. Leave the key in the cylinder, trust me.
Now I make Redfive take pics again, so if you notice a jump in quality, thank him. I take pics about as well as I paint anything.
Remove this plate. One bolt and it comes off.
Bolt and plate removed.
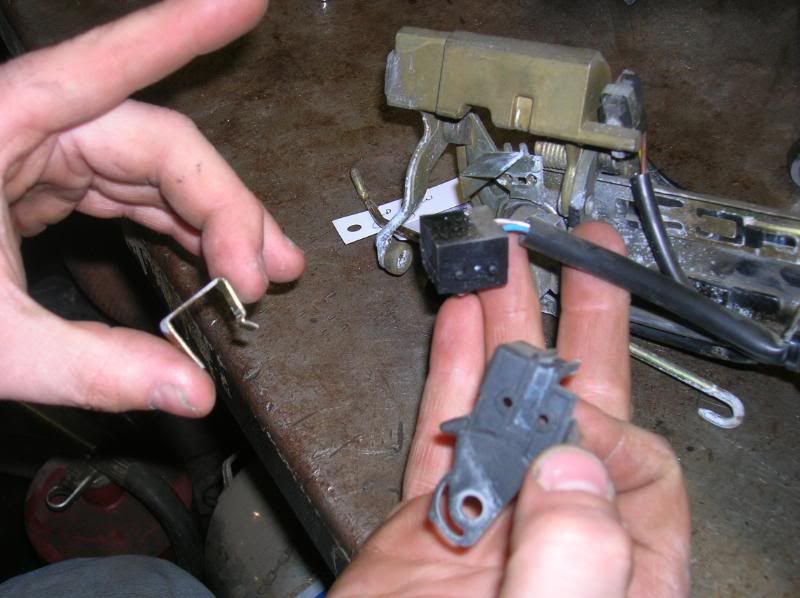
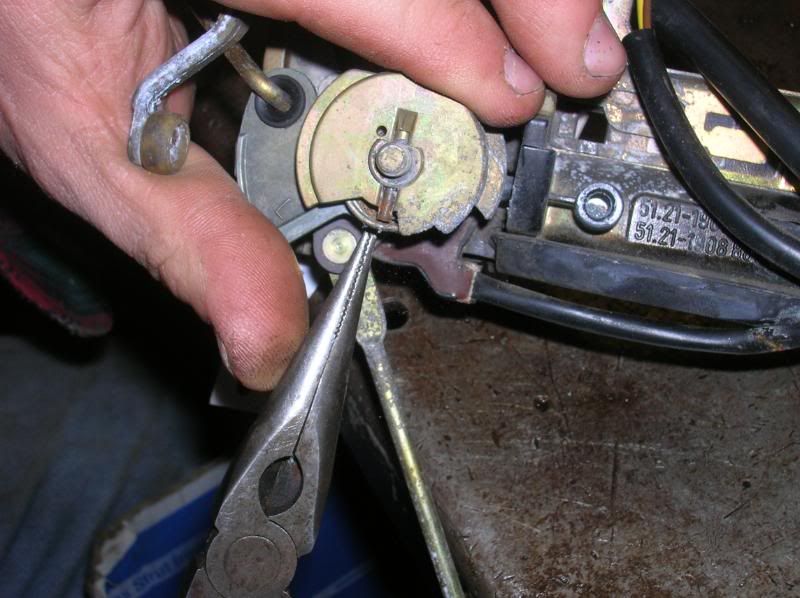
Next remove this spring clip. It may not look like a spring, but just wait until you pry it off. Put a finger over the top of it when you pry it off, or you'll find out why I'm calling it a spring clip.
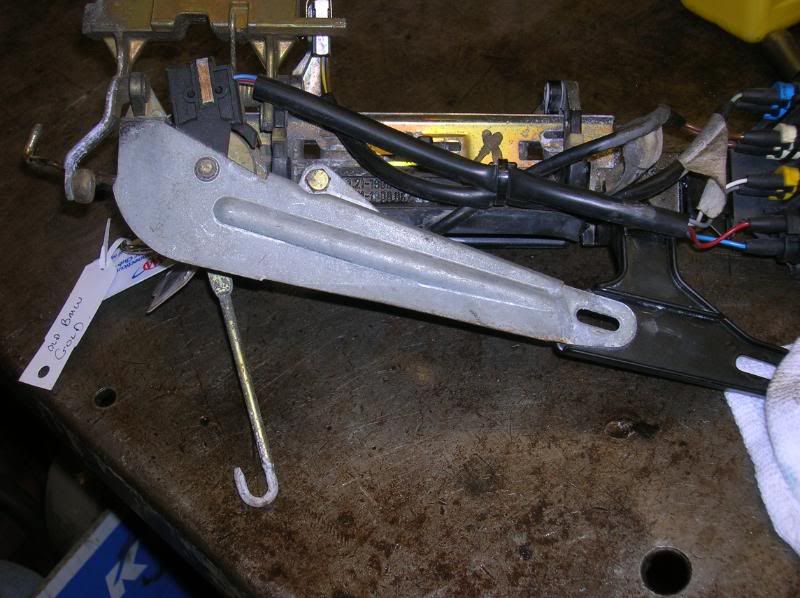
With the spring clip off, you can pull the cover it holds in place, and the sensor/switch thing that resides under it.
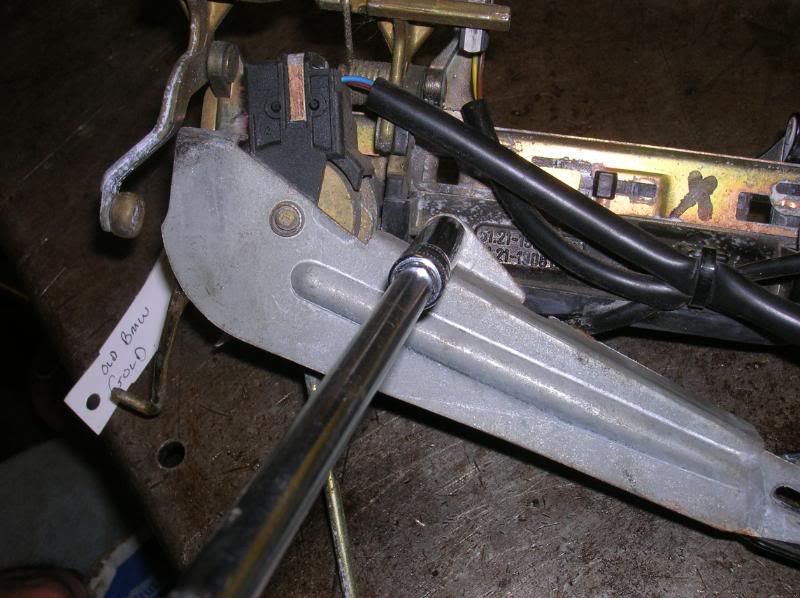
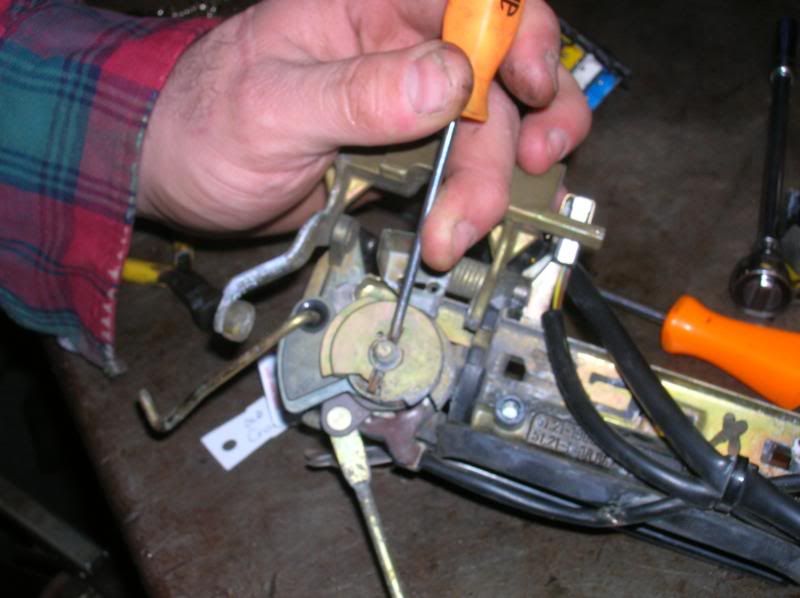
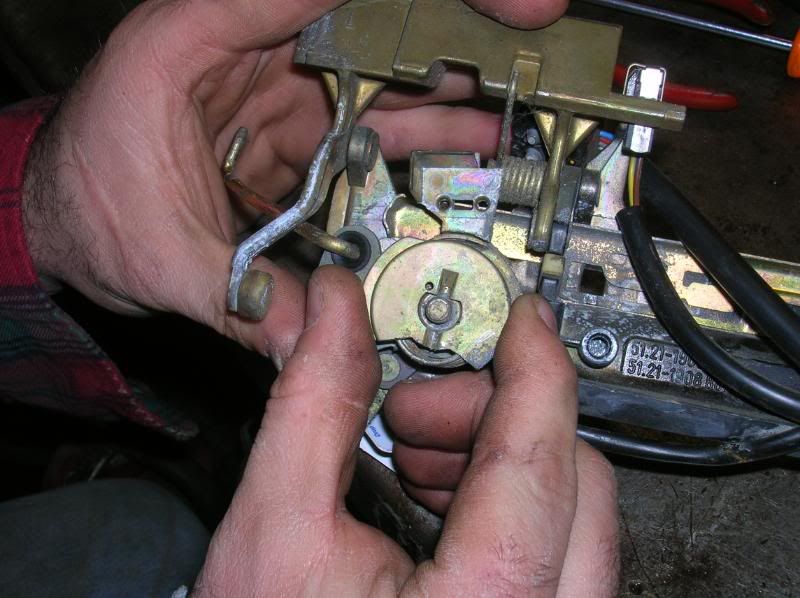
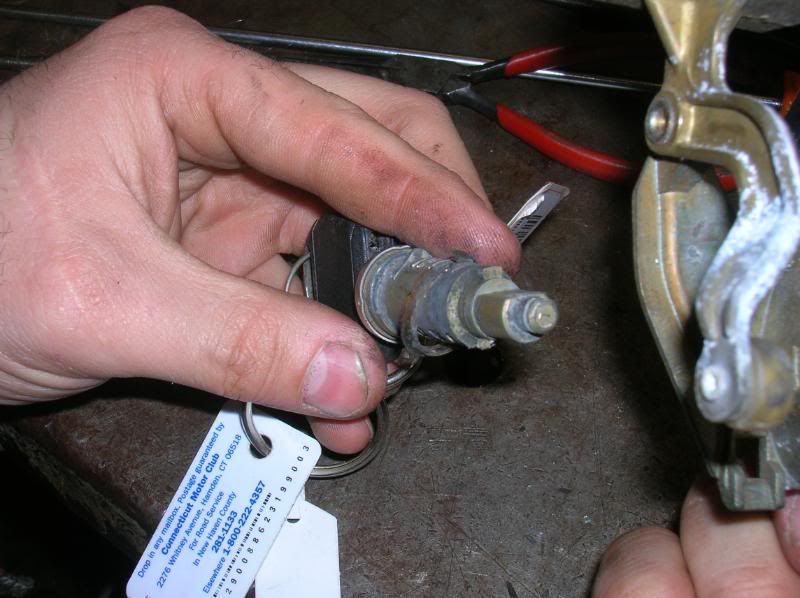
Drive this roll pin out. You won't be able to drive it all the way out, so get a pair of pliers to pull it the rest of the way out.
Wiggle wiggle, and this piece comes off.
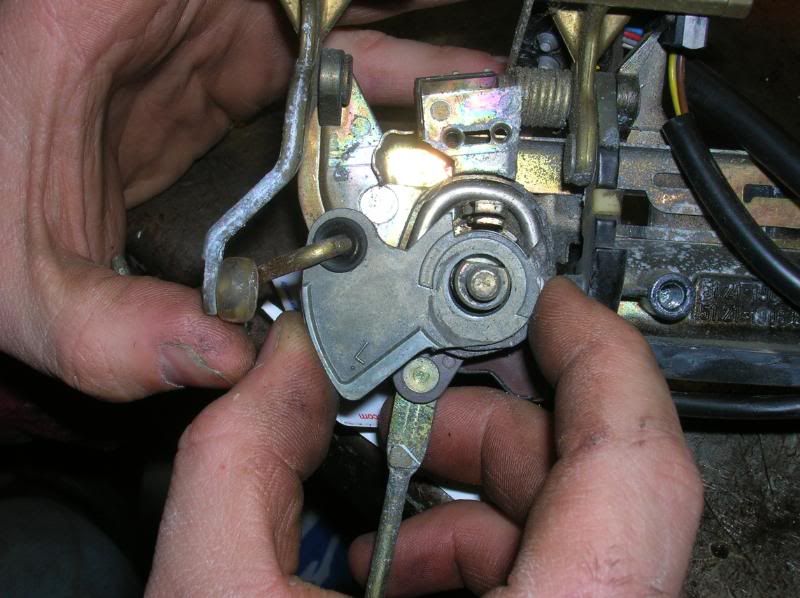
Once off, the piece underneath if comes off the same way. Quick little wiggle and pulls right off.
Once that's all off, you'll have the post from the lock cylinder sticking out. GENTLY nudge it a little little bit, you don't want to push it all the way out yet, as there is a little ball that will fall out and get lost if you're not careful. I lost the ball on mine, I didn't even know I was supposed to have one until we did this one.
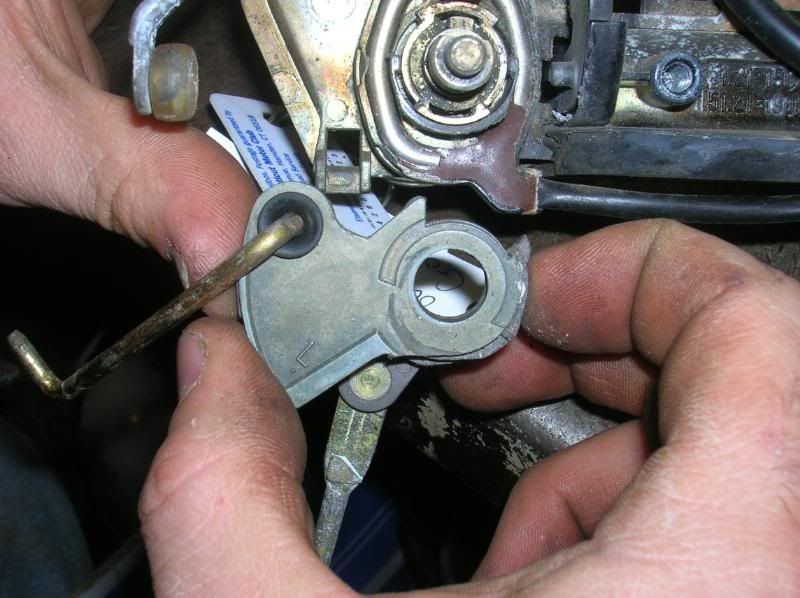
Flip it over so you can see while you're pushing the cylinder out, and you'll be able to see the ball.
Little ball. You can glob a bit of grease on it to keep it from flying away while you work on it. Strongly recommended. Once you do that, you can pop out the lock cylinder.
Heh, you can totally see my awesome scar in this pic.
Installation really is the reverse of disassembly, there's not too much to get wrong here, so I didn't bother to take pics of it going back together. If you want, you can look at the pics again in reverse order.
Last edited by Binjammin; 01-21-2008 at 11:35 PM.
Go ahead and bite. Plenty for everyone.
Member
Very nice post, you sure everyone can figure out how to look at the pictures backwards to re-install?
Member
Originally Posted by Nosilw

Am I sure? No. Do I have pics of it going back together? No
Go ahead and bite. Plenty for everyone.
Member
Awesome Writeup! Good Job Guys!!!
Member
I too can attest to simple nature of this job. I had to take it apart twice before the door panel went on to reroute, redo, reconnect one thing or another that I missed on reassembly. Thanks for the pics, I wish I would've had them before I started the "30 Minute Job."
Later,
Bruce
'03 Envoy XL - Tow Rig
'94 525i Auto - RIP
'86 GLi - $200X Grassroots Challenge Car
Member
Good job indeed. I wish I had this when I took mine apart. It is definitely challenging the first time you do it with nothing to guide you.
I think I could do it again pretty easily, though.
Member
Nice writeup guys! Informative and entertaining, I guess that's edutainment?
But seriously, do you happen to know if the front window channel is also slotted like the rear one? I lost the bottom screw on ours, and the channel bent. I was going to take it to the dealership, but if it just presses in with a slot I think I could handle that. Getting my big arm into the door is the hard part, and not knowing what's up there is no fun. I'm getting too old to keep ripping things apart before knowing how they go back together again!
Thanks!
No current BMWs.
1994 Roadmaster Wagon
1974 Alfa Romeo Berlina
Member
I don't know actually, and although I'm going to be pretty busy today I'll try to get the parts car open to take a peek for you. PM me if you don't hear back in 24 hours or so.
Go ahead and bite. Plenty for everyone.
Member
hey nice write up. i was wondering if you had part numbers for lock cylinder and the part that was broken.
License Revoked
Nice write up, this will help when I change my non-working passenger lock. I have a question though. My passenger key cylinder is FUBAR (it comes right out and spins 360 degrees). How do I fix that?
PTFE Man
why is this not under the diy section?
Old car->1992/E34/525iA/70k
Custom User Title
Nice writeup fellas.
-Denton
Member
nice watchi want it lol
Member
Uh, it is. Under exterior/door handle assembly.
Go ahead and bite. Plenty for everyone.
racecar
Thank you for this. My doorhandle is all sorts of screwed up too (no light when I pull up on it w/ locked car, and also if i try to lock it with the door open, the whole assembly jams up and i have to take it apart to get it unstuck ... this is just what I need: a DIY on how to swap the cylinder lock to a new door handle. Off to the junkyard Wednesday to buy a door handle assembly.
Member
Wow! excellent, thank you! I need to change the rubber gaskets on mine, this shows me exactly what i need to do!
['07 BMW M5/6.:Indianapolis Red/Black:.
Toys
'93 BMW 850i J Spec- (DiamondSchwartz)-CSI Kit- Lowered-Wokke Chips- Custom Exhaust- 18" MK1's-KN Filters+ M Steering Wheel- Stereo Upgrade +++
94 BMW 850 CSi - OE
91 BMW 850Ci Manual
'88 BMW 635CSi ACS's++
'81 MB 500 SEC Koenig (pearl white)
00 BMW 750iL J Spec- Alpina Mods
06 MB S65 AMG
09 911 4S
11 BMW M3 DCT Competition
12 BMW 328i M Sport Convertible
+++
Member
I also appreciate.I've been hesitating replacing the two actuators in the front doors. In cold weather the remote locking system won't keep them locked. They used to just require one or two manual locks/unlocks then the remote system would lock but this year @ below freezing the system just kicks back. I finally got it to stay locked after about five minutes of manually operating the lock but that won't do for the rest of the Winter.. Now I see well enough where the actuators are and how they come out . I'll order them and be done with it. Thanks and did Red-Five give you Lip over chipping his paint at that Plastic Cap when you could have slipped a rag under even though the cap covers it from view? Naked paint seems like a nice place for rust to start.
Member
Nope, because that's not from me with the screwdriver. If you look in the first two pics you can see the chip's already there. I'll have to ask him, but I'm pretty sure that's one of the doors on the car that's been resprayed, the whole car needs paint work.
Go ahead and bite. Plenty for everyone.
Member
BMW CCA Member
Thanks for the DIY, I will be using this for my new door handle gaskets
Member
No worries man, it was my pleasure
Go ahead and bite. Plenty for everyone.
Member
Great write up. I wish I would of found this about 6 hours ago. I just swapped doors on my car and pulled the handle and lock out of the original door.
I wanted to let you know that I didnt need to remove the window track to get the handle assemble out. Now I have not tried to take out the 2nd one and put the original one in. SO it may need to be done. But if it saves a step I thought I would let every one know.
Ill post again if i did have to pull the track. If you dont hear from me then I was able to do it without the track being removed.
Thanks again..
B
 Posting Permissions


Bookmarks