
 Senior Member
Why Aftermarket Gauges?
The primary reason to install aftermarket gauges is that the e36’s stock gauges don’t provide information necessary for spirited and/or track driving. The coolant gauge is what is called a “dummy” gauge; it only moves if the temperature gets outside of a certain range. Anything within the range is considered “safe”, and the gauge remains at 12 o’clock. That temperature range is about 140-220 degrees Fahrenheit. The average operating temperature of the m50 is about 175 degrees. Also, there is no oil pressure gauge at all on the e36, only an idiot light, which comes on if the pressure goes lower than 7psi, indicating imminent engine seizure. There is no oil temperature gauge on the e36, so the driver has no idea if the engine is warmed up, and if the oil starts to overheat, the driver is oblivious. Another handy gauge to have is a voltmeter. This lets you know if your battery has a proper charge and if the alternator is functioning properly.
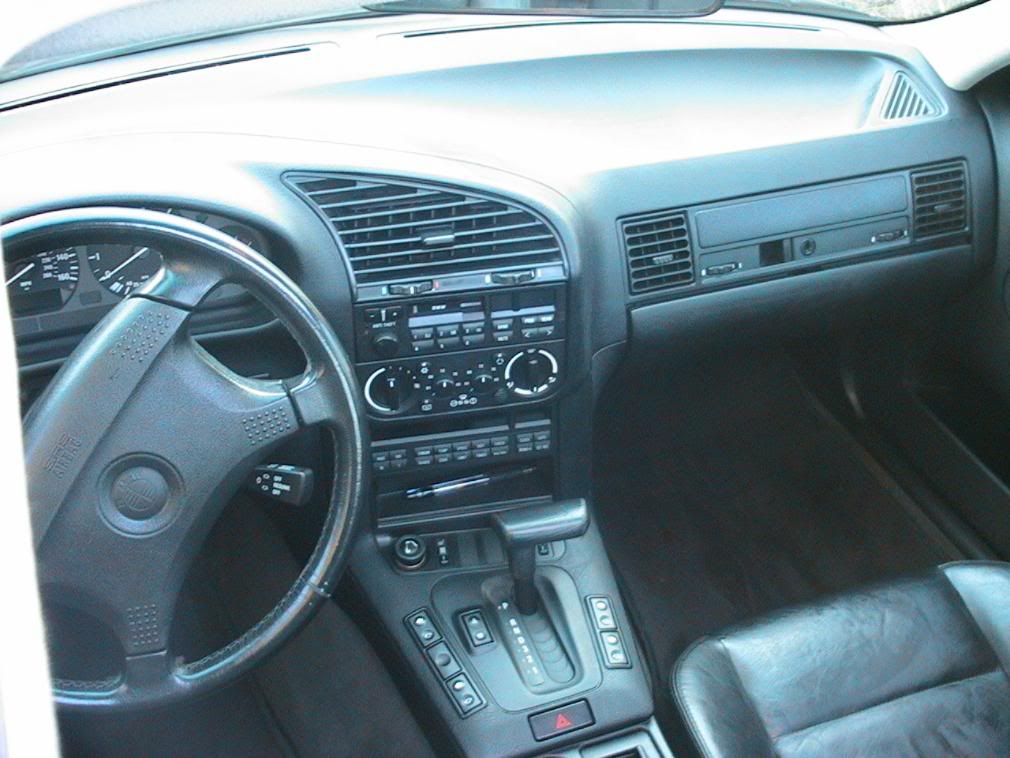
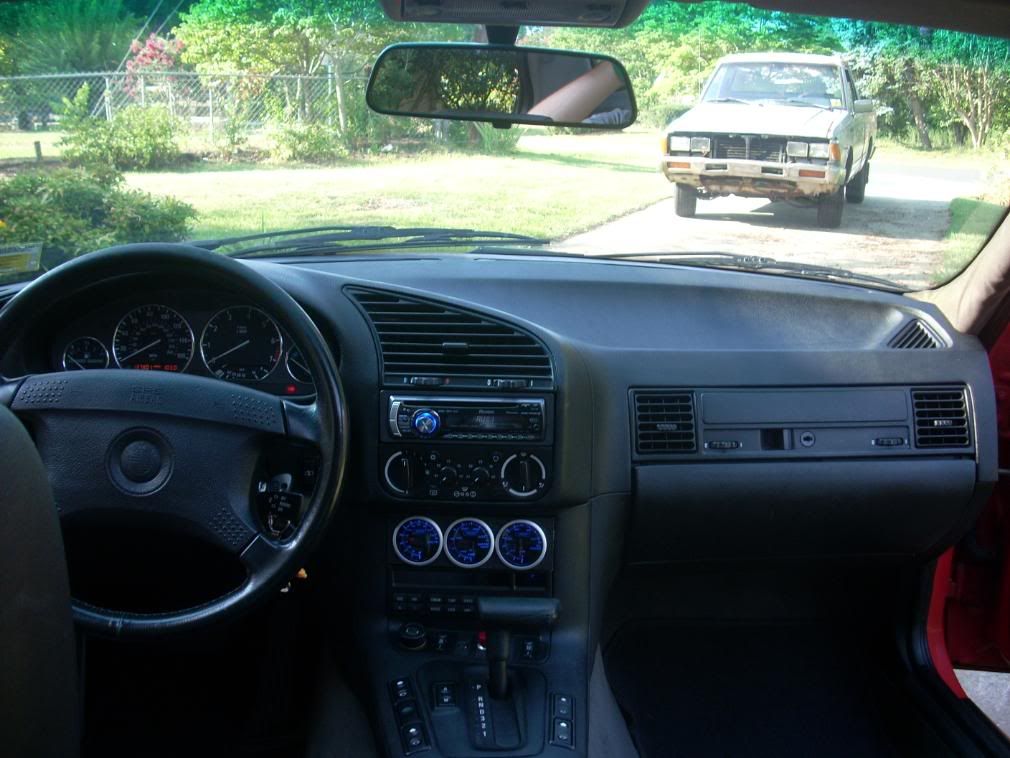
There are two common locations to add gauges; the A-pillar, and the sunglass holder. Some people think that the A-pillar is ricer, and some think that the sunglass holder doesn’t provide enough visibility to the driver. I agree with both of these statements, so I decided to move the OBC to where the sunglass holder is, and add my gauges where the OBC was. This doesn’t seem like much of a change, but it is much more visible.
Enough with the information, let’s get on with the DIY!
Materials required:
Gauges (3)
Bezel (1)
Dremel tool or similar cutting device.
Wire, electrical tape, wire stripper, etc.
Adhesive
Some common sense
First you need to decide which gauges you want and where you want to put them.
Some possible choices include:
Oil Pressure
Oil Temperature
Voltmeter
Water Temperature
Boost
A/F Ratio
EGT
You can also buy expensive digital gauges that display more than one thing in the same pod. These are very nifty, but I simply couldn’t afford them.
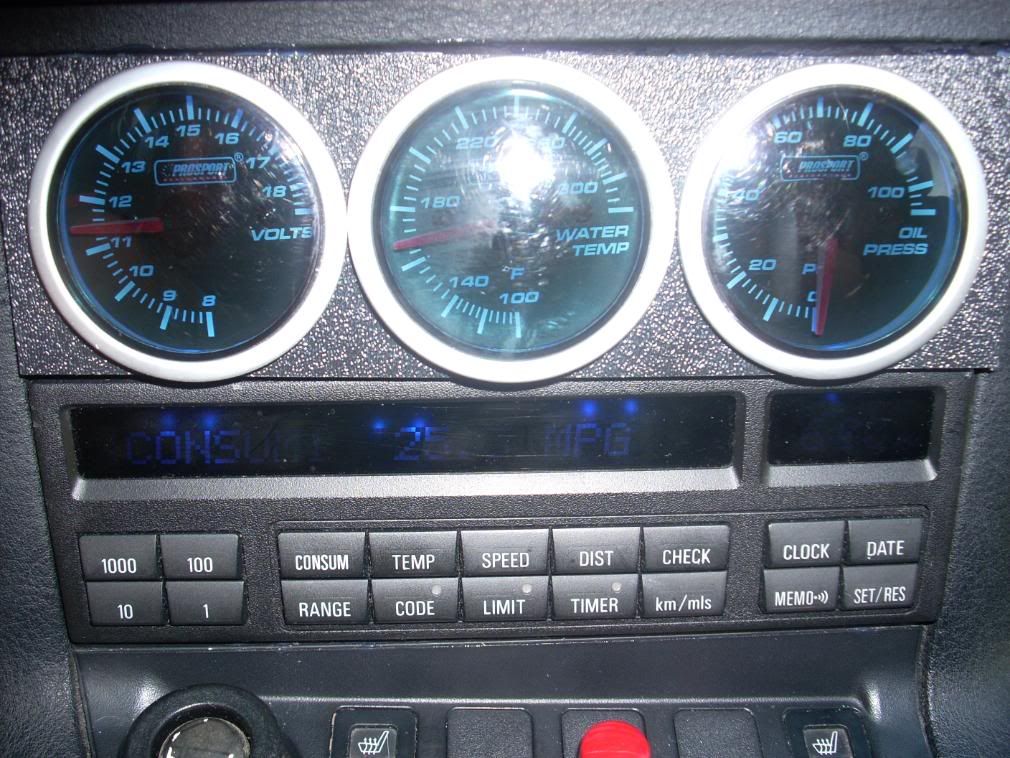
I got mine from www.prosportgauges.com. They have excellent customer service, and the gauges themselves look very good. I also chose them because they had gauges in blue to match my interior lighting conversion.
WARNING: IF YOU ARE SQUEMISH ABOUT CUTTING UP PARTS OF YOUR INTERIOR, BUY THE VDO KIT SOLD HERE AND GO THAT ROUTE!
Once you’ve ordered the gauges you want, you’ll need a bezel to make them fit in the OBC opening. This is a standard DIN sized opening (2” x 7”). I found a seller on ebay who cut a piece of ABS plastic in that size, and cut the proper sized holes. Look around, you’ll find this somewhere. If all else fails, you can buy some ABS yourself and cut holes in it with a Dremel.
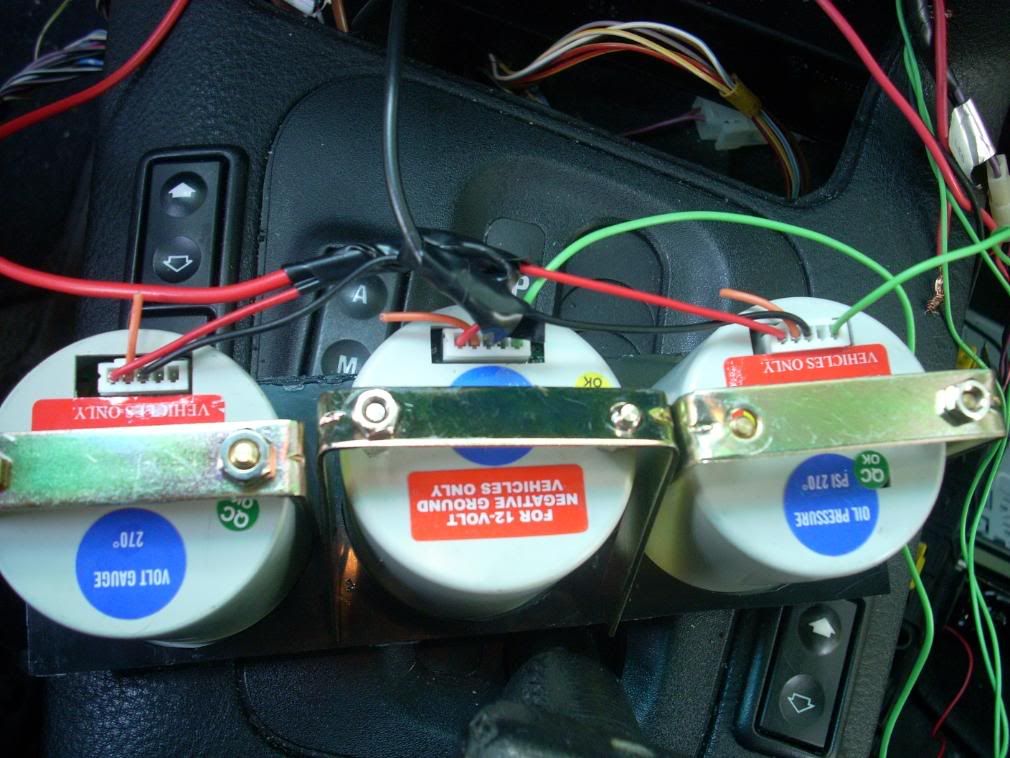
If you ordered oil pressure/oil temperature, you’re going to need a distribution block. Here is one that I bought. Also on the website is an adapter to make the water temperature install easy. I would recommend buying that as well, it saves you the trouble of drilling a hole in your thermostat housing.
Once you have received everything, get your gauges out and test-fit them into the bezel. See which ones you want where, and most importantly, make sure they fit!
Go ahead and splice all 3 ground wires to each other, and do the same with the power wires. By doing this, you will only have to run one of each kind of wire to the car.
Then take all the sender wires and attach about ten feet of wire to each, you will need it!
The gauges should include senders and instructions, albeit they’re in broken English.
Next, go under the hood and locate the oil filter housing. Behind that is the stock sender location for the oil pressure light. You’ll need to unscrew this (it requires some patience), and replace it with the sender block. Then put the oil temp/pressure senders in their respective holes in the block, and tighten them down. I would recommend using some blue Loctite to ensure they don’t come out.
Picture coming.
Now for the water temp sender. If you purchased the adapter, all you have to do is remove a radiator hose, put the adapter in place, and replace the hose. Otherwise, you’re going to have to remove the thermostat housing and drill and appropriate sized hole in the housing, then put the sender in place.
Picture Coming.
Now that the sender units are in place, you can start with the fun part, the interior!
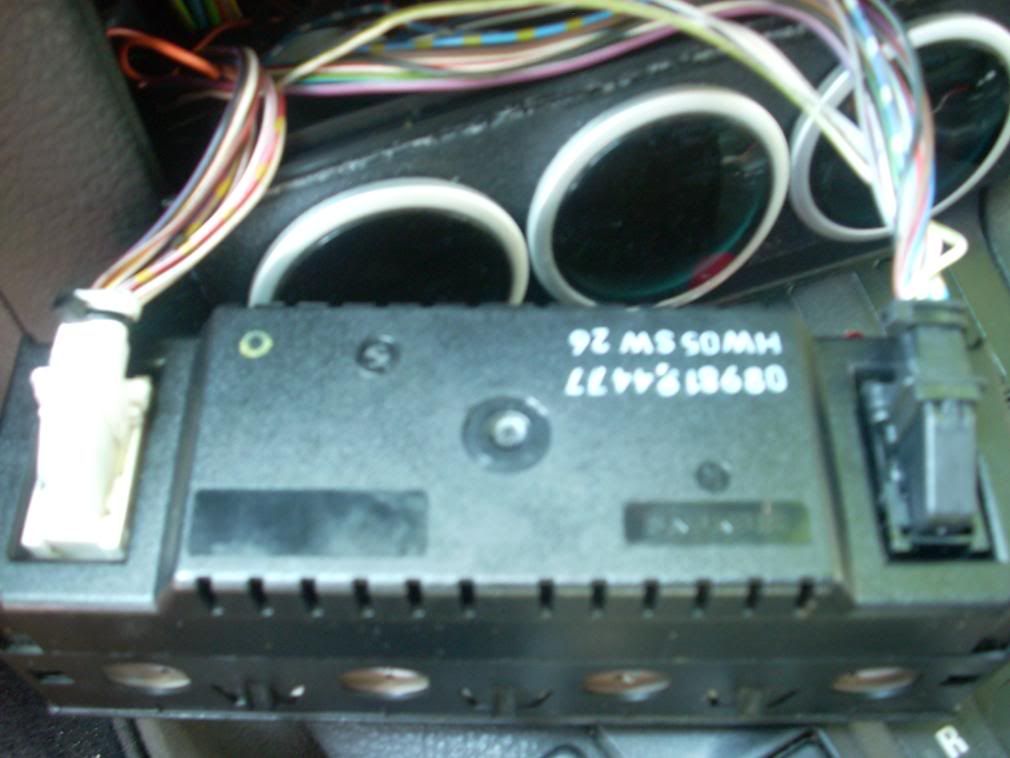
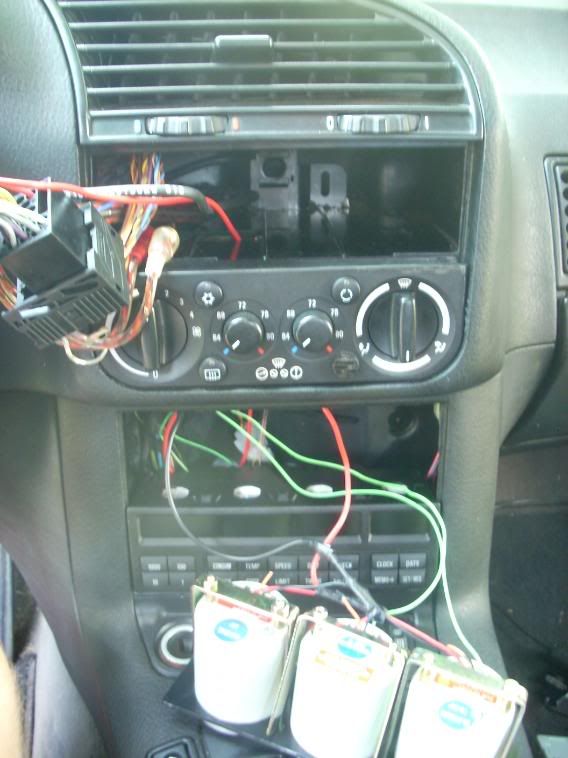
First, remove your OBC. There is a hole in the top of the sunglass holder that you can use to pop the OBC out with. Feel around and you’ll find it. The wiring harnesses are tricky you have to push down on the little button and simultaneously pull the retaining clip down. Lay the OBC aside, you won’t be needing it for awhile.
These are the harnesses:
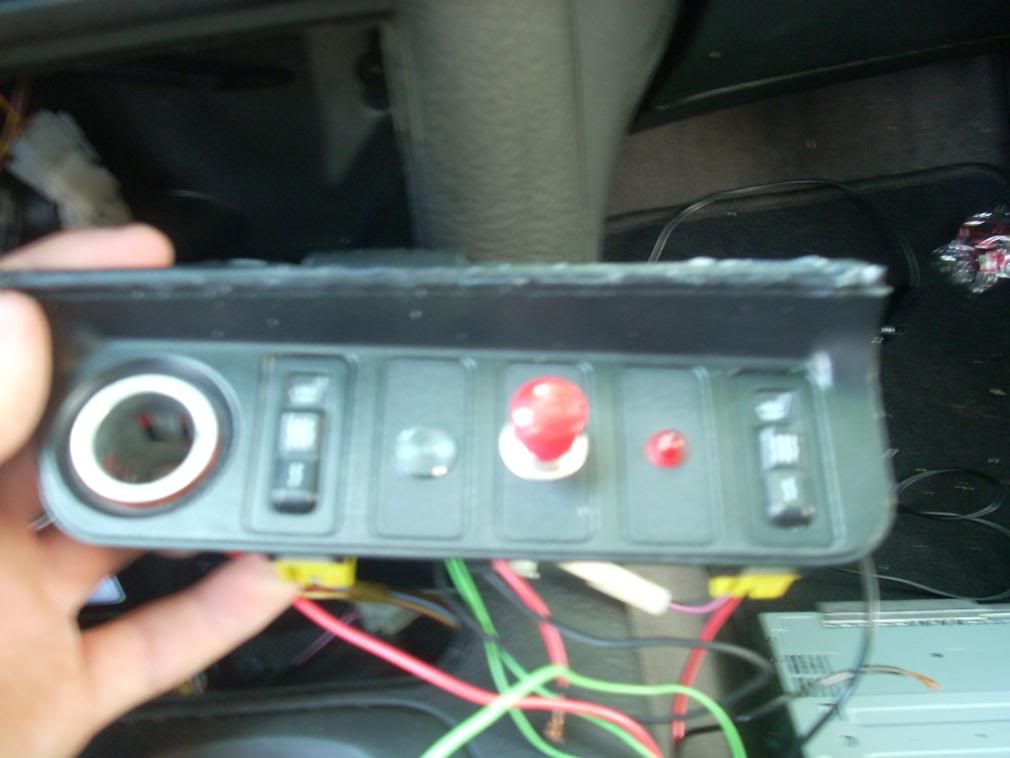
Next for the sunglass holder. Pop it out, there are no clips holding it in place. Remove the heated seat switches, cigarette lighter power, etc, and then pull it out. Now for the really fun part!
Compare the sunglass holder and the OBC. You going to cut off the cubby part of the sunglass holder, and replace it with the OBC. You only want to take off enough plastic to allow the OBC to fit; otherwise everything will be loose. Get to cutting with the Dremel, working slowly and carefully, you don’t want to have to buy new stuff is you screw it up! There is a little grove below the cubby, I just cut right along the top of the groove, then sanded down any rough spots to make it look clean.
Here's what it looked like before I sanded it down:
After you cut the sunglass holder, re-install it in the car, put the OBC on top of it, and put the bezel on top of that, to see if they fit. If they do, continue. If not, you’re going to have to do some more cutting.
Now take your bezel and install the gauges in the order that you want them. Then put the metal frame that is included over the back of the gauges, and screw it in. This will keep them from popping out.
OBC installed, gauges in the bezel:
You can see everything in this picture; the spliced wires and the frame.
Now that you have all the gauges in, find a power and ground source. I used the ones from my radio, since I was installing that at the same time. Splice those into the gauges. At this point, you can turn the car on to make sure that the gauges function as they should. If you bought the prosport ones, they should “test” themselves on start-up. The needle will go all the way to the top, and all the way to 0, then to the proper reading.
Video:
http://youtube.com/watch?v=8nZy-XT_vEQ
Next you’re going to have to take out the glovebox. There are 6 screws. Two inside the vents, two on top of the box when it’s open, and two on bottom. After these screws are out, it should just slide out.
Now, take your sender wires (in my case the water temperature and oil pressure), and run them from the OBC area to the glovebox area.
Pull the carpet back from the bottom of the glovebox area, and you will see the battery cable. It runs through the firewall at a rubber grommet. Run the wires through that grommet, and they will come out under the jumping post. There is a little plastic cover that you have to pop off to access it.
Picture Coming.
Then run the wires down the side of the engine bay, under the passenger headlight, through the radiator shroud, and into their respective sender units. You can route the wires any way you want, but I found that route to be easiest.
Picture Coming.
Once these wires are connected, you can once again test your gauges, making sure that they read like they should. If they don’t, go back and check your connections, sender units, and ground.
If everything works, you can re-connect all the switches in the bottom part of the sunglass holder and put it back. Then put the OBC in and connect it. You will need to use a couple dabs of adhesive to hold it in place. Next put your finished bezel on top of the OBC and adhesive it in. All done! Stand back and admire the finished product.
Finished:
And again:
And for reference, a before shot:
Last edited by RahgBag; 12-01-2007 at 08:33 PM.
Senior Member
P.S. I put this together in a hurry, please let me know if you see any errors or if anything needs to be added, etc. Good luck!
Is quite insane.
Pretty good writeup, I'm in the middle of doing this myself so finding out about that grommet is helpful.
Although, uh, your link for the gauges goes to a chiropractic place...
1998 BMW 323is - SOLD
I miss my BMW
Swap Whore
nice obc. hah.
I have those same gauges.
460whp/515wtq wifes MMW tuned 335i
Senior Member
Haha I fixed the link, thanks for the heads-up.
Oh 328ijunkie, this finished out my conversion...I actually finished a few months ago, but just now got around to writing it up. Got the 332 running again?
Build it!
Nice work & good write up
Member
Nice write up, thinking about putting in some guages myself
Member
The finished product looks ever so sexy mister! I'm buying those guages now. Thanks for the great write up!!
Member
Nice!
Member
i have that SAME headunit! and honestly. even thought i wont use the gauges often, ima do this one just cuz it looks really nice. but can the gauges go under the obc?
Extremely Legit
That's where the commercially available gauge kits are installed.Originally Posted by Arctikz

E36 DIYs: Air Pump | Vent Gauge | E46 Armrest | SmarTire TPMS
E46 DIYs: Hella TPMS | Aftermarket Horns | Window Regulator Notes | Trunk Wire Harness | Trunk 12V Socket
Member
im confused. lol. so yes?
Senior Member
Yes, you can put them under the OBC. It's easier to do it that way IMO but I like having them up a little higher so I can see them easier.
Member
o cool thanks
Member
Considering this.
How would you pull your OBC out if a light in it goes bad, or if one of you gauges went bad or something. If you glue stuff, its going to be non-reversible to a point to fix lights or change stuff?
After owning my E36 for 2 years and experiencing some bad things, I see the importance of gauges. If I had them before I could see a problem before it happened.
Last edited by Righteous; 12-08-2008 at 06:16 AM.
Senior Member
You can slide the OBC out using a flathead screwdriver.
BMW - Roof = =D
BMW CCA Member
i wana put a tomtom there!
vrrrm psshh
How did you get the prosport oil pressure guage sender to fit into the stock port? i couldnt find an adaptor anywhere
Senior Member
I didn't. I got an adapter from The Racers Market.
Member
My project.. I saw out the abs plate from sheap ratchet toolbox. Looks almost same than other parts in dashboard. Stepper gauges are from ebay. They are "black smoke" models. Sorry for huge pic. Its in server......

Last edited by Silli; 04-08-2009 at 12:19 PM.
Member
I did mine a few weks ago but only did oil pressure and temp. Made my own sender adapters, drilled and tapped the vanos oil line bolt for pressure and made a sleeve to fit in the upper radiator hose. Here's a link to the video.
http://s196.photobucket.com/albums/a...install001.flv

Last edited by jmo69; 06-09-2009 at 11:47 PM.
Gave away my BMWs, driving a VW and an Audi now.
Member
Well...relocating the OBC down looks like a good idea.
Member
I wish I knew how to move the HVAC controls so I could put the gauges where the radio is, radio where the HVAC is and so on.
Gave away my BMWs, driving a VW and an Audi now.
Senior Member
Digital just involves re-wiring. Manual Hvac is more difficult.
- - - - - - - - - - -
Silli, what headunit is that for your radio??
 Posting Permissions


 Reply With Quote


Bookmarks