
 Member
***More Pix Post 24
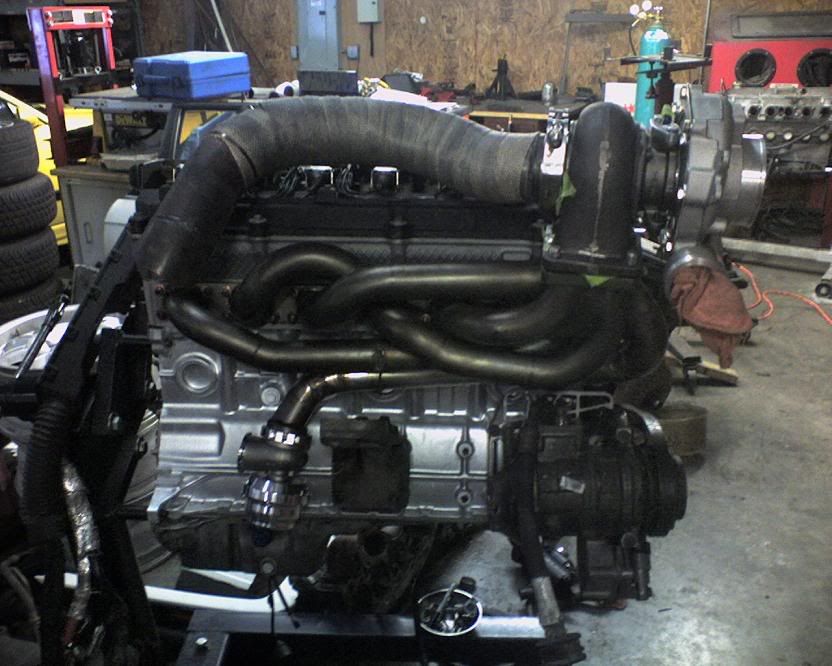
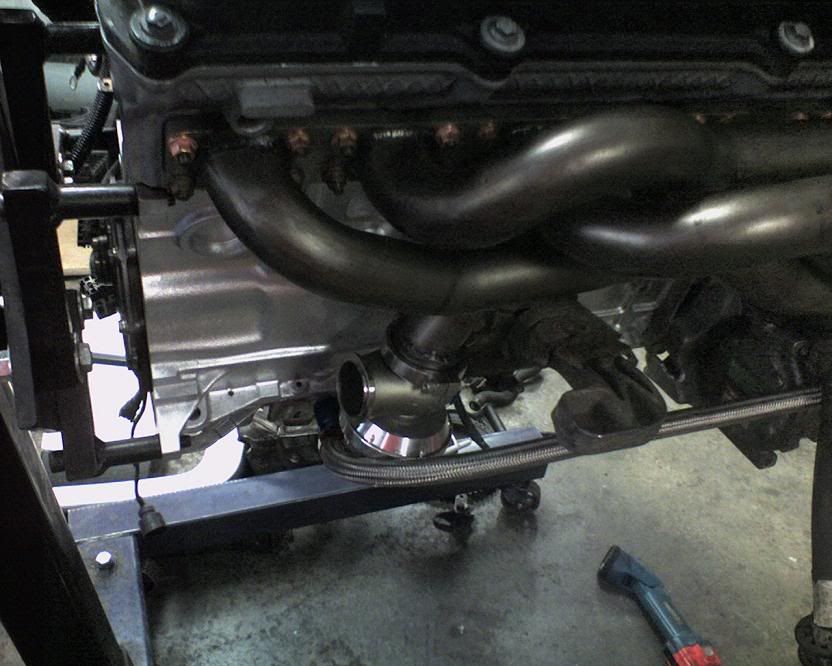
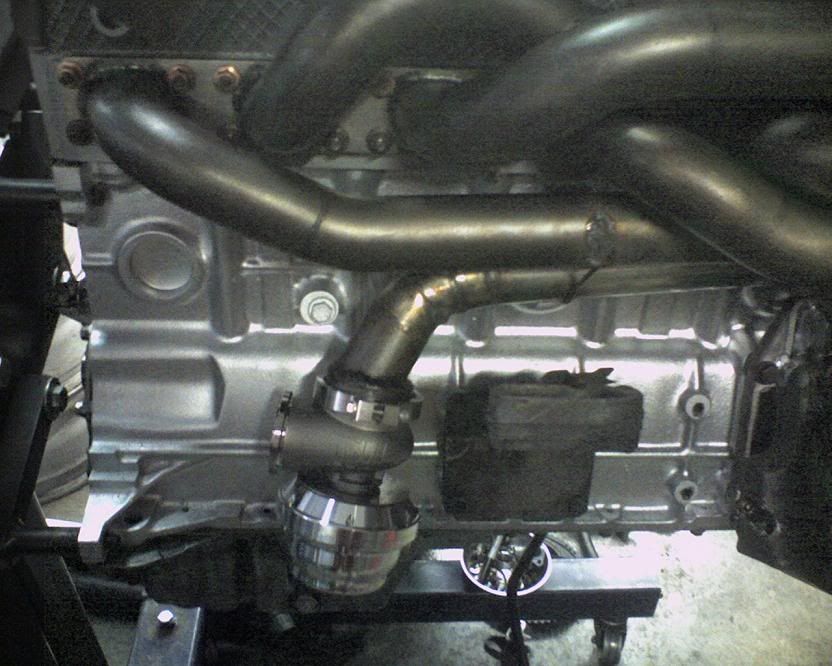
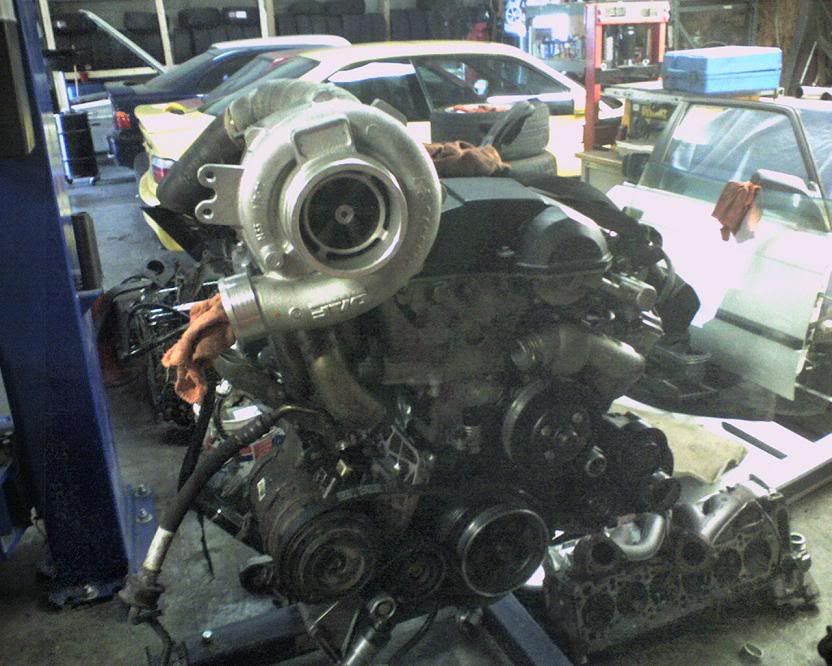
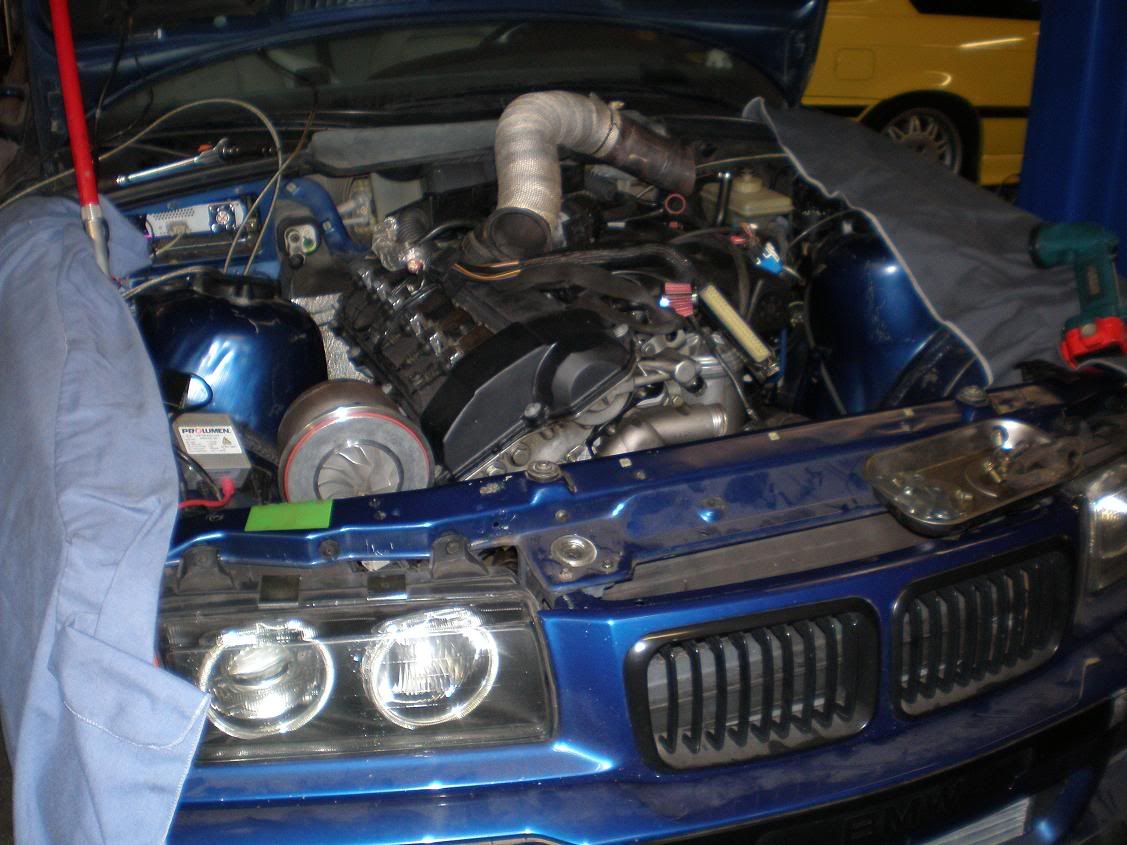
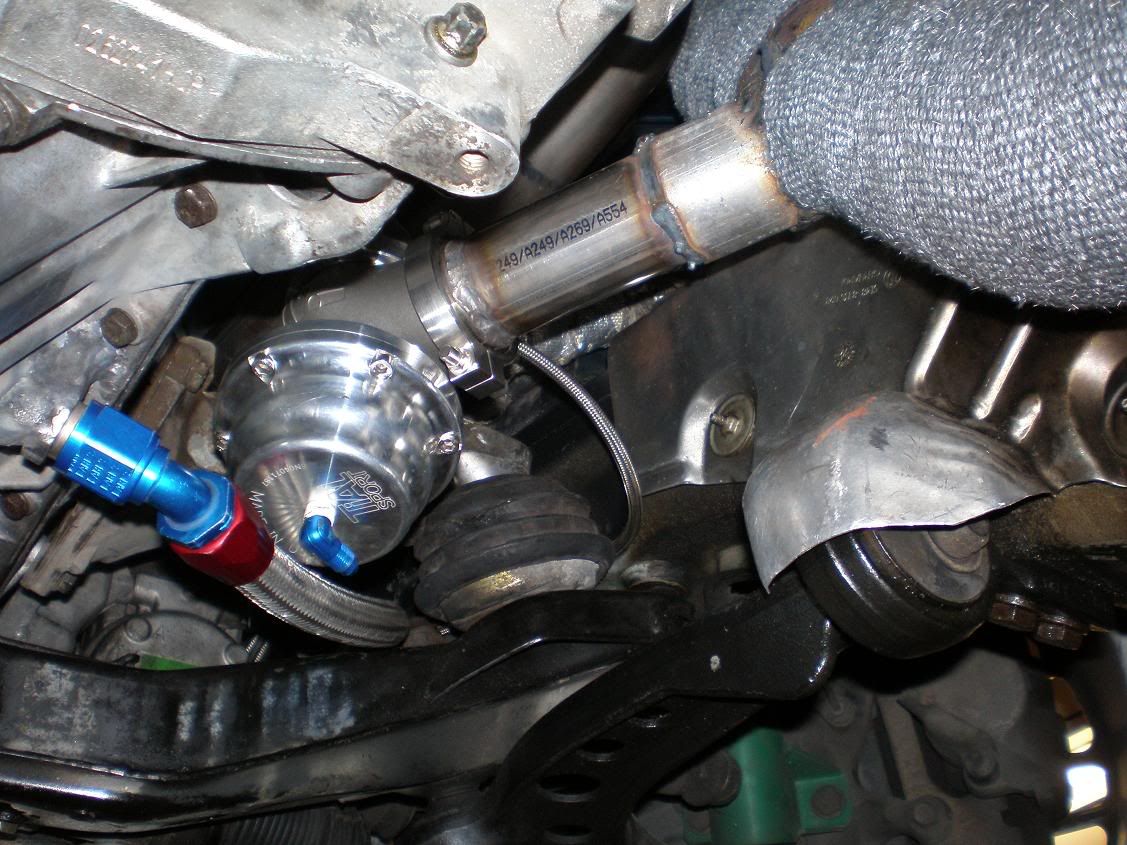
well since i got my top mount it was clear that AC was not going to work. the WG placement was right where the ac compressor would sit and to top that off the ac compressor interfered with the runners of the manifold anyways so thats strike 2.
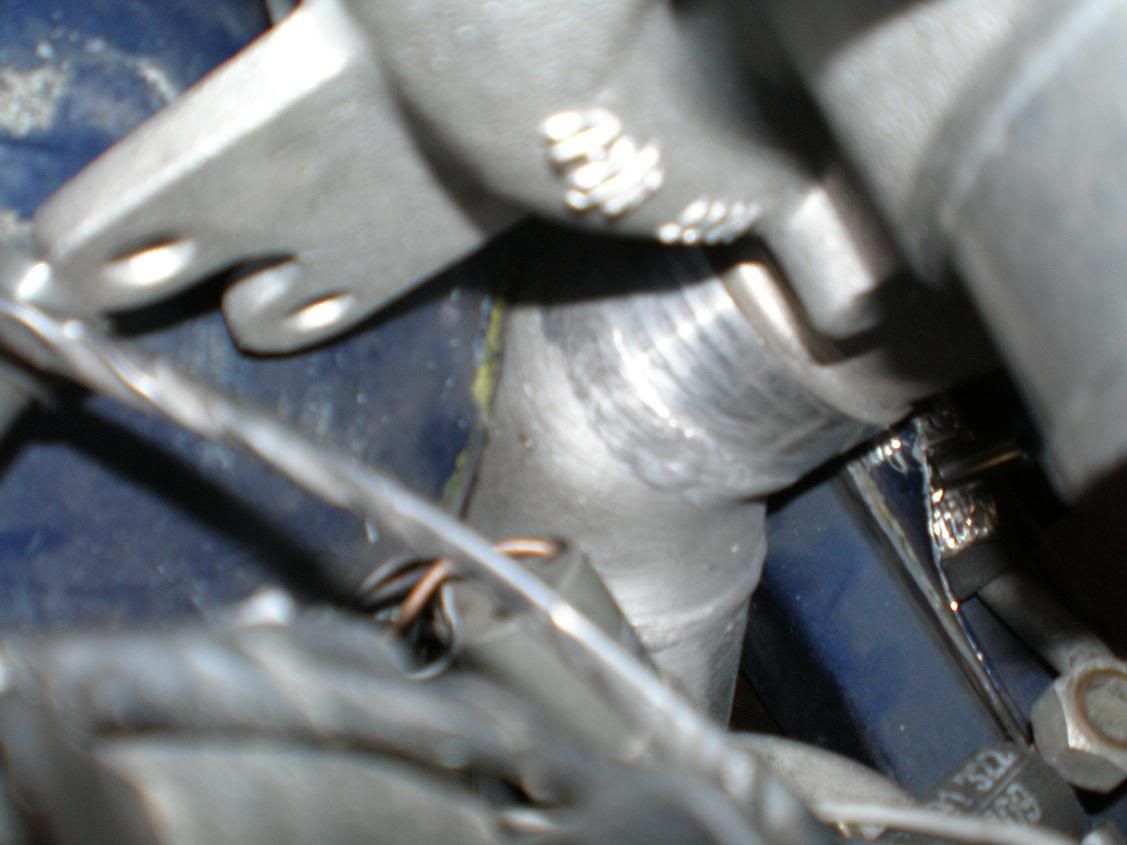
i called up techno550 to work his magic and i suggested modifying the AC bracket to lower the compressor, i had no idea he would actually slice the bracket in half horizontally which turned out awesome.
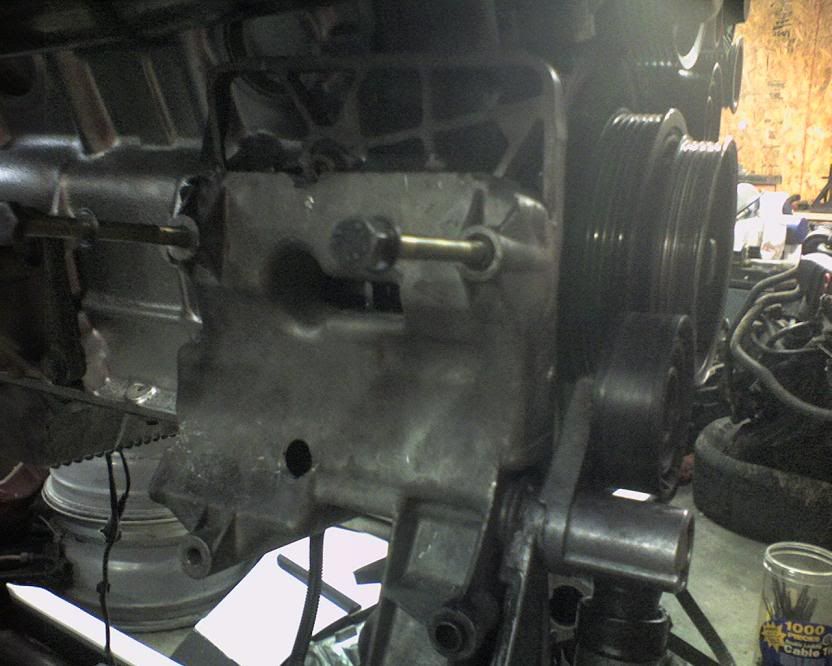
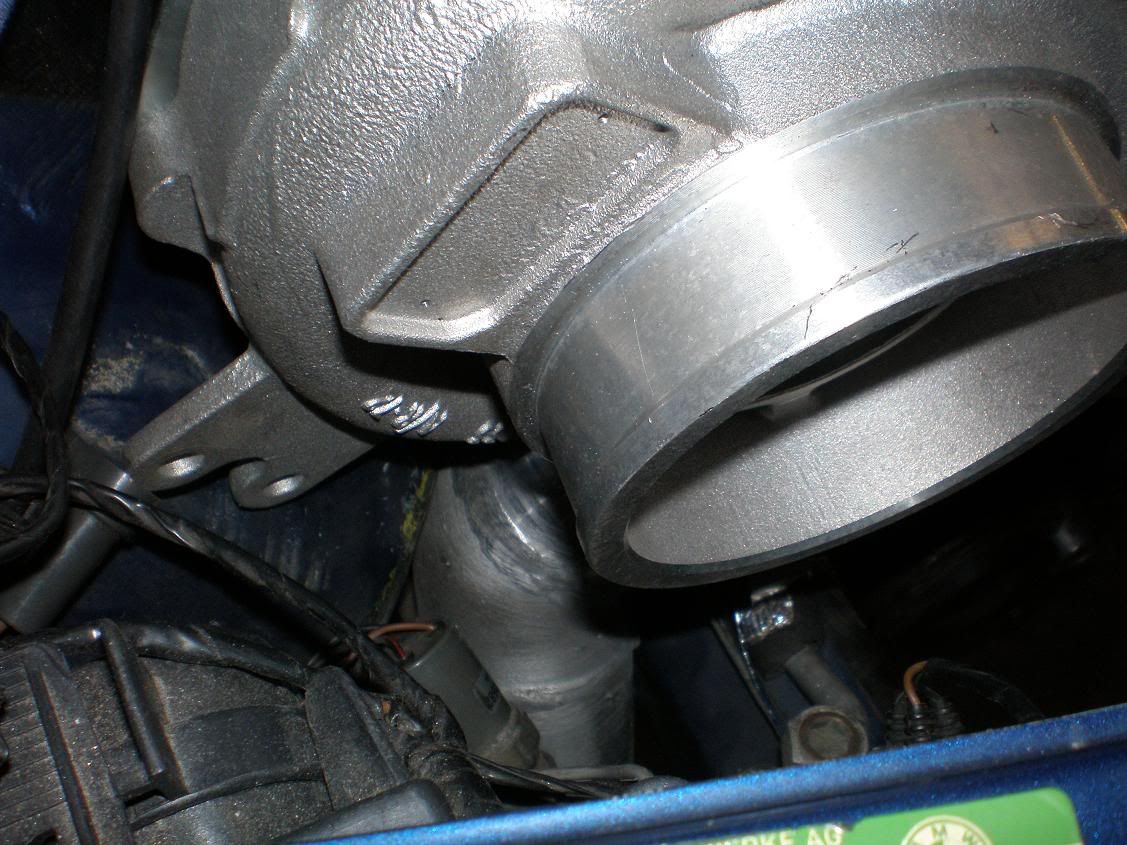
basically mccoy and wayne the other fab guy at the shop where my car is put their heads together and decided that cutting the ac bracket in half horizontally would allow them to retain the stock mounting points on the block while still lowering the compressor almost 3 inches which thus allowed more than enough room for the compressor, lines and the new WG plumbing.
after they sliced the bracket they welded the bracket on the sides corners and the back and filled the back as well to add more strength (not like its going anywhere anyways lol)
the compressor mounted is not mine just a spare mock up one we grabbed from another motor.
in the end all i need is a slightly shorter 5 rib belt from Napa or autozone and everything will be fine. losing AC was not an option for me in atlanta plus its a street car.
sorry for the crappy pix i left my camera in a friends car
on to the pix.
Last edited by CosmoE36; 07-27-2007 at 09:22 AM. Reason: more pix
Nikon D800e | Nikon D700 | MB-D10 | SB900 | SB800 | SB600 | LumPro160 | Nikon 85 1.4G | Sigma 50 1.4 | Sigma 35 1.4
Member
Originally Posted by CosmoE36

...need i say more????
#1 o-ring fan
Wow!That is going to be one helluva ride! Nice top mount setup. Nice to see another going for more than GT35R.

Where have I been? Astral projecting.
Member
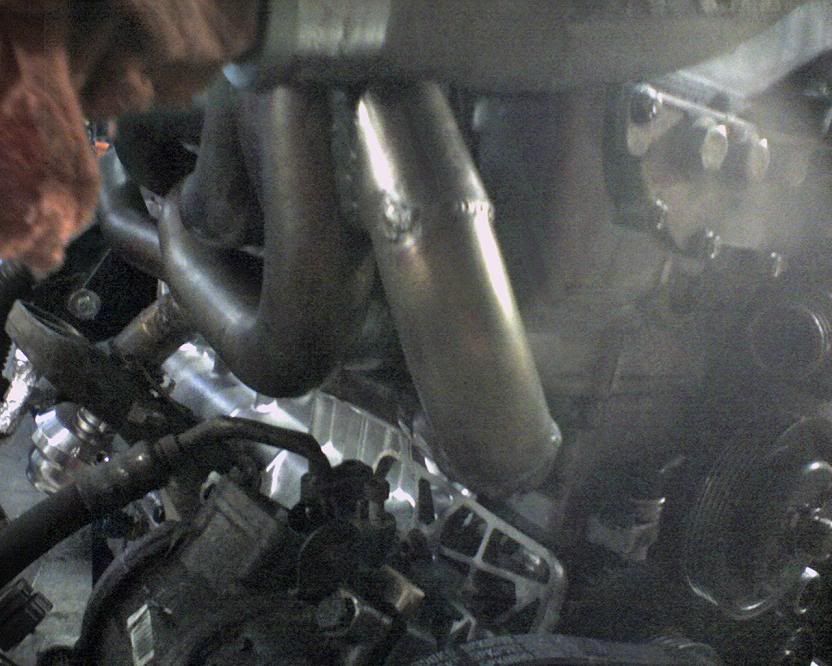
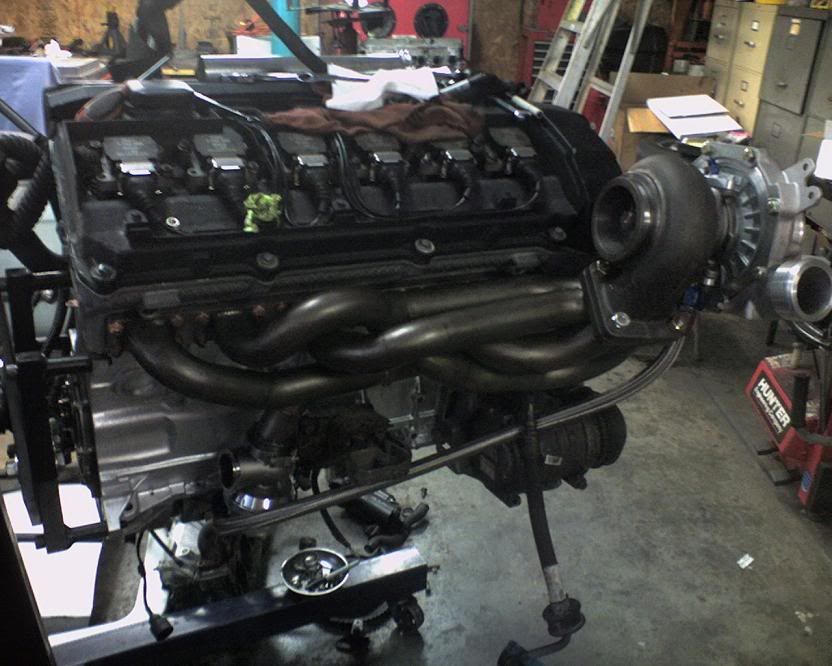
nice, like how you got it to work with a/c. I however am not crazy about the collector. do you have better pics? of possibly looking into the collector? Is it a true merge collector?
Still looking better then mine though. cant wait to see it in action.
1005whp/831wtq little bit of low boost pump gas magic...
Member
as far as i know all 6 runners merge together at the flange
Nikon D800e | Nikon D700 | MB-D10 | SB900 | SB800 | SB600 | LumPro160 | Nikon 85 1.4G | Sigma 50 1.4 | Sigma 35 1.4
AA 55 AA 55 AA 55
Your wastegate is where your turbo goes...
Looks great Shawn.
No PMs. Email through forum please.
Member
yea pish posh gt35r
c'mon t88h baayyyybee
#1 o-ring fan
Well now...actually pt67 would be nice. Or...I got off the phone with someone who gave me personal impressions of an ITS Super 70 and OH MY GOD!
That might be my next turbo right there! Put it this way...he blew doors off a GT35R M3 at ~550whp.

Where have I been? Astral projecting.
Member
I got a PT67 in my shed......I was one of precision turb's customer back in the day....it is jyst collecting dust now...
Member
^$50?
Member
300.00
True M3 Enthusiast
Cosmo,
What about the valve cover melting with the downpipe routed directly over it (and hovering only like an inch from it)?
915whp '98 M3 Sedan /// 37k Mile '95 M3
showers with Gojo
That...looks....Awesome.
Austin
Btw, why do turbo guys use header wrap instead of just jet-hot coating the stuff. I hate working with header wrap. Ugh, the stuff bugs me.
Austin
Active Autowerke C38 stage 2 on 95 dakar yellow M3, 30k miles
.080 mls headgasket, ARP headstuds and obd2 valve retainers; Stewart water pump; Dunlop Z1's on staggered CSL's.
387whp, 296wtrq --- girls dig dakar
Member
do you mean the plastic motorsport cover? that shouldnt melt , i will be using very good heat wrap on the down pipe, the guy thats working on my car says he wants to make a aluminum cover to replace the plastic one, so we will see how that goes.
i never have time or think about sending the stuff to get coated lol no place near by and i hate shipping stuff that i have to get back.
Nikon D800e | Nikon D700 | MB-D10 | SB900 | SB800 | SB600 | LumPro160 | Nikon 85 1.4G | Sigma 50 1.4 | Sigma 35 1.4
True M3 Enthusiast
When I asked the question I was thinking you might go the aluminum route as I would be worried about the plastic melting. Granted the pipe is heat wrapped but its still going to radiate heat of atleast 300+F I would think.
915whp '98 M3 Sedan /// 37k Mile '95 M3
#1 o-ring fan
Huh? That doesn't make sense cause the cob webs on that T88H are older than the ones on the PT67.
Where have I been? Astral projecting.
Member
you should see the t78 that has been archived as a true historic peice
Member
All I have to say is that is one beautiful series of pictures.
Stays crispy even in milk
Nice!
The a/c compressor is the bane of most peoples charge piping design...such unfortunate placement. Nice to see a creative workaround (albeit for a unique situation).
I take it the stock a/c lines are going to interfere with the manifold too. Do you plan on making your own or getting that fabbed elsewhere?
SOLD -A dozen ///M3s of all shapes
Member
the stock AC lines wont interfere that much. they will have to be slightly bent or pushed out of the way but as long as your gentle with them it will be fine. they are already wrapped in heat resistant foil as well to protect from heat from the manifold.
Nikon D800e | Nikon D700 | MB-D10 | SB900 | SB800 | SB600 | LumPro160 | Nikon 85 1.4G | Sigma 50 1.4 | Sigma 35 1.4
Member
thats is sweet looking!
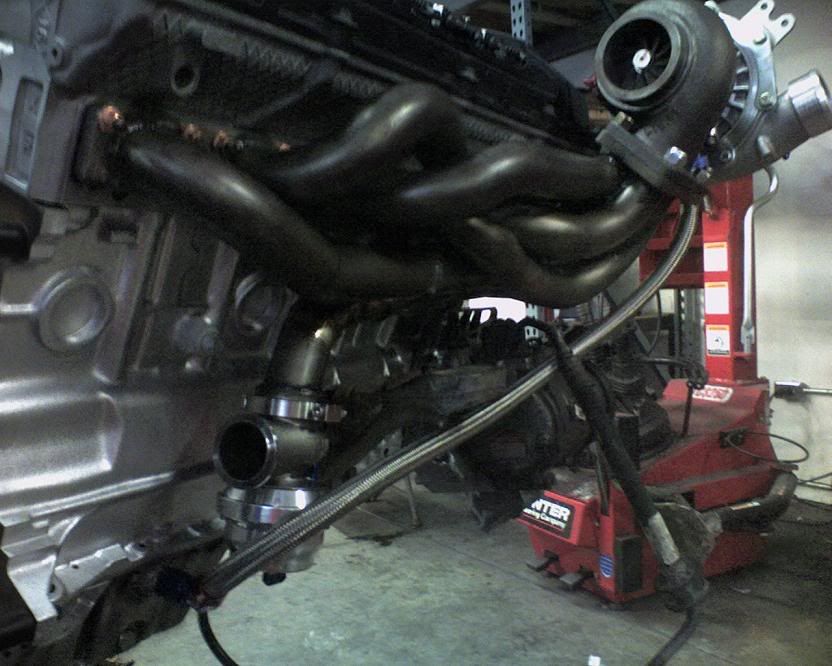
but yeah. taking the downpipe off everytime you want to check plugs, etc sounds like a bummer
#1 o-ring fan
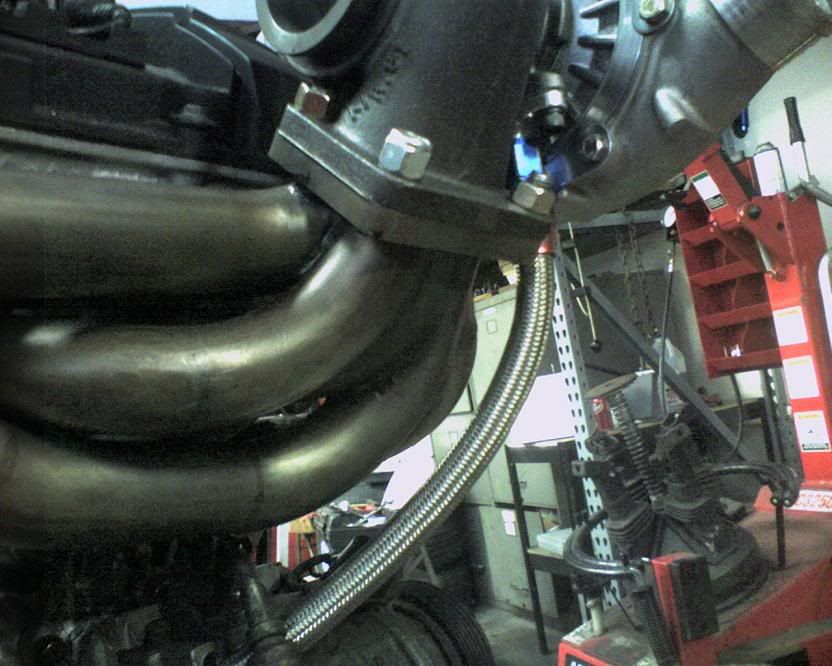
I have to do that too. Depending on the manifold though you can squeeze the downpipe sliding down and over the manifold so it is not on top of the coils. I couldn't do this because my runners are so long and come way up in the back.
Here is a perfect picture of how it can be done with any top mount manifold other than mine due to runners going pretty much right to collector.
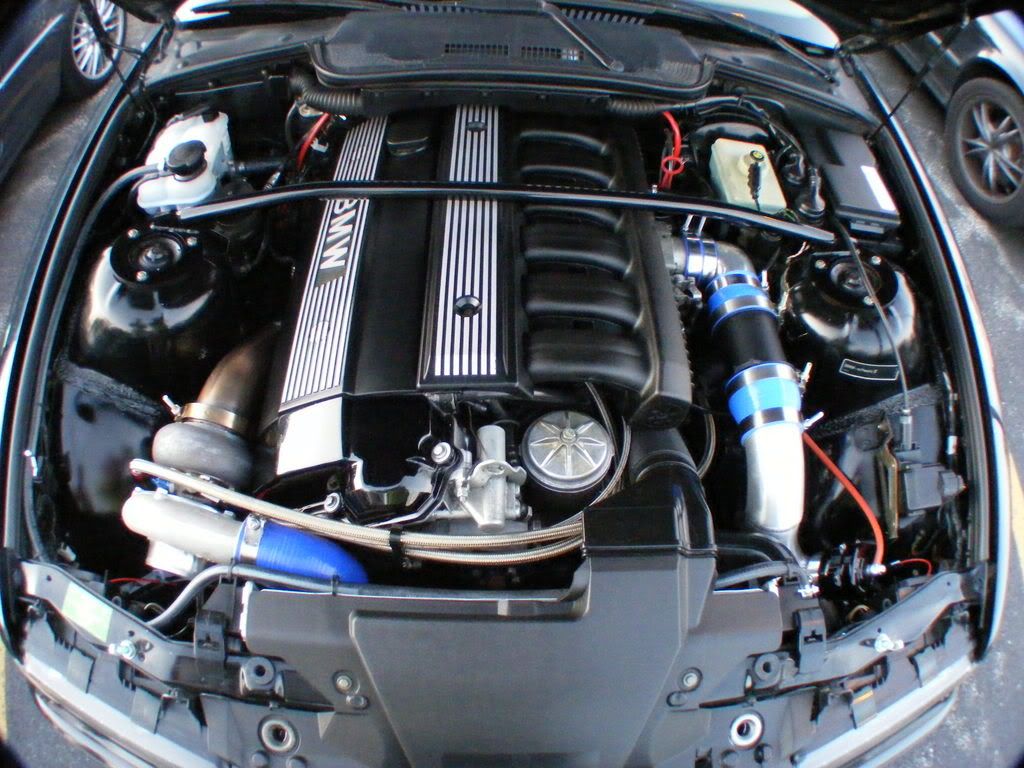
Where have I been? Astral projecting.
Swap Whore
Nicely done.
Mike=the man.
love the fisheye lens too
460whp/515wtq wifes MMW tuned 335i
Member
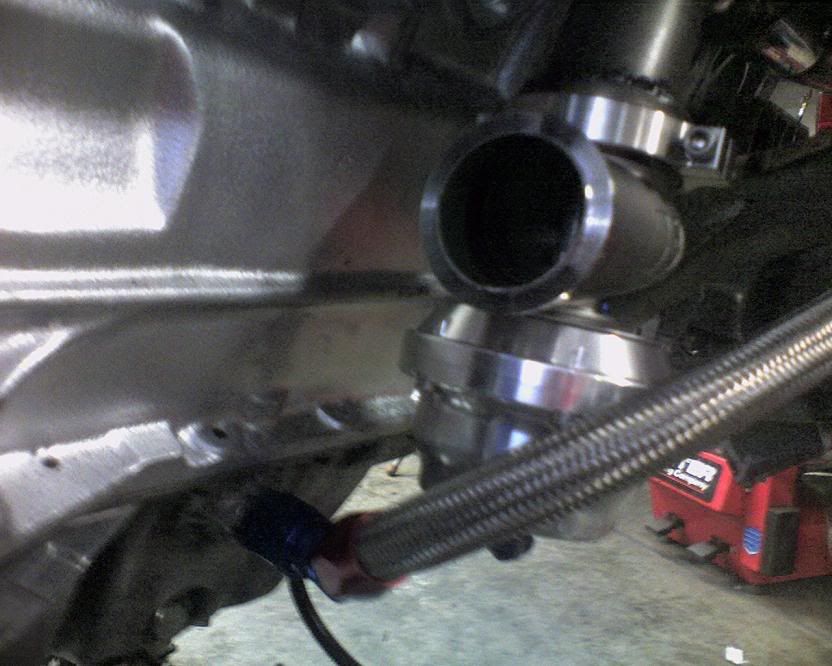
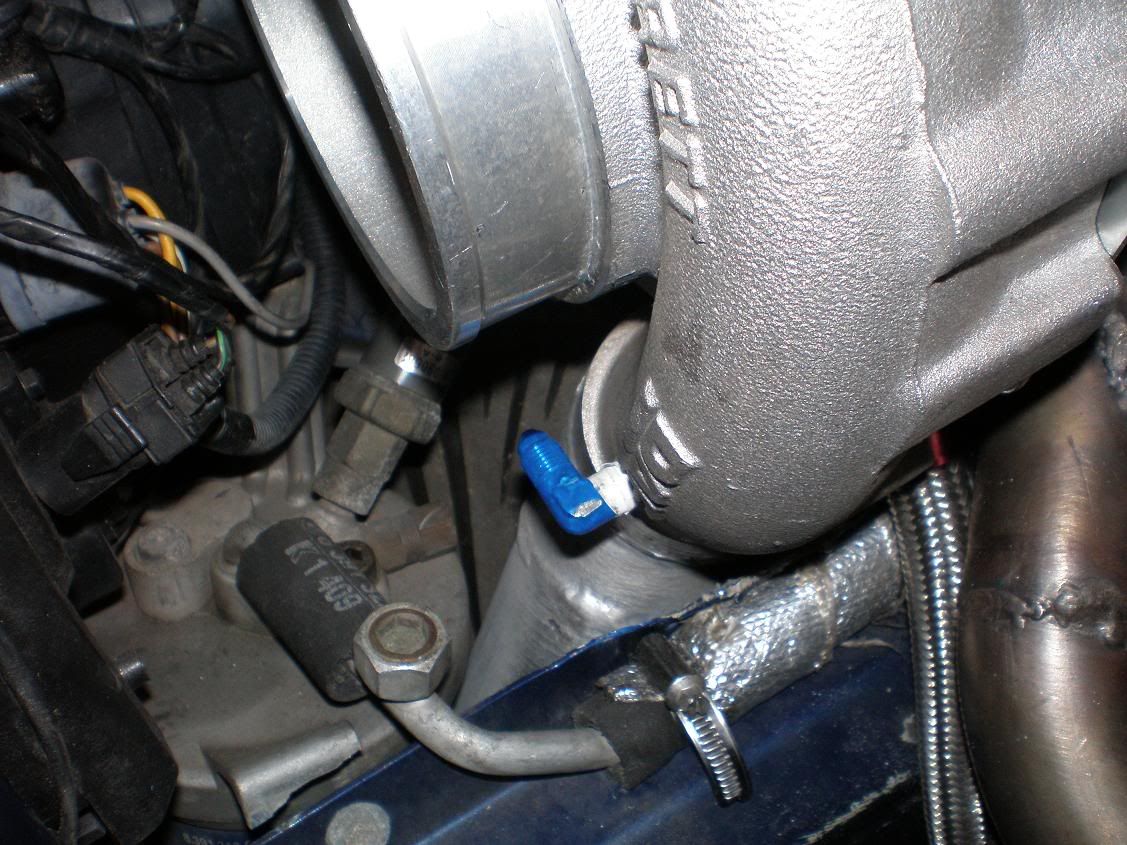
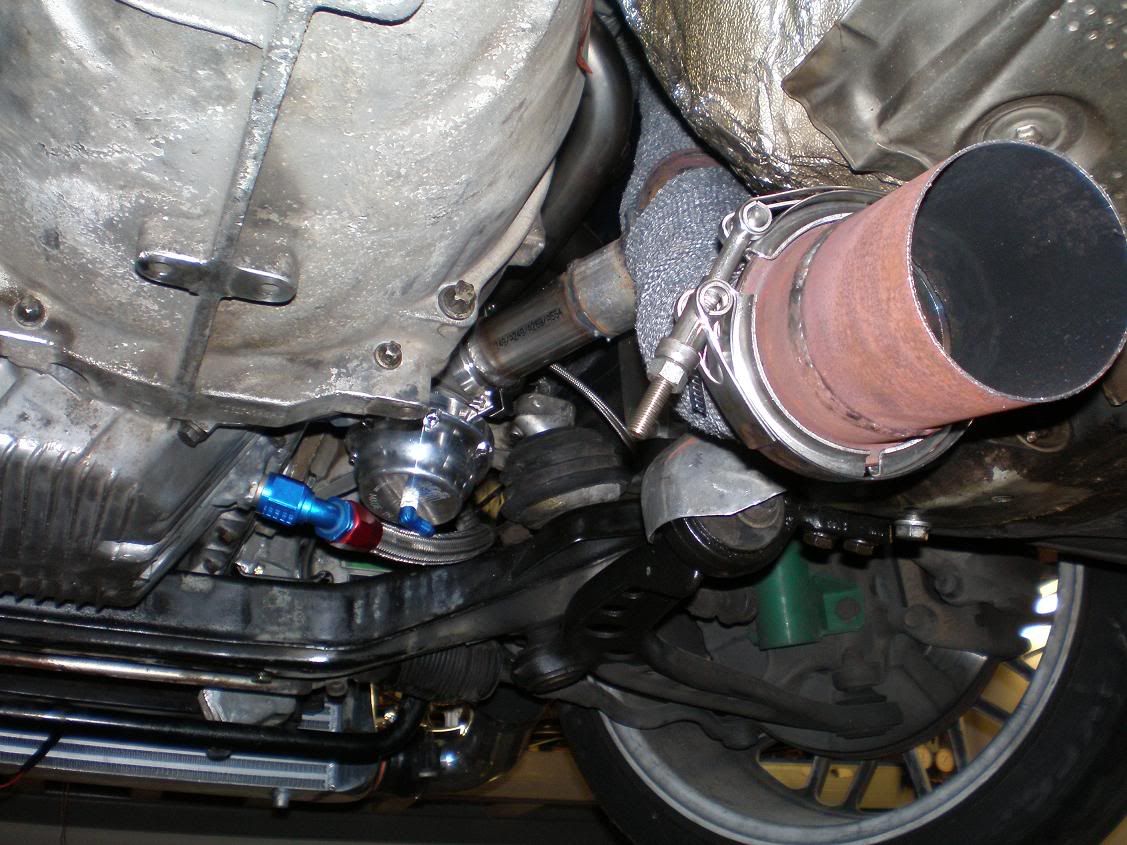
Ok, so you were right lol. one of the AC lines had to be modified. doh
we ended up using a piece of ac hard line from a E30 (the only thing from a e30 that will ever be on my car lol) to add length to the e36 line as well as cut and reweld the line at a different angle.
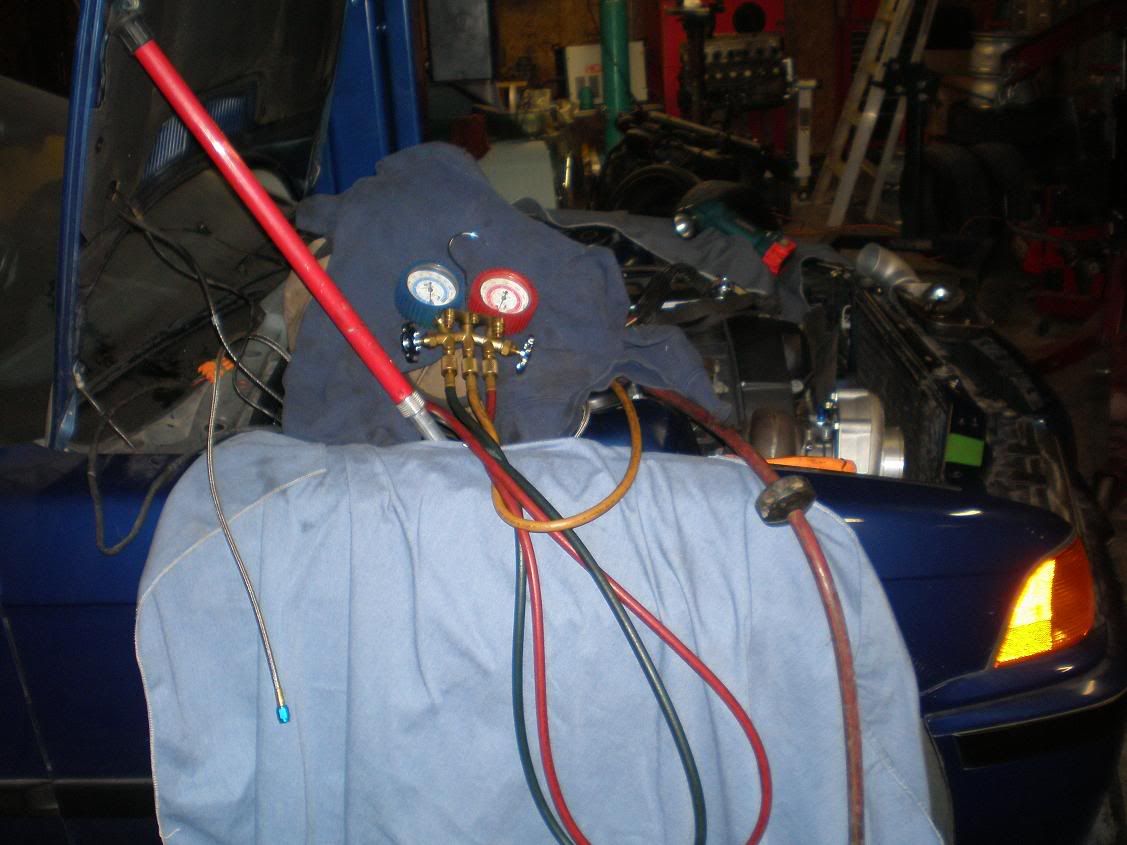
after a few welds and pressure testing with AC equipment we fond a leak and repaired the leak and another pressure test and vacuum test left over night showed the system holding 25 inches of mercury over night no problem.
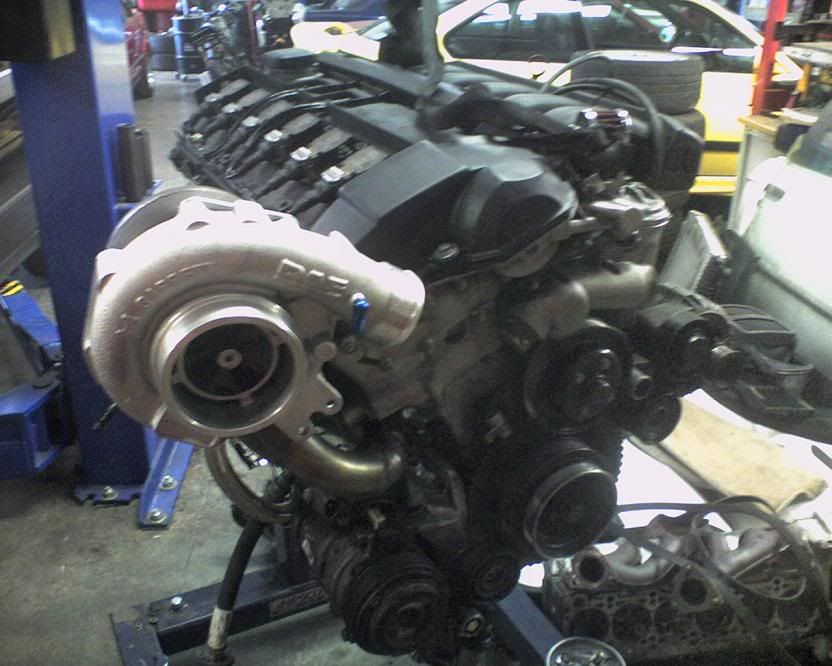
i have some new pictures now.
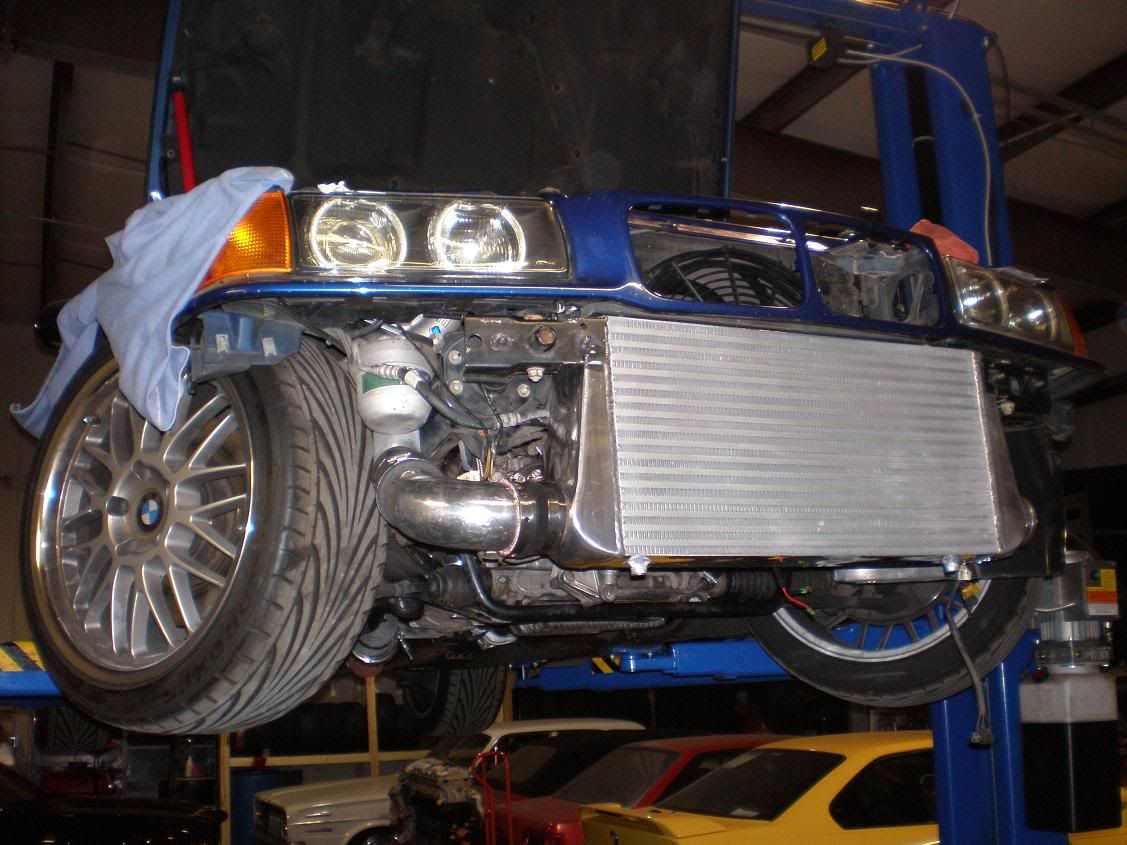
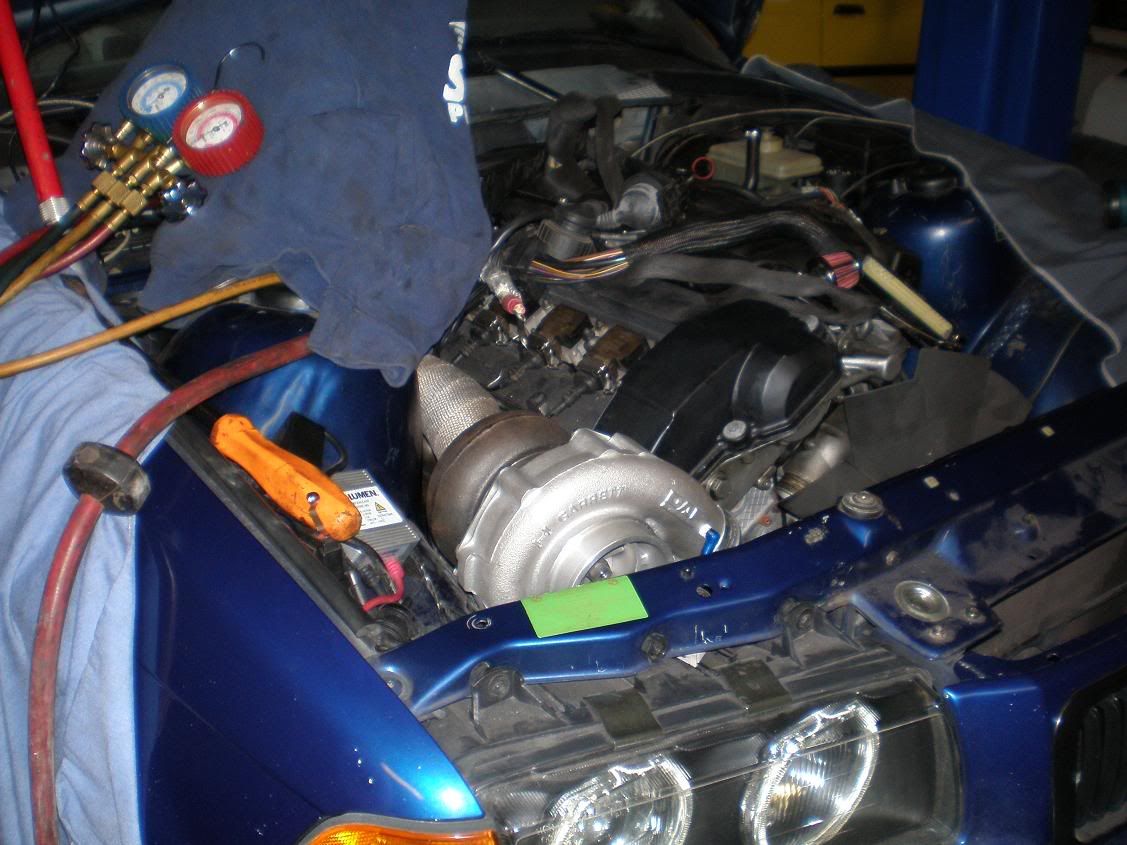
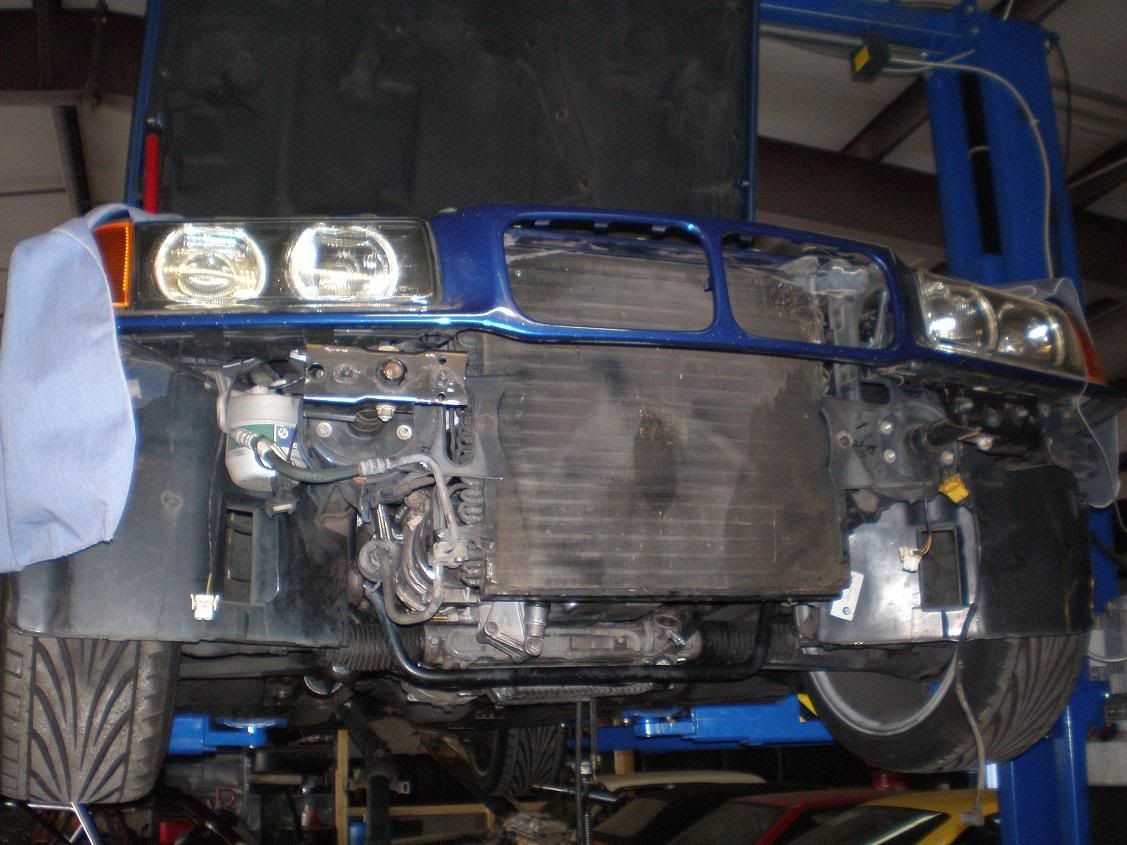
motor is in. had more items that had to be modified :sigh
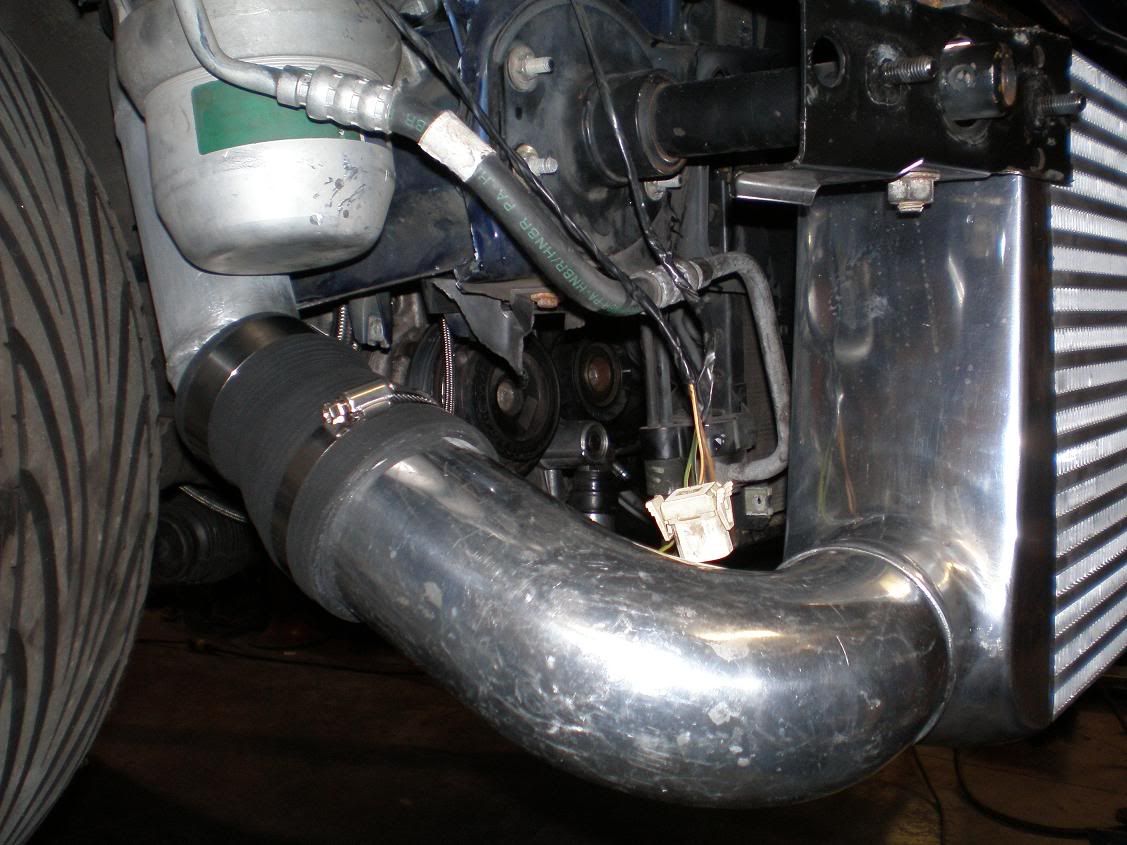
lower radiator hose didnt fit now so had to fab up a cutom hard pipe so thats done.
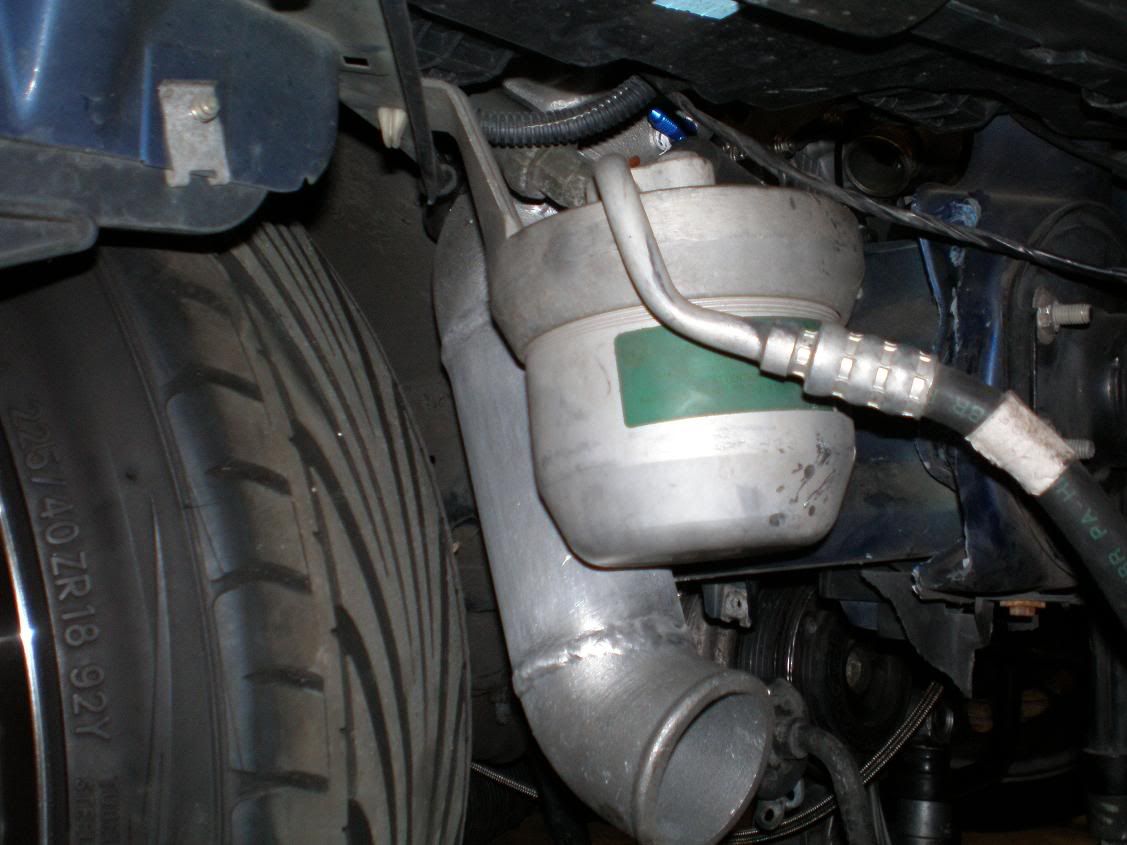
had to move the AC drier forward to free up the hole so we could fit the charge pipe off the compresor housing. in the pictures it looks close to the wheel but we have clocked the wheel and lowered the car all the way and it clears no rubbing. whew and it happens to go right to the hot side of the intercooler perfect.
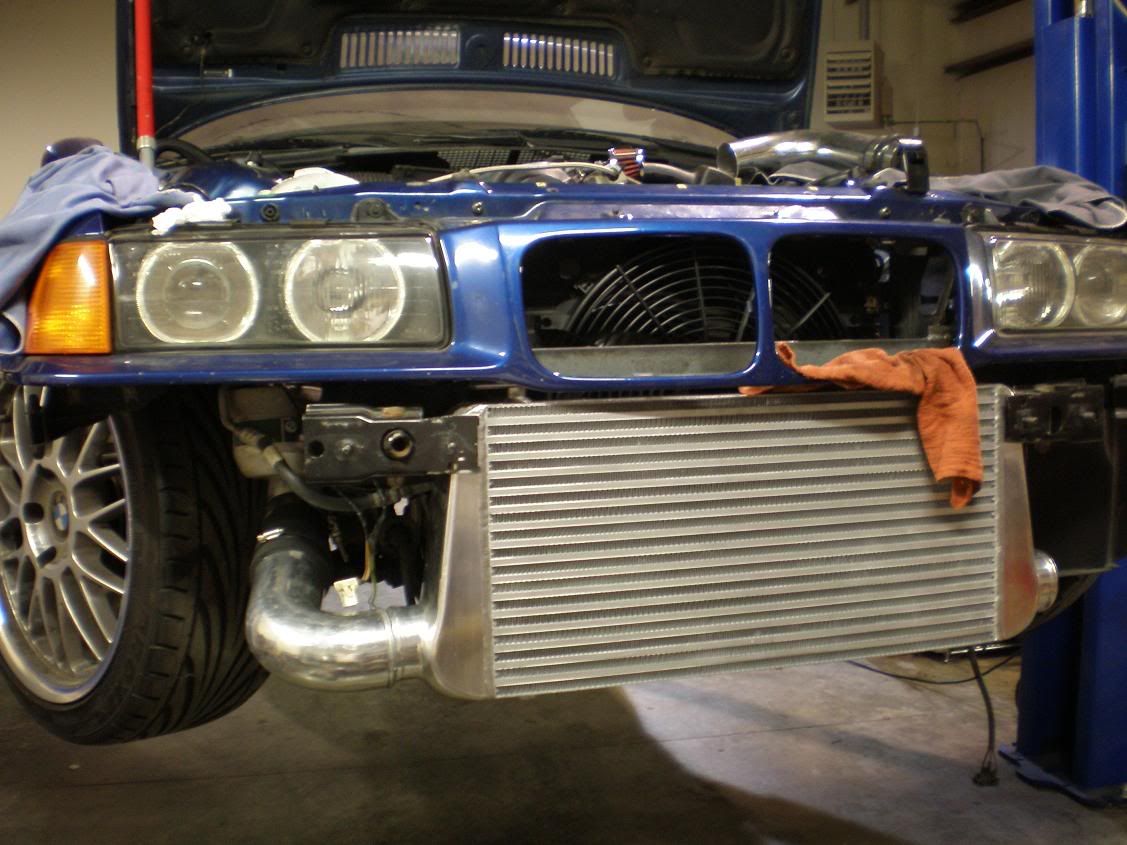
had to redo the intercooler bracket to fit the new electric fan so now that fits.
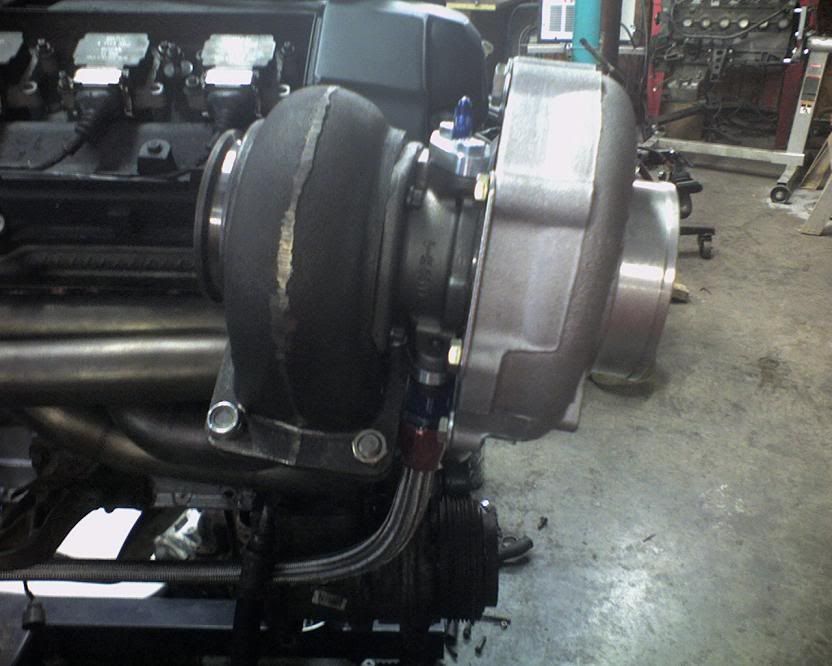
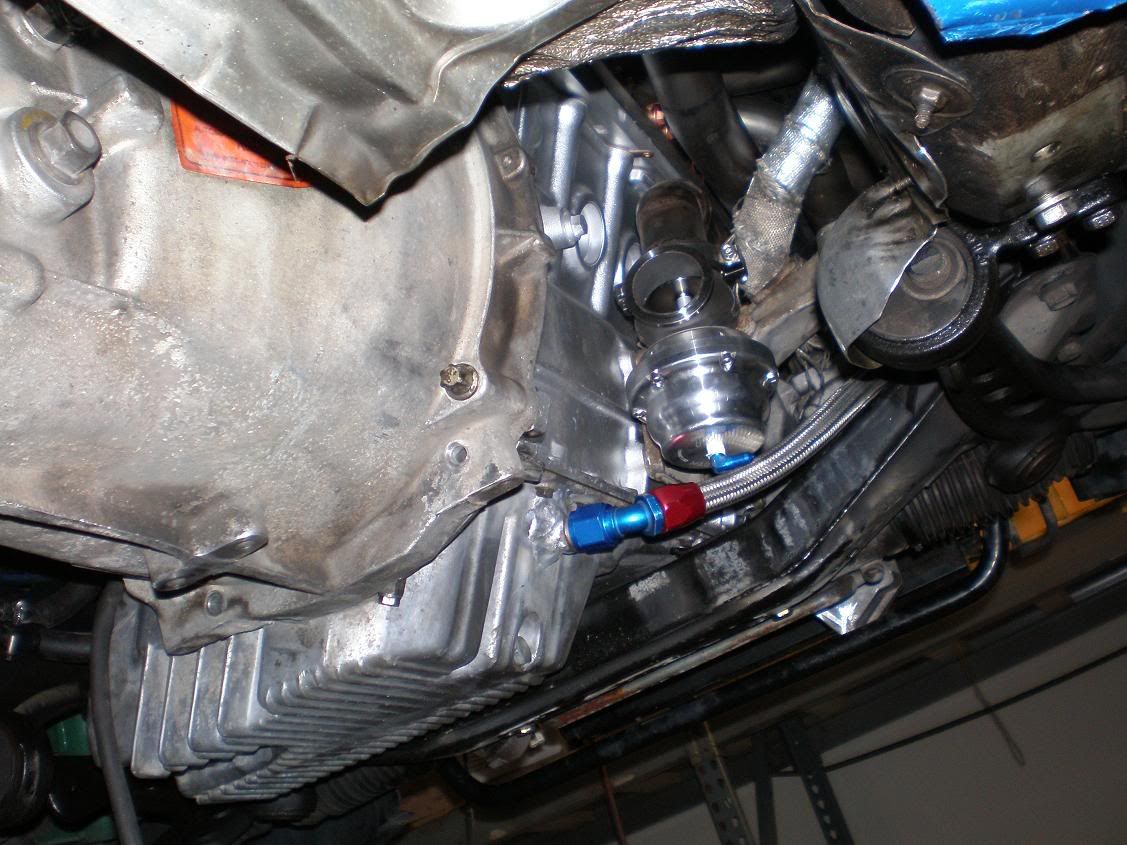
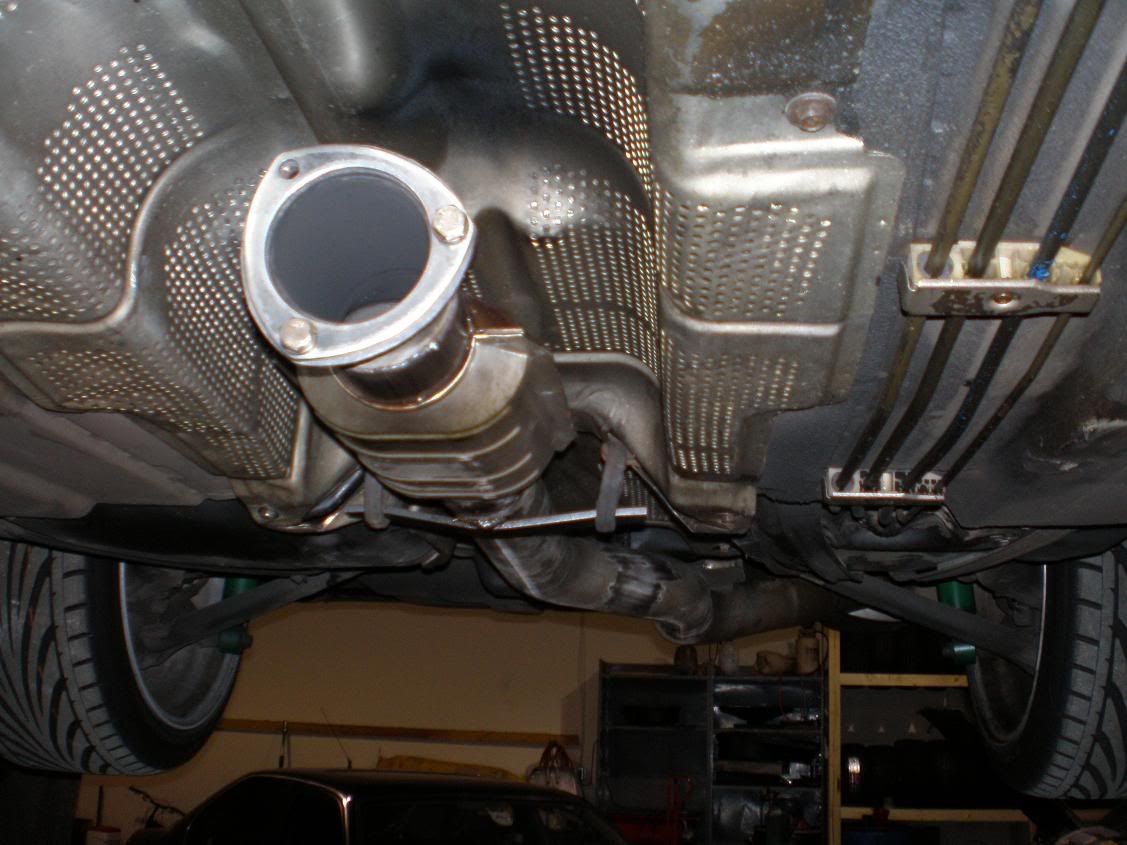
down pipe and dump tube from WG routed back into down pipe at a slight angle done.
all thats pretty much left is to connect the down pipe to the rest of the exhaust and finish the cold side of the charge piping.
have to pump the 6 month old 93 octane gass out and put in fresh gas.
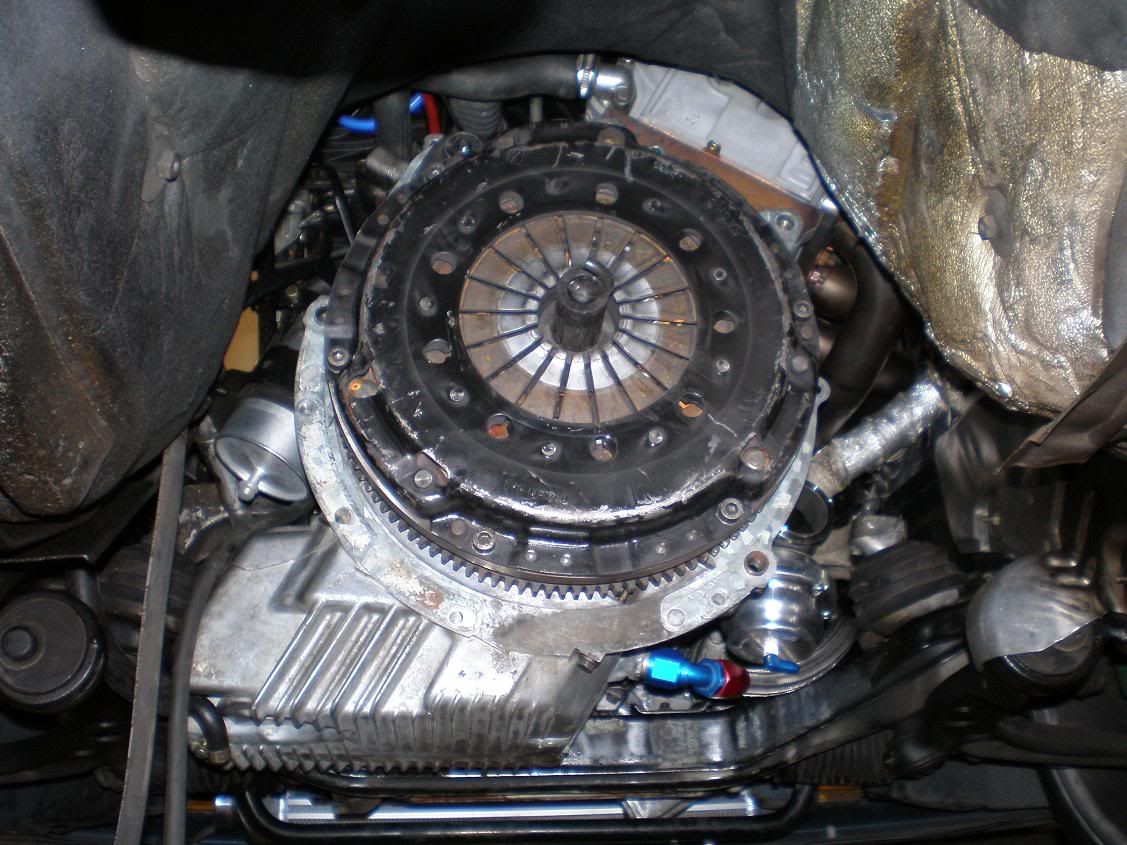
motor has already been primed along with oil feed line we have turned the motor over with the starter and it spun quite nicely with 7 quarts of 30 weight oil.
will change oil at 100 miles, 500 miles, 1000 miles and then 3000 miles put in my standard weight oil
Sunday is the day we should be finished! ill cross finger.
Nikon D800e | Nikon D700 | MB-D10 | SB900 | SB800 | SB600 | LumPro160 | Nikon 85 1.4G | Sigma 50 1.4 | Sigma 35 1.4
270KPA
The whole car looks amazingI'm jealous of your piping routing with the top mount setup.
I haven't figured out how I can go above the subframe with a gt35r bottom mount and retain the a/c..
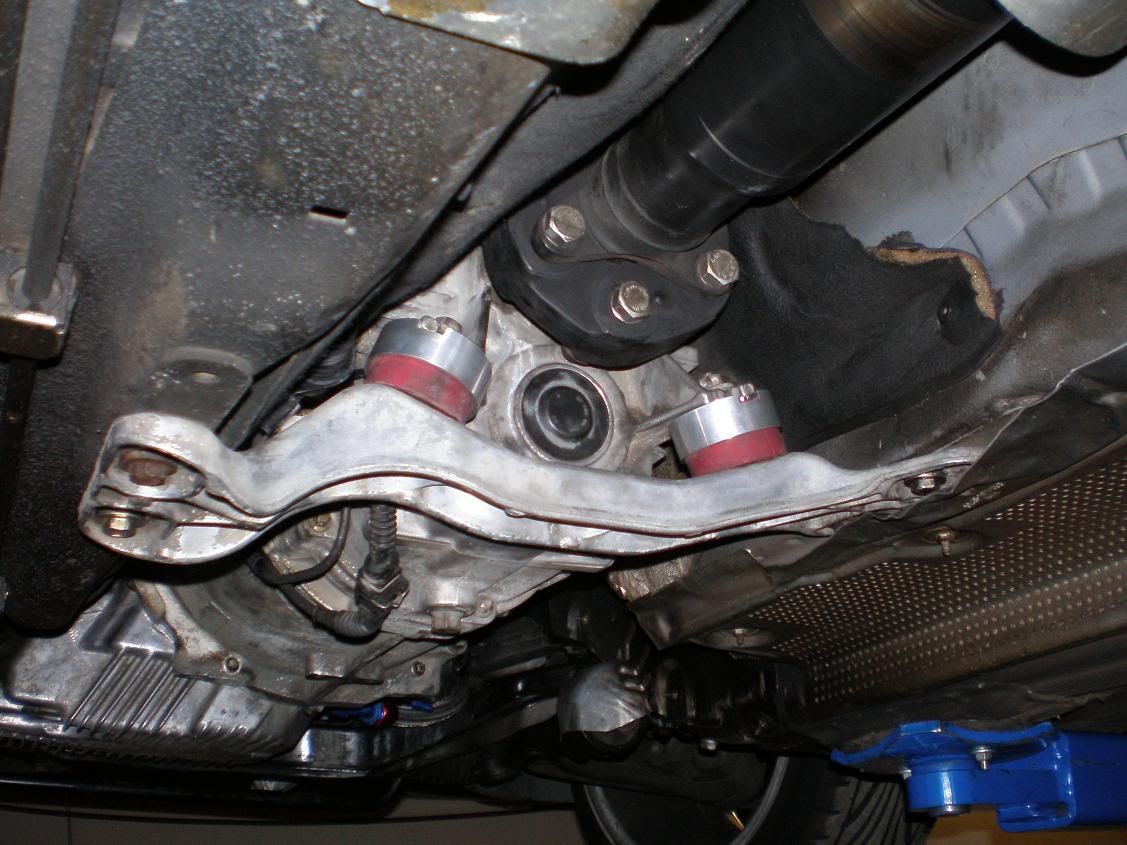
I'm also curious what is holding the IC mounted? It looks like a piece of angled steel mounted inside the nose panel?
How do you like the UUC red tranny mounts with the TME's? I had a set on mine but ended up switching back to the stock mounts bc they felt much better IMO, they made everything feel smoother..
-Kyle 1995 Custom Turbo M3 SOLD!
 Posting Permissions


 Reply With Quote


Bookmarks