
 DIY monkey
My driver's side door handle on my E36 M3 coupe had been giving me trouble for a while. One day, I gave it a yank and heard a plinking sound. The door stopped opening from the outside at that point. Most people recommend taking the car to a mechanic because messing with the window is a PITA, but I decided to save some clams and do it myself.
WARNING: This isn't an easy/fast task the first time around. Give yourself plenty of time.
WARNING: You might drain your battery while doing this job because there will be quite a bit of window actuation but little motor usage. Hook the car up to a charger just in case.
0. PREFACE
You'll need these tools.
[LIST][*] T20 torx bit[*] 5mm hex bit[*] Pick tools and/or cotter pin tool[*] 10mm wrench or socket[*] Dull butter knife or screwdriver[*] Needle nose pliers[*] Ruler[*] Depth gauge and/or calipers (maybe)[*] T30 bit (optional)[*] Work light (recommended)[*] Flash light (recommended)[*] Battery charger (highly recommended)
This is a general diagram of where you'll be working. Blue is for door panel clips. Green is for rear window guide rail. Red is for window regulator clips.
1. REMOVE DOOR PANEL
There are a bunch of DIY about this, so I'll make this quick. For more details, check this link (written by someone else).
- Pop out and disconnect mirror controls.
- Remove interior door handle trim.
- Use screwdriver or dull butter knife to pop the door panel off the clips (located at the blue markings in the overview diagram.)
- Disconnect speaker wiring.
- Peel away vapor barrier.
2. DISCONNECT WIRING
Disconnecting the electrical wires can clear up some working space, so it's not a bad idea to get them out of the way. To get the lock wiring out of the way, disconnect the lock actuator and unclip the wire bundle from the door. You'll have to maneauver the connector a bit because it's a self-locking harness.
This would be a good time to disconnect the door handle wiring. It might give you a little more clearance for later to take off wiring clip now; turn it (counter-clockwice, I think) and pull it out.
3. MOVE WINDOW OUT OF WAY
The door window is the single greatest obstacle in preventing this job from being quick and easy. The Bentley manual says to remove the window outright, but you can save yourself a little trouble by just unclipping it and positioning it out of the way.
First, make reassembly easier on yourself by marking the locations of the 6 rear guide rail fasteners (green markings in the overview diagram.) There are two 10mm bolts facing the interior, two 5mm hex bolts under the door, and two 10mm nuts on the window dolly. After marking their original locations, remove the nuts and bolts and take the rear guide rail out of the door.
Remove the retaining clips holding the regulator to the window glass (red markings in the overview diagram). There are two of them in the rails at the bottom of the glass and they will be covered in grease. Use a pick or cotter pin tool to take the retaining clips out and pop the regulator arms out of the gliders. Since they are wear items anyway, you can throw the gliders and the clips out and use new ones for reinstallation. New gliders pictured below.
By this time, the window will basically be floating in the door, so you'll have to hold it. Fortunately, the weather stripping at the top of the door and on the front guide rail will help prevent it from free falling. You should be able to raise/tilt/maneuver the glass and have it rest at an angle with the rear as high up as possible. Lowering the window regulator arms will give you more room to work. Note that the window will likely fall out of the front rail, so keep that in mind for reinstallation.
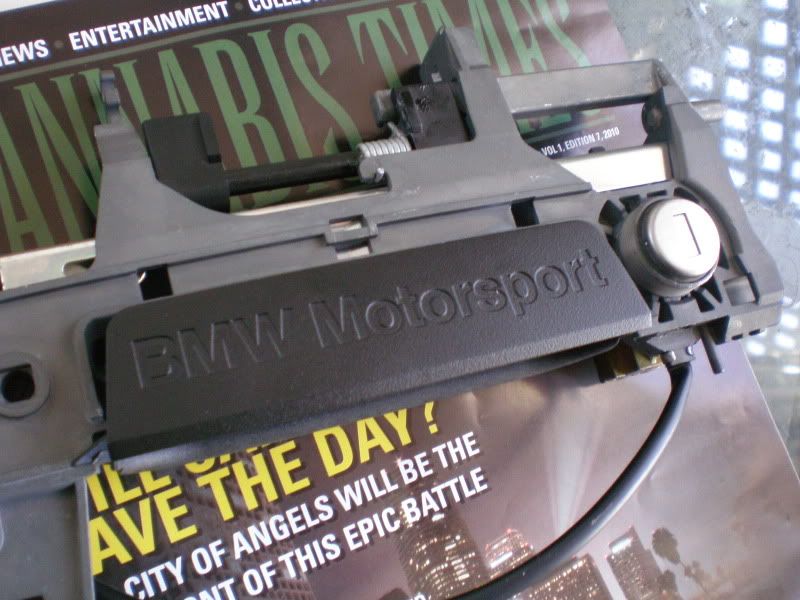
4. REMOVE DOOR HANDLE AND PREPARE THE NEW HANDLE
Now, the crux of this DIY.
First, take off the door handle trim. It's been covered before, so just refer to this DIY or whatever post you can dig up with the Search button. On coupe doors, there's a metal tab that will basically cover the sliding trim lock, so it might be easier to work from inside the door than through the access hole. You can kind of make it out in the next picture, but you'll see it when you get to this step.
Second, disconnect the door handle from the door lock. There are two things to take care of. Decouple the large metal arm on the door handle from the slotted lever in the lock. Then disconnect the hooking arm between the tumbler from the lock mechanism.
Third, undo the door handle attachments. On the inside of the door, unclip the back of the retaining piston and pull it out. On the outside, unscrew the locking ring and remove the plastic washer (don't lose it!). Some other write-ups have suggested using a horologist's tool for removing the back of watches, but that's not necessary. I used a pair of needle-nose pliers without trouble.
That's it! Now pull out the door handle.
Here's a picture of the carnage in my door. Notice that no less than three things had broken: (1) the door handle arm, (2) top half of the the door handle assembly, (3) the cable holder. I imagine that the assembly had been broken for a long time, and arm was the straw that broke the camel's back.
Transfer the cabling from the old assembly to the new one.
5. TRANSFER THE LOCK TUMBLER
My old assembly came from a 4/95 car. There must have been a design change at some point because the tumblers are different between the original handle and the replacement! So keeping the old key will require transfering the key wafers from the old tumbler to the new one.
Drive out the retaining pin on the old tumbler. Put the key into the tumbler and pull everything out. I used a nail and a vice to do the work.
Do the same for the new tumbler. I used a very small hex bit to drive out the retaining pin.
Here's how the key works: As you push the key in, small wafers in the tumbler slide up and down. If your key matches the wafer arrangement, they'll all go down and allow the tumbler to rotate in the bore. You'll need to transfer all the wafers to the new tumbler in order to continue using the old key.
At the moment, the keys are the only thing preventing the wafers from falling all over the place. So, take a breath. Take the keys out of the tumblers and lay out each set of wafers. Reinstall them into the other tumbler, making sure not to lose the tiny springs in the wafter slots along the way. Put the new tumbler with the old wafters into the new handle assembly. You'll know you're finished when you can insert, turn, and remove the key from the tumbler without anything binding.
Drive the retaining pin back into the tumbler.
6. OTHER MAINTENANCE/REPAIR
Since the door is already apart at this point, you might as well do the following:
- Replace the sliders at the ends of the window regulator arms. Most likely, if you're replacing broken door handles, the sliders are already toast.
- Remove the door lock and spray everything down with white lithium grease. You'll need the T30 bits to undo the bolts. If you're feeling extra enthusiastic, clean the bolts and refresh the Loctite blue.
- Spray the inside of the door stop/check. This will help the door swing open.
If your key gets stuck in the tumbler when turning, check out the door lock. When you turn the key, the tumbler pulls an arm on the lock via a connecting rod. There's some plastic that's supposed to help guide things when all these things move (there's a lot of play in their movement), but that broke on my lock.
Notice the V-shaped expanse of space between the black plastic? There's supposed to be plastic there. Unfortunately, you can't seem to order individual parts for the lock, so you'll have to ghetto-rig something if you want to save the expense of a new lock.
7. REINSTALLATION
Reinstallation, as they say, is the reverse of installation. Make sure you line up the window hardware to the markings made before. If not, you'll need to follow the adjustment procedure in the Bentley manual; for that, you'll need a depth gauge or some calipers.
ACKNOWLEDGEMENT
The following posts were useful when I was doing this job. There are a bunch of other threads that were useful, too, so I hope their authors don't mind that I may have forgotten to mention them. As always, thanks to the community for sharing their knowledge.
Last edited by shogun; 12-23-2016 at 12:33 AM. Reason: pics no longer working
ex-1995 Cosmos M3 Coupé - deck spoiler / koni struts + shocks / x-brace / clears / unstaggered contours / yokohama avs es100 / alu thermostat housing / emp water pump / porterfield r4-s pads / gc rtab shims / bavauto ss brake lines / fdm / ie rsm plates / kicker sub + box + amp / sylvania silverstar lows / lamin-x / loc-tite'd opn / lots of refurbishing
Retired - mason strut brace / jl stealthboxes / tms chip + hfm / s&b filter + outerwears / ecis heatshield / alpine 9835 + aux
E36 ///M DIY & Tech - Door Handles / Underpanel / Coolant Hoses / Gear Ratios / 3.5" Intake / Lower Chain Tensioner / Threaded Starter / IAT Sensor / 24# Injectors
isturning over a new leaf
very nice.. how did you take off the upper exterior trim on the door handle? Great write-up, btw~~
-M3J0N
DIY monkey
You mean the hard plastic trim around the door handle and the lock tumbler? There's a flat piece of metal (with a lip on it) that runs the length of the handle assembly (on the side facing the interior of the car); this piece locks the plastic trim in place. Push the slider and you'll be able to pull the trim off. See the links at the bottom of the DIY for better tutorials on how to do this.Originally Posted by m3j0n

ex-1995 Cosmos M3 Coupé - deck spoiler / koni struts + shocks / x-brace / clears / unstaggered contours / yokohama avs es100 / alu thermostat housing / emp water pump / porterfield r4-s pads / gc rtab shims / bavauto ss brake lines / fdm / ie rsm plates / kicker sub + box + amp / sylvania silverstar lows / lamin-x / loc-tite'd opn / lots of refurbishing
Retired - mason strut brace / jl stealthboxes / tms chip + hfm / s&b filter + outerwears / ecis heatshield / alpine 9835 + aux
E36 ///M DIY & Tech - Door Handles / Underpanel / Coolant Hoses / Gear Ratios / 3.5" Intake / Lower Chain Tensioner / Threaded Starter / IAT Sensor / 24# Injectors
DIY monkey
Yes, you can. I replaced the following part on the passenger door without taking the panel off. Be warned, though, that BMW decided to put a metal tab in front of the slider you need to push ONLY on coupe doors. Literally. You'll want to use something like a heavy-duty cotter pin tool (looks like a pick with a 90-degree bend; shown in the first post) to reach the slider.
This link will tell you a lot more.
http://forums.bimmerforums.com/forum...d.php?t=232798
EDIT: The hard plastic piece shown above also comes with a rubber piece that sits between the hard plastic and the door. The rubber cracks over time and (if I'm following you) is likely what you're trying to replace.
ex-1995 Cosmos M3 Coupé - deck spoiler / koni struts + shocks / x-brace / clears / unstaggered contours / yokohama avs es100 / alu thermostat housing / emp water pump / porterfield r4-s pads / gc rtab shims / bavauto ss brake lines / fdm / ie rsm plates / kicker sub + box + amp / sylvania silverstar lows / lamin-x / loc-tite'd opn / lots of refurbishing
Retired - mason strut brace / jl stealthboxes / tms chip + hfm / s&b filter + outerwears / ecis heatshield / alpine 9835 + aux
E36 ///M DIY & Tech - Door Handles / Underpanel / Coolant Hoses / Gear Ratios / 3.5" Intake / Lower Chain Tensioner / Threaded Starter / IAT Sensor / 24# Injectors
Member
Cryptic, Someone jerked up hard on my handle and I lost the trim. I got new trim and now seehow to do the slider from the other diy. But somehow I lost that pin that you show in your gloved hand picture. I was thinking of making a pin to press fit in from outside with a nice tight fit but not sure how important the back clip is. Do you think I can get away without that clip? Is it easy to get at if I take the door panel off and not mess with the window?
Thanks, Jeff
DIY monkey
Just got to the dealer and get the pin+clip. I'm sure it'll be cheap enough that it won't be worth your effort to jury-rig something on your own. I'm almost positive that you need the clip to keep the assembly attached to the door. Pretty easy job if you're just replacing the pin. Good luck!
ex-1995 Cosmos M3 Coupé - deck spoiler / koni struts + shocks / x-brace / clears / unstaggered contours / yokohama avs es100 / alu thermostat housing / emp water pump / porterfield r4-s pads / gc rtab shims / bavauto ss brake lines / fdm / ie rsm plates / kicker sub + box + amp / sylvania silverstar lows / lamin-x / loc-tite'd opn / lots of refurbishing
Retired - mason strut brace / jl stealthboxes / tms chip + hfm / s&b filter + outerwears / ecis heatshield / alpine 9835 + aux
E36 ///M DIY & Tech - Door Handles / Underpanel / Coolant Hoses / Gear Ratios / 3.5" Intake / Lower Chain Tensioner / Threaded Starter / IAT Sensor / 24# Injectors
Member
When I swapped mine out, I really didn't remove my window. I removed the old handle, then I took both the old & new handle I bought from the JY to the locksmith and he swapped out the tumblers for 10 or 15 bucks, I forget.
Installing it when window was intact was a PITA unless you have someone with small hands to get in there. Nonetheless great detailed DIY'er write up Cryptic.
Thought I'd share my experience with the door handle.
It's not the size of the dog in the fight, but the size of the fight in the dog.
Member
Ok, had a false start today in performing this. Before I try again, I wanted to post a few tips that I learned and didn't see in the DIYs (esp. for those with 97 or 98 E36 coupes)
1) No DIY I've read mentioned the 3rd screw under the airbag emblem on the door. There's a screw there and will drive you mad thinking a panel clip is being stubborn until you realize there's a 3rd screw.
2) You have a side airbag. That will prevent you from removing the vapor barrier unless you remove it. Unless you plan ahead real well, you *WILL* trip the SRS light. This is because maneuvering the window requires power and the airbag should be disconnected. To have it dangling and connected is unsafe. You're also supposed to replace the bolts. This is because of the risk of the airbag going loose; a loose airbag WILL FAIL to deploy correctly. That's bad.
3) My door panel's glue came undone from the window trim, side trim and door pockets. In other words, it's only being held on by
the screws. Probably will happen to you too. Be prepared to re-adhere the door pockets and trim (spray adhesive)
4) For some reason every door panel DIY seems to barely mention the vapor barrier. This is an important feature to me because of its soundproofing. For some reason, most people just don't put it back on or use plastic (which works for homes not for cars). So what's the issue? It's held in place by black strip caulking (called dum dum). If you're not careful, you WILL TEAR THE FOAM. However, it's quite possible to peel it off if you're careful. Be careful. And the strip caulking will work again; it stays tacky.
Finally, I want to describe what broke on my door handle (once I pull it out, I'll post pics). The control arm that attaches the handle to the latch arm sheared completely off. In fact, mine sheared so well it took me a while to figure out that it was broken. The descriptions I've read about how these break (weak, very weak, broken), this now makes a lot of sense. The resistance from the door latch will stress the connection over time.
This means - keep those latches lubed. More resistance == more likely to shear!
Hope this helps other people. Will continue to update as I try this again.
Member
I changed the old tumbler without a key. On the lever assembly on the back of the cylinder you will see an extension of the housing shaped as a rectangle topped by a square. There will be a cover staked on this. carefully pry off the cover (you can restake later) there will be a ball bearing and a spring and a cam (flat piece) remove them this will allow the cylinder to turn in the housing. If you look on the bottom of the lock assy. you will see a small square hole. Take a small bladed screwdriver and depress the wafers slowly working the cylinder out as you turn the cyl. The old cylinder can be removed in this method. To install new cylinder restake the cover with the spring, ball bearing etc. inside. This must be done in a fashion that does not allow it to come apart later while on the door. Some jb weld should provide the necessary insurance. Before installing the new cylinder, spray the cam in the rear of the lock cylinder receiver with wd-40. Look inside the hole you will see what I am talking about. Put your key and cylinder in the hole and pin the rear.
Not everything that counts can be counted, and not everything that can be counted counts.
Resident Defibrillator
Wow this is a fun one huh!
I got the door handle replaced, the old one was in pieces..
Edit:
New issue.
Every time I try to re-install the window and check its movement, the regulator arms pop out of the (new) sliders. I made sure to position the rear guide channel where it originally was, and have checked just about every other position it can be in....all with the same result. Somewhere along the way, they pop out of the sliders. I even tried keeping the bolts loose and let the window create its own path, but they still popped out...lol
Turns out I was just being wimpy. Those little knobs take a good solid squeeze to pop all the way into the slider. It's pretty obvious when they seat properly..
Everything works great now. Good times!
Last edited by ///M_Nicht; 02-14-2009 at 07:49 PM.
Signature Disabled - Check the Signature Rules... Your current signature is LAME!
Afterwards post in the signature/avatar request thread in the forum suggestions forum.
Member
I noticed a couple of other guys said they had a lot of trouble getting the new handle to seat correctly. I've spent a couple of hours trying to get it to seat. No luck so far.
.The reason why I had so much trouble was that the handle actually slides under a little notch on the door... make sure you push the handle toward the outside of the car so it slips under it when you position the handle. I know it's vague but it'll make sense later on
Anyone have any details about this? It's not making sense to me. Where is the little notch located exactly. On the top? I didn't remove the window but I did remove the rear rail, so I'm limited in removing it completely to see in there it as it went in very hard. But it will fit by the window with some not so loving force. You have to pull the window up and out a little and it just fits. Came out the same way. It scratched the old one a little so I sanded the edge of the body under the handle so it was smooth and put electric tape on the black handle. Worked pretty good. When I put the new one back in I had to get someone else to manipulate the window though while I forced it past.
Anyway now I can't just take it back out easily to look up in there to see what is blocking it? Maybe I should have taken out that darn window!
Anybody? Anybody? Thanks in advance.
Thanks for the write up. It was a big help!
Update:
The reason the handle would not fit is it was bent. Took me three hours to figure that out. Thats what you get when you buy pulled parts. I was finally able to pin one side and then I had to bend it enough to put the key ring on. I left off the gasket. To finish the experience off, I get it all back together and the handle still will not open the door! Linkage is all hooked up so I don't know? Maybe that is bent too? Probably have to put a whole 'nother one in. At least I know how to do it now.
I learned one thing which I will share. You do not need to take out the window if you don't want to mess with all that. You do need to remove the rear rail. If you remove the stop (at the top) 10 mm nut, on the end towards the door with the lock and remove the 5mm allen nut located on the bottom part of the window thingamajig. (it removes from the inside - 1/4 drive fits in there) you can achieve enough play in the window to remove the handle assembly rather easily. Just pull up on the end of the window. If you do not remove the stop then the window hits it and won't go any further. It is a very tight fit that way. This gives another 1/4 inch that allows just enough room to get it out rather easliy. I was able to do it by myself this way.
I still put tape on the handle so as not to scratch it - a lot of good that did me! Repair guy wanted $390 to fix it. $60 for a no good used part and a whole weekend makes me wonder if perhaps it would have been worth it? But I wouldn't have had so much fun and learned all this.I also had to glue the whole door panel back together. There are some good videos on UTube on how to do that right.
Last edited by Emery; 02-16-2009 at 12:24 AM. Reason: Update
Member
Help!!!! i have just finished two door handle replacements on my m3 coupe, drivers door completed and works perfect. Passenger door handle works perfect execpt the dam window has comeout from the front window guide. Can anyone tell me how to get the front window back in the guide as the window is only going up half way and gets stuck by the mirror. This job has taken me 2 days so far 4hours of fiddling with the window trying to get it back in line..Does anyone now the correct way...Many thanks .....
Member
Here's one more update on my handle. I figured out why it would not work. There is a plastic part that goes on the post that fits into the lock actuator. This one of the parts that ends up breaking last, usually after the other cracks in the frame have weakened it. On mine I could feel it getting worse and worse until it finally snapped. When that happens you can no longer open your door from the outside. So I realized this plastic part was missing from my used handle and there was not enough throw to trip the door catch.
So what I did because I did not want to take it all apart again was take a piece of new 1/4 inch fuel line hose. I cut it 3/4 of an inch long and then I cut it lengthwise. You have to do this to get it on the post while it is still in the car. I was able to push it onto the post and through the gap in the lock actuator. It went in quite easily. The length will keep it from falling out the end as it hits the door frame. The fuel line is very durable and I think it will last longer than the crappy plastic they put on there at the factory.
So my handle is working great and maybe this will help somebody. Obviously you really want to do this before you put the new handle in!!! That way you can cut it perfectly to fit right in place. A new fuel hose is flexible enough to fit over the piece on the end and then you don't have to cut it lengthwise to get it on.
Now if you buy a new handle you will not have this problem. But if the old one stops working it could be that the plastic part wore out and came apart. It's a crappy design and a fuel line is more durable. The original plastic gets old and cracks and falls apart. It does not take much pressure to actually release the door catch. But without the plastic it does not have enough throw to release it. I never did figure out why the handle fit so hard but I just used a long screw driver to force it to fit so I could get the nut on the lock ring with my other hand.
Member
lock_1.jpg
GREAT TECHNICAL INFO: Here is an image of what we are talking about
V12 M73 E31
Ahem....lookie what I just got!
238.00 Ordered NEW from BMW AG keyed for my car! ( no need to mess with a tumbler swap)
If you must replace the door handle, might as well do it with the coolest part available from BMW!
Edit: 4 hours and Thousands of curse-words later, finally installed What a P.I.T.A. this job was!
Last edited by ELIBEEMER; 03-21-2010 at 10:01 PM.
E31 M73 Forever
Member
Interesting site on how the BMW locks work. And a good reasons to alarm the car.
http://www.autoblog.com/2006/12/29/v...ets-explained/
Once you understand, it should take 5 minutes to re load the pins with the key in hand.
IWannaBMW
Ultimate Breaking Machine
Member
I would like to thank CRYPTiC and anyone else for the information and guides to allow me to a temp this fix myself. I had problems with opening my door and did not know the problem. Since I just did the window clips a few month ago I pulled the panels back off and got to the latch. It did not seem to spring open when lifting the handle. After a bit of experimenting I found the problem when the last pull snapped the lever. After a hour of investigation on how to remove the handle I gave up, rigged a strap to open the door. Yea it's ghetto but beats going through the passenger side ( Loop a strap like the ones on a box of paper onto the door latch lever, (the one the lever was supposed to pull), out and down the side of the door to the drain hole. You need at least 4 inches to grab on to pull and open the door, tape the ends together to give more material to pull on. ) The strap lasted long enough for me to read this post and decide if I would attempt the fix myself. The possible problems were I had the old lock style and had to do the tumbler swap. Door windows are not fun after doing the window clips, my window fell off the track. Finding a replacement handle. I thought most were easy, just takes time.
Keep key in cylinder until ready to swap. Slowly pull key out with cylinders position so they do not fall out. It became a simple 10 min swap.
I have to admit I did not want to remove the window or even pull out the the glides. But after many tries, the handle would not come out without it removed. With the window tilted, I got the old handle out once but couldn't get it back in, it was for practice with the new. However one try with the new handle and it was in. Surprised me so I tried to take it out, but no go, left it and went on so I have no help hints on this. The front window did fall out of the front track, no help on this just put it back in before putting on the clips or window bolts. When replacing the door latch, I have a hint. To make it easier to put on the door lock lever, loop a string on the latch lever. Work the latch into place, pull up on the string, press in the lock lever that hangs from the door handle, then lift up the door latch loop over the door handle, (that's the lever that breaks).
I did notice no one really talks about the connectors. My new one has the built in heater (White) and no micro switch for the door locks (yellow). Got mine from Bimmerspecialist and had to move it over to the new handle. A third switch is possible and looks like a latch lever (for alarm or lights?) The rest goes in as others have said. It took me 3 hours to find the problem one day then 2.5 hours to fix once I got a new handle to put back in. I don't know how much the dealer would charge for this, $250 for a handle with no lock was as far as I got anyone know?
Last edited by gc325is; 05-09-2010 at 11:10 AM.
Member
BMW improvement to the door handle see old vs new vs old2. Note where crack is and how $0.02 of extra metal is added to prevent it from occurring.
Old was Mfg 8/94 new was 12/09
The pictures do shows some add thickness in some parts and removal of some metal in the right corner. I can't confirm since I do not want to remove the new handle to confirm. I will need to ask a mechanical person if the new design is better. BMW must think so.
Last edited by gc325is; 06-16-2012 at 11:51 PM. Reason: 2nd old picture
Member
I did this last weekend and thought I'd add a tip I found helpful in getting the handle to sit flush. We found the first few attempts it was pretty far off, like 1/4 of an inch, so we massaged the sheet metal in a bit with a plastic interior trim tool. It didn't take much but just bringing in that lower lip of the door was enough to get the handle gasket up and over and sitting properly.
Pretty tough job overall. I definitely had to move the window per the write-up. I tried squeezing it in with the glass in place and there was just no way, ended up scratching my brand new handle.
I bought a new handle from my BMW dealer and it came keyed to my car. With my club discount the price was $179.18 and they got it in 4 days. I don't know how it could be re-keyed and shipped out so quickly but it works great with all of my keys (you have to provide a copy of your registration and driver's license to the dealer).
Very nice to be able to enter the car from the driver's side. Now I just have to re-assemble the interior door panel which has come all unglued.
Member
re-keying the lock tumbler to your key is a pretty straightforward process once they end up having your VIN. They have access to all the coded keys and can reproduce keys/etc at will. I didn't bother as I chose to swap lock tumblers on my door handle instead which is relatively easy to do, if you have the patience for it. Paul
Last edited by shogun; 05-24-2022 at 03:57 AM.
Current Cars:
1995 BMW 325i
2013 BMW X3
2017 Infiniti QX30
Past Cars:
1997 BMW M3
2011 Chevrolet Avalanche LTZ
2010 GMC Terrain
1998 BMW 328is
2006 BMW 325i
2007 Saab 9-3ss AERO
2004 Saab 9-3ss Linear
2003 PT Cruiser
2001 Volvo S40
1990 Honda Accord EX-R
Member
I just did my door handle. What a biatch to take out. The replacement handle was from a 318is 1992 model and the one I was replacing is 325 1993 model. But looking at the back of the handle they are slightly different. I was planning on switching the tumbler over, but the difference in the handle stopped me from doing it and I just installed the replacement part. Now I have to use a different key for my door. But the good thing is that my car has a remote key and I don't have to use the key unless the battery runs flat or the alarm system is kapoot. Even then I will probably open the passenger door to access the car.
BMW E60 530i & F30 320i
"Its sometimes better to shut up and be thought of as a fool than to speak and have all doubts removed"
Member
I'm in the middle of this project on my mom's car right now. I didn't read the whole topic but, I got the door handle out by just removing the window sliders unbolting the two rear guide bracket nuts, and then tilting the window forward.
Now, for the lock repair and re-installation. Yay.
"Fist in the air and a finger to the sky.
Do I care if you hate me?
Do you wanna know the truth?
C'est la vie,
Adiós,
Good riddance,
F--- you.
I'm under and over it all."
Member
My door handle broke on the drivers side. It was because the door lock itself had lost pretty much all lubrication... I got a new door handle and took out the lock and cleaned it and regreased it. It works, much better. Almost like new.
I just took the lock out, removed the actuator then took electrical parts cleaner and used the whole can on the lock while periodically rinsing it with hot water. There was a lot of nasty gunk in it. When it was pretty spotless and dry I loaded it up with lithium grease then put it back in the car.
1995 M3 Coupe - Cosmos - CES Built S52 Bottom End - JE Pistons - Eagle Rods - S52 Cams - GT3582R - SPA T3/4 Manifold - RK Tuned - 513rwhp
2016 Ford F150 SCREW - Leveling Kit and Tires for now
Official Tax Payer
Awesome write up! We have to change the passenger side and this will be a great help. Thanks!
Member
Anyone know if you can just stick the old tumbler in the new handle?
that may save me a big headache lol
 Posting Permissions


 Reply With Quote


Bookmarks