
 Member
Because I haven't started a dedicated "Here is my work" thread, I guess I'll do just that. Unlike a lot of other builds on the forum, mine is to be more budget-based for two reasons - the first being that I don't have a TON of money to drop on a motor in one shot. The second reason is that I personally feel very few people actually run the motors for what they're worth. My motor rebuild entails an M50 non vanos motor I picked up - the car is a 1992 525i 5 Spd with an M50 non vanos already in it. My goal is to build my turbo setup and drop it in the car as-is now, and when I have my other non vanos motor built, I will swap motors in/out. It sounds easier than it has been, but it is what it is.
History of the car:
Original goal was to do body/rims/audio and just have a comfortable cruiser, but as time went on and I kept wanting to do more than what is offered for the E34, I decided to look into forced induction. I built a custom mounted ASA supercharger with a 9.5 psi pulley for the car using an FMU and slightly larger injectors. It ran good pulling away from chipped/intake/exhaust E34 540 6spds. Then one day I was working on the car, took it down my street for a rip and heard a horrible grinding noise. The flexible filter tube had come off the intake side of blower and it sucked in a vac line doing much damage to the compressor wheel. Sad sad day, but I decided this was it, time for turbo.
I looked around at all the kits avilable and what not but I could not justify the cost for what you get. AA gives you a small Mitsu 20g turbo and the others are ok except that they are all using chip tunes. I have been around VW/BMWs for a while and know how easy it is to get the boost bite and want to swap stuff in and out and a chip tune would just make this a nightmare. I started looking at standalone ecus: DTA, TEC3, AEM EMS, etc, then found megasquirt and decided since I am a DIY'er that's what I want to do.
So I started gathering parts to build my turbo setup before I build the other motor.
Turbo Setup:
-Holset H1E (from 6.0L - 7.2L diesel motors)
-16x13x3" FMIC (had a 29x6x2.5 anodized but its hard to fit FMIC on E34, more on this later)
-All 2.5" mandrel bent custom piping welded by yours truly
-Ford Motorsport 42#/hr flow matched injectors
-SS Autochrome T3 manifold, reinforced
-Custom 2.5" mandrel bent stainless steel up pipe to mount turbo "top mount" - laser cut 304 stainless T3 flanges
-T4 3/8" 304 stainless flange redriller for Holset on-center exhaust
-3" mandrel bent stainless steel down pipe
-Innovate LC-1 wideband
-Tial 38mm 8.7 psi spring (dump open)
-Tial 50mm BOV
-Either making a collector for my B&B E34 M5 Triflo or doing 3" straight exhaust 304 stainless
The second motor:
1992 BMW M50 NON VANOS
-Retaining 2.5L displacement *
-Hot tank all parts
-Flex hone stock bore
-Check head and block surfaces
-New valve seals/guides
-ARP head studs
-VAC MLS .140" HG **
-New Main Bearings
-New Rod Bearings
-New Rings
-All new seals
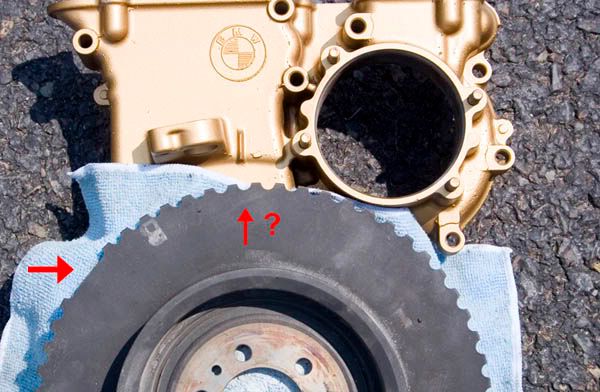
-Timing chain
* 2.5L will conserve thick cylinder walls good for cooling and headgasket mating surface
** Because the M50 NV is already 10.0:1, it should be a 0.5 lower compression than what the M50/S50/S52 guys are running. I think the .140" is putting an S50 at around 8.5:1 or 9.0:1 though I am unsure - this then should put an M50 NV in the 8.0:1 or 8.5:1 CR.
The motor is not my priority right now because I am still in college and working an internship. Being 21 and in college makes it hard for me to accumulate money and time to have the car off the road. So, doing things this way should really mean that the transition from turbo stock M50 to turbo modified M50 will be fluid - this is of course in a perfect world which we all know does not exist.
Here is me removing my supercharger and reverting the oil system, intake system, idle, fuel, etc etc etc., all back to stock while she undergoes sc -> turbo transformation.
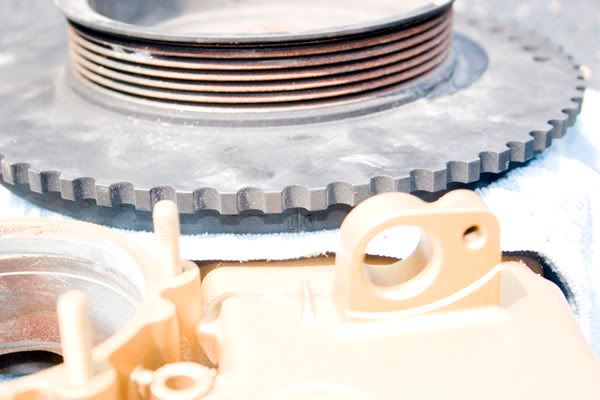
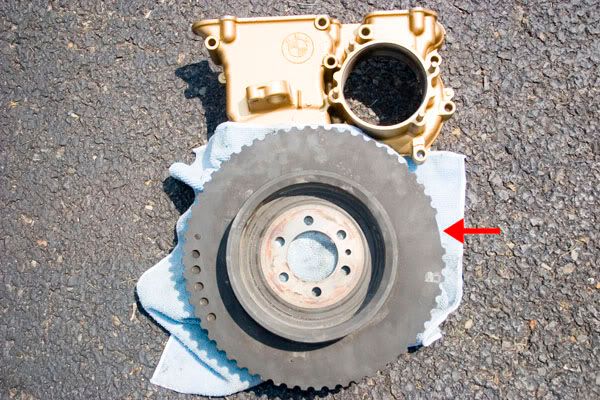
Here you can see my 2nd M50 NON VANOS on the stand with some of the top end taken apart. I really pulled the valve cover and such to check the condition of the cams and all. If the car needed, I was going to buy new stock cams. These motors do not run the 228 cams that the vanos and s50 cars run - because the motor has no variable timing, it would be a rather boring driver through the entire RPM range. So, BMW decided to put in 244/244 cams. This is good news!
As you can see here, the cams and the whole topend look great.
(I guess higher res pics are in order for you to see how clean the cams are on this motor, but that will come later)
I bought this engine off of an E34 friend who had it turbo'd with a small T3 in a 525i. This means the oil pan is already tapped which is nice although wouldn't really matter at this point. I paid $250 which is just ridiculous. One thing worth mentioning is that the M50 NON VANOS oil pan for the E34 is specific to E34 and thus it's harder to find than an E36 oil pan. I really lucked out in finding this motor so close (Connecticut)!
Last edited by 5mall5nail5; 07-25-2006 at 04:06 PM.
Member
This motor supposedly had over 180,000 miles on it and like I said, was turbo'd at some point. The car it came from was wrecked but in the back/side but the motor was untouched. Taking a look at the bottom end really shows how durable these engines are!
This picture shows the stock oil squirters and bottom end:
Here is a shot from the crank area up and out of the cylinder bore - I thought I'd be able to show the cross hatching that is still VERY visible, but it didn't come out in the picture as well as it does in person:
Here is the crank wear on a 180,000+ mile M50 Non Vanos:
Pretty impressive if I do say so! The bearing area on the right is not wear/burned, it’s oil on the surface.
Here are the rest of the bits:

Member
The reason I am keeping most of this motor stock is because I think, and few people on here have pushed them to find out (with the exception of Ulysses on the M52 and Radowski on the S52) how strong these things are. The non vanos motor comes stock with double valve springs which are noted as stiffer than an S52’s. The cylinder walls are thicker (debated) and the connecting rods are, without a doubt, MUCH stronger in design than any other E36 motor.
This is proof (image borrowed from another BF.C member):
Here you can see so of the parts I gathered but ultimately ended up not using. They are a 29x6x2.5” anodized intercooler and 30# injectors. I couldn’t get the intercooler to come remotely close to fitting and the 30# injectors weren’t going to support the horsepower I am asking from this setup:
The stock pistons on the M50 Non vanos do appear to be cast so nothing exciting there, except that they are pretty heavily dished for a stock piston. This is probably how BMW obtained the 10.0:1 compression while using similar parts with the vanos motor (10.5:1). The dished pistons also help concentrate the combustion and are ideal for FI.
As the motor sits now, it is COMPLETELY apart simply waiting for funds to start the assembly. I have been dumping all of my cash into the turbo project. Like I said before, I want to build the turbo, tune the car, and then swap motors in later. This way it is the smoothest transition.
Member
This section is going to contain any updated I have in the way of the turbo installation. The supercharger development and removal is pretty boring so I figured I’d spare you guys.
I stated earlier that I am going to use an SS Autochrome turbo manifold. This is a 321SS tubular manifold with a T3 flange. Mike Radowski said he cracked one but no one else has had an issue and they supposedly fixed their issue – I think mike was using two-step and broke it, but not certain. Regardless, the manifold doesn’t fit on my car the way I wanted. I want to top mount the turbo because I have the room and the oil drain will be much better. Additionally, it looks nicer, is easier to plumb, and cmon, how Supra-esque is that?
As you can see, it’s not just a matter of flipping the manifold upside down and bolting the turbo to it.
Here you see the relatively nice welds and build quality, but again the turbo will literally touch the valvecover studs if it were placed on.
I thought about ditching the top mount idea, but truthfully with this large turbo I am not sure it would even clear the cross member on the E34. Remember that the E34 subframe setup is much different from the E36 which is good and mad. I have more block to fender clearance (tons more) but I am not sure how the fitment would be with the big turbo down low:
So, I am going to leave the manifold bolted to the head in the “bottom mount” position, but make a custom mandrel/welded stainless pipe that comes off the stock T3 flange and brings another T3 flange up top. Here are some parts I cleaned up as well as the TIG welder we’re using to accomplish said task:
It is worth noting that I have never TIG’d before and so there is a GREAT learning curve. It’s difficult. With stainless you can fuse two metals without filler, but with almost all other metals (aside from aluminum) you will need filler rod. Still trying to figure it out to make it PERFECT.
Still working on the theory and welding:

Member
Here is the up-pipe I started to make. I had to joint it like that about 10 or 15 degrees to clear the top of the engine mount. I have since done away with that idea because of the amount of space I’d have to fill with either another piece of pipe or sloooowly build up a TIG weld. I bought more mandrel bent stainless that I am welding to bring the up pipe over the engine mount nice and smoothly with no hard joints. Got impatient with the weld and am scrapping it:
That is where my manifold stands right now – once I get my bends in we’re going to finish it J
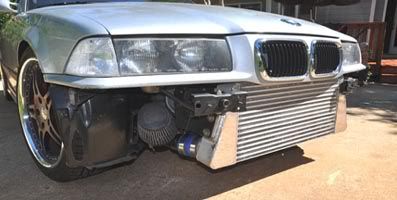
As for the intercooler story, its not as easy as you E36 guys have it.
I originally had this unit:
You can see how long it is and the arc of the bumper meant it’d never seat in there with the AC and all. You can see where I made a marking of where I wanted to fit a square style IC.
Here is the unit on the desk:
I ditched the Greddy Type S and bought the Tial 50mm
And here is how I ended up mounting it after removing the aux fan/AC:
I think it came out really clean and its thick as well.
I’ve only had a few people ask about it since getting it behind there – so that means its FAIRLY stealthy.
To give you guys an idea of the turbo I’m using:
I will start the ECU build/modify/initial tuning segment of this write up in a few moments.
Currently Fornicating...
Member
sexy! wow!
BMW CCA Member 186373 - Golden Gate Chapter
Former (e)Bombe Magazine Editor, "The Toy Box" product review writer | Current member of Team Jesus
Gone: 1995 E36 M3 Arctik Silber, 1996 E36 M3 Cosmos, 1991 E30 318is Cosmos
"You're so Techno"
WOOOOHOOOO!!!!
And great idea on using the SSAuto manifold as a springboard to make a topmount adapter!! If you got the room, why not!
Man I love that body on that car and with the nice deep dish rollers....mmmmmmmmmm
And I will also comment........damn that motor looks FRESH!

License Revoked
Awesome write-up! Best of luck with the build.
"Diogenes the Cynic"
That looks great, but I have one question: where's the flange for the wastegate?
Boris
'96 Cosmos Black M3 422rwhp/407rwtq SAE @ 13psi / 444rwhp/444rwtq SAE @ 14.5psi
Engine/Drivetrain: Technique Tuning Stage 2 TurboTT Turbo Exhaust, M50 Manifold, TMS Oil Baffles, SSR Comps, SPEC Stage II Clutch, UUC SSK, Titanium Cavallino Ti-130R Shift Knob, UUC TME, EMC Diff Bolt, RCCA's. Suspension: GC Coil-overs, GC RSMs, GC RTABs, GC Trans Mount; H&R SB. Instrumentation: VDO Boost, VDO Oil Press, VDO Oil Temp, VDO Water Temp, BMW Traffic Pro Navigation, Valentine One TODO: W/A Injection
Member
Originally Posted by ///3oris
Theres no flange on the SS autochrome mani Boris, but since I am building an up pipe to relocate the turbo to the top, there will be a flange right below the top T3 flange
Diff Killer
Moderator
that's pretty damn slick. good luck with the project!
Hey man, I'm a professional!
Member
As for my ECU, I decided to choose the MegaSquirt ECU because of the price and flexibility. The unit is a full fledged standalone ECU that can be run to piggy back either fuel or spark, but it’s claim to fame is that it’s a <$500 standalone.
It requires assembly. That’s about the only negative I can think of that would put someone off from trying it. However, there are people (myself included) who intend to build this for the community and still have them WAY cheaper than any alternative. The MS ECU (MS-I v.3) will run just about any car in default format, however there are a few issues with the E36 generation motors – they are:
-Individual coil packs
-60-2 crank wheel
-PWM Bosch Idle Control Valve
-Prob a few other small nuances I forget
So we’re all screwed right? Wrong. There is a firmware for the MS that allows 60-2 wheel decoding and multiple spark outputs. MS in default firmware accepts a single coil (distro/rotor setups). In addition to this alternate firmware we gain:
-12x12 fuel and spark maps
-Switchable tables
-Boost control
-Water Injection control
-Dual EGO support
-Shift Lights
-Launch Control/Flat Shift
-Realtime barometric correction (MAP)
-4 auxillary outputs
-Knock Sesnor input
-PWM Idle Control
-Nitrous Control
-EGT Logging
-Tach out
-MAF in (no need but its there)
So that, in addition to what the MS offers by default, makes an VERY capable stand alone ECU all for way less than any other alternative.
The unit I bought comes with a high quality engine harness:
Starts out looking like this:
when unbuilt but turns out looking like…
But when you want to control the individual coil packs on the MS your ignition circuit looks more like:
It looks daunting but it is pretty straightforward. There are 3 spark outputs set to 6 ignition triggers, so you run wasted spark! Because I didn’t feel like messing around with the stock coil packs immediately I have my engine running on GM Coil packs (Hello Electromotive) for the time being but that too requires modification:
You have to pin-out the GM coil to bypass the HEI ignition module – we don’t want that:
Once you’ve done that you simply mount them up:
And you’ve just got to make custom spark plug wires. I went with MSD units as they are the best build.
The other reason I am using wires is because you can’t strobe a Coil On Plug car for timing check because theres no spark plug lead. This means it’d be impossible or near impossible to find the timing and make sure the timing the engine sees is the timing the ECU sees.
Here is the stock TDC mark location:
That was taken with a camera in macro mode all contorted in there – not possible to see when the car is running.
So, I set the engine to TDC using a mirror and the camera and then went below to the oil pan and made reference marks so I can strobe the motor as it runs like so…
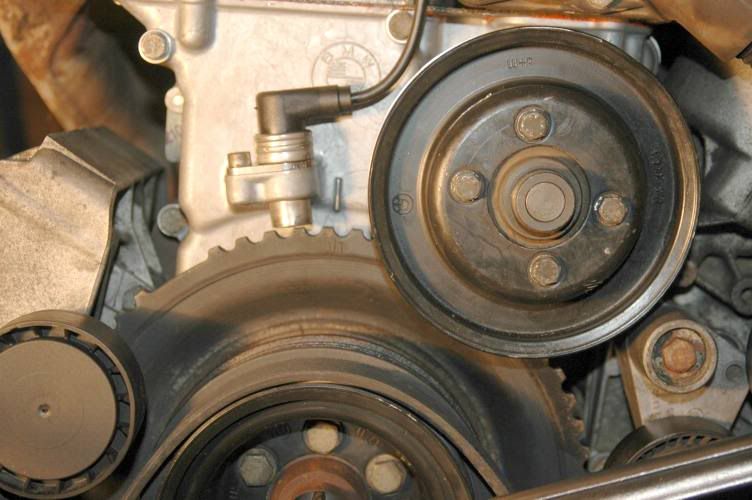
Part of the reason it took me so long to get the engine to turn on ignition control is because a guy on bimmer.info posted a pic of an M50* (not sure its an m50 any more!) at TDC and it clearly shows a crank wheel with a marking on the face of the wheel and the missing teeth to the left of the crank sensor. This is weird compared to the M30 and M20 but whatever it could be right - so I thought.
Set the MegaSquirt up and couldn't get it to go. Still have yet to get it to run so I decided to just double check the wheel position. This is result of my own failure to check it myself especially since I have a spare engine.
Anyway, here is the photo the guy gave:
You can see gap to the left and a little TDC marking on the front.
Well I checked out my wheel. There's no TDC mark on the face at all. There IS a mark on the base of the wheel behind the teeth (as if you were looking top down) as per bentley manual. The reason I was confused is because bentley shows the M50 at TDC with a marking like mine and theres no gap to the left of the sensor. I was confused, so I went and looked and mine matches bentley:
Hrm so I have the marking where bentley says... so where does that put my gap?
Very off! This is similar to the M30 and M20, if not the same! I have to go find some pics of the M20 and M30. So all of this time I was probably doing my coil on plug correctly but using wrong numbers because my engine is different than the one that the guy posted... whatever model engine that is. This is a 1992 M50 non vanos... im so perplexed as to what is going on in the other picture, but now im using basically M20 settings with a 67 degree crank angle instead of 65… timing is dead on!
A VANOS motor would be different – that pic with the gap the left is from a vanos motor so that will change things, but nothing a few minutes and some math can’t fix!
So as some of you know the car is running on fuel and spark from MegaSquirt but I am going to either remove my PWM idle valve or hook it up - I have the circuitry built to run it, but I hear engines run great without idle valve and just gap the throttle plate.
Here is a video of the car running:
http://www.blowneuroz.com/msrunning.AVI
Right-click save as
Will continue this tonight.
Member
danm i wish i can do ao turbo build, looks good.
Member
awesome car, awesome pics, awesome build
"Diogenes the Cynic"
Ahh, ok, gotcha! Well, good luck with that. Will be nice to see the finished product.
Boris
'96 Cosmos Black M3 422rwhp/407rwtq SAE @ 13psi / 444rwhp/444rwtq SAE @ 14.5psi
Engine/Drivetrain: Technique Tuning Stage 2 Turbo
Dr. Boost
Wow, the M50 rods have a ton more meat on them than the S50. If I made this much power with the S52 rod, those M50 rods should be good for more if they are forged and have good fasteners.
97 M3 - 8.94@164 - 8 sec street machine, all BMW driveline, factory ECU
02 M3 - 9.74@145 - Maximum PSI stage 2 turbo kit, stock motor, factory ECU
16 M3 - 9.3@151 - Built motor/twins
15 M3 - 9.2@162 - Built motor/single turbo/Ecutek
BMW SOB's turbo E30 - 8.72@158.39
follow our latest builds and upcoming events! - facebook.com/maximumpsi - instagram.com/maximumpsi
S54 FTW
Thats very impressive! Keep up the good work, I hope you get the beast up and running soon!
'03 E46 M3 - "Brittney"
'92 E34 525i - "Ivanka"
Member
Thanks guys.
Yeah mike I am going to see how they do in stock form, time will tell
Member
Great write up and troubleshooting.
My 97 3.2L has the TDC mark on the front of the toothed vibration damper.
I looked behind it per Bentley forever to be sure...never found it and front marking did put cyl 1 at TDC...sorry to digress.
Member
Right - but youve got a variable timed motor while mine is non. Bentley makes no discussion between the two - it's my assumption the Vanos cars have it on the front and the non has it on the side - but additionally, your gap is going to be to the left of the CPS @ TDC while mine is on the right like an M20.
License Revoked
Jon, as you know, I love your build. Great work :-)
Question, is the M50non-vanos crank forged or not? As well as the con rods?
13psi and Rising
+1 subscribing......
Great learning thread
OBD1 ECU TUNER
#1 o-ring fan
Very nice write-up.
Awesome pictures!
Thanks for starting a thread on this!
I wish you the best luck with the project and I hope she drives like a dream!
Where have I been? Astral projecting.

Member
whata pos.
lol jk man.. good write up.. cant wait to get a ride
07 MDX | 08 m3
 Posting Permissions


Bookmarks