
 Member
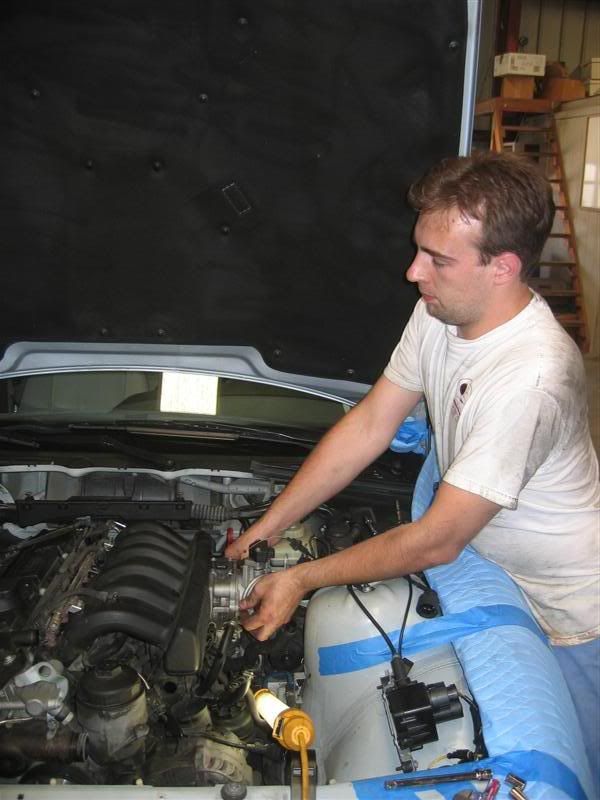
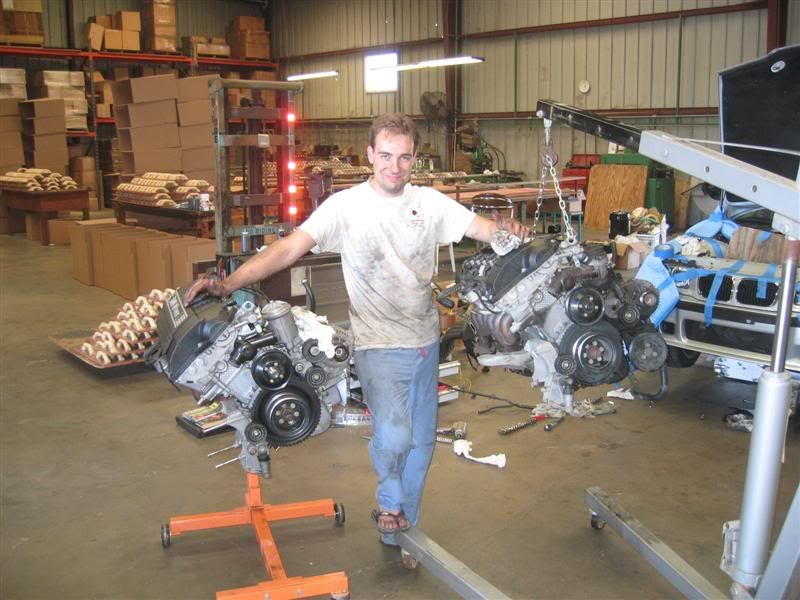
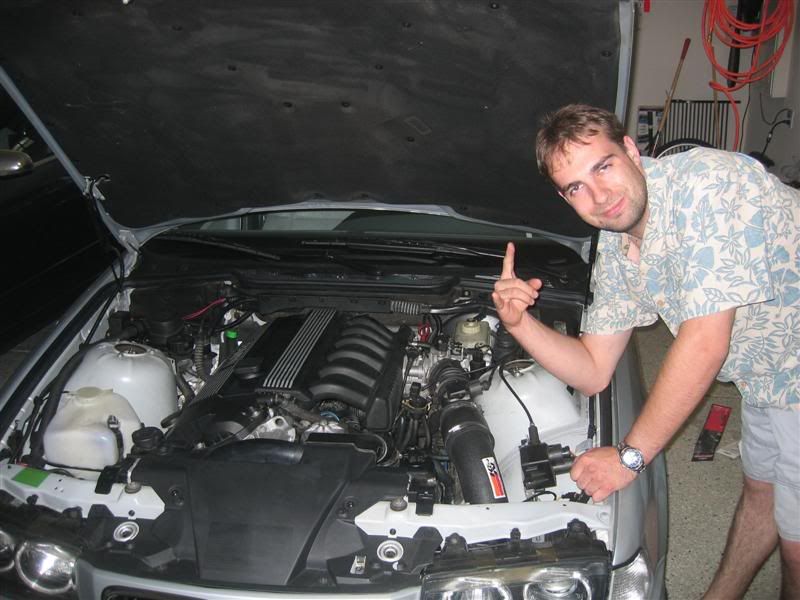
WOW It’s a alive!!!!!!
Well Here it is guys and Maybe the few Gals (Not to be sexist) the official S52 Swap write up and a tale of my project in the swap. I Hope this helps some of you it would have been very helpful for me to have had a write up but none the less I made it through the whole project and am more than pleased with the results.
I think we will start out with some background information which is pretty important to this project such as parts list and some of the things that are going to need to be rounded up in order to take on a project of this magnitude. Don’t fret however though the swap is not as bad as you have probably built up in your mind. I have got to say it went smoother than I could have ever imagined it going.
First I think we shall discuss the parts list of the things you are going to need for the swap. I will start with the basic parts.
- You will need an S52 motor
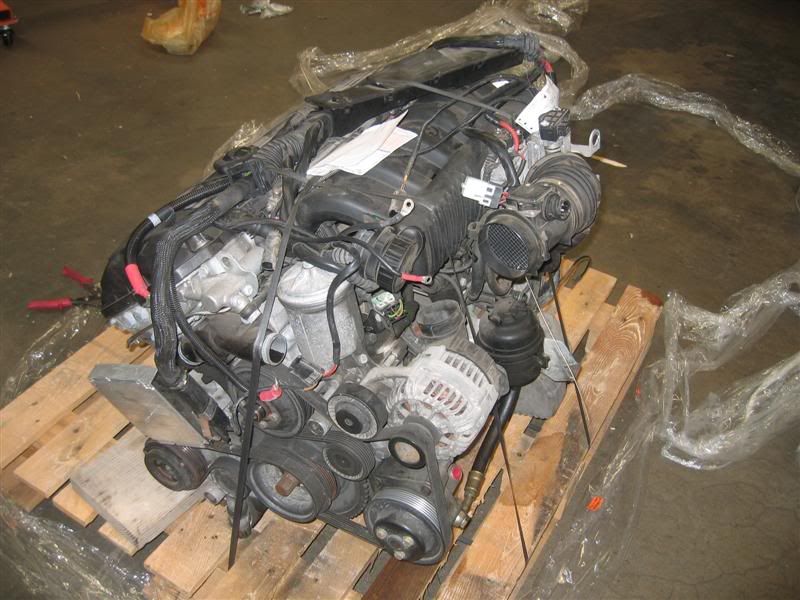
( I think that is pretty obvious however), depending on where you acquire your motor from and what condition it comes in it could vary a bit from my project. Preferably if you can find a motor that comes with all of the accessories already bolted onto it (Alternator, AC compressor, Power steering pump, etc.) My motor was pretty much just ripped out of the car and packed in a crate and sent to me.
- You will need an M3 ECU to control the motor try to get this with the motor.
- Depending on the car your swapping into you might need to get a wiring harness. If your swapping from a 328 then you will not need a wiring harness the 328 one is the same if you are swapping from a 323 then you will need to also change the wiring harness in the car with either an M3 one or a 328 one that is post 96.
- M3 cluster is optional but nice to have due to the redline change on the TACH. (150$ usually I found mine on eBay. )
That is pretty much the list of basic parts that you need for the swap to be swapped into the vehicle that you are going to be performing this job on.
There are a couple of preliminary logistical steps that need to be thought about while your car is still drive able with M52 motor in it still. The first one is the fact that you are going to be running on a different ECU for the S52 motor. This means that your car will not start unless it has an EWS realignment with the new ECU in the car. Now there are two ways to go about solving this problem the expensive one and the cheap way. I opted the cheap way.
The Cheap way was drive your car to an independent shop that has the capability of realigning the EWS system and take the S52 ECU with you. When you get there swap the ECU’s and then have the shop realign the EWS it should take only about 5 minutes. If you live in Southern California I went to AVUS auto sport in <st1:City w:st="on"><st1:place w:st="on">Glendale</st1:place></st1:City>. Great bunch of guys and only charged me 85 dollars to get it done. You then just drive the car back on the M3 ECU but take it easy on her because it will run like total crap and your power will be horrible. I just drove mine straight home and put it in the garage till I was ready to start the swap.
If this option does not work for you then you will need to have the car towed to a shop that can realign the EWS after you are done swapping the motor. Personally this was not really that great an idea because its going to suck if the motor still doesn’t start in some shop and you have to sit there working on it. I rather have it in my garage and have that happen where I have time to work on it. Not to mention the Towing bill could be insane.
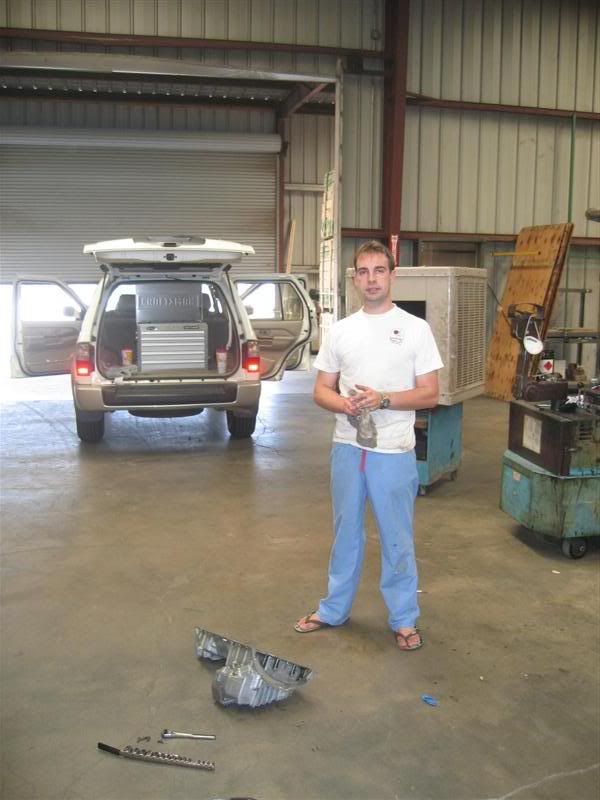
Now after you get your used motor I spent a long time cleaning the motor up because I did not want to drop it into the car full of grease and oil. I used an excessive amount of carb cleaner (10 bottles).
This is a list now of all the stuff that I recommend be replaced while you’re doing the swap. The total cost of the parts was probably around 800 dollars from the dealer with the CCA discount you could probably get these a bit cheaper online but I like putting OEM parts in and just walking out with all the parts I need from the dealer. Besides I really like Riverside BMW they are fantastic to deal with.
Part Part #
Oil Pan Gasket 11 13 1 437 237
Dip Stick O ring. 11 43 1 740 045
Motor Mount x2 11 81 2 228 298
Motor mount nuts x4 (M10) 22 11 1 095 156
Vacuum system and intake manifold
Vacuum hose from hard pipe in front to valve thing 51 73 1 257 971
Intake manifold gasket to intake valves x2 11 61 1 740 069
Throttle body to intake gasket (Big round one) 11 61 1 716 174
Vacuum hose from electric valve to hard pipe 11 73 1 714 217
Cooling system
Water pump 11 51 7 527 799
Water pump o ring seal 11 51 1 265 084
Thermostat 11 53 7 511 580
Thermostat O ring 11 53 1 265 084
Thermostat housing gasket (orange square) 11 53 1 740 437
Oil Housing
Oil housing Gasket 11 42 1 719 855
Oil pressure switch 12 61 1 710 509
Exhaust Headers and Such
Exhaust manifold gaskets x2 11 62 1 744 252
Manifold to midpipe gaskets x2 18 30 1 716 888
Nuts for midpipe to manifold studs x6 (M10) 18 30 1 727 774
Vacuum system to manifold x2 11 72 1 435 367
Belt Drive system Don’t buy these yet wait till motor is in
Deflection Pulley 11 21 1 748 130
Adjusting pulley 11 28 1 748 131
Clutch/Tranny
Pressure Plate bolts M8x16 x6 07 11 9 901 023
Transmission Bolts
Torx Bolt M12x50 x2 23 00 1 222 891
Torx BoltM12x90 x2 23 00 1 222 894
Torx Bolt M8x50 x3 23 00 1 222 887
Spark Plugs x6 12 12 9 069 877
Mics Parts.
Crank Position sensor (Don’t have to do this one but it’s a PITA if it fails and you have to go in later.) 12 14 1 709 616
Hydraulic Hose from S52 power Steering Pump 32 41 1 141 953 (200 dollar part but you need it!!! Don’t forget the crush washers x4)
Hollow bolt for one end of the Hydraulic house. 32 41 1 141 953
That is pretty much it for the parts list as I said I spent a lot on parts and some of these you probably don’t need and could get away with reusing the old ones but since the motor is already out why not do the job right and avoid having to have to go back in and fix an old part that preventative maintenance would have taken care of.
Now here is a list of the Tools that you will need to do this job.
-You will need a full set of metric sockets 25mm down to 6 mm preferably in 12 point and 6 point versions at 3/8 drive or half inch drive.
-You will need two universal and several extensions (used to get the tranny bolts out)
-You will need Box end wrenches in all the sizes specified.
-A cherry picker will be required to life the motor out of the car (engine hoist arm with hook on it that hydraulically lifts the motor out)
-One jack and two jack stands to put the car up on.
-Torque wrench (Must have this )
-Bentley Manual of some sort for torque specs
-A friend to help you with some extra hands (Offer lots of beer its helps talk them into it)
-Code Reader/Reset tool of some sort (Peak Tool, I used the car soft cable and software)
That’s about it for tools probably some random ones in there but if you’re undertaking this kind of job you should be able to figure out what you need but those are the main ones that I can think of.
-A motor stand is nice and handy for working on the motor before you put it in the car might want to pick one of these up too.
Now after you have rounded up all the parts its time to get started on the swap. IF you are intimidated already then this job might not be for you but if you are feeling pretty good and have a positive attitude then its not going to be that bad the rest of it just takes some time and goes pretty smoothly honestly.
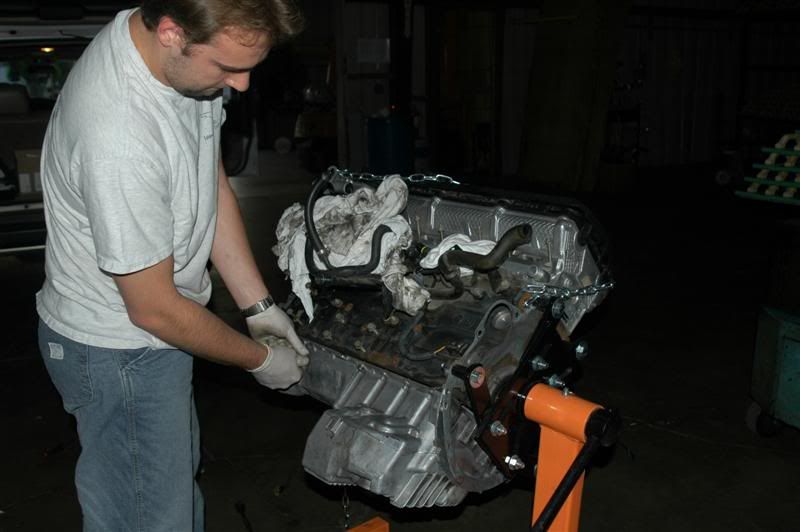
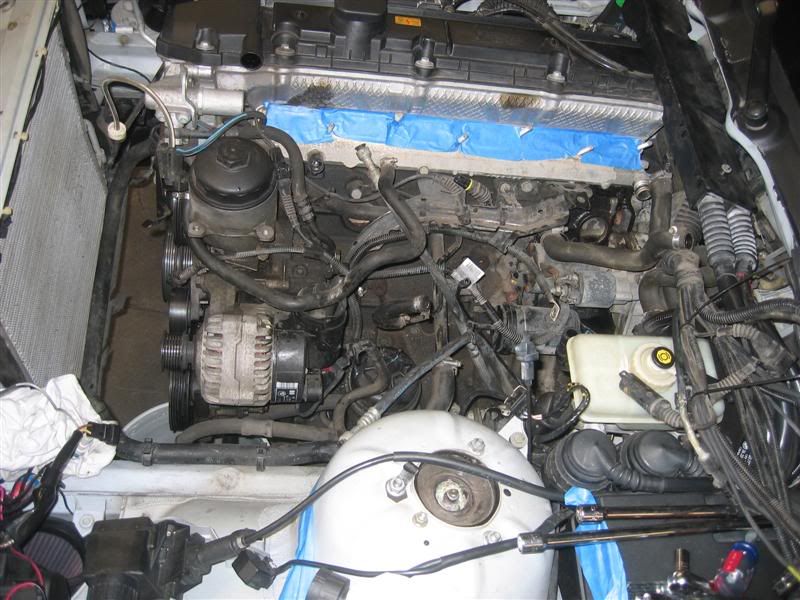
I started out by preparing the S52 motor to go into the car on the motor stand. I unbolted all of the accessories and cleaned up the head and block. I left the head on the motor because I did not want to deal with getting new stretch bolts and putting the head on at the right Torque with a protractor. Any way take off the oil housing and clean that all up and clean up the block with plenty of carb cleaner.
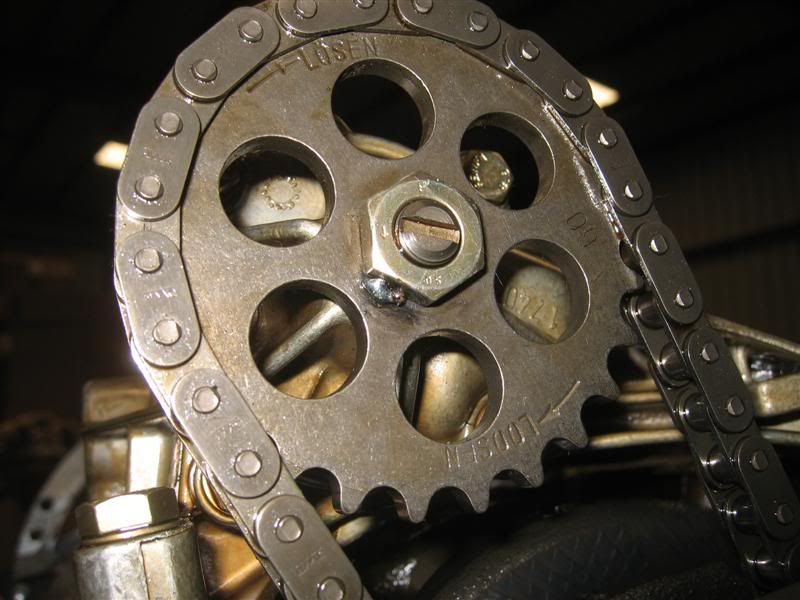
Then Remove the Oil pan just pull out all of the bolts and clean up the oil pan. At this point it’s not a bad idea to secure the oil pump nut since it is really easy to do while the motor is on the stand. I just spot welded the nut to the sprocket and the problem was solved. IF you don’t have a welder or the skills then some loc tite ought to work fine or a punch into the threads. Replace the oil pan with a new seal it will save you the headache of an oil pan weeping oil later once it is in the car and 1000 time harder to take off and do. When the oil pan is replaced you will need some gasket sealer that should be applied at the seems of the front and back aluminum covers of the motor.
Now that the motor is all prepped and cleaned up (Took me a good 8 hours spread out over a few weeks to get it to my approval) Its time to get started with the actual swap of the motor into the car.
Last edited by leedawg; 11-15-2007 at 11:50 PM.
Member
-Jack the car up in the front and place it on two jack stands securely.
<o:p> </o:p>
-Put the hood into the service position which is straight up and down by removing the bolt on the right side and putting it up vertically.
<o:p> </o:p>
- Now drain all of the fluids from the motor (Coolant and Oil)
<o:p> </o:p>
-Its time to start removing the cooling system from the car Just pull the house off of the motor and remove the fan and the radiator along with the fan shroud from the car.
<o:p> </o:p>
-After the cooling system is removed it is time to start getting the motor disconnected from the car this is a long and tedious process take your time and you will be fine. Take lots of pictures if it helps you remember where everything goes. I did not label any cables but if it helps you then it might not be a bad idea.
<o:p> </o:p>
-Remove the area over the climate control blower and main are of the wiring harness.
<o:p> </o:p>
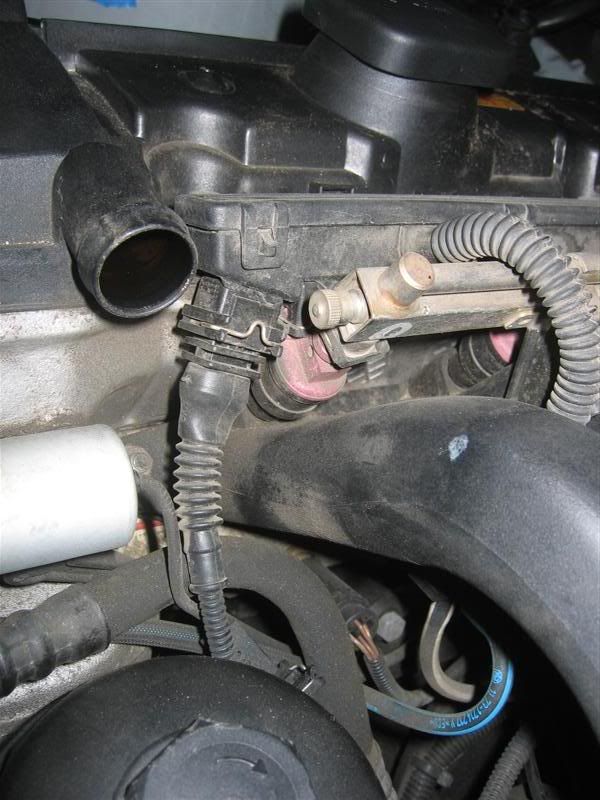
-Remove the valve covers and fuel rail covers and disconnect the cooling lines from the throttle body and the throttle cables that go to the throttle body in the car. The fuel lines need to be removed from the fuel rail by just pressing down on the coupling and pulling them off. But first you can depressurize the system by taking the little cap off the end of the fuel rail closest to the front of the engine bay, it looks like a tire air nozzle just gently push the stem in with a small screwdriver and fuel should spray out depressurizing the system.
<o:p> </o:p>
-After the throttle body is pulled off its time to tackle the intake manifold remove all the bolts and start disconnecting the wires that go to the ICV and the air intake temp sensor.
<o:p> </o:p>
<o:p> </o:p>
<o:p> </o:p>
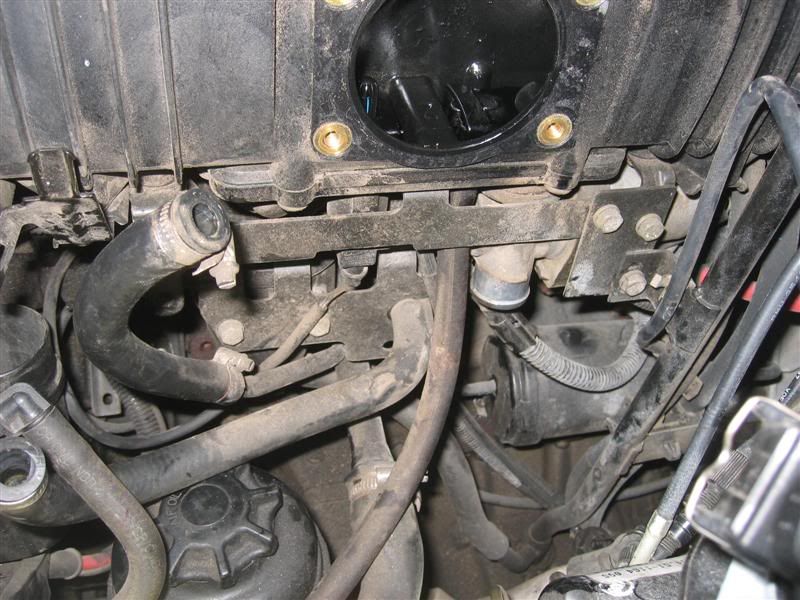
-Now remove the vacuum lines that go to the intake manifold so that you can get it free from the car. The ICV and temp sensor and the big plastic thing stays with the intake manifold. There are two large nuts way down low that hook to the bracket of the manifold which need to be removed if your wondering why the thing wont come off after you get all of the nuts that hold it on off.
<o:p> </o:p>
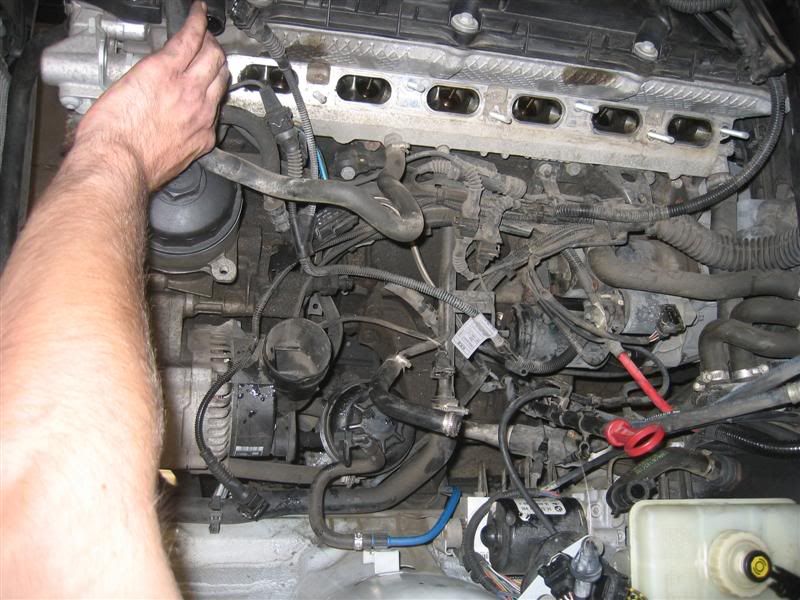
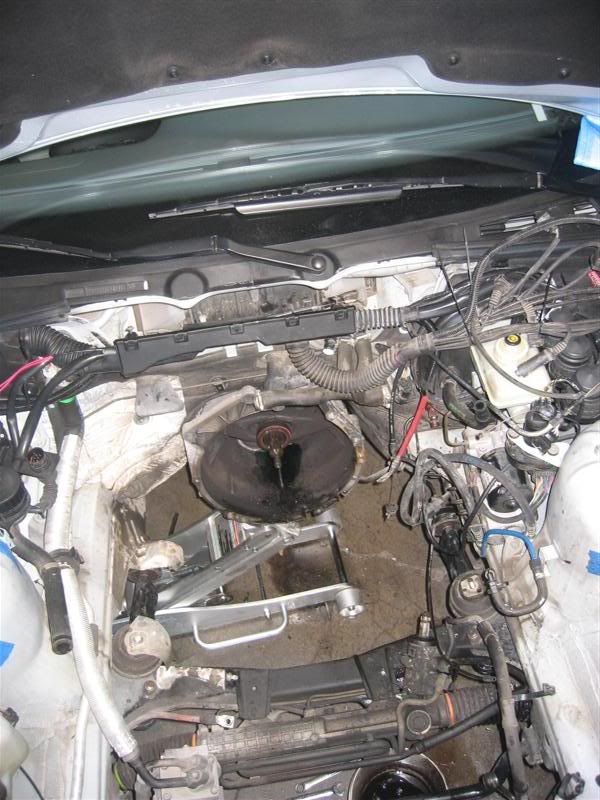
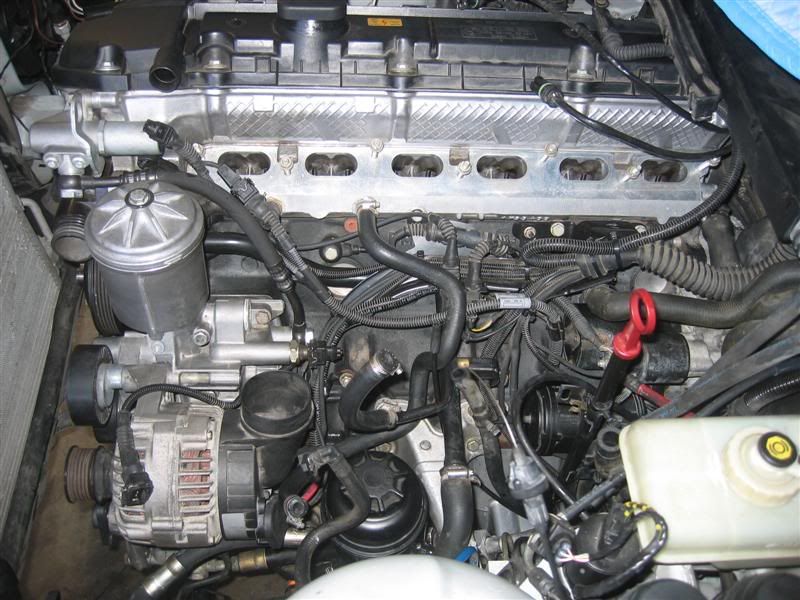
-After you have gotten the manifold off tape up the holes on the intake valves so stuff dose not fall into the motor and it is now time to start removing the wiring from the motor. Just clip all of the zip ties off the wire races and zip tie the main bundles that go right and left so that you can remember where the wires run to when you put the new motor into the car. Dont worry about the connectors they all only go back one way so you dont have to worry about connecting the wrong end with a sensor thats not supposed to be connected.
<o:p> </o:p>
<o:p> </o:p>
<o:p> </o:p>
<o:p> </o:p>
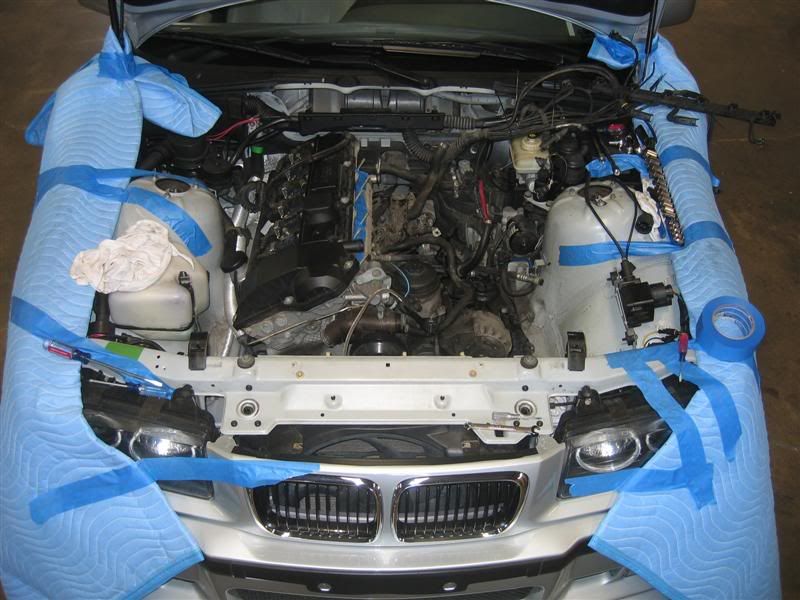
-After all the electrical and vacuum have been removed from the car it is time to get the motor ready to be pulled. GO under the car and remove the whole exhaust system all the way up the headers. You do not need to remove the headers from the motor however.
<o:p> </o:p>
<o:p> </o:p>
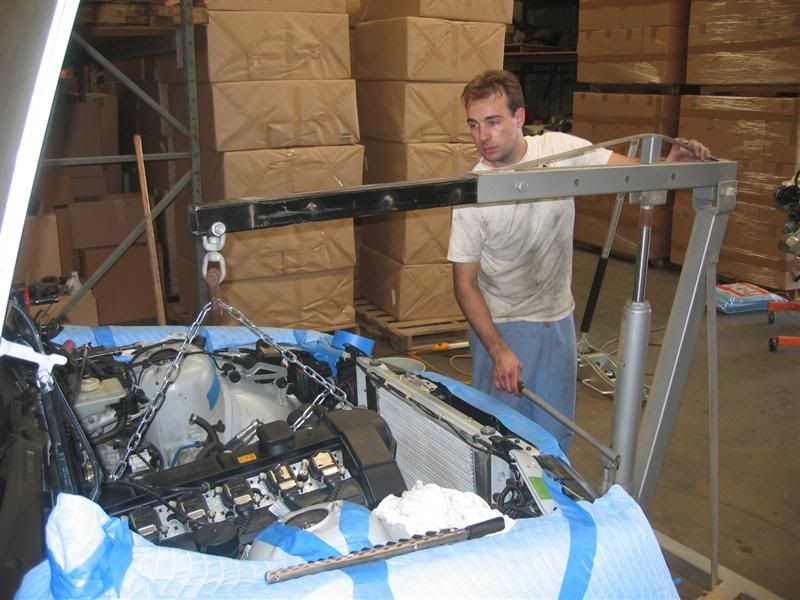
-Now comes the hard part roll the cherry picker over the motor and secure a chain from the eye in the front of the motor to the large hole at the back of the motor. And secure it to the cherry picker.
<o:p> </o:p>
<o:p> </o:p>
-Now unbolt the transmission from the motor, there are 4 M12 bolts and 3 M8s if I recall and two starter bolts that are M10s You will need Torx sockets to remove these. Place the jack under the transmission once you are done unbolting all of the bolts it will hold the transmission in place when you pull the motor out of the car.
<o:p> </o:p>
<o:p> </o:p>
-Remove the AC compressor and leave it in the car so you do not have to deal with recharging the AC system this will save you a major headache.
<o:p> </o:p>
-Now it is time to remove the two nuts that hold the motor to the mounts and then start to jack the motor up with the lift. Place a piece of plywood between the front of the engine bay so you do not damage the air conditioner radiator and pull the motor up so it just clears the mounts then make sure the tranny is supported and wiggle the motor forward till it unmates from the transmission.
<o:p> </o:p>
<o:p> </o:p>
-Removal of the steering linkage is necessary because the oil pan on the motor will not clear it when the motor is being removed. Removal of the linkage was a bit of work and took me a while to get it to disengage. Make sure you remove the three bolts at the pinch joints completely because the splined shafts have a groove cut in them that dont allow the joints to slide apart unless the bolts are removed. Penetrating oil helped get the linkages loose as well.
<o:p> </o:p>
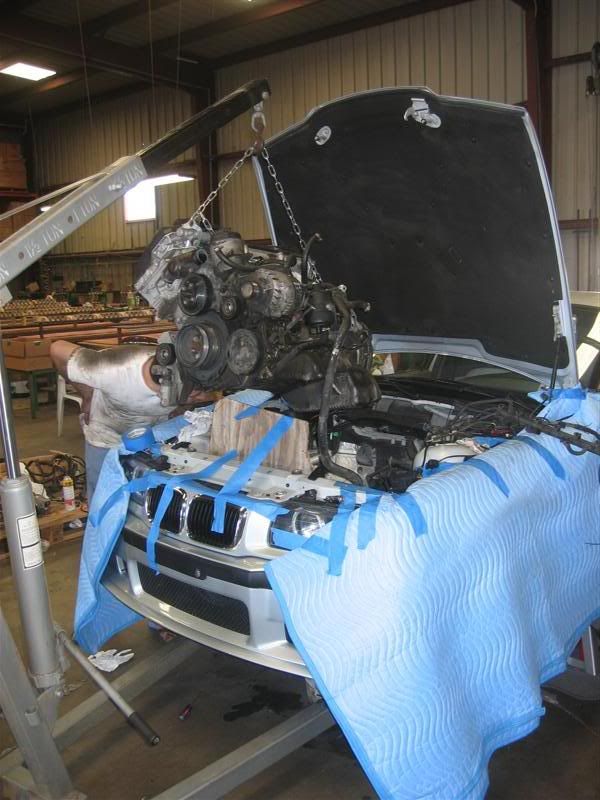
-Now this is where it is really important to have a friend and slowly work the motor out of the engine bay as you jack it up. (This part was pretty exciting for me seeing as it was about the half way point in the swap.)
<o:p> </o:p>
<o:p> </o:p>
****Whew we are half way through hopefully it hasnt been too brutal yet. I spent 6 hours up to this point so I was pretty happy about that. *****
<o:p> </o:p>
<o:p> </o:p>
<o:p> </o:p>
<o:p> </o:p>
Member
<o:p> </o:p>
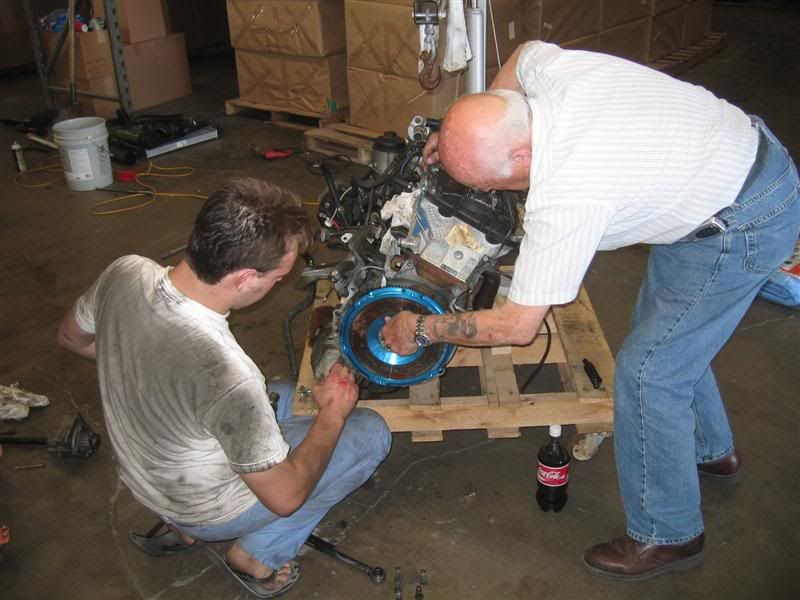
-It is now time to put the S52 motor into your car. I did not worry about a clutch because I already had the UUC Flywheel and M5 clutch set up in my car but it wouldnt be a bad idea to put in a new clutch if you have your standard non M3 clutch still with at least an M3 clutch or a light weight flywheel. Whatever you end up doing get the new fly and clutch bolted up and be sure to use a clutch alignment tool to make sure the clutch is centered when you bolt the pressure plate.
<o:p> </o:p>
<o:p> </o:p>
-The install is pretty much the reverse of the removal except its a lot of work to get the transmission and the motor to mate up properly with each other. What we did was put the motor almost up to the transmission and wiggled the two together with one person under the car pushing up and down on the tranny and the other moving the motor back and fourth as the two slide together. IF the shaft of the tranny isnt mating move the crank a bit with a 22 mm socket so that the spline matches up.
<o:p> </o:p>
-After the motor is mated to the transmission just set the motor back down onto the new motor mounts and torque all of the nuts to the to 33 ft/lbs.
<o:p> </o:p>
<o:p> </o:p>
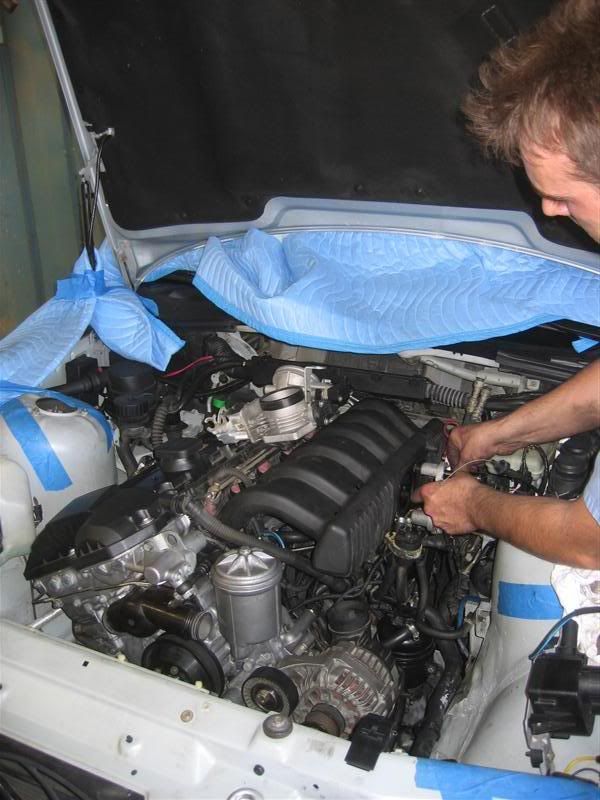
-The next step is pretty much routing all of the electrical connections back the way they were on the old motor and making sure that they are all plugged into the appropriate locations. This too me awhile and a bunch of zip ties to get it all looking just as it was from the factory.
<o:p> </o:p>
<o:p> </o:p>
-The intake manifold is the next item to be put back on the motor, while the intake manifold is off of the motor clean the ICV since its really easy. Now there are a couple main vacuum lines that need to be reconnected to the intake manifold and then just bolt the manifold back down to the head the opposite way you took it off.
<o:p> </o:p>
<o:p> </o:p>
-The rest of the cooling system and various other hoses and connectors should all be reconnected I wont bother to mention them all there are too many but just make sure you get everything reconnected on the motor and double check all of your work as you go along.
<o:p> </o:p>
<o:p> </o:p>
-Now After everything is reconnected together it is time to stop and think to yourself and make sure that all the clamps and everything are tightened down. At this point I ran a quart of oil through the motor and let it just drain out the bottom to make sure that I got anything that was foreign inside the motor to come out with the flush of oil. I then plugged the bottom and filled it up with oil and filled up the cooling system with coolant and distilled water.
<o:p> </o:p>
-The next step is to important so pay attention. Before you just go and turn the key you need to make sure the fuel system has fuel up to the motor so turn the key all the way on but dont crank the motor, then press that valve at the end of the fuel rail that you used to depressurize the system and air should come out. Wait 20 sec if fuel does not start coming out then turn the key off and then turn it back on and repeat the procedure till fuel sprays out of the nozzle. At this point the fuel system is primed and ready to go. Step two dont start the motor yet!!!!! I know its really tempting, but we need to get the oil primed into the pump since you had all of it out of the motor. Pull the fuel pump fuse the ignition coil connector and the ECU relay. Now crank the motor for 10 seconds on the starter then let the starter rest for 30 seconds, then crank the motor again for another 10 seconds letting the starter rest in-between repeat about 5 times to make sure the oil pump starts to move some oil around the motor.
<o:p> </o:p>
<o:p> </o:p>
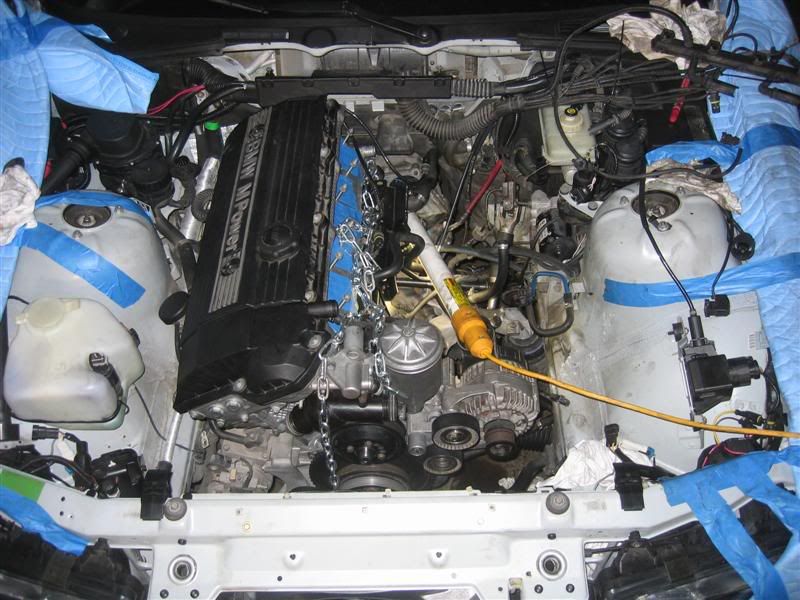
Alright its time to cross your fingers pray do whatever it is that brings you good luck because its time to see if the bitch will start. Plug the Ignition coil connector back in and replace the ECU relay and the fuel pump fuse. Get in the car and Crank it over!!! In my case the motor fired immediately and started right up. Now there was a ton of smoke coming off the headers of the motor which is totally normal because you get oil and stuff all over them so it will burn off. Just watch and make sure the oil light is not on and that the coolant is circulating through the motor. CHECK for leaks under the car while the motor is running. Pay attention to it and just let it idle for a couple of minutes making sure everything is working properly.
<o:p> </o:p>
<o:p> </o:p>
After your sure you have solved all of the leaks (I had a few the hoses at the throttle body I forgot to tighten the clamps and the bottom radiator hose had a bit of a leak) you are ready to take her out and driver her around a bit. Now I took it easy on my motor for the first 20 miles kept it under 4k because I wanted to make sure it was settled into its new home.
<o:p> </o:p>
<o:p> </o:p>
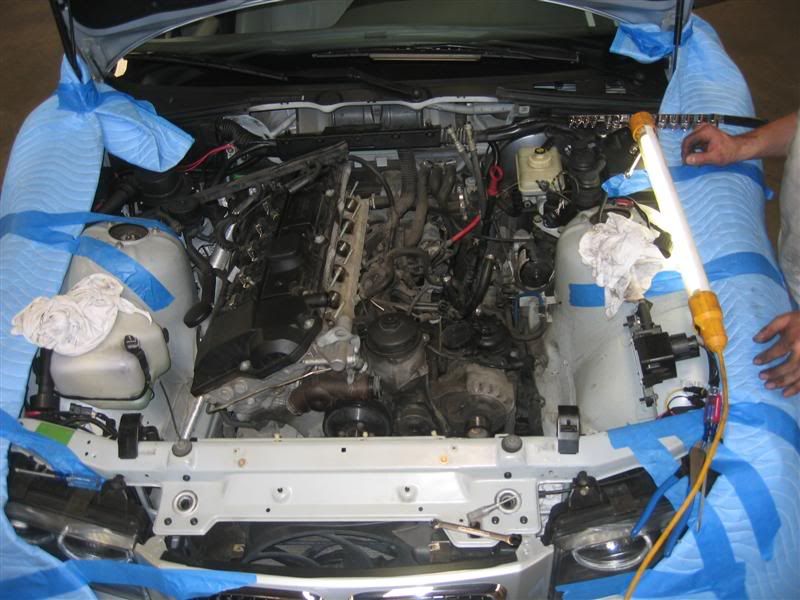
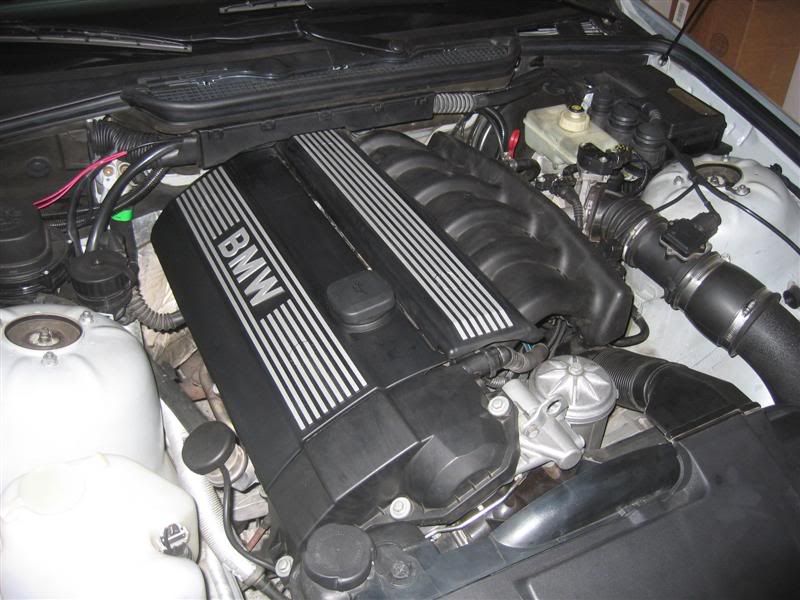
Then I opened up the throttle and took it to red line WOW is all I can say, she pulls hard and you will for sure notice the HP increase. IT was insane!!!! IM loving the motor and the best part is, it looks as though it came from the factory with the S52 already installed.
<o:p> </o:p>
<o:p> </o:p>
All and all the swap went pretty good and was nowhere near as bad as I thought it could have been. But its important to note that without the proper tools this job would be a super bitch. If you get the stuff I mentioned above it should go just fine. Hopefully this takes a bit of the mystery out of this process because I have yet to have seen a good write up on the procedure. Any way Sorry for this incredibly long post any questions feel free to ask but I am loving the motor and hopefully didnt leave to much out in the write up.
<o:p> </o:p>
<o:p> </o:p>
<o:p> </o:p>
Cheers Leedizzal
S54 FTW
WOW! Nicely done buddy! Great to have another 332 running around the area! Bring that beast out this week, I gotta see it! Congrats, and what a great resource this thread will be for the forum.
'03 E46 M3 - "Brittney"
'92 E34 525i - "Ivanka"
Member
Fuckin A buddy It was a bit of a job but she hauls ass I mean I cant beleive it still it just pulls like crazy. IM rollin out early tommorow morning to NOR cal where you were this last weekend but I will have to for sure bring it out for you to see it. We have for sure got to hook up so you can see this thing man it feels so good, im already itching for a super charger though LOL
S54 FTW
I was actually in NorCal - Grandma had her 80th bday, so I had to go up and celebrate. Now Lee, I don't want to hear any more talk of superchargers - we all know go turbo or go home!Originally Posted by leedawg

Can't wait to see it.
PS: You'll be used to the power within 2 weeks

'03 E46 M3 - "Brittney"
'92 E34 525i - "Ivanka"
Member
Wow looks like you put a lot of work into it.Its all worth it after that first drive right?
Member
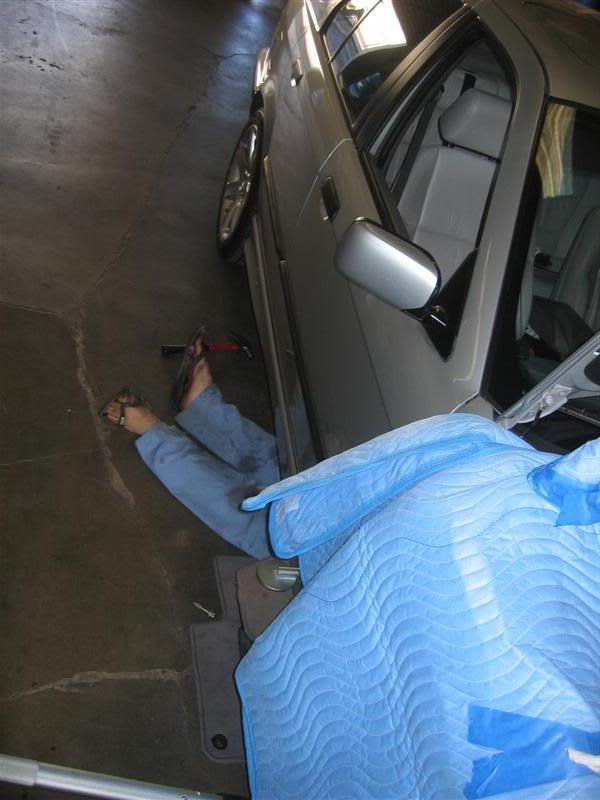
Nice work! But dude, open-toed sandals?
-Peter
Current toy: none
Past cars: 88 M3, 99 M3 x2, 04 M3, 91 NSX, 06 S2000, 01 911TT, 06 Exige, 00 NSX, 04 GT3
Member

You've got red on you.
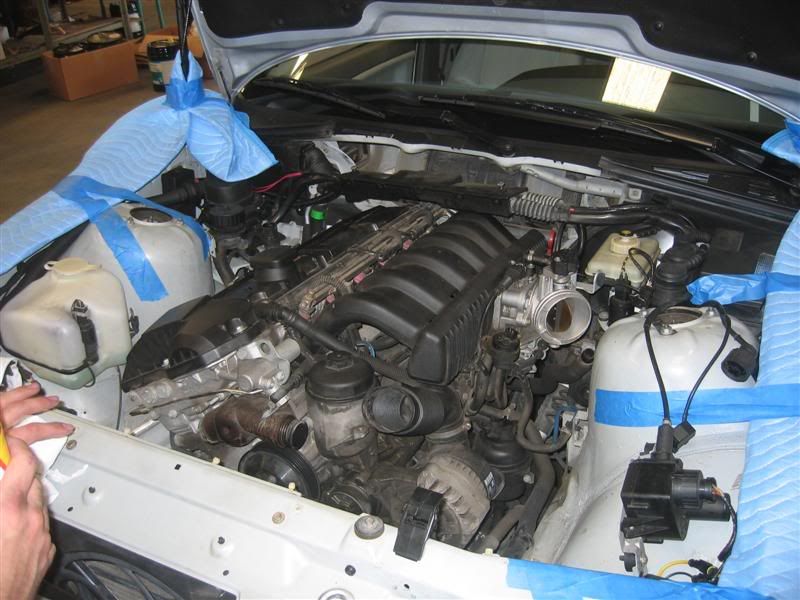
and obdII intake manifold?!
Member
Flip flops for the win!!!!!
And yeah I went with the OBD II intake manifold ill do an M50 one later. I just wanted to feel the motor in its stock state before I start modding it so I can appreciate the power gain more. THe manifold swap is nothing compared to the motor so really not going to be that big of a pain in the ass.
HypeBeast
WOW!!!! THANKS FOR THE WRITE UP!!! i finally figured out how to do my fuel lines!!very nice!
Member
Yeah, thanks for the write up. Good pics and good info!
1994 BMW 325i
1991 Mazda SpecMiata (SCCA)
1993 Mazda Miata (Street)
2004 Chevrolet Silverado 3500
1966 Ford Fairlane "500"
Landing gear inspector
VERY nice. Awesome writeup, especially useful with the great pics!
I would have stuffed some rags or something into the intake holes tho, or run some painter's tape over em... just to be on the safe side.
Very clean install otherwise!
Member
Yeah, I guess I'm not one for taking chances with body parts
-Peter
Current toy: none
Past cars: 88 M3, 99 M3 x2, 04 M3, 91 NSX, 06 S2000, 01 911TT, 06 Exige, 00 NSX, 04 GT3
Member
WOW....awsome awsome write-up
I was just wondering what part would be different about it if you were to drop it into an obd1?
Member
He did, in one pic he already stripped it to put the intake mani back on though.
Member
I take it back.I also have a pair.
Member
Yeah its pretty easy to convert it over I would imagine you just put the S50 stuff on it instead of the OBDII S52. LIke I said I just wanted to have basically the stock M3 motor feel the power then go from there makes me appreciate each upgrade more, ive got to say this has been the best mod yet thogh and opens up a lot of options on which ways to gain more power now. Im glad that its going to help some ppl cause it was always a bit of a mystry to me and nobody that has done it has written it up.
Member
Awsome Figure its no more of a risk then your hands that your working with right on the project. Shit ive welded in my flip flops
Member
I agree.Never tried welding in them.But changed my oil in them.
Member
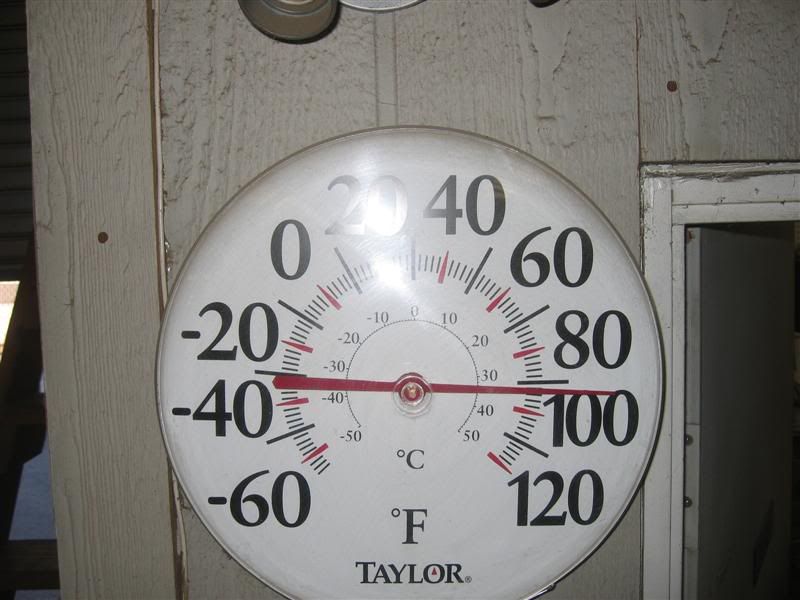
When its 100 degrees out its not a bad way to go.
Landing gear inspector
You're right... my bad, skipped over this one.
Nice install!!
Member
Yup im not a total NOOB
Member
WOW. I would have never tackled that on my own. Good Job. Enjoy the new motor...
 Posting Permissions


 Reply With Quote
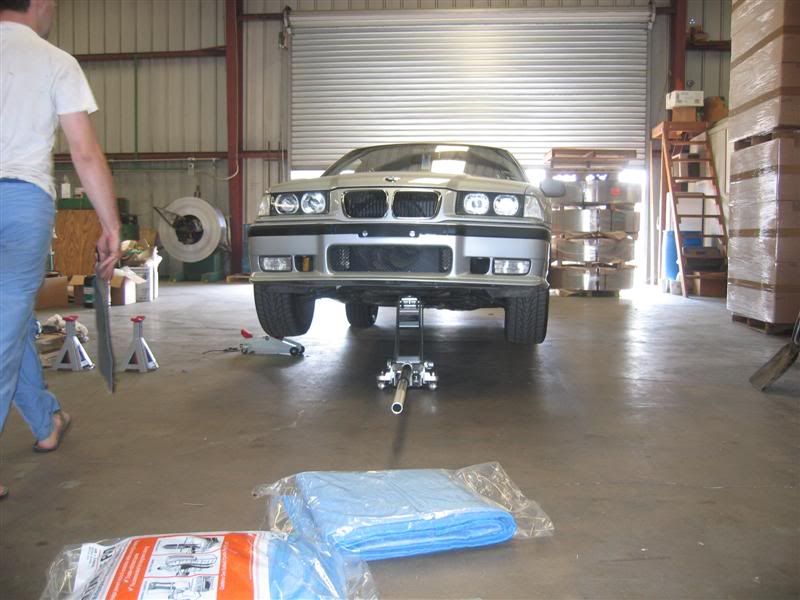


Bookmarks