
 Member
NOTE: I no longer rent the special tools. They never came back from a renter years ago.
Also I no longer have the DIY in MS Word Format. Sorry.
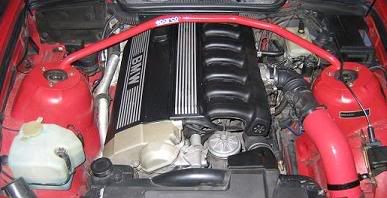
As many of you are aware, our E36 I6’s are very prone to blown head gaskets due to overheating. Couple that with the less than reliable cooling system components (in my case the POS plastic radiator neck cracking) and you may find yourself in my position. My first caution is to keep your cooling system maintenance up-to-date, it’s much cheaper than this repair.
Looking through the forum, and other sources, I could find no complete DIY articles for R&R of a head gasket. I used the following sources to succesfully complete the job, and truthfully it was enough. Compiling all of the sources into one DIY is not worth the effort. Instead I’ll lay out the steps and sources, and try to fill in the gaps. Here’s what you need:
1. Bentley Service Manual
2. Pelican Parts Cam Removal DIY
3. Pelican Parts Vanos/Cam Timing DIY
4. Pelican Parts Valve Cover Replacement DIY
I like the Pelican Parts DIY’s but hate the fact that they are really geared to viewing on the web…they have all the photos as thumbs so you can’t read and look at the same time. So I cut and pasted the text and larger photos into a Word.doc that I have for you to print. I put the printouts in a three-ring binder for use in the garage. The files are too large to attach here but I will send them to anyone that PM’s me an email account that can accept large attachments.
Normal caveat: This is for my 1995 325is, you might have minor differences due to your year and motor, and use this DIY at your own risk.
Put on some old clothes, strap on your BMW fender skirt, here we go:
Last edited by hellrot325; 10-13-2013 at 12:08 PM.
[
Turner Perf Chip/Fan Delete/Sparco Strut Tower Brace/X-Brace/JTD Underpanel
Zimmerman X-D Rotors/Axxis Ultimate Pads/Solid Caliper Guide Bolt Bushings
UUC EVO3/DSSR SSK/3.15 LSD/Cosmos Racing CAI V2/ASC Delete
96+ M3 LCA/LCAB M3 RTAB and GC Shims
BMW OEM Alarm/Woodgrain Delete/Blizzaks baby!/16x7 BMW Style 30 Sport wheels
Member
The first thing to know is that you will need some special tools to do this job. I’ve read that you can do it without some, but I decided against it. Doing this yourself versus having a dealer or independent shop do it can save you over $1,000, so why chance it? Here are the special tools. They are available many places, but I got mine from www.zdmak.com:
Description-Part Number-Cost
1. Camshaft Alignment Kit w/ TDC Pin - BMW113240 - $95.00
2. E12 Torx Headbolt Tool - BMW112250 - $48.95
3. Rigid Chain Tensioner - BMW113390 - 29.99
4. Vanos Turning Tool - BMW115490 - $38.00
5. Valve Pliers - 10218A - $18.50
6. Valve Spring Compressor - Sears - $15.00
7. Homemade Protractor for Torque Stages 2 & 3 - N/C
Note: I have a rental program for these tools if you want to save some money. PM me.
Last edited by hellrot325; 02-20-2007 at 11:20 PM.
[
Turner Perf Chip/Fan Delete/Sparco Strut Tower Brace/X-Brace/JTD Underpanel
Zimmerman X-D Rotors/Axxis Ultimate Pads/Solid Caliper Guide Bolt Bushings
UUC EVO3/DSSR SSK/3.15 LSD/Cosmos Racing CAI V2/ASC Delete
96+ M3 LCA/LCAB M3 RTAB and GC Shims
BMW OEM Alarm/Woodgrain Delete/Blizzaks baby!/16x7 BMW Style 30 Sport wheels
Member
Here are the parts you will need to do the job. Keep in mind that this is for a 1995 325is, so you will need to make sure that you order parts specifically for your car. I ordered the top four items from Pelican Parts, www.pelicanparts.com, the rest I got locally.
Description Part Number Qty Cost
Head Gasket Set, 325i/is/iC (from 09/92) BW-11-12-9-064-467 1 148.60
Cylinder Head Bolt Set, 325i/is/iC (1992-95) BW-11-12-1-721-938 1 20.75
Copper Lock Nut, Exhaust Flange, 325i/is/iC (1992-95) BW-18-30-1-737-774 6 0.55
Nut for Exhaust Manifold to Cylinder Head BW-11-72-1-437-202 24 0.55
Coolant BMW OEM 2 17.00
Distilled Water, Gallon N/A 2 1.00
Motor Oil Mobil 1 0W40 7 4.00
Oil Filter BMW OEM 1 6.00
[
Turner Perf Chip/Fan Delete/Sparco Strut Tower Brace/X-Brace/JTD Underpanel
Zimmerman X-D Rotors/Axxis Ultimate Pads/Solid Caliper Guide Bolt Bushings
UUC EVO3/DSSR SSK/3.15 LSD/Cosmos Racing CAI V2/ASC Delete
96+ M3 LCA/LCAB M3 RTAB and GC Shims
BMW OEM Alarm/Woodgrain Delete/Blizzaks baby!/16x7 BMW Style 30 Sport wheels
Member
Before you start make sure you have and use:
1. Zip Lock bags to keep your fasteners organized and easy to find.
2. Masking tape and a Sharpee to label the bags and hose connections on your car.
3. Digital camera to take pictures of each step as a reference. You may have a better memory than me, but this saved my butt a couple of times.
4. Complete set of tools including a set of external torx sockets
5. Torque Wrench theyre torque specifications, not torque suggestions!
6. If you havent done the fan delete, youll need a 32mm wrench for removing the fan procedure is in the Bentley and one more use that is a surprise!
Last edited by hellrot325; 05-29-2005 at 08:01 AM.
[
Turner Perf Chip/Fan Delete/Sparco Strut Tower Brace/X-Brace/JTD Underpanel
Zimmerman X-D Rotors/Axxis Ultimate Pads/Solid Caliper Guide Bolt Bushings
UUC EVO3/DSSR SSK/3.15 LSD/Cosmos Racing CAI V2/ASC Delete
96+ M3 LCA/LCAB M3 RTAB and GC Shims
BMW OEM Alarm/Woodgrain Delete/Blizzaks baby!/16x7 BMW Style 30 Sport wheels
Member
Removing the Cylinder Head
Follow the Bentley procedures on removing the Cylinder Head starting on page 113-10, steps 1 thru 36 with the following enhancements:
Step 2: The six nuts holding the exhaust to the manifold are one-time use dont be a cheapskate, discard them. Also, loosening the front exhaust hanger will help make this task easier by allowing the exhaust to drop off the manifold.
Step 5/6: This Pelican Parts DIY will help with any issues here. Have a copy printed for reference http://www.pelicanparts.com/bmw/tech...lant-Flush.htm. When removing the fan shroud, you need to disconnect the coolant level sensor and the heater hose from the coolant reservoir tank. The sensor is located at the bottom of the tank, and unscrews by hand. The heater hose snakes through the shroud and connects at the bottom of the tank.
[
Turner Perf Chip/Fan Delete/Sparco Strut Tower Brace/X-Brace/JTD Underpanel
Zimmerman X-D Rotors/Axxis Ultimate Pads/Solid Caliper Guide Bolt Bushings
UUC EVO3/DSSR SSK/3.15 LSD/Cosmos Racing CAI V2/ASC Delete
96+ M3 LCA/LCAB M3 RTAB and GC Shims
BMW OEM Alarm/Woodgrain Delete/Blizzaks baby!/16x7 BMW Style 30 Sport wheels
Member
Step 7: Hold off and just disconnect them from the head as they become accessible some are easier when you have the intake manifold off.
Step 8: Not necessary.
Step 9: Not necessary. Just remove the two screws under the grille (location red arrows) holding this wiring box (white arrow) so you can move it around to get access to the rear valve cover bolt, fuel rail, rear fuel hose and ignition wiring box. You will need to remove the passenger side wiper arm to lift the grille up to access it the screws. Removing the wipers sometimes can be a PITA... just pop off the little plastic cap, remove the nut, and relieved tension on the arm by lifting the blade while simultaneously wiggling the arm free.
Last edited by hellrot325; 05-27-2005 at 11:12 PM.
[
Turner Perf Chip/Fan Delete/Sparco Strut Tower Brace/X-Brace/JTD Underpanel
Zimmerman X-D Rotors/Axxis Ultimate Pads/Solid Caliper Guide Bolt Bushings
UUC EVO3/DSSR SSK/3.15 LSD/Cosmos Racing CAI V2/ASC Delete
96+ M3 LCA/LCAB M3 RTAB and GC Shims
BMW OEM Alarm/Woodgrain Delete/Blizzaks baby!/16x7 BMW Style 30 Sport wheels
Member
Steps 10-14: If you have experience changing plugs then this is easy. Use the following Pelican Parts DIY for more complete information if you need it.
http://www.pelicanparts.com/bmw/tech...eplacement.htm
http://www.pelicanparts.com/bmw/tech...park-Plugs.htm
Pelican Parts Valve Cover Gasket Replacement DIY
[
Turner Perf Chip/Fan Delete/Sparco Strut Tower Brace/X-Brace/JTD Underpanel
Zimmerman X-D Rotors/Axxis Ultimate Pads/Solid Caliper Guide Bolt Bushings
UUC EVO3/DSSR SSK/3.15 LSD/Cosmos Racing CAI V2/ASC Delete
96+ M3 LCA/LCAB M3 RTAB and GC Shims
BMW OEM Alarm/Woodgrain Delete/Blizzaks baby!/16x7 BMW Style 30 Sport wheels
Member
Step 16/18: Huh? There are all kinds of fluid, vacuum, and electrical connections to the head and manifold. Almost all are easy to figure out where they go later but mark them or take a picture to be sure. No big deal. You need to know that there are three connections on the bottom of the intake manifold that you have to remove after its unbolted but before it can be removed. Heres a photo. #1 is closest to the firewall, and is removed by compressing a clip on the bottom. #2 is a spring loaded electrical connection....press and pull. #3 is closest, and has a clip on the bottom and needs to be slightly rotated to release. You will have to do this by feel to some extent, hard to access and see.
Last edited by hellrot325; 05-27-2005 at 11:00 PM.
[
Turner Perf Chip/Fan Delete/Sparco Strut Tower Brace/X-Brace/JTD Underpanel
Zimmerman X-D Rotors/Axxis Ultimate Pads/Solid Caliper Guide Bolt Bushings
UUC EVO3/DSSR SSK/3.15 LSD/Cosmos Racing CAI V2/ASC Delete
96+ M3 LCA/LCAB M3 RTAB and GC Shims
BMW OEM Alarm/Woodgrain Delete/Blizzaks baby!/16x7 BMW Style 30 Sport wheels
Member
Step 17: If you have ASC, you will need to disconnect the ASC throttle body from the TB first. Just two bolts. Then just grab the ASC throttle cable and pull it to give you slack and remove it from the retainer to release. It should pop out of the yellow clip that holds it. Set aside.
Last edited by hellrot325; 02-20-2007 at 11:23 PM.
[
Turner Perf Chip/Fan Delete/Sparco Strut Tower Brace/X-Brace/JTD Underpanel
Zimmerman X-D Rotors/Axxis Ultimate Pads/Solid Caliper Guide Bolt Bushings
UUC EVO3/DSSR SSK/3.15 LSD/Cosmos Racing CAI V2/ASC Delete
96+ M3 LCA/LCAB M3 RTAB and GC Shims
BMW OEM Alarm/Woodgrain Delete/Blizzaks baby!/16x7 BMW Style 30 Sport wheels
Member
Step 19: Disregard the Bentley, just undo the rubber fuel-line clamps at the fuel rail, its much easier. You may have to cut through the rear one I did because the clamp was not accessible. Replacement kit (hose, two clamps) is available from BMW for $7. Since I was replacing the fuel rail I bought both the front and rear kits. Reference the www.realoem.com site in the 1315 Fuel Injection System for part numbers for Kit for Fuel Hose and Clamp
[
Turner Perf Chip/Fan Delete/Sparco Strut Tower Brace/X-Brace/JTD Underpanel
Zimmerman X-D Rotors/Axxis Ultimate Pads/Solid Caliper Guide Bolt Bushings
UUC EVO3/DSSR SSK/3.15 LSD/Cosmos Racing CAI V2/ASC Delete
96+ M3 LCA/LCAB M3 RTAB and GC Shims
BMW OEM Alarm/Woodgrain Delete/Blizzaks baby!/16x7 BMW Style 30 Sport wheels
Member
Step 20: Not needed. Already done in Step 9.
Step 21: The single bolt is about half way down the tube. Dont pull out the tube, unbolting it from the flange is enough to get it out of your way.
Step 22: Remember those three connections underneath!
Last edited by hellrot325; 06-01-2005 at 12:39 AM.
[
Turner Perf Chip/Fan Delete/Sparco Strut Tower Brace/X-Brace/JTD Underpanel
Zimmerman X-D Rotors/Axxis Ultimate Pads/Solid Caliper Guide Bolt Bushings
UUC EVO3/DSSR SSK/3.15 LSD/Cosmos Racing CAI V2/ASC Delete
96+ M3 LCA/LCAB M3 RTAB and GC Shims
BMW OEM Alarm/Woodgrain Delete/Blizzaks baby!/16x7 BMW Style 30 Sport wheels
Member
Missing Step from the Bentley! Remove both front and rear exhaust manifolds. Four nuts for each cylinder. All are accessible with different combinations of 3/8” drive ratchet, 3” extension, 6” extension, deep-well socket, and standard socket. PITA as in most cases you can only get a half or quarter turn. My kingdom for air tools! Once all the nuts are off remove manifolds from underneath.
Note: Many have said they left these on and removed them with the head. I am sure it is possible, and if I ever do this again I would leave them on and remove them from the head later, but be aware that the head is heavy and awkward enough to remove...this will make it even more difficult.
Last edited by hellrot325; 02-20-2007 at 11:27 PM.
[
Turner Perf Chip/Fan Delete/Sparco Strut Tower Brace/X-Brace/JTD Underpanel
Zimmerman X-D Rotors/Axxis Ultimate Pads/Solid Caliper Guide Bolt Bushings
UUC EVO3/DSSR SSK/3.15 LSD/Cosmos Racing CAI V2/ASC Delete
96+ M3 LCA/LCAB M3 RTAB and GC Shims
BMW OEM Alarm/Woodgrain Delete/Blizzaks baby!/16x7 BMW Style 30 Sport wheels
Member
Steps 23-33: Use Pelican Parts Vanos/Cam Timing DIY for more complete information. One thing I found was that rather than disconnecting the wiring to the Vanos solenoid, I simply unbolted the plunger from the body. It was much easier and now I have found a second use for that $25 32mm Craftsman wrench I bought to get the damn fan off. Sweeet!
[
Turner Perf Chip/Fan Delete/Sparco Strut Tower Brace/X-Brace/JTD Underpanel
Zimmerman X-D Rotors/Axxis Ultimate Pads/Solid Caliper Guide Bolt Bushings
UUC EVO3/DSSR SSK/3.15 LSD/Cosmos Racing CAI V2/ASC Delete
96+ M3 LCA/LCAB M3 RTAB and GC Shims
BMW OEM Alarm/Woodgrain Delete/Blizzaks baby!/16x7 BMW Style 30 Sport wheels
Member
Step 35: Youll probably need a breaker bar to remove the headbolts. The bolts will not be able to be removed until the head is off the block, so just leave them there. Make sure to save all the headbolt washers as the set of new bolts does not include them. Once all the bolts are loose it might take a few light taps with a rubber mallet (or a well padded hammer) on the head to get it to break free. Easy there tiger, you just want to break it loose. Have at least one person to help lift that bad-boy off the block. Better to have an extra helper to keep tension on the primary chain and feed it through the head when lifting. Heres the pattern...it's in the Bentley but a larger image may help you.
Last edited by hellrot325; 05-29-2005 at 08:10 AM.
[
Turner Perf Chip/Fan Delete/Sparco Strut Tower Brace/X-Brace/JTD Underpanel
Zimmerman X-D Rotors/Axxis Ultimate Pads/Solid Caliper Guide Bolt Bushings
UUC EVO3/DSSR SSK/3.15 LSD/Cosmos Racing CAI V2/ASC Delete
96+ M3 LCA/LCAB M3 RTAB and GC Shims
BMW OEM Alarm/Woodgrain Delete/Blizzaks baby!/16x7 BMW Style 30 Sport wheels
Member
Now that the head's off you need to take it to a machine shop to have them inspect it for warping and/or cracks, and to have it decked. Call the best independent BMW repair shop in your area and ask them where they send heads to be worked on. Go there. My head had a slight warp. Cost was about $100 to have it decked.
Before you take it to the shop, you need to take the cams and valve train out or pay the shop to do it. Since you are a real man (or a modern woman), you do it yourself. Heres how:
1. Remove the cams using the Pelican Parts Cam Removal DIY. Follow the instructions to the letter and youll find it really quite easy.
2. Once the cams are removed, you will need to remove the cam ledges from the head. They just lift right off but turn the head on its side to prevent the lifters from falling out the bottom and being damaged. Set ledges aside upside down and put a sticky saying lifters so you dont forget and pick it up later (dont ask )
Last edited by hellrot325; 05-29-2005 at 08:12 AM.
[
Turner Perf Chip/Fan Delete/Sparco Strut Tower Brace/X-Brace/JTD Underpanel
Zimmerman X-D Rotors/Axxis Ultimate Pads/Solid Caliper Guide Bolt Bushings
UUC EVO3/DSSR SSK/3.15 LSD/Cosmos Racing CAI V2/ASC Delete
96+ M3 LCA/LCAB M3 RTAB and GC Shims
BMW OEM Alarm/Woodgrain Delete/Blizzaks baby!/16x7 BMW Style 30 Sport wheels
Member
I discovered major scoring on some ledge cap bearings and on my exhaust cam. All the bearings on the ledges were fine. After some research, I found this is not uncommon. The cap bearings get scored, yet the corresponding bearings on the ledges are clean, because the cam is constantly being pushed up into the caps by the valve springs. Additionally, oil is being supplied from the ledge bearings so the cam is riding on oil. Unfortunately the caps are part of the ledge assembly and cannot be purchased separately from BMW. I purchased used ledges and replacement M50 cams in great condition from a used BMW parts provider Vines Automotive, www.vinesautomotive.com, (800) 214-4839, for $100. You could also take the opportunity to put S50/52 cams in. Although my intake cam was fine, I chose to install the new cams as a pair. I would also suggest not reinstalling scored cams, ledges, or caps.
[
Turner Perf Chip/Fan Delete/Sparco Strut Tower Brace/X-Brace/JTD Underpanel
Zimmerman X-D Rotors/Axxis Ultimate Pads/Solid Caliper Guide Bolt Bushings
UUC EVO3/DSSR SSK/3.15 LSD/Cosmos Racing CAI V2/ASC Delete
96+ M3 LCA/LCAB M3 RTAB and GC Shims
BMW OEM Alarm/Woodgrain Delete/Blizzaks baby!/16x7 BMW Style 30 Sport wheels
Member
3. Now the valves, valve springs, and retainers need to be removed. I used the valve spring compressor listed above to accomplish this. I found that I needed to remove the spring closest to the rear of the head for each cylinder first, because the forward one did not allow sufficient room to for the compressor and spring to be lifted from the head. The pic shows in red the orientation of the spring compressor when you have a pair, and then the orintation once the first valve is removed...make sense?
I could not grab the springs low enough to compress them below the keepers on the end of the valve, so I had to push down a little to accomplish this. Because of this, a two man job would be much quicker.
Last edited by hellrot325; 11-23-2005 at 04:00 PM.
[
Turner Perf Chip/Fan Delete/Sparco Strut Tower Brace/X-Brace/JTD Underpanel
Zimmerman X-D Rotors/Axxis Ultimate Pads/Solid Caliper Guide Bolt Bushings
UUC EVO3/DSSR SSK/3.15 LSD/Cosmos Racing CAI V2/ASC Delete
96+ M3 LCA/LCAB M3 RTAB and GC Shims
BMW OEM Alarm/Woodgrain Delete/Blizzaks baby!/16x7 BMW Style 30 Sport wheels
Member
4. The springs are compressed between the spring seats on the head, and the valve retainers. To remove them, two small keepers must be removed. Their slots match grooves on the end of the valve stems. Once you get the retainer below them, the keepers can be removed, releasing the retainer and spring. The key to do this quickly is to use a magnetized screwdriver theyll just come right off. I found this out when my 25 year old said "Do you have magnetized screwdriver?". this was after 22 valves where removed. I hate smart-asses!
Last edited by hellrot325; 06-01-2005 at 01:20 AM.
[
Turner Perf Chip/Fan Delete/Sparco Strut Tower Brace/X-Brace/JTD Underpanel
Zimmerman X-D Rotors/Axxis Ultimate Pads/Solid Caliper Guide Bolt Bushings
UUC EVO3/DSSR SSK/3.15 LSD/Cosmos Racing CAI V2/ASC Delete
96+ M3 LCA/LCAB M3 RTAB and GC Shims
BMW OEM Alarm/Woodgrain Delete/Blizzaks baby!/16x7 BMW Style 30 Sport wheels
Member
Once removed, take the retainer, spring, and springs seat off the valve. The valve seats are shown in the photo. Push the valve stem though the head to remove the valve.
Last edited by hellrot325; 06-01-2005 at 12:45 AM.
[
Turner Perf Chip/Fan Delete/Sparco Strut Tower Brace/X-Brace/JTD Underpanel
Zimmerman X-D Rotors/Axxis Ultimate Pads/Solid Caliper Guide Bolt Bushings
UUC EVO3/DSSR SSK/3.15 LSD/Cosmos Racing CAI V2/ASC Delete
96+ M3 LCA/LCAB M3 RTAB and GC Shims
BMW OEM Alarm/Woodgrain Delete/Blizzaks baby!/16x7 BMW Style 30 Sport wheels
Member
I kept all parts together in a set, and organized them by what cylinder they came out of, so I could reinstall them in the same place. I dont know if this is necessary, but seemed prudent.
Last edited by hellrot325; 05-29-2005 at 08:33 AM.
[
Turner Perf Chip/Fan Delete/Sparco Strut Tower Brace/X-Brace/JTD Underpanel
Zimmerman X-D Rotors/Axxis Ultimate Pads/Solid Caliper Guide Bolt Bushings
UUC EVO3/DSSR SSK/3.15 LSD/Cosmos Racing CAI V2/ASC Delete
96+ M3 LCA/LCAB M3 RTAB and GC Shims
BMW OEM Alarm/Woodgrain Delete/Blizzaks baby!/16x7 BMW Style 30 Sport wheels
Member
6. Once all the valves are out remove the valve stem seals with the pliers and toss them out. Just grab them at the plastic ends and pull. Easy. New seals are provided in the head gasket kit.
7. Remove these fittings from the head if you havent already. The head is now completely bare and can be brought to the chosen machine shop
Last edited by hellrot325; 06-01-2005 at 01:23 AM.
[
Turner Perf Chip/Fan Delete/Sparco Strut Tower Brace/X-Brace/JTD Underpanel
Zimmerman X-D Rotors/Axxis Ultimate Pads/Solid Caliper Guide Bolt Bushings
UUC EVO3/DSSR SSK/3.15 LSD/Cosmos Racing CAI V2/ASC Delete
96+ M3 LCA/LCAB M3 RTAB and GC Shims
BMW OEM Alarm/Woodgrain Delete/Blizzaks baby!/16x7 BMW Style 30 Sport wheels
Member
While you are waiting for the machine shop to finish the head work, here’s some suggestions:
Have all your fuel injectors refurbished. You have easy access to remove them and the time to get it done. Your car most likely is at or above 100,000 miles, they need it. I sent mine to RC Engineering, http://www.rceng.com/service.htm, and had it done…$24/each. A lot cheaper then new. Three were dripping and the other three were rated “good”…all came back rated “excellent” with new O-Rings and tips. Trust me, do it! Use this Pelican Parts DIY if you have questions on removal and installation: http://www.pelicanparts.com/bmw/tech...eplacement.htm
Clean engine compartment and all the plastic and rubber parts that you removed. You want every thing to look purdy when it back together don’t you? Easy to do when they are off the car. I just gave them a wipe off with WD-40. Make sure you wipe if all off with a clean detailing towel so you don’t create a dust magnet. Also clean your throttle body inside and out and lube the mechanism.
Upgrade/update your cams, lifters, retainers. Have the valves and valve seats reground.
Clean or replace your ICV (thanks beatniks!)
Things to consider and plan for during reassembly include:
- M50 Manifold mod
- New H2O pump
- Aluminum Thermostat Housing
- Fan Delete mod
- ASC Delete
Last edited by hellrot325; 02-20-2007 at 11:32 PM.
[
Turner Perf Chip/Fan Delete/Sparco Strut Tower Brace/X-Brace/JTD Underpanel
Zimmerman X-D Rotors/Axxis Ultimate Pads/Solid Caliper Guide Bolt Bushings
UUC EVO3/DSSR SSK/3.15 LSD/Cosmos Racing CAI V2/ASC Delete
96+ M3 LCA/LCAB M3 RTAB and GC Shims
BMW OEM Alarm/Woodgrain Delete/Blizzaks baby!/16x7 BMW Style 30 Sport wheels
Member
8. Once the head is back, assembly of the valve train is opposite of removal. Before I put it all back together I removed all lifters and cleaned them and their bores thoroughly. I then put a light coat of Red-Line Assembly Lube on the sides and tops and reinstalled them in the ledges. I also cleaned all the carbon deposits off the valves and their seats in the head to improve compression. I used Sea-Foam Deep Creep to dissolve the carbon worked great. During assembly I lightly coated all friction points with the assembly lube lifter tops, cam lobes, ledge and cap bearings, and valve seals. Red-Line Assembly lube is great because it is purple, allowing you to know where youve put it, and it will not clog your oil filter once the motor is running. (I changed the oil and filter a couple of days later anyway)
9. Once all the valves are installed, drop the ledges back into the head. Remember the lifter issue put the head on its side!
10. Use the Pelican Parts Cam Removal DIY to reinstall the cams.
11. You are now ready to install the head back on the block call a friend!
Last edited by hellrot325; 06-01-2005 at 12:48 AM.
[
Turner Perf Chip/Fan Delete/Sparco Strut Tower Brace/X-Brace/JTD Underpanel
Zimmerman X-D Rotors/Axxis Ultimate Pads/Solid Caliper Guide Bolt Bushings
UUC EVO3/DSSR SSK/3.15 LSD/Cosmos Racing CAI V2/ASC Delete
96+ M3 LCA/LCAB M3 RTAB and GC Shims
BMW OEM Alarm/Woodgrain Delete/Blizzaks baby!/16x7 BMW Style 30 Sport wheels
Member
Installing the Cylinder Head
Follow the Bentley procedures on installing the Cylinder Head starting on page 113-15, steps 1 thru 25 with the following enhancements:
Make sure to replace all old gaskets, washers, and rings as you go with the new ones provide in the kit. Here is a photo to help you identify them.
1- Valve Cover Gasket
2- Head Gasket
3- Timing Chain Cover Gasket
4- Spark Plug Hole Gasket (2)
5- Cylinder Head to Intake Manifold Gasket (6)
6- Exhaust Manifold to Exhaust Pipe Gasket (2)
7- Cylinder Head to Exhaust Manifold Gasket (2)
8- Water Pump O-Ring
9- ?
10- ?
11- ?
12- ?
13- ?
14- ?
15- ?
16- Oil Filter Housing Bolt O-Ring
17- Fuel Injector O-Rings (2 ea. x 6)
18- Valve Guide Seals (24)
19- ?
20- Sensor under the intake manifold
21- T-Stat Housing Seal
22- Coolant Fitting on back of head
23- Throttle Body to Intake Manifold Gasket
24- ?
25- ?
26- ?
27- ?
28- Vanos Oil Banjo Fitting (2)
[
Turner Perf Chip/Fan Delete/Sparco Strut Tower Brace/X-Brace/JTD Underpanel
Zimmerman X-D Rotors/Axxis Ultimate Pads/Solid Caliper Guide Bolt Bushings
UUC EVO3/DSSR SSK/3.15 LSD/Cosmos Racing CAI V2/ASC Delete
96+ M3 LCA/LCAB M3 RTAB and GC Shims
BMW OEM Alarm/Woodgrain Delete/Blizzaks baby!/16x7 BMW Style 30 Sport wheels
Member
Step 2: Unnecessary. Your machine shop took care of this issue.
Step 6: Use a protractor for the last two 90 degree torquing stages. Torquing these bolts takes tremendous effort and you will lose your reference points if you try to eyeball it. It's important that there is even torque in all the head bolts. I made my own with MS Paint and pressboard. Mark a line on your headbolt tool and align on the protractor. It’s all available in my tool rental. Again, the Bentley has the torque pattern, here is a better photo. I've attached the .jpg that you can save and print to make your own protractor.
Steps 8-22: Use the Pelican Parts Vanos/Cam Timing DIY and Valve Cover Replacement DIY for more complete information. Once completed turn the motor clockwise two complete revolutions to insure that a piston is not in the same place as a valve…I did it four times.
Step 23: I found that the exhaust would not line up with the manifolds easily, so I loosened all the nuts on the rear exhaust manifold to give it some play. I would suggest putting these nuts on finger-tight and tightening them to the final torque specification after the exhaust has been connected to the manifold.
Last edited by hellrot325; 02-20-2007 at 11:35 PM.
[
Turner Perf Chip/Fan Delete/Sparco Strut Tower Brace/X-Brace/JTD Underpanel
Zimmerman X-D Rotors/Axxis Ultimate Pads/Solid Caliper Guide Bolt Bushings
UUC EVO3/DSSR SSK/3.15 LSD/Cosmos Racing CAI V2/ASC Delete
96+ M3 LCA/LCAB M3 RTAB and GC Shims
BMW OEM Alarm/Woodgrain Delete/Blizzaks baby!/16x7 BMW Style 30 Sport wheels
 Posting Permissions


 Reply With Quote
Bookmarks