
 Member
10 hours. What a day.
I don't care what the "new thread Nazis" say, I am making a new thread for this one.
So, I replaced my first set of adjusters last week, and figured the 2nd time around would be a lot faster.
Boy, was I wrong. These are the $12 adjusters I used. They are a perfect fit.
First, I have a 2001 530i. The first set of headlights baked open with a few tries, and some patience.
Today, the lights just would NOT budge. I literally baked the lights about 8 times, and nothing.
I spent 2 hours baking and prying. All I did was dig into and kink the plastic with my pry tools.
I was at a stand still. I started to look up the 2002-2003 DIY's about not baking, but replacing from the outside ("ship in a bottle"). The low beam adjuster is visible from the outside of the bulb openings, but I rejected the idea, because it just seemed like a royal PITA. Also, the high beam adjuster is not even visible. This looked like a complete nightmare. In fact, physically impossible. Taking something out is one thing, being able to put it back is another entirely! At best, this job was only half possible.
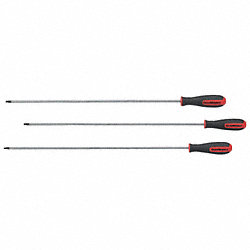
After sitting around a while, I decided to at least try replacing the easy adjuster using the no-bake method. At least I could mostly see both parts I was to remove and replace. One adjuster is better than nothing, and maybe it would help hold the lights up a little. The key was needle nose pliers. Mine just barely did the trick. That reminds me, I am going to order the longest needle-nose you can buy. These things are invaluable, and longer is better. I unscrewed the adjuster, it fell free, and fished it out with the needle-nose. At this point, it was like Operation. I was able to get the Torx screw on the ball socket, detach it, and fish that out also. The broken ball never comes out, and you need to drill it and shatter it. It took at least 15 minutes to get the emptied ball socket back into place using the needle nose. You just have to keep trying until it lands on the notch. Using tape to stick the Torx screw to the screwdriver was key to getting the screw back in.

At that point, I knew there wasn't a chance in hell to remove the other adjuster from the outside (Let alone replace it!) It seems physically impossible. You can't even SEE the high beam (angel eye side) adjuster's ball socket, let alone remove/replace it. I decided I was done, and snapped the first adjuster into the socket. One adjuster has to be better than none. Oh well. I couldn't believe this damn thing didn't bake open.
After relaxing for a while, I started looking inside the headlight again. I was really bummed out that I would have to 1/2-ass this headlight. The roof above the hidden adjuster seemed unobstructed. I decided cutting a hole in the top would probably make it a lot easier to replace the 2nd adjuster. I figured I had nothing to lose. Worst case, I just duct tape it closed after failing. I dug out my soldering gun from the closet. Note to self: Add Rotary Cutting Discs to HarborFreight shopping list.
So I made that cut. Unfortunately, I had made the mistake of already attaching the first adjuster. The result is that it's impossible to move the lens around enough to give you room to install the 2nd adjuster, and to remove/replace the ball socket (which has the old broken ball still in it) So, I had cut open a hole for nothing. The adjuster and ball socket are just too close to each other to have room to unscrew the adjuster. You really need to remove the ball socket first, but you can't get a Torx driver anywhere even close to that ball socket screw, even though you've cut a hole and can see it.
There was NO room in here. I did not see how you could possibly remove the adjuster. I started screwing the adjuster all the way in, and then all the way out. Nothing. If you unscrewed it all the way out, it would hit into the ball socket before being able to come free. Again, I could not remove the ball socket b/c the ball socket's Torx screw was IMPOSSIBLE to reach. The screw is much lower than it appears it the photo above.
So, I just stared and this for a long time, dejectedly. It was tough to SEE the adjuster right there, yet having absolutely no way or removing it. I just sat and flapped the reflector housing back and forth, which is what you do once you understand what broken adjusters are all about.
As I pushed the reflector housing back and forth, I thought maybe it I cut some more, I could raise the ball socket up and out of the housing entirely, making room for removing the adjuster ??
Unfortunately, something else was hitting the roof, and I could not move the ball socket above the plane of the headlight, and out of the way to remove the adjuster. I then looked inside and decided to cut away as much as I could. I knew I was cutting away one "track" that the adjuster sits on, but I knew it only needed the bottom one for any support, if that. I was desperate. I'm not sure what I was even looking for. I thought maybe I could lift it directly up and out? That is the 2nd incision you see above. Below is the larger cut away.
Once I was looking at this, I still was unable to do anything. You can also see the old ball stuck in the ball socket, and I could not unscrew the adjuster out.
I decided to unhook the self-adjuster motor (to give more play to the entire reflector housing), so see if this would give me some leeway in creating more room between the adjuster and the ball socket. I was leery of detaching the motor, b/c I feared not being able to reseat the joystick ball with the reflector lens already attached to one adjuster, and having limited mobility. It was hard enough getting the joystick reseated last week when the entire assembly was apart. Oddly, I was able to twist the housing and pull it on and off the channel easily. (What took 30 mins last week now took 5 seconds) So, I removed the motor, but it did nothing. There was still no way to access the ball socket Torx screw.
Then, I had the idea of simply using a drill to shatter both pieces to bits right in place! Forget removing them, if I just shattered them both, maybe I could somehow install the adjuster? This also solved the impossibility of removing the ball socket Torx screw (which I still contend is physically impossible).
So, I got the drill and smashed the adjuster to bits !
I also shattered the remnant in the ball socket !
I had to shake and blow all the white bits out.

With the adjuster gone, only the screw remains. Next, I tried to put in the adjuster but it just wouldn't fit...It was too long to fit this way. It was never meant to be installed this way. It was meant to be installed straight on, from the inside. The carved opening was not big enough. I was soooo close, yet so far! So, I carved out a little more, to allow for the ball to pass. (See red circle)
Now, if I pushed away the ball socket I could almost get the adjuster to lay flat! However, it wouldn't lie flush. It barely cleared the extra notch I just cut away.
The adjuster was at like a 30 degree offset from the screw.
But, was it close enough to get it threaded, so it could pull itself back into place???
I would have to risk misthreading it, but this was my only hope.
YES! The threads caught after a few tries and it started pulling itself back into the channel !
It just barely fit. There was almost no room anywhere. I still can't believe it worked....
Here it is after I tightened it about half way.
Once it was threaded back into the channel, I then turned the socket the other way, which then pushed it forward into the ball socket.
I couldn't believe it all came together.

I literally was doing this
To seal it, I put a layer of duct tape, and then overlaid with electrical tape.
All 4 adjusters are now replaced !
Big lessons here:
1) 2001 Hellas do not all bake open. Or, maybe this headlight was replaced with a post-2001 Hella. (It was less pitted than the one that did bake open easily)
2) DO NOT attach the first adjuster when it's done. Leave everything detached.
I still contend no one will R&R the 2nd (high beam) adjuster via the "ship in bottle" method, but it is doable via the "cut a hole" method
If my adjuster was not prematurely reattached, maybe I would have been able to unscrew that god damned ball socket. Who knows.
3) You can consider the option of not removing the ball socket or adjuster, and just blasting them in place, with a drill.
This was, by far, the hardest DIY I've ever done.
The main reason was that I had to forge my own way, and figure it out, as I went.
This was very different than just following steps in a recipe.
No existing DIY worked. (I was unable to bake open, and I do not believe it's physically possible to remove the 2nd adjuster without a hole)
Had I not done the bake-open last weekend (and known exactly what's going on inside the assembly), there's no way I could have done this.
On a side note, while I had the headlight out, I sanded the lens. Here is how to make it look like new: 600, 800, 1000, 1500, 2000, 2500 grit sandpaper. This takes out all big scratches, and leaves many small tiny scratches...A scratchy haze..... THEN, you need to polish the hell out of it with a high speed drill and plastic polish compound for about 7-10 mins.
Here are some pictures:


Last edited by OnTheFence; 12-09-2015 at 10:19 PM.
E39 DIYs done: Wipers, O2 sensors , MAF , Upper/Lower Intake Boots , FSU , ABS module fix , Power Steering Reservoir , Changed Rear Differential Oil , DISA , SAP, Vacuum lines , Radar Detector Hardwire , Fuel Filter , LED Angel Eyes , Headlight Adjusters--> [1],[2], [3] , Headlight Polishing, Punted: Fan Clutch/Tensioner/Pulleys , Oil cap O-rings , Window regulator ,Crumbling Cowl
Member
Congrats!
I've been reading through your pain.
Just ordered myself a set of adjusters...let the madness begin
BMWCCA 484984
Thank you for taking the time to post this up. It will help anyone planning on trying the DIY.
Clear cover looks new.Sweet.
Edit: Did you save the pieces you cut out? Why not solder them back in place like in the one DIY? It's not the prettiest thing in the world, but it would be sealed better.
http://www.m5board.com/vbulletin/e39...some-pics.html
Also, I believe the author of the DIY shortens the adjusters to make installation easier. Note the authors attitude.
Originally Posted by Raf0419

Last edited by jamesdc4; 04-02-2012 at 10:24 AM.
Member
Fence, I suppose there are numerous ways to cover/hide that hole but note that these housings are black ABS. You can get the stuff from remnant stock at local plastics suppliers in assorted sheets/thicknesses and cut to size, glue on with the black ABS cement that plumbers use for ABS piping, and it will be air/watertight and at least look better than tape.
Did this take care of the grinding noise you posted about in your other thread?
Member
Bummer you had to take a drill to the bimmer but hey it works now right? I'm assuming you are a large handed person? The 2003 non-bake adjuster replace looks like it favors small hands.
+1 to what pleiades said, the tape might not be secure forever, and the plastic sure will look nicer when you pop the hood or if you ever (gasp) sell it.
Was fun to read, glad you got your lights polished nicely.
Last edited by aspensilver540; 04-02-2012 at 12:34 AM.
Member
Hands are completely irrelevant. No hands can remove the 2nd adjuster in the no bake method. Again, you can't even SEE the F'ing ball socket. I couldn't even remove the ball socket WITH A HOLE CUT OPEN! Even with a hole, I would have needed to have a 90 degree angle in my screwdriver. I have a feeling the no-bake, no-hole method has a different internal configuration than my 2001 lens. It was literally impossible to do. The only way I could see it possible is if you had a micro-thin super-long Torx driver to slip between the 4 thick Angel Eye cables, which do not budge one bit.
No, it's still there. However, with the boot in place, and the hood closed, I can't hear it. So, maybe it was always there. Next step is to align the lights. I will see if that takes care of it.
Last edited by OnTheFence; 04-02-2012 at 01:44 AM. Reason: Automerged Doublepost
E39 DIYs done: Wipers, O2 sensors , MAF , Upper/Lower Intake Boots , FSU , ABS module fix , Power Steering Reservoir , Changed Rear Differential Oil , DISA , SAP, Vacuum lines , Radar Detector Hardwire , Fuel Filter , LED Angel Eyes , Headlight Adjusters--> [1],[2], [3] , Headlight Polishing, Punted: Fan Clutch/Tensioner/Pulleys , Oil cap O-rings , Window regulator ,Crumbling Cowl
Member
You're lenses look great! Good job!
'17 BMW 330i XDrive MSport Touring
'20 BMW R 1250RS Imperial Blue Metallic-Exclusive
'02 BMW Z3 2.5i Titanium
official
wow, that's a heck of a job you did there.
Like i said before, with this much labor involved, it probably would have been smarter to spend a little more & use aluminum adjusters, but oh well.
Member
but this increases the chances of getting to play Operation again in 5 years!
Member
Did you ever read the DIY for the no bake honestly? It clearly states you need a LONG torx driver to do the job. 2001-2003 headlights have the exact same internals for Xenon so yours are no different than the DIY. Maybe you should have sent yours out to some one that could/has done the job with no issues next time. BTW lens look good.
You ask any ricer, any serious ricer. It doesn't matter if the other guy is racing or not. A win is a win.
Member
I can't believe you kept on saying it's impossible to get it done without baking the headlights when clearly, somebody have done it before and even posted the DIY. I think you just need to sit back and relax instead of aggravating yourself in doing these stuff when it's clear that you lack the common sense and patience which are prerequisite in working on something you hardly have an idea on.
Just pay somebody to do everything for you.
Status Quo!
Lol you bring common sense and general knowledge into this thread? You got jokes. The problem with OTF is that he does not want to spend anything but the bare minimum.......if that. Will destroy car parts before he pays someone to do it correctly. I dont mind a person trying but I do not like his Bs about the DIY's not being proper and lacking detail. Also saying that things are impossible to do when they have been well documented in the past. This is a noob coming onto this forum for the first time, worst nightmare.
Sometimes i wonder if OTF has ever played with a jigsaw puzzle or building blocks when he was a kid. Perhaps some lego?
Another FP5241 Creation
Parting out M54 Engine. Intake and all. Cats avail as well. PM ME!
Member
Just b/c there is a DIY written, doesn't mean anyone actually can do it.
I can guarantee you that the number of people who were able to R&R the high beam / angel eye side adjuster is few and far between.
For anyone that does attempt it, this is a requirement.
E39 DIYs done: Wipers, O2 sensors , MAF , Upper/Lower Intake Boots , FSU , ABS module fix , Power Steering Reservoir , Changed Rear Differential Oil , DISA , SAP, Vacuum lines , Radar Detector Hardwire , Fuel Filter , LED Angel Eyes , Headlight Adjusters--> [1],[2], [3] , Headlight Polishing, Punted: Fan Clutch/Tensioner/Pulleys , Oil cap O-rings , Window regulator ,Crumbling Cowl
Status Quo!
The number who actually accomplished it is pretty high. I have been here long enough to see the outcomes. The number of people who have attempted this AND made it into an issue this big is indeed few and far between.
Another FP5241 Creation
Parting out M54 Engine. Intake and all. Cats avail as well. PM ME!
Member
Bare minimum? LOL, I have literally spent thousands on dollars on this car in under 4 months, and most of those dollars did not need to be spent.
I don't need to justify anything to you, but I am doing this to learn something new.
If I wanted a reliable car without issues, I would be driving a Honda, like I have for the last 20 years.
I was going to let this go, but since you continue to troll my threads while adding nothing, let's explore how Gumbi feels about us.
The real problem is that you detest the people who take the time to learn to DIY.
(Us being people who use forums to learn about cars and have the courage try DIYs at home, with no mentoring, training, or professional garage)
Now, please go away and allow me to learn about BMW's in whatever capacity I can, in peace.
You don't need to read my posts. Just block me, please.
Having a "professional" mechanic harassing me doesn't help. In fact, it's pathetic.
Are you an expert at anything besides cars? I can virtually guarantee you're not.
Last edited by Gumbi4u; 04-02-2012 at 09:27 AM.
E39 DIYs done: Wipers, O2 sensors , MAF , Upper/Lower Intake Boots , FSU , ABS module fix , Power Steering Reservoir , Changed Rear Differential Oil , DISA , SAP, Vacuum lines , Radar Detector Hardwire , Fuel Filter , LED Angel Eyes , Headlight Adjusters--> [1],[2], [3] , Headlight Polishing, Punted: Fan Clutch/Tensioner/Pulleys , Oil cap O-rings , Window regulator ,Crumbling Cowl
Status Quo!
BTW I too went through this but within 30 minutes, I knew it would not work. I didnt butcher my lights. I sent them out to a person who knew what he was doing. Now they have aluminum adjusters and it only cost me 150. I retained my resale value on these lights and if anything, padded the value since it has permanent adjusters. The lights look great. What you have done, is destroy those lights. Please note Im not talking you down. Im just being honest. Those lights are finished. You will get condensation, they will never sell for what they could have. I would have sold those lights and grabbed a set of dj auto lights and called it a day. Yes I understand that no one can see the work when the hood is closed. I cant sleep if something like that resides under my hood. Half assing it is just as bad as assing it completely
.
Another FP5241 Creation
Parting out M54 Engine. Intake and all. Cats avail as well. PM ME!
Status Quo!
For the record, I only detest people who take other's DIY's that they have spent so much time putting together, and you coming in and criticizing it.
Last edited by Gumbi4u; 04-02-2012 at 09:28 AM.
Another FP5241 Creation
Parting out M54 Engine. Intake and all. Cats avail as well. PM ME!
Member
This is my daily driver. I don't have the luxury of sending the lights out.
Also, like I said above, if I wanted to send work out, I'd still be driving a Honda.
I'm not worried about resale. I am driving this car until it dies.
The headlights will now operate better with new adjusters. I don't mind a little tape.
Did it suck that the 2nd headlight didn't bake open like the first? Yes.
But, I did what I had to do to get the job done.
Also, headlights are not sealed units. I've been driving with my low beam rubber boot completely off for at least a month. No condensation.
I have seen other DIY's where they cut it open, so time will tell.
But, what I might do is reinforce that decomposed top rubber gasket with a thick foam strip. **
Next time I drive in the rain, I will see if any water is currently getting past it and onto the taped area. *
If so, I will add the foam strip to block water coming in from the front.
What's the market demand for a set of Hellas with pitted lenses and busted adjusters? Broken Hellas may be a dime a dozen as all E39s have them.
For my purposes (driving at night), I think I've added value. Clear lens and fixed adjusters. And if they break again, I know how to replace them.
Last edited by OnTheFence; 04-02-2012 at 09:59 AM. Reason: Automerged Doublepost
E39 DIYs done: Wipers, O2 sensors , MAF , Upper/Lower Intake Boots , FSU , ABS module fix , Power Steering Reservoir , Changed Rear Differential Oil , DISA , SAP, Vacuum lines , Radar Detector Hardwire , Fuel Filter , LED Angel Eyes , Headlight Adjusters--> [1],[2], [3] , Headlight Polishing, Punted: Fan Clutch/Tensioner/Pulleys , Oil cap O-rings , Window regulator ,Crumbling Cowl
BMWCCA 484984
OTF,
Were you not aware of the DIY I added in post #3 above? Raf0419 from the M5 board posted the difficulties and solutions to the procedure.
Last edited by jamesdc4; 04-02-2012 at 10:28 AM.
Member
Word.
There are some things some people just should not do.
"On The Fence" [OTF] is one of those people that falls into that case...
I appreciate the incentive and urge, but when you start cutting up 2001 headlights, things need to stop IMO...
In fact, I really think OTF should not own any BMW, or E39.
Just my opinion...
Last edited by Jason5driver; 04-02-2012 at 10:45 AM.
Looking for an E39 belly pan , passenger front inner fender liner
Member
OTF, there is a huge difference in trying the proven DIY compared to just saying it is "impossible" to get it done the way it was written. With that being said, you already failed even before starting. The DIY James posted works because I just did it on my 2003 530 that has the sealed lens. I contemplated about using my heat gun to separate the lens from the housing bunt I didn't do it because I saw the DIY which doesn't require baking the lens. It works for people like me who have a bit of common sense and patience in getting the job done. I approached it with positive outlook because if somebody can, I can do it also or at least try it the way it was written.
Now I know you failed because you didn't have the long torx screwdriver which greatly helped in completing this DIY. Anyway, keep on charging!!!!!
Member
You can buy new rubber gaskets for the headlights at the dealer.
And, actually, used Hellas with broken adjusters still fetch a pretty penny IMO...
Looking for an E39 belly pan , passenger front inner fender liner
BMWCCA 484984
+1
Member
That is correct. If I intended to do the sealed method, I would have bought the long Torx ahead of time. I started headlight #2 with the intent of baking it open, just like I did with #1 last week. When it didn't give, I had to try something else. That's why I looked at plan B, but with no long Torx. That said, I still don't think a long Torx would have worked on mine, b/c the Angel cables were frozen solid. Like I said before, hats off to anyone who can pull off the sealed method. You should have been a surgeon. No way I could have done it. Hence, plan C of cutting it open.
I also knew that if I somehow ruined the headlight, I can just buy a new one. But, if I wanted a reliable car, or to just send everything to a mechanic, I'd still be driving a Honda. My time is not cheap, so I consider DIY a very expensive hobby. For 10 hours of my time, I could just as well have bought a brand new set of headlights, when factoring in my opportunity cost. Like I said, this is all for learning about cars, and trying some DIYs.
Last edited by OnTheFence; 04-02-2012 at 11:05 AM.
E39 DIYs done: Wipers, O2 sensors , MAF , Upper/Lower Intake Boots , FSU , ABS module fix , Power Steering Reservoir , Changed Rear Differential Oil , DISA , SAP, Vacuum lines , Radar Detector Hardwire , Fuel Filter , LED Angel Eyes , Headlight Adjusters--> [1],[2], [3] , Headlight Polishing, Punted: Fan Clutch/Tensioner/Pulleys , Oil cap O-rings , Window regulator ,Crumbling Cowl
Member
I guess you need to go back to driving a Honda before you drive yourself crazy doing the DIYs.
 Posting Permissions


 Reply With Quote


Bookmarks