
 Jordan
Visit my website where you can find all of these write-ups and more at:
Bmwz3diys.weebly.com
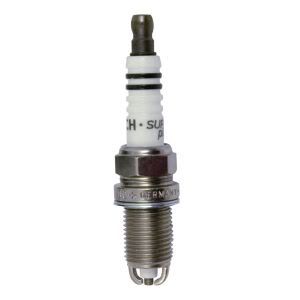
Supplies:
· 4x Bosch Copper Super+ Spark Plugs [7402]
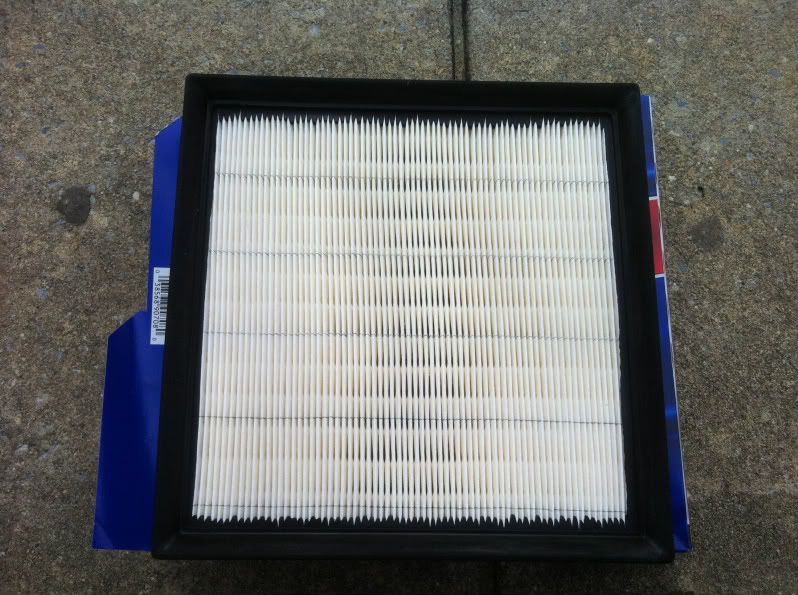
· BMW Air Filter [13721247404]
94038_x600.jpg
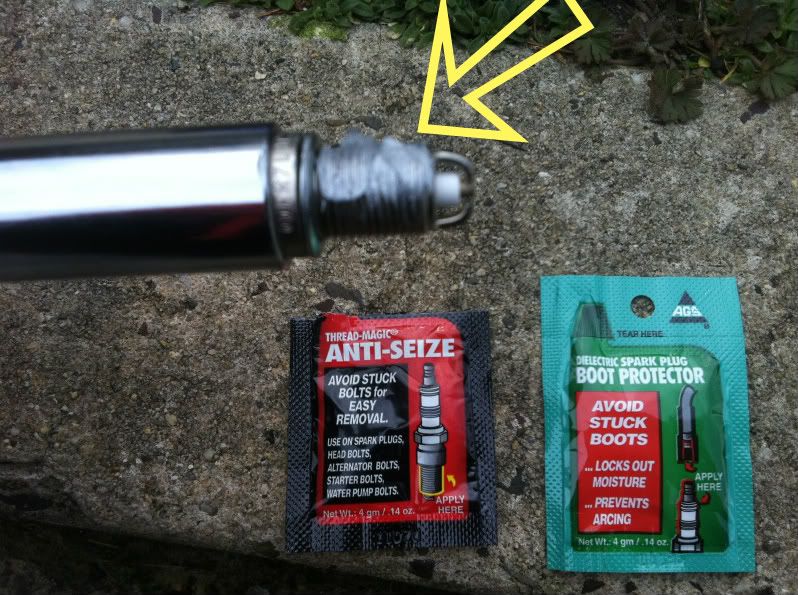
· Anti-Seize and Boot Protector(di-electric grease)
· 3/8 Socket Wrench with long extension
· 5/8 Magnetic Spark Plug Socket
· Flat Head Screw Driver
· Shop Towels
All Supplies can be bought from your local AutoZone. [Part Numbers]
--------------------------------------------------------------------------
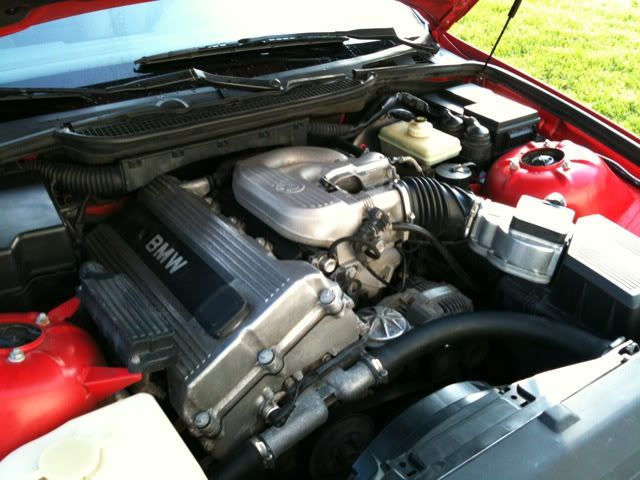
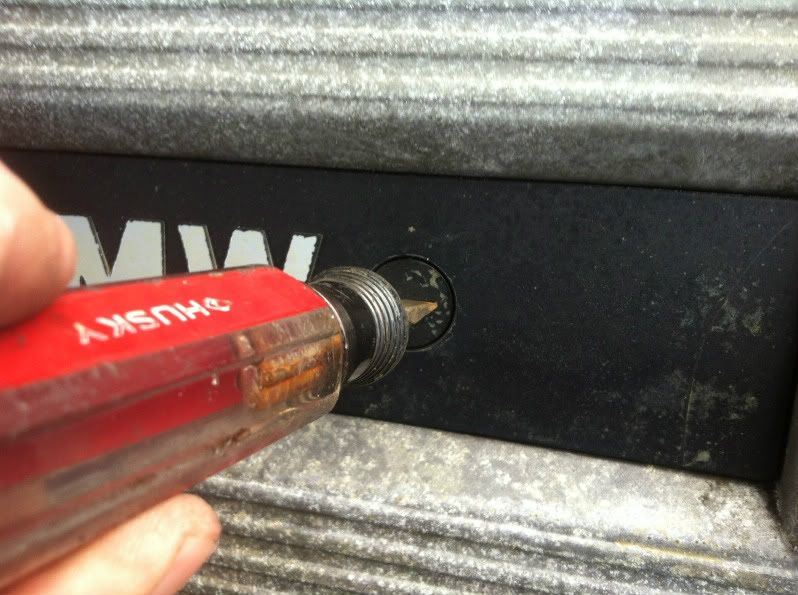
Step 1:
Use a flat head screw driver to take off cover. Turn until parallel
--------------------------------------------------------------------------
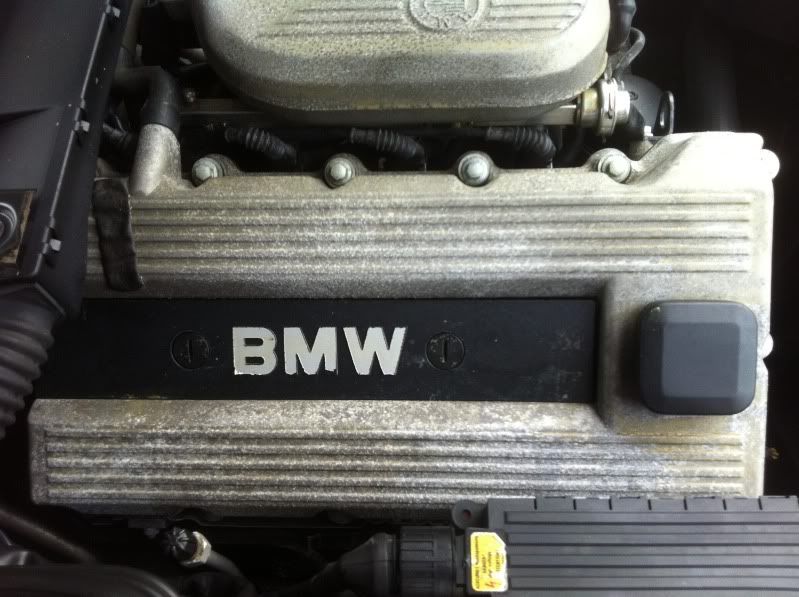
Step 2:
Remove cover to expose plug wires.
--------------------------------------------------------------------------
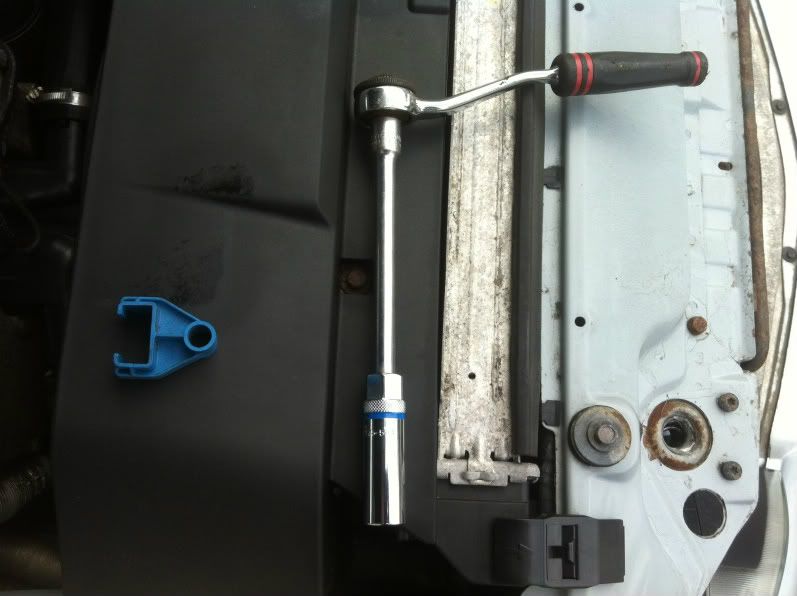
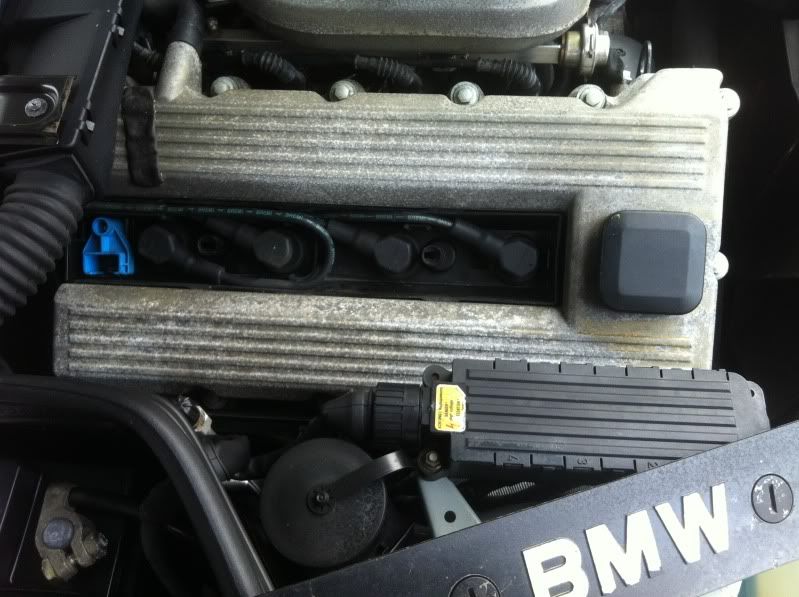
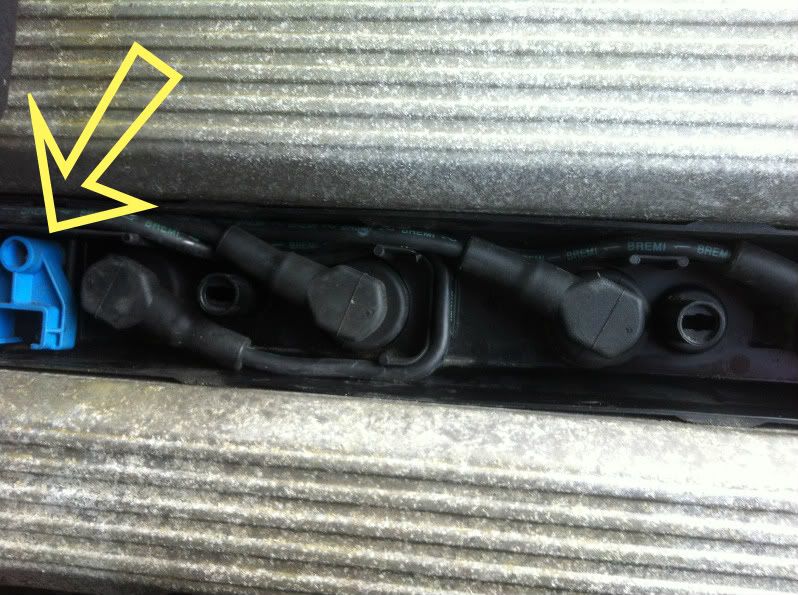
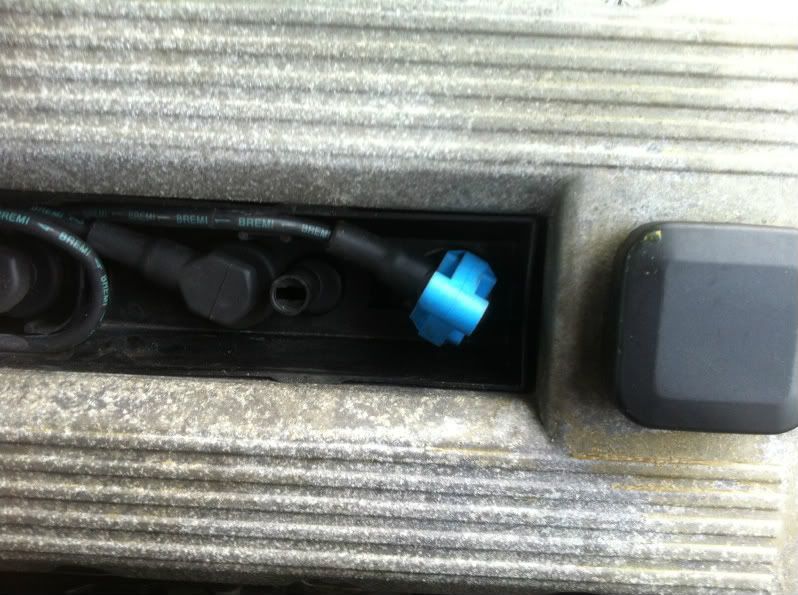
Step 3:
Take blue tool and use it to pull plug boots.
--------------------------------------------------------------------------
Step 4:
Insert Wrench with extension and plug tool, turn to the left until plug is loose and remove.
--------------------------------------------------------------------------
Step 5:
Wipe out the inside of plug tubes with a towel.
--------------------------------------------------------------------------
Step 6:
Get a new plug and apply anti-seize to it.
--------------------------------------------------------------------------
Step 7:
Insert the plug back in tube and turn to the right until hand tight.
--------------------------------------------------------------------------
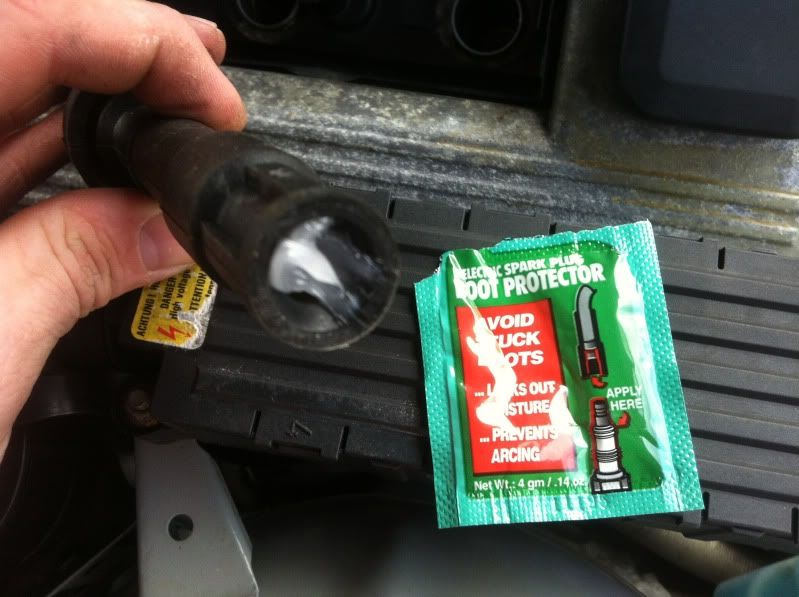
Step 8:
Apply Boot protector to Spark Plug Boot.
--------------------------------------------------------------------------
Step 9:
Re-insert plug boots in proper order, it will look like this when done.
--------------------------------------------------------------------------
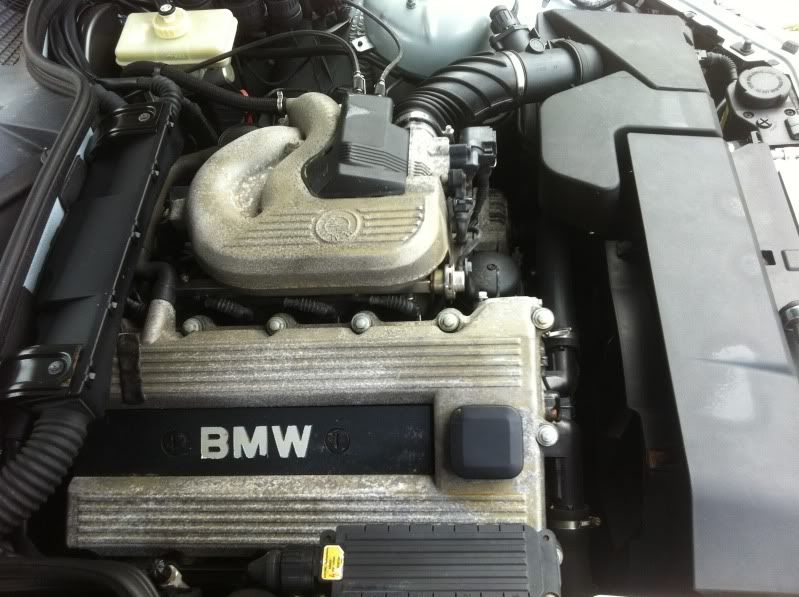
Step 10:
Re-install cover and turn nuts to right so they are horizontal.
--------------------------------------------------------------------------
Air Filter Install:
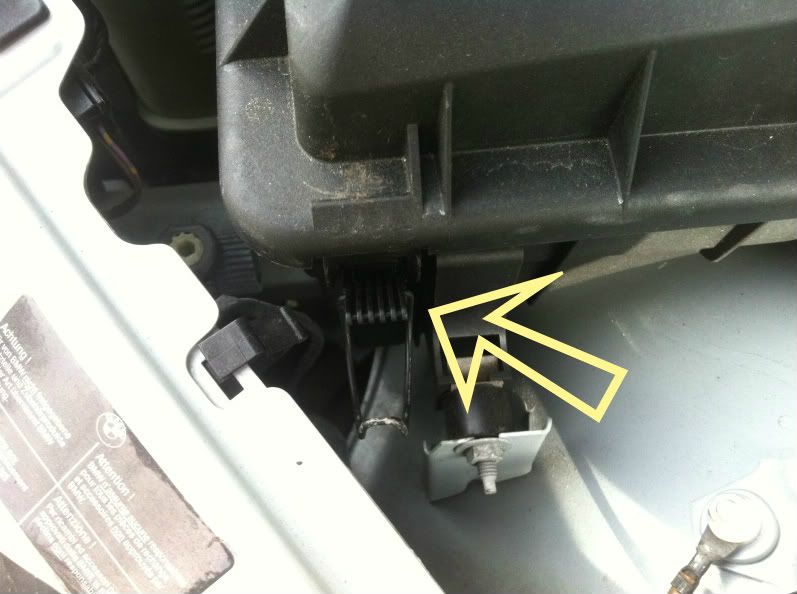
Step 1:
Flip all tabs up. There are 4
--------------------------------------------------------------------------
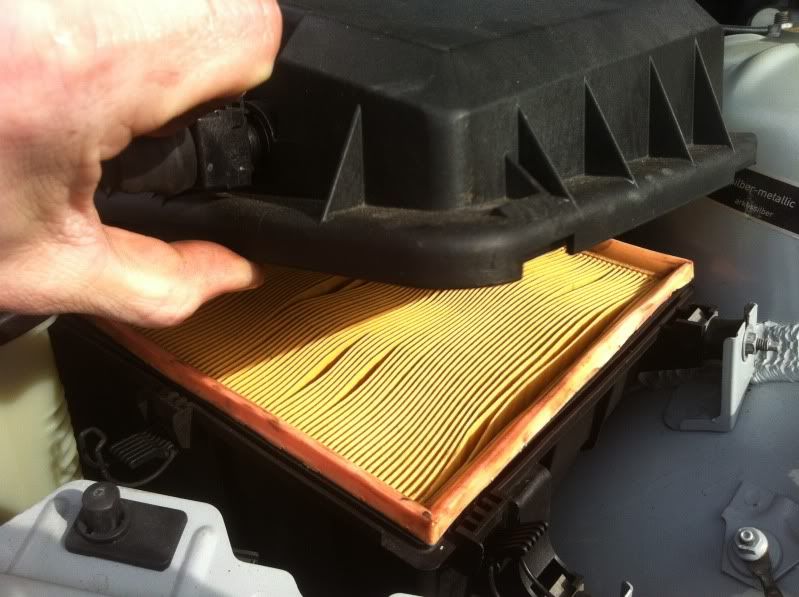
Step 2:
Lift box carefully to expose filter.
--------------------------------------------------------------------------
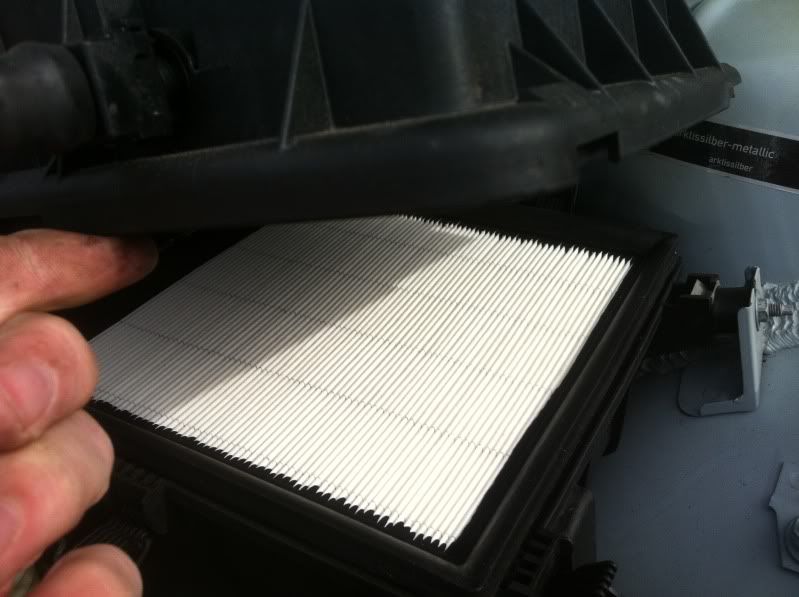
Step 3:
Remove filter.
--------------------------------------------------------------------------
Step 4:
Get a new filter and install.
--------------------------------------------------------------------------
Step 5:
Re-seat the top cover and reapply the clips.
--------------------------------------------------------------------------
Next Write ups:
-Valve Cover Gasket
-Fuel Filter
-Oil Change
Last edited by KillerSE7EN; 03-31-2013 at 10:16 PM. Reason: Automerged Doublepost
-Seth
Nice write up!
Will be helpful for both the experienced and the new.
1.9's are documented far and in between.
Speed has never killed anyone.... Suddenly becoming stationary, thats what gets you. - Jeremy Clarkson
Supercharged
Member
Just FYI, there are lots of M44 DIY writeups at 318ti.org.
11 128i Space Gray slicktop
13 WK2 Deep Cherry
Member
Nice... you need to polish that engine. it could look like this:
2001 Z3 3.0i -Oxford Green/Sandbeige
2016 428xi -Estoril Blue II/Black
2018 430iC- Estoril Blue II/Black
2018 330it - Melbourne Red/Venetian Beige/Black
screwed member
Originally Posted by amancuso

Al, is the M oil filter cover A direct fit or did he change the housing?
2011 Z4
2010 MB GLK 350
2000 M Roady
1998 Lincoln Mark VIII LSC
1996 Z3
Jordan
WOW! what did you do to get your engine like that?
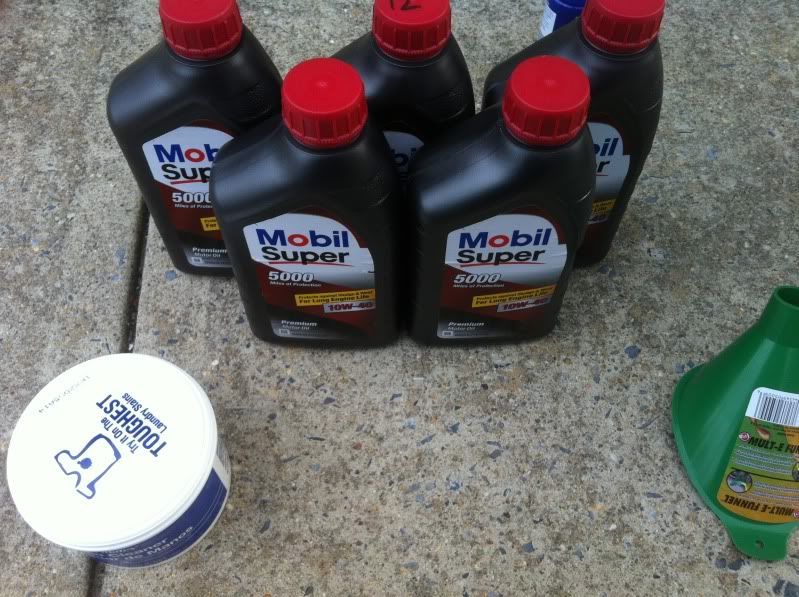
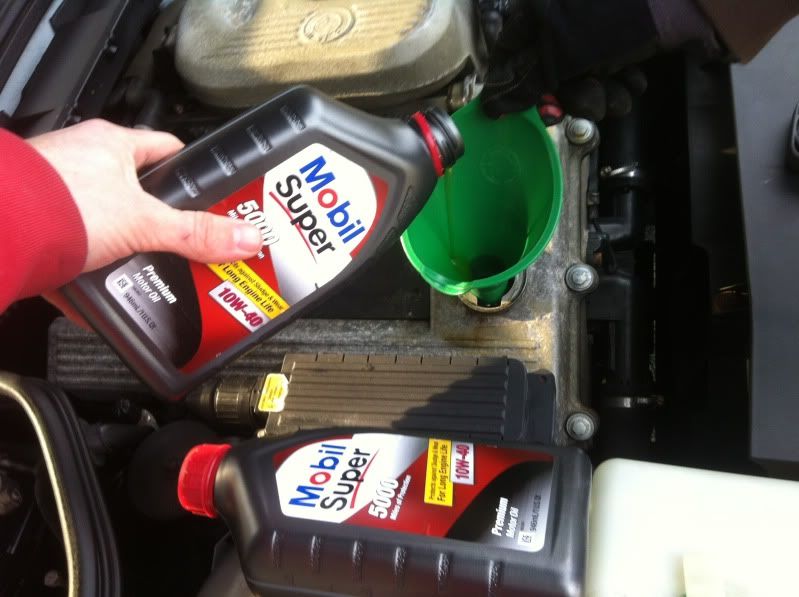
Oil change supplies:
- 5.3 Quarts of your favorite oil [Mobil 5000]
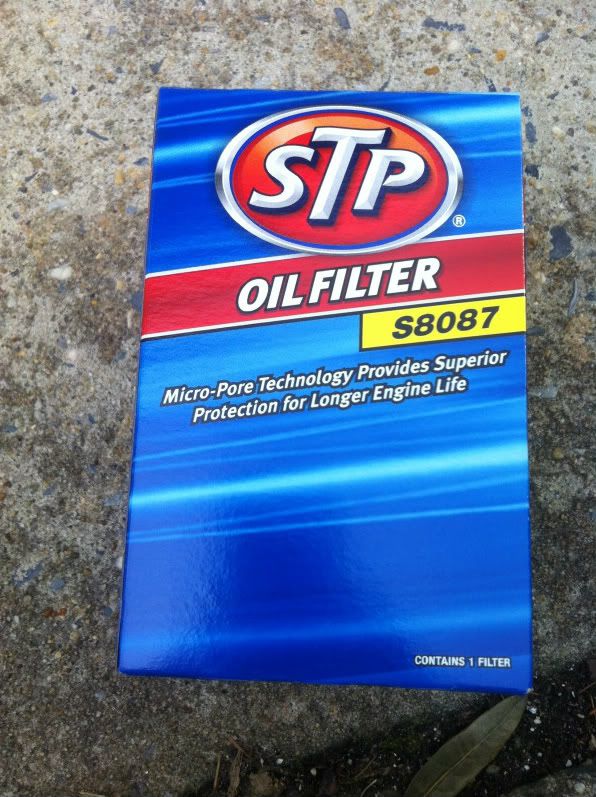
- Oil Cartridge Filter [S8087]
- Oil Filter Chain Wrench [25078]
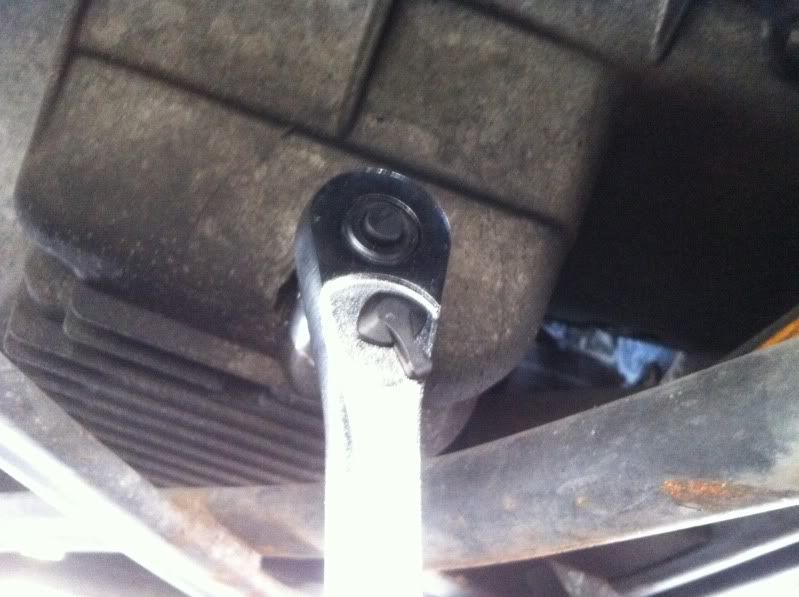
- 17mm Socket and 3/8 Wrench
- Oil Funnel [05009]
- Oil pan [at least 7qt]
- Rhino Ramps
I used a 10w-40, but others can be used such as 15w-40, 5w-30.
Car must be either jacked up using a solid part of suspension or driven up onto ramps.
All Parts can be purchased at Autozone. the oil was on sale and the drain pan, funnel, hand cleaner, oil pan, shop towels were 5$ with the purchase of oil.
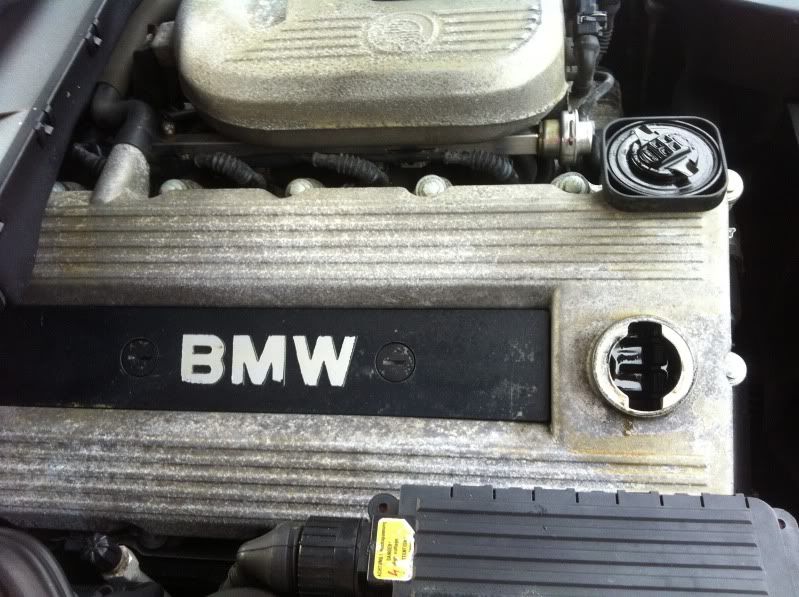
Step 1: Remove oil cap from engine cover.
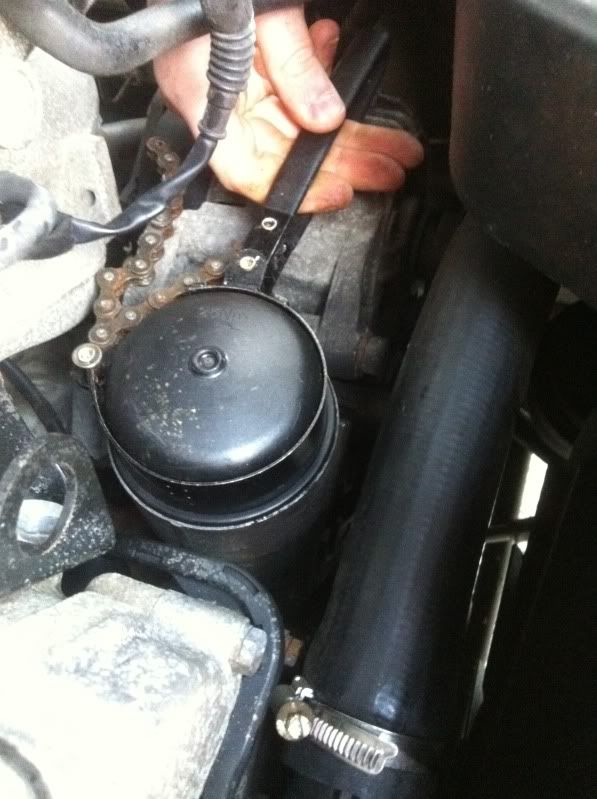
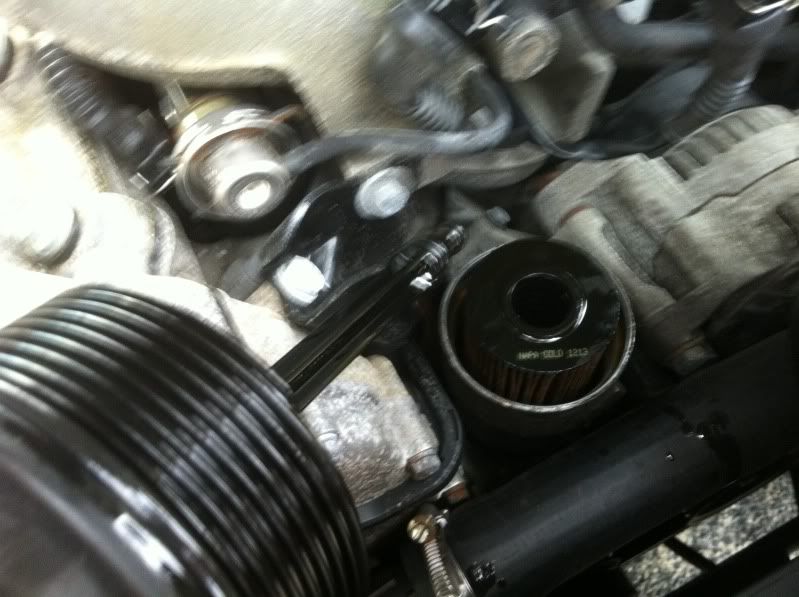
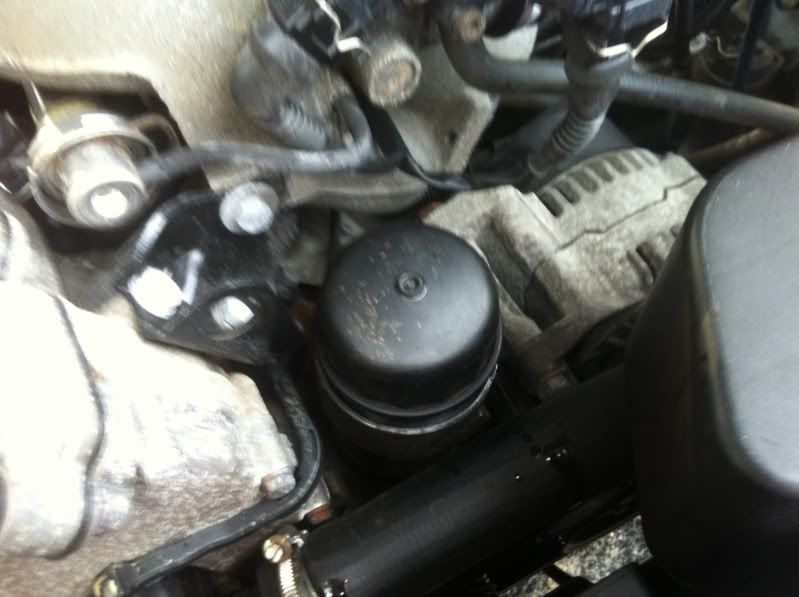
Step 2: Loosen Oil Filter Housing Cap using Strap wrench/ Chain wrench.
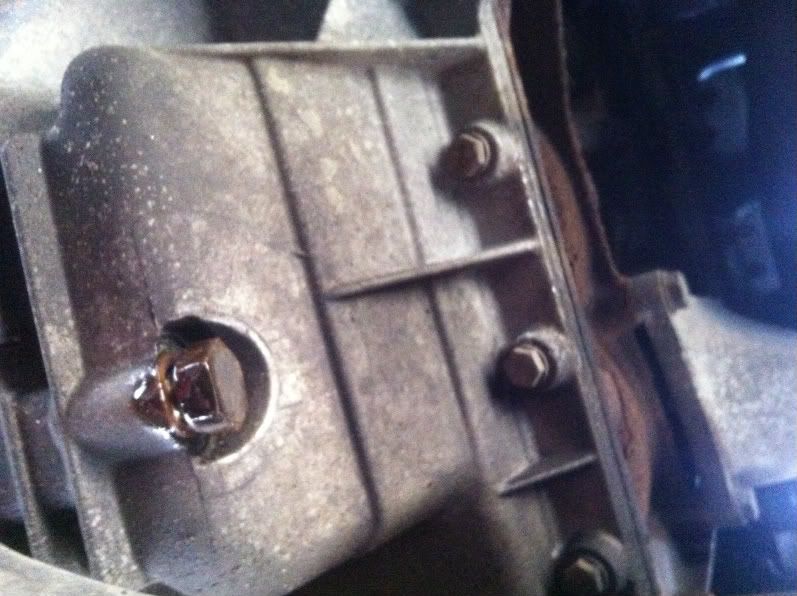
Step 3: Locate the Oil pan drain plug, go under the car and you'll see a bar making an X shape, the bottom of the oil pan is located directly above this.
You will see a bolt on the side of the pan facing the passenger side, this is the oil drain plug.
Step 4: Use a 17mm socket and wrench to break the bolt.
Step 5: Let the oil drain completely into the pan.
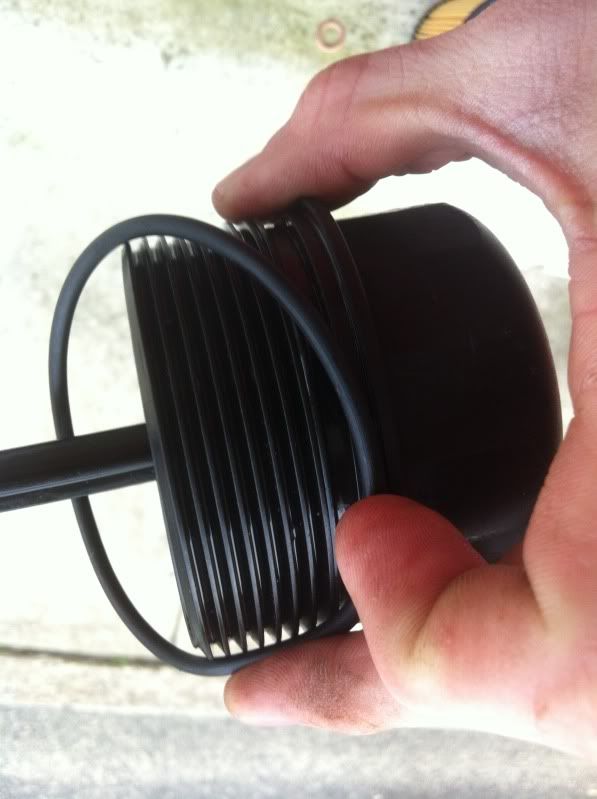
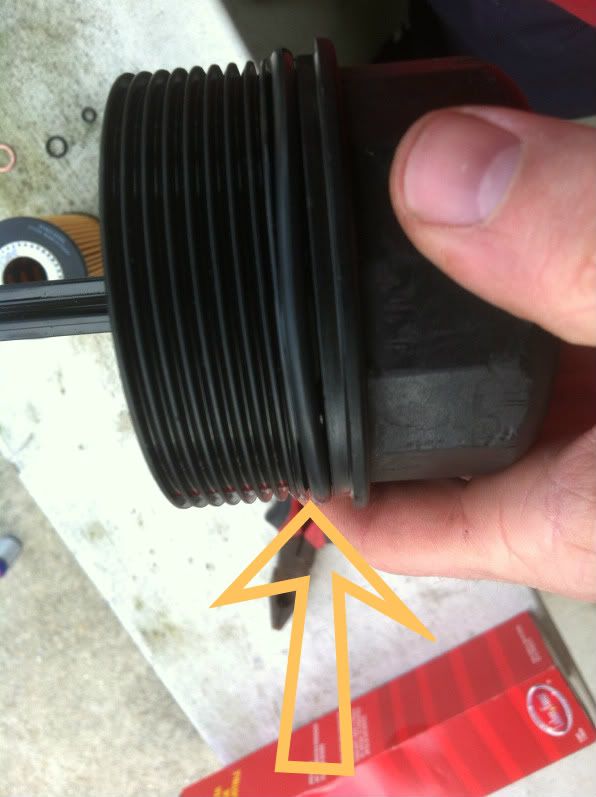
Step 6: Remove the Oil filter lid.
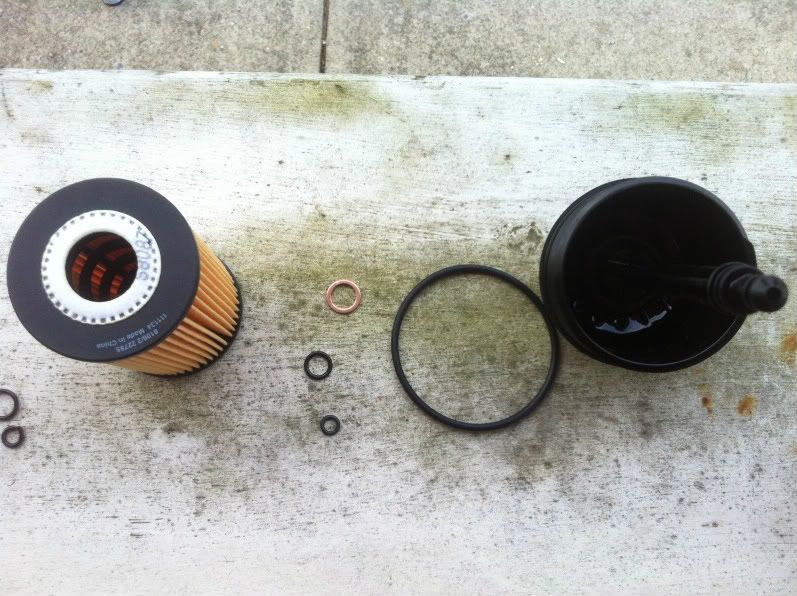
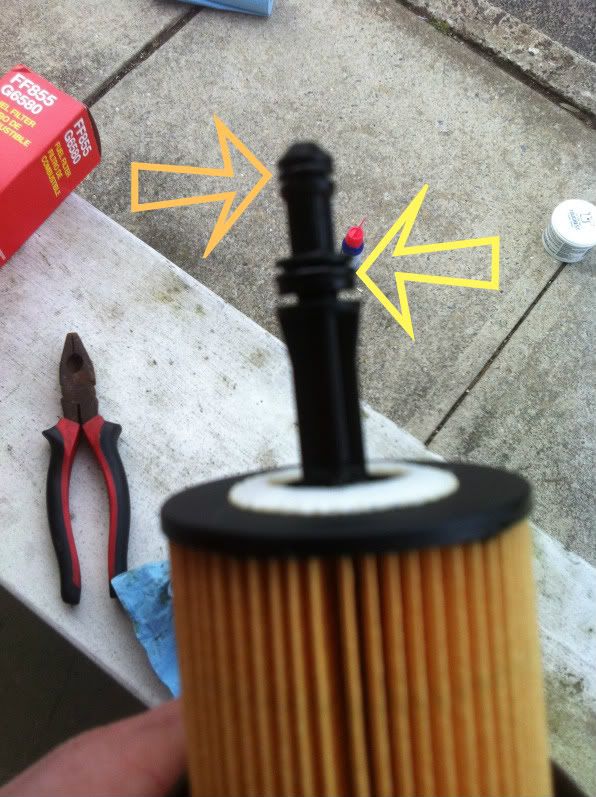
Step 7: Get the new gaskets and filter ready.
Step 8: Cut the old gaskets off. Install the large gasket onto the cap itself.
Install the two smaller gaskets on the two slots on the stem.
Step 9: Re-install the new filter and re-tighten the cap using the wrench. Put the new washer on your drain plug and hand tighten it into the drain pan with the wrench.
Step 10: Put the oil funnel into the valve cover and fill your car with new oil.
Put back on your oil cap and check your dip stick after letting the car onto level ground.
Next write ups:
-fuel filter
-Valve cover gasket
-HID Installation
-LED Bulb installation
Last edited by KillerSE7EN; 04-13-2012 at 10:50 AM. Reason: Automerged Doublepost
Member
Can Anyone add to this or no
98 Roady M44
* Auto to 5 Speed Swap
* 3.73 LSD Diff swap
* e46 330i Staggered Wheels
* H&R Springs & Sways with Bilstein Sports
82 320is
* 5-speed, LSD, Recaro Seats & Completely Stock
Jordan
Of course, I'm just adding diys as i do them, anyone who wants to make a DIY for this thread is welcome. Let's just make sure were not all posting the same ones haha
Btw id like to see a write up on getting our engines polished
screwed member
You should really use the tool that fits over the cap. Will post pic for you tomorrow.
2011 Z4
2010 MB GLK 350
2000 M Roady
1998 Lincoln Mark VIII LSC
1996 Z3
Member
http://www.318ti.org/forum/showthread.php?t=27719
11 128i Space Gray slicktop
13 WK2 Deep Cherry
Member
I know most of us know how to change our oil, but I'll add just for a beginner:
You should run the motor for a bit (<1 minute) to fill the oil filter housing before checking the level.
-Todd
I'm Dez btw :)
Nice of you to take the time to do this. In the future, pour your quarts with the neck up so you don't have to play with funnelsYou can pour from 1' up and never spill a drop.
Yes you do because how else are you going to apply the correct torque value re-installing it so it doesn't leak??
Last edited by RemedialMoFo; 03-05-2012 at 09:30 PM. Reason: Automerged Doublepost
"Dezmar, your hood has an airfoil. The scoop is raised and it forms an airplanes airfoil. This knocks out the top atoms and allows the bottom atoms to Lift!! You will loose your hood on the highway and hit another car, causing it to crash and someone will Die! (I took it off)"
Jordan
Why thank you haha good luck getting me to part with my oil funnel
Member
I just picked up an oil filter cap tool that fits the 1.9 at AutoZone for $6. As mentioned you need it for proper torque!
Jordan
do you happen to have a part number for that filter? and what are the torque specs if anyone knows
Member
Interested in the part# or photo of the 1.9 oil filter cap also.
Member
74mm, 14 flute, same as for a Toyota 3.4L OE oil filter
Last edited by Monolith; 03-08-2012 at 11:28 AM.
Member
Not only is the oil filter cover different but the thermostat housing is aluminum not plastic. I think pic is of a euro car. The M cover won't fit its diameter is much larger.
Member
I believe its an M42 rather than an M44.
Jordan
what are you guys trying to figure out?
Member
Al's car (engine shot). I believe it's an M42 318 engine with metal thermostat housing.
Jordan
i think it's an m42, m42 and i believe i6s before the m54 use the metal oil filter housing.
Last edited by KillerSE7EN; 03-31-2013 at 10:23 PM.
Member
This is the correct oil filter lid tool you want to use next time around, not a strap wrench. I got a second hand Hazet unit for cheap on Ebay.
Hazet:
Stahlwille:

-2023 Honda Odyssey Elite
-2019 F31 Individual (M-Sport, Prem, Exec, Track)
-2004 Honda CRV
-2002 S54 M Coupé
Jordan
thanks for the info, i will update it after getting the proper tool
i believe this may be the equivalent from autozone?
http://www.autozone.com/autozone/acc...questid=996105
Last edited by KillerSE7EN; 03-08-2012 at 01:52 PM.
Member
I like this thread. There are so many luxury car forums where no one will do anything themselves. They pay a technician to do it.
Not all but most...
I like the Do It Yourselfers out there.
 Posting Permissions


 Reply With Quote


Bookmarks