
 Member
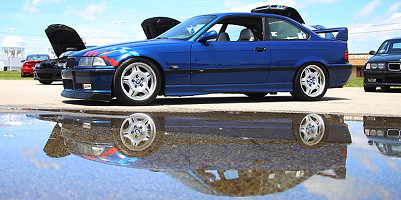
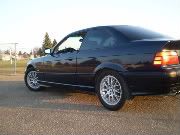
Okay, I'm a long time reading, new to posting, I'm far enough into this project that I figure its time to share a bit. First off, I'm Alex, live in Edmonton, Canada. Now the car: 1998 BMW 328is, picked it up in 2008 for $5500, was a high mileage car, but after driving it I loved it. Years passed, and in spring 2011, my baby seemed to be on it's last legs, the brakes were shaky, the bushings (RTABs mainly) were wobbling, wheel bearing vibrating, seemed like it was time for a new car. I thought about it, decided to throw the $3-4k into new suspension instead of a car (haven't regretted it yet!).
And since it is now winter and the project car is sitting, I've been looking at a few things I need to fix up (sunroof, P/S leak, Vanos tick, OBC, windows, etc) and decided I'd like to do an engine build, see how much power I can squeeze out of this. I've been talking to a guy down in Calgary who's going to supply me with an M54B30 engine out of an X5, an M50 Manifold, new fender (which I need), and an M50 NV intake cam... for $1000! So the stroker rebuild project will begin soon (new year I'm hoping). My plan (since it would be cheaper/easier to just buy an M3 engine and call it a day) is too see how much power I can get out of the engine using OEM Non-M pieces. Stroker, M50 mani, 540i hfm and TB, etc. I'll fab up an intake and exhaust. We'll see where this goes.
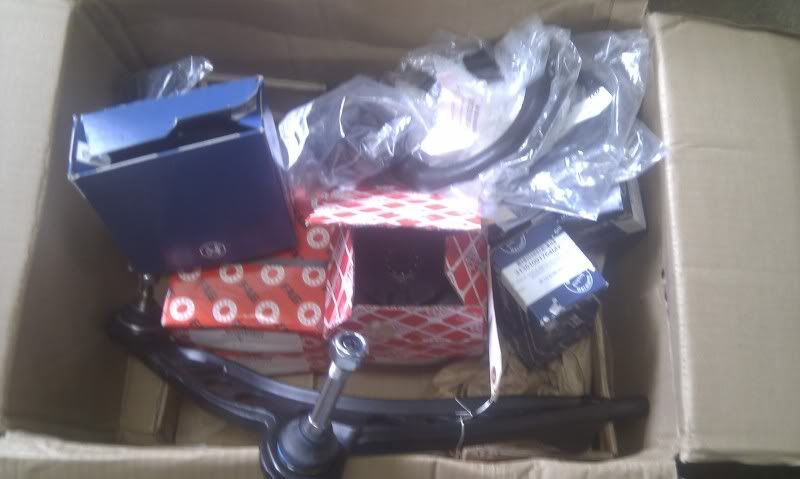
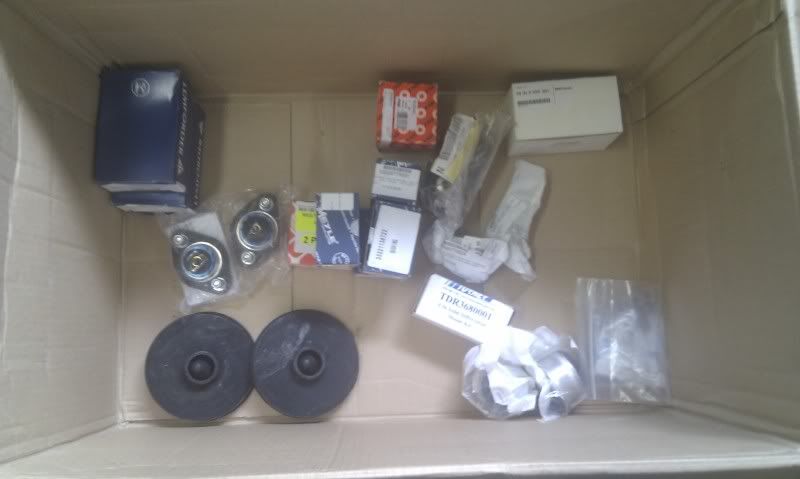
So suspension work started in June, and went slow (2 motorcycle "incidents" this summer). Ordered the bulk of my parts from Turner Motorsport, and all subsequent parts needed (from noticed wear while working, or breaking upon removal...) were mostly from pelican. All in all here is the parts list so far (will update if more is added during reassembly):
Turner Motorsport:
Brake Bleeder Screw x4 $36.45
Front Brake Caliper Rebuild Kit x2 $41.80
Rear Brake Caliper Rebuild Kit x2 $55.99
Replacement Flex Disc x1 $73.10
E36 Bilstein/H&R Sport Suspension x1 $791.74
E36 Rear Suspension Mount Package x1 $773.19
Turner Motorsport Reinforcement Package x1 $257.19
Meyle HD Front Sway Bar Link x1 $81.34
Rear Sway Bar Link x2 $32.99
Front Wheel Bearing Hub Assembly x2 $222.31
Rear Wheel Bearing x2 $122.07
Turner Motorsport Brake Bleeder Bottle x2 $33.58
E36, Z3 Meyle HD Control Arms With Solid Rubber Bushings x1 $260.17
E36 318i/325i Front Upper Strut Mount x2 $81.34
E36 318/325/328 Brake Package x1 $277.89
Steering Rack Boot x2 $20.26
Flex Disc Bolt x6 $18.02
Pelican Parts:
Tie Rod Assembly, Left x1 $54.00
Tie Rod Assembly, Right x1 $54.00
Lock Plate for Tie Rod to Rack x2 $17.00
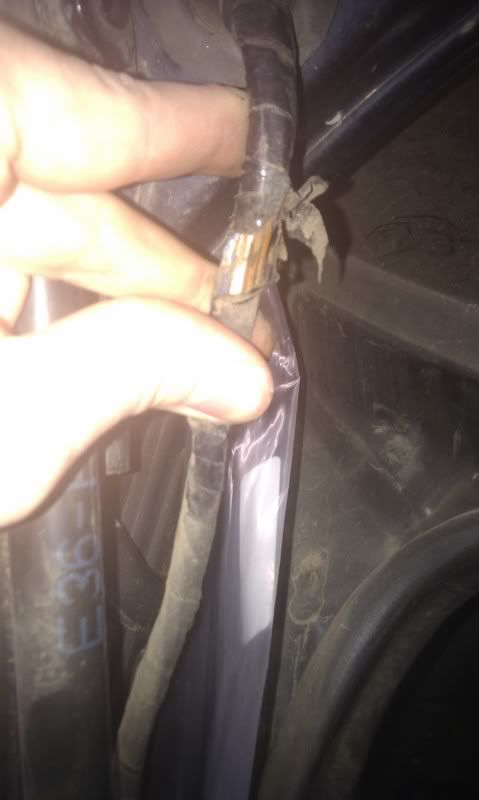
Steering Rack Boot, Left or Right, Includes Clamps x2 $19.00
Torx Screw, M10x43 x1 $3.00
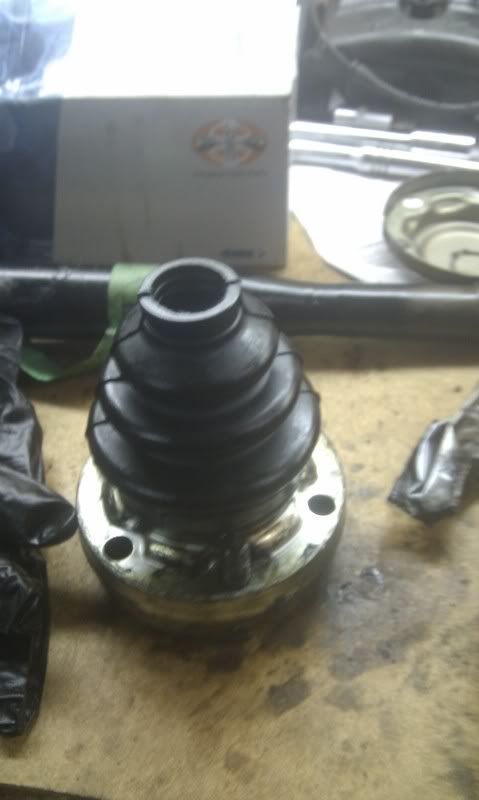
Axle Boot Kit, Rear Axle Outer CV Joint x2 $24.50
Eccentric Washer for Rear Control Arm, 12 mm x1 $2.50
Self-locking collar nut, for Eccentric Bolt in Rear Control Arm x1 $1.25
Eccentric Bolt for Rear Control Arm (12 x 1.5 - 81mm) x1 $9.75
Axle Shaft Securing Nut x2 $10.50
E-Brake Shoe, Set of four x1 $32.25
Lug Bolt (Black) for Alloy Wheel (12 x 1.5 mm), Each x4 $13.00
Front Sway Bar Mounting Bracket, Lower Control Arm to Sway Bar End Link x2 $17.00
Axle Boot Kit for Inner C/V Joint x2 $39.50
Protection Boot for Rear Shock x2 $7.00
Rear Sway Bar Mounting Bracket, Rear Trailing Arm to Sway Bar End Link x2 $6.00
Other:
Bleed Valve Screw x2
Strut Mount Gasket x2
E36 Front Camber Shim Kit x1 $24.99
3.91 LSD x1 ~$400 shipped
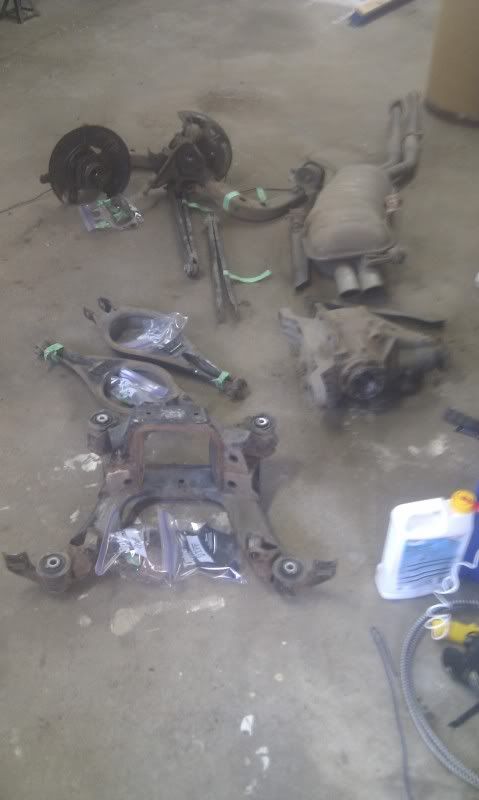
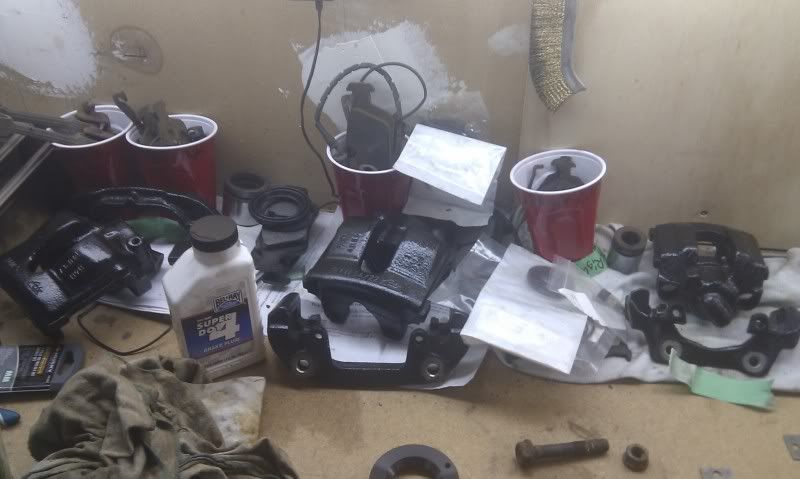
Now some pics! Rear suspension and what not removed:
Where it all used to be:
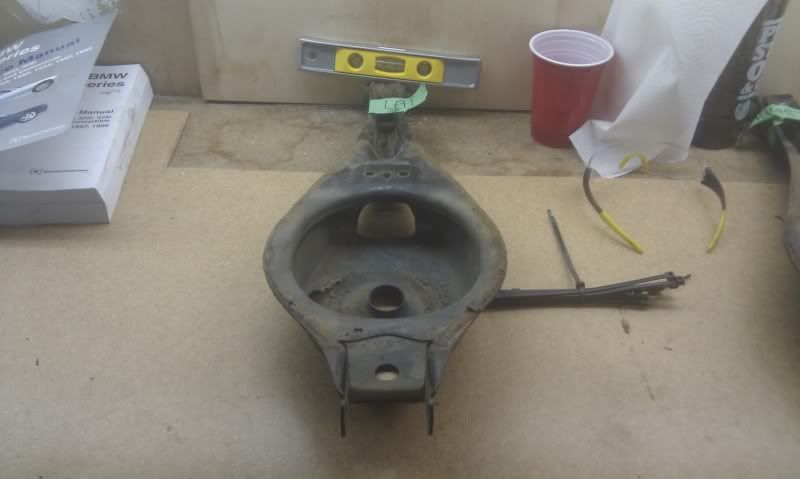
As it sat:
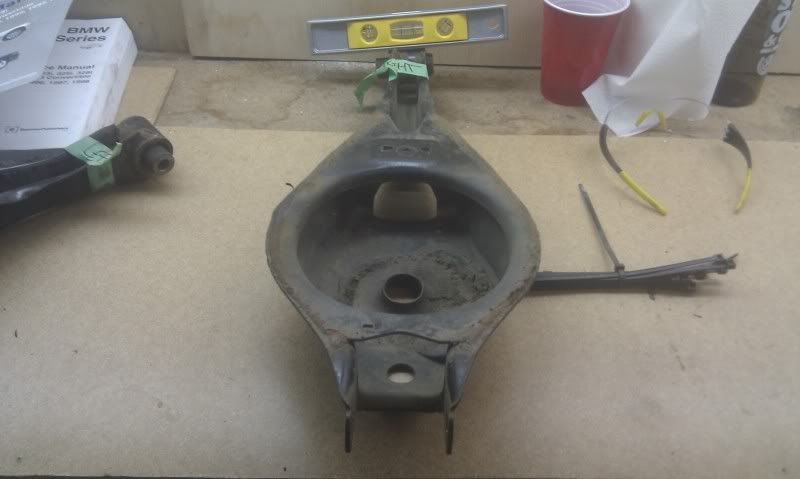
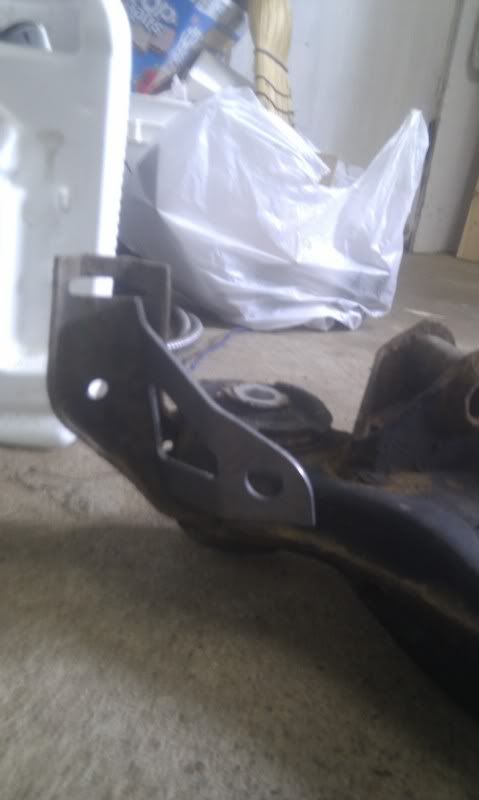
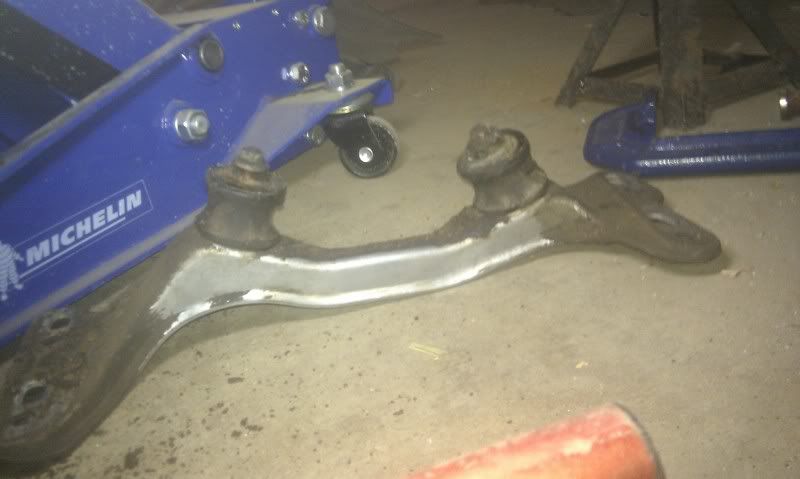
When I was looking at my rear upper control arms, I noticed a slight bend, I posted up here and was told (vaguely) that this is normal. This is what I saw:
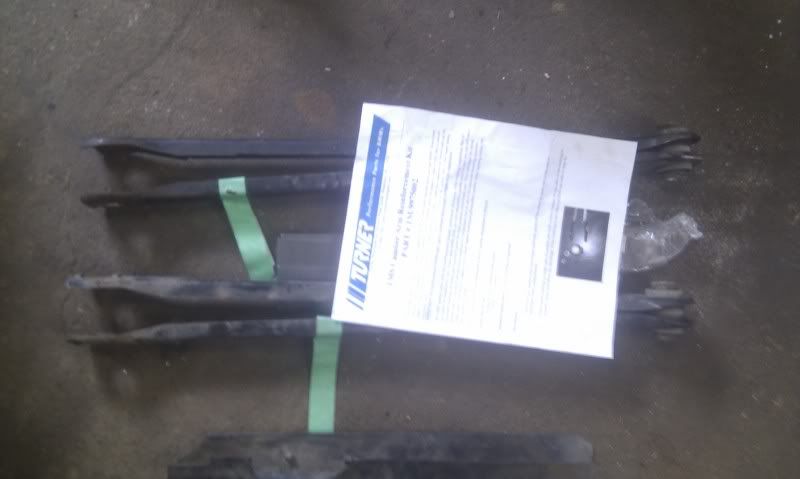
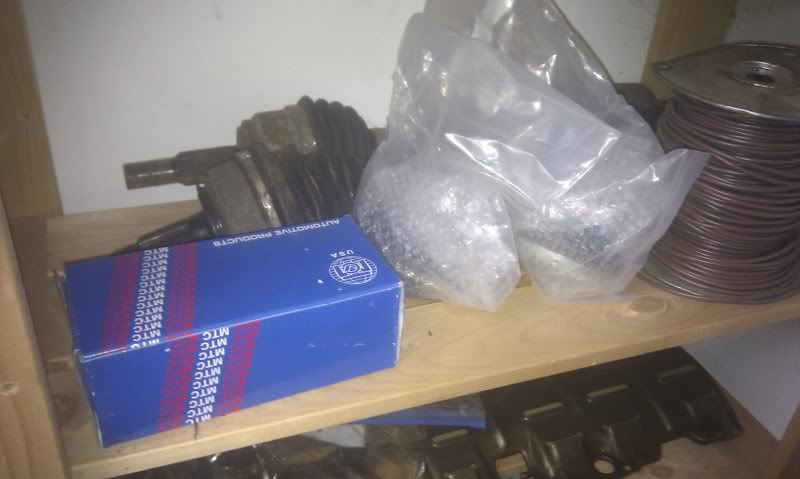
And all the goodies arrived!
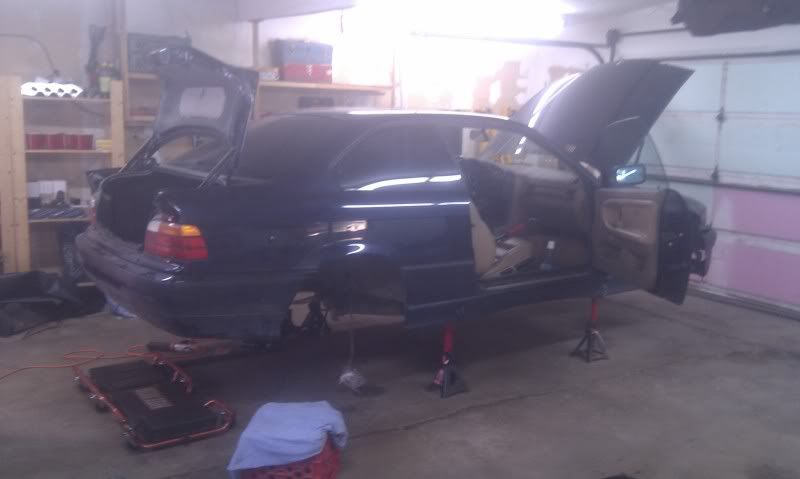
And then I began on the front suspension:
From here it pretty much came to a stand still. I was recovering from 2 accidents this summer. I got the welding done, took the arms/etc to the shop for pressing, got a little bit done here and there.
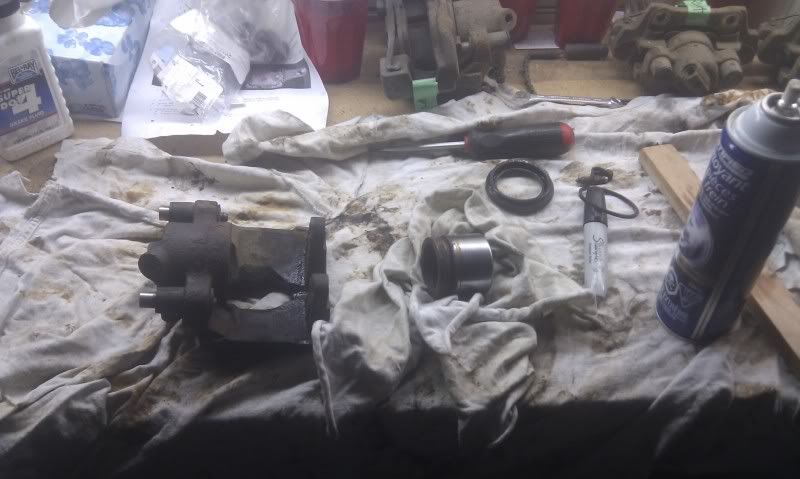
Rebuilding the calipers, piston out:
Painted with High-Temp, drying:
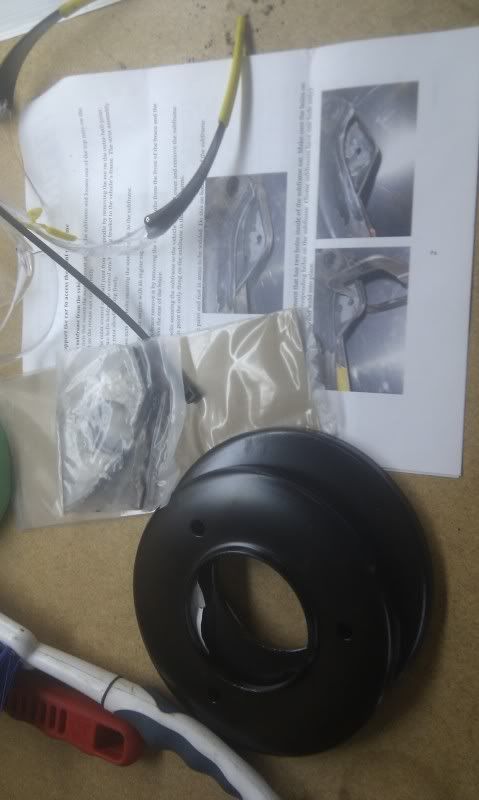
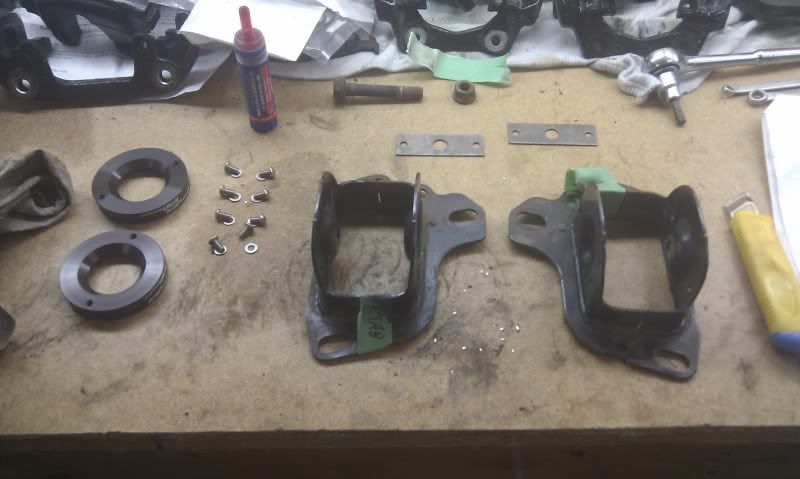
To work on the RTAB limiters (super easy, took me about 15 minutes) everything layed out:
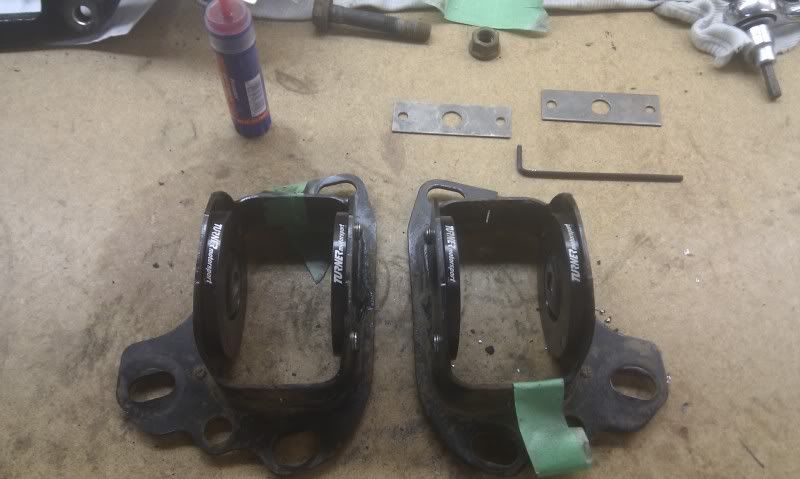
And together:
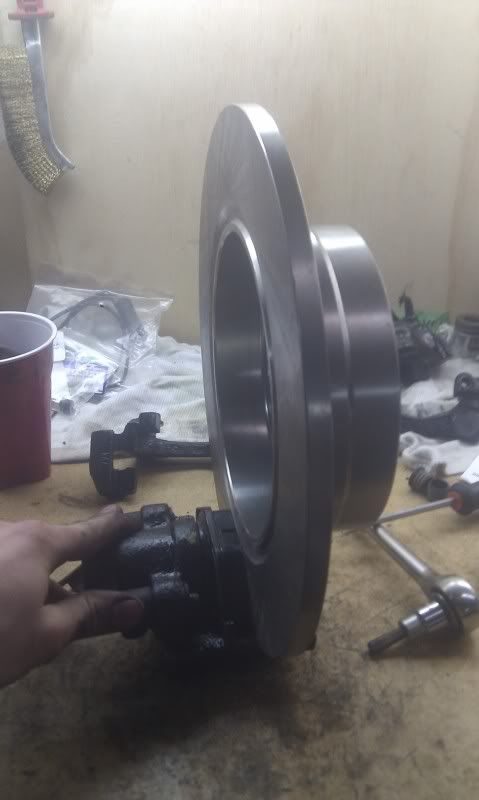
When I assembled the calipers, this is how tight my rear brakes were:
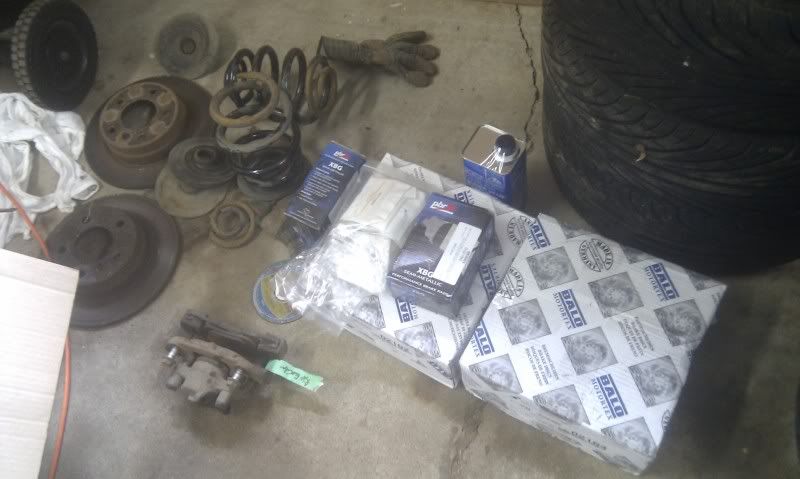
All finished and ready for the car:
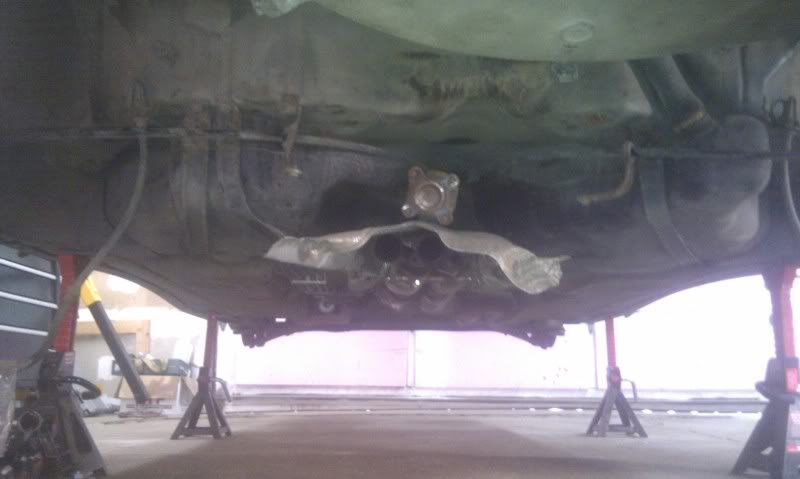
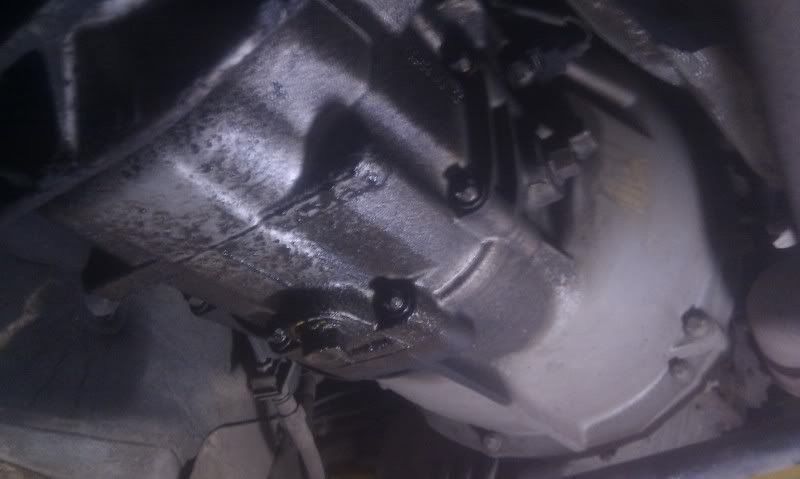
Did some snooping around while the car was up, found a leak on the tranny. Not sure where it's from, the plugs seem tight and non-leaking. Could be the output seal, or something on top dripping down. If and when I pull my engine I'll take a look.
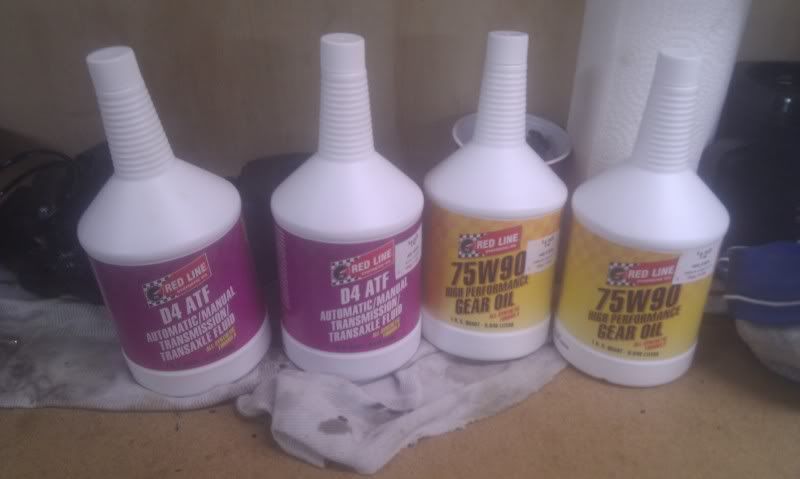
Fluids for the diff and tranny, found a local shop that stocks this, very happy.
I removed the fender which had some damage from a fender bender (lol). Took a video so I remember where all the bolts go when I paint it and put it back on. Thought I'd share, cause it's annoying trying to hunt down every bolt and screw.
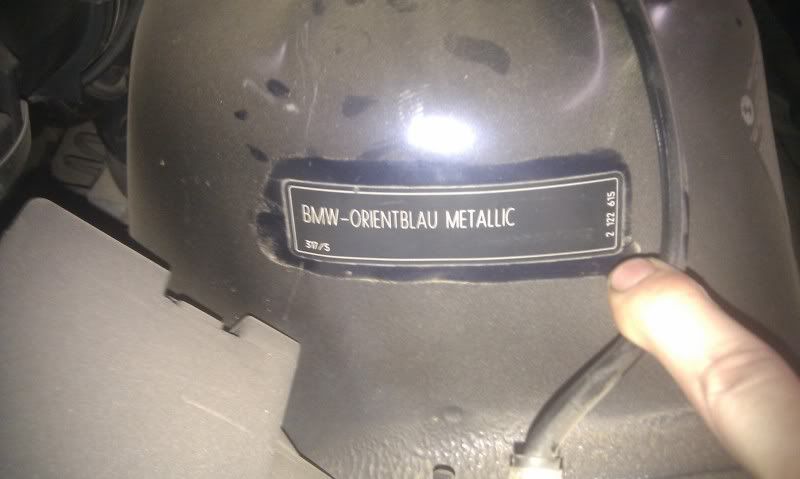
Took my old fender in for paint matching (I have a E46 style bumper from Bavaria to paint too). Quick pick so I remember what colour my car is
Diff arrived! I immediately removed the back cover and took it along with the solid bushings to the shop. Unfortunately they hadn't even touched my other items yet. Busy time of year for people putting snow tires on
Member
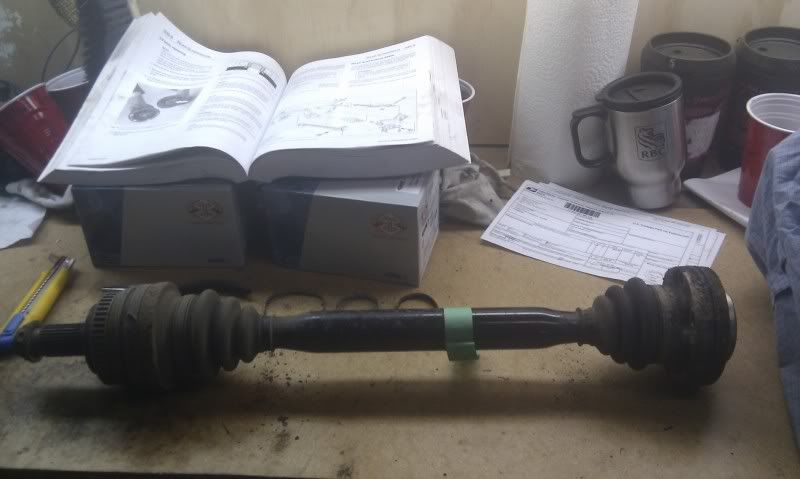
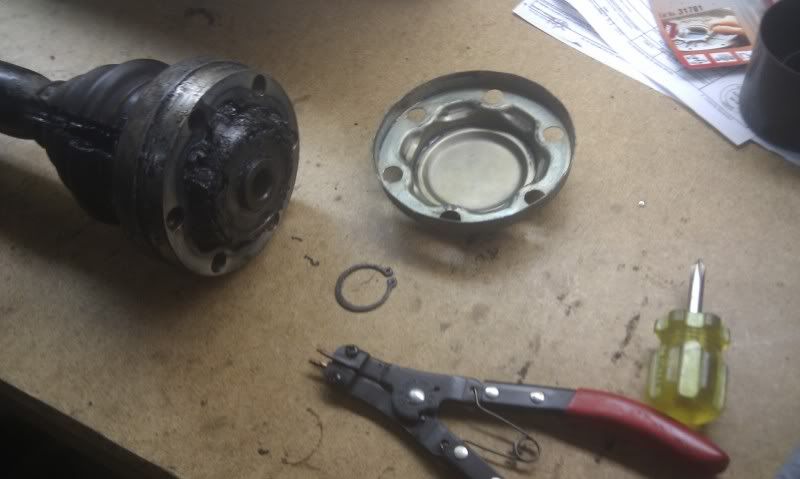
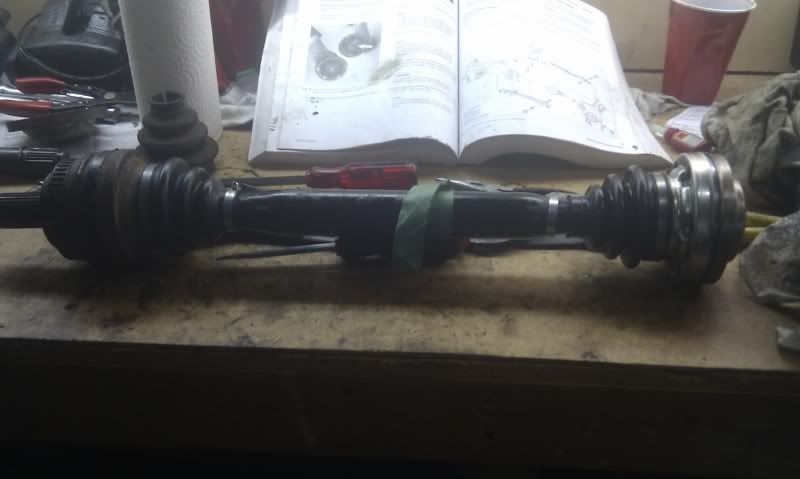
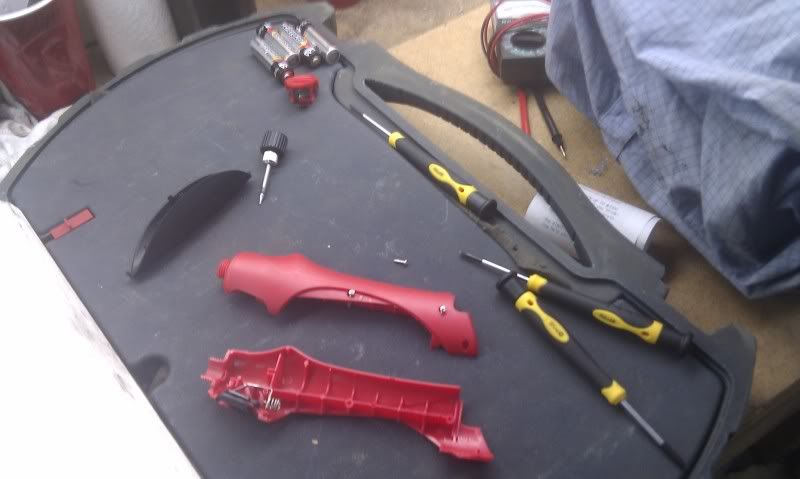
A small DIY CV boot replacement (Saturday afternoon with the GF, what a lovely date). Here's the setup (I had been assembling my rear shocks at the time too)
Step 1: Clear a nice work area, have rags and paper towels handy, this is gonna get messy.
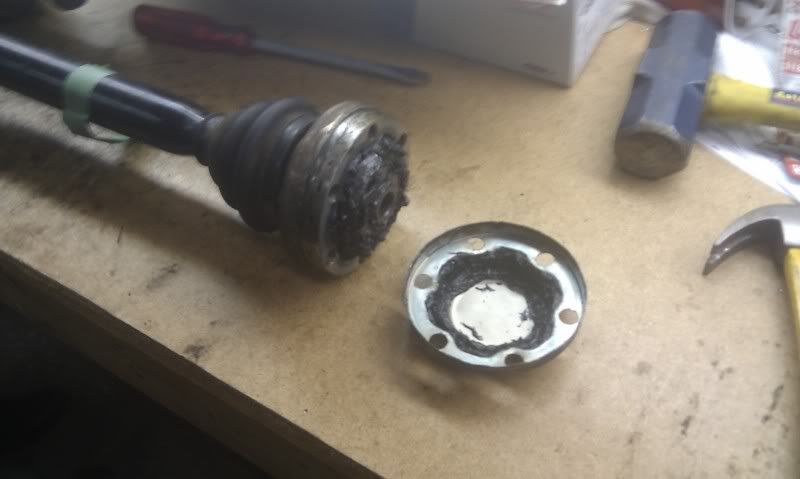
2: Hack off the old boots. I used an exacto knife, the GF used some tin snips. In hind sight I'd do this after the dust cap removal (that gets hairy)
3: Dust cap removal. I used my smallest flat head to pry (with the slight tap of a hammer) all the way around, then used a larger flat head to force the thing off. You don't want to damage this, the kit doesn't come with another one.
3.5: What I forgot to take a picture of, and I did later on, but would probably best be done now is removed the dust cap on the other side of the inner joint. This one you can destroy if you feel like it, the new boot comes attached to one.
4: Remove the circlip with your handy dandy snap ring pliers (if you have them)
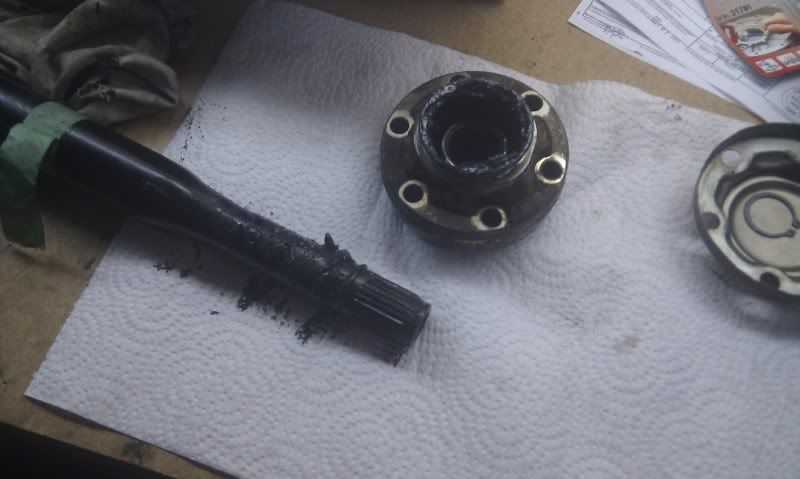
5: Slide the axle out of the joint
6: Clean it up
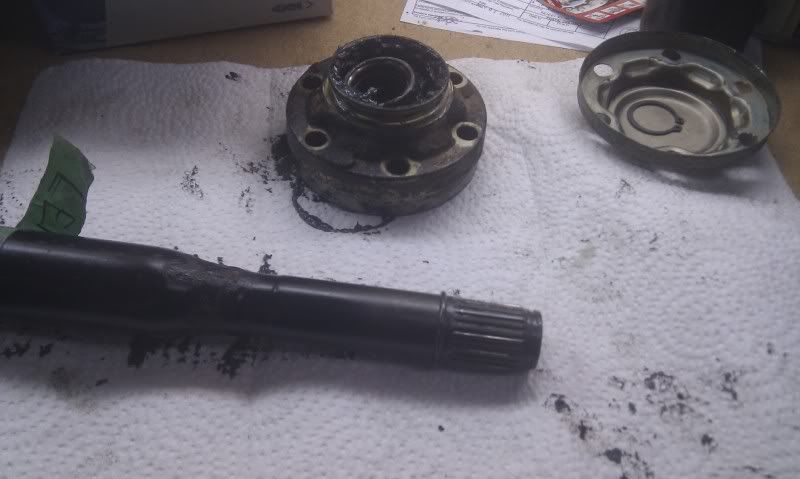
7: Slide the outer boot down to the outer joint
8: Tap the new dust cap and boot onto the inner joint, I used those torx bolts to line up the holes, then just hit it hard with a hammer.
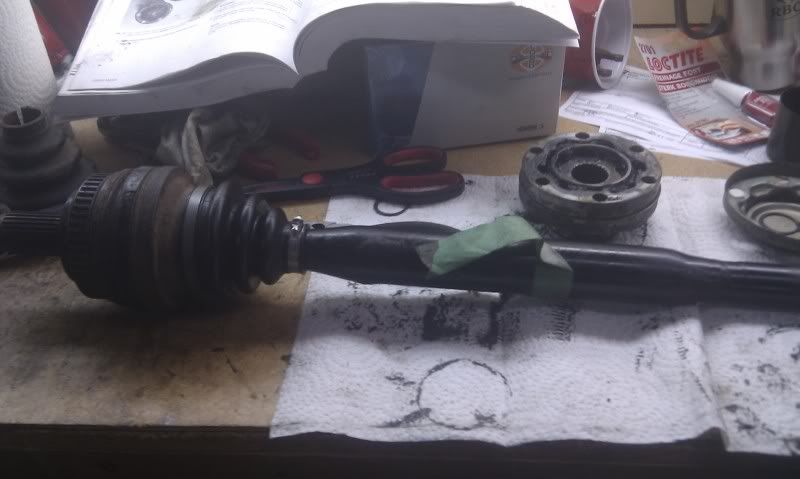
9: Hardest part: sliding the inner boot down onto the shaft, there is a ring on the shaft that the boot just did not want to slide over... A couple of flat heads and some effort did the trick. And it's done!
I made sure to pack a ton of grease into the joints before reassembling, and don't forget the new clamps.
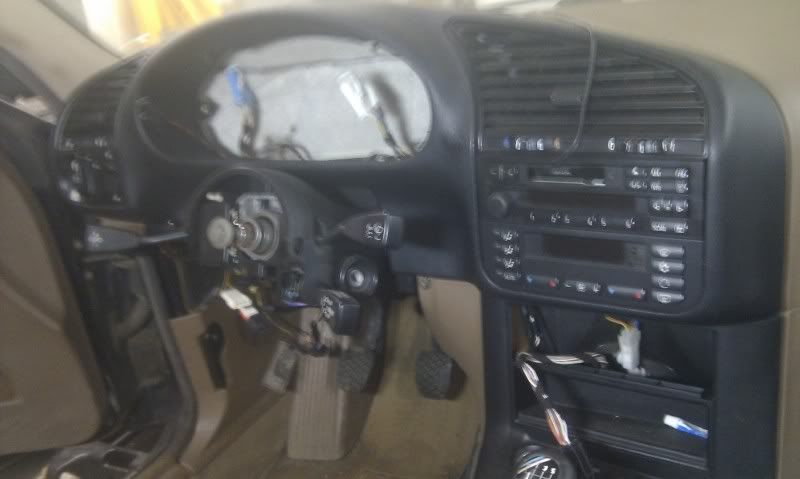
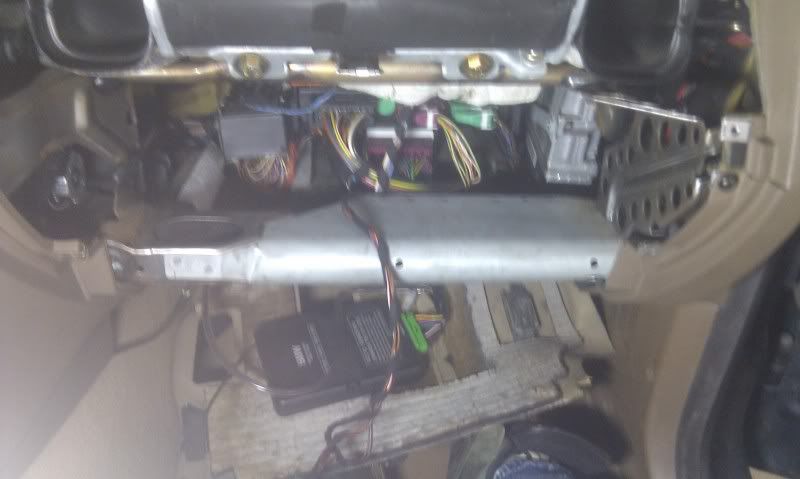
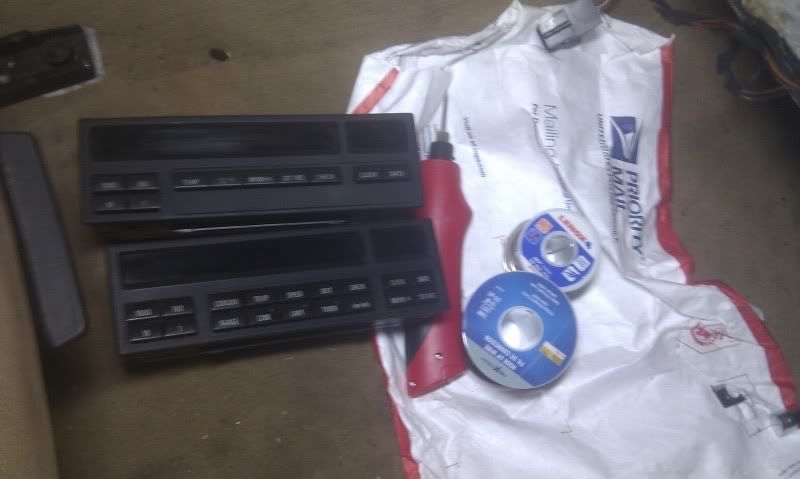
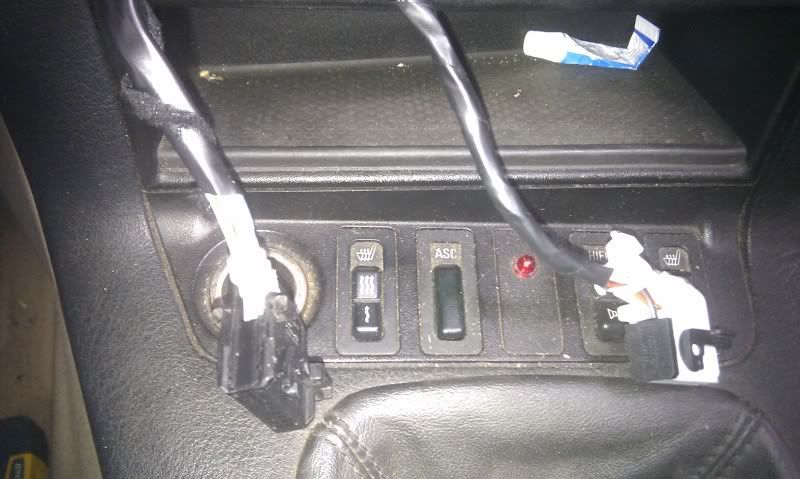
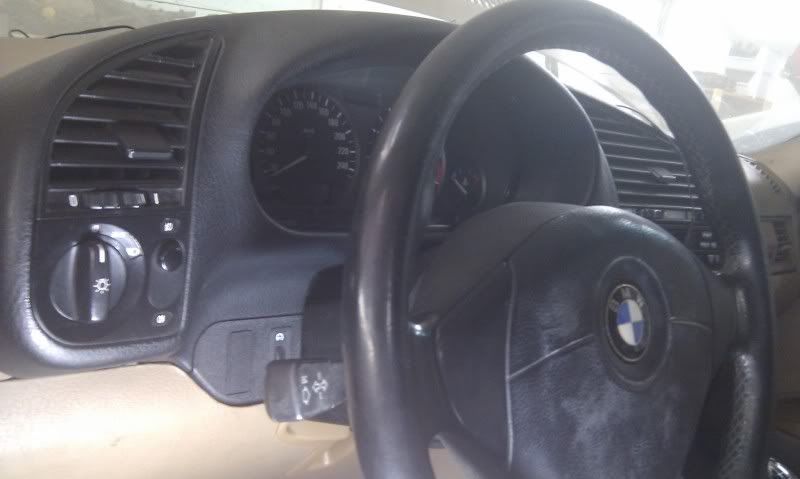
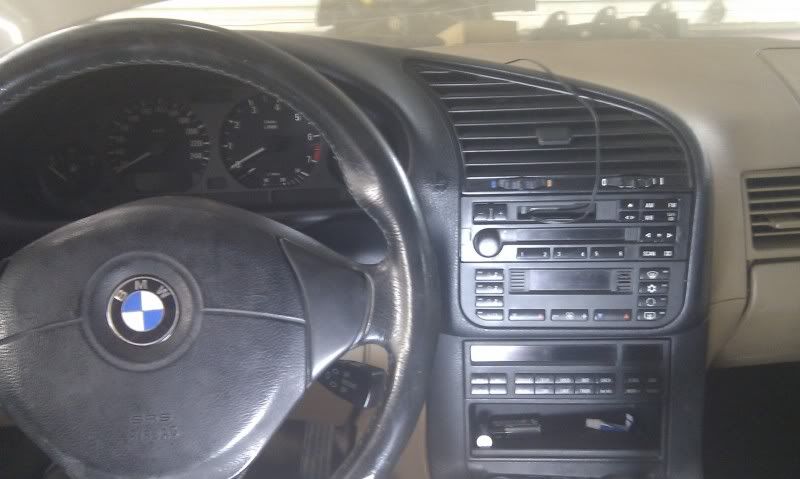
And we arrive to today, still waiting on the shop, I'll be stopping by tomorrow to see what's taking so long (I also think I ordered the wrong rear bearings). So to pass the time, I started my 18-button OBC install.
All panels needed to be removed have been:
New OBC vs old one:
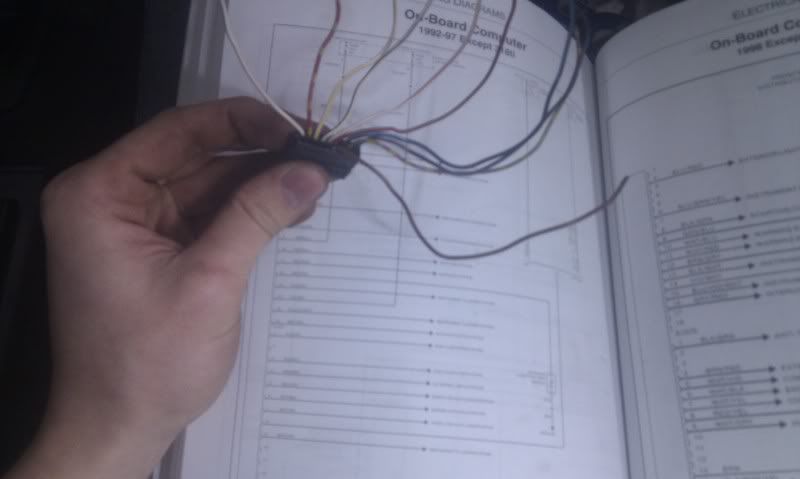
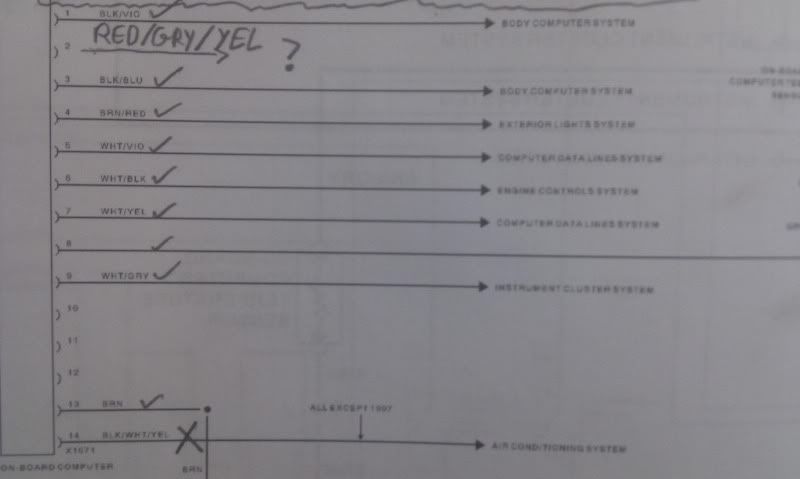
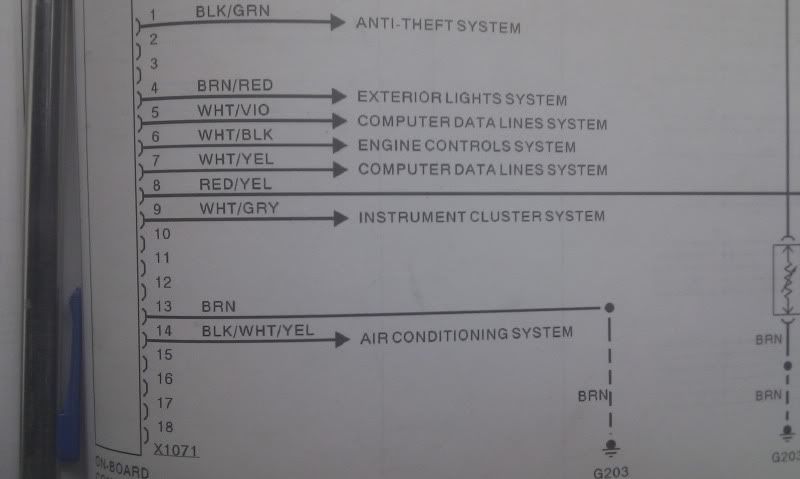
And then I started my studying (aren't wiring diagrams fun?). So following all the wires here's what I've found:
- The OBC I've received came from a late 94-96 model (judging by the wire colours and pinouts on the white X1071 connector)
- the black X1070 plug is the same as the 98 OBC, except for pin #1 which has a wire running to the exterior lights. And I'll be damned if I can't find any reference to ANY OBC connections in the 94-96 exterior light diagrams... I'm stumped. I found the connection to pin#2 in the 98 exterior light diagrams, and the 94-96 OBC has the same pinout, so I'm okay with leaving it as is.
- the white X1071 has a rogue wire in pin#2 that is not referenced in any diagram. It also is missing the A/C pinout, so that might be it, but I'm not sure?
Pics:
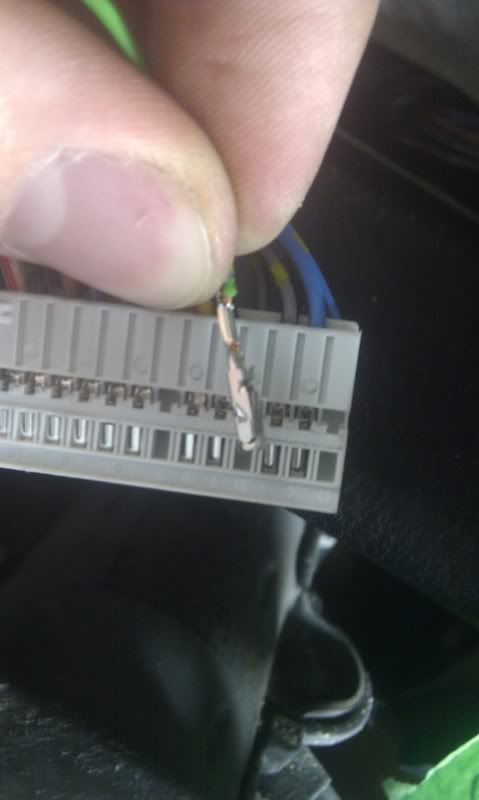
X1071 (white) removed from casing to look at pins:
94-96 OBC X1071 pinout on diagram (with my marking in pencil)
98 OBC X1071 pinout on diagram
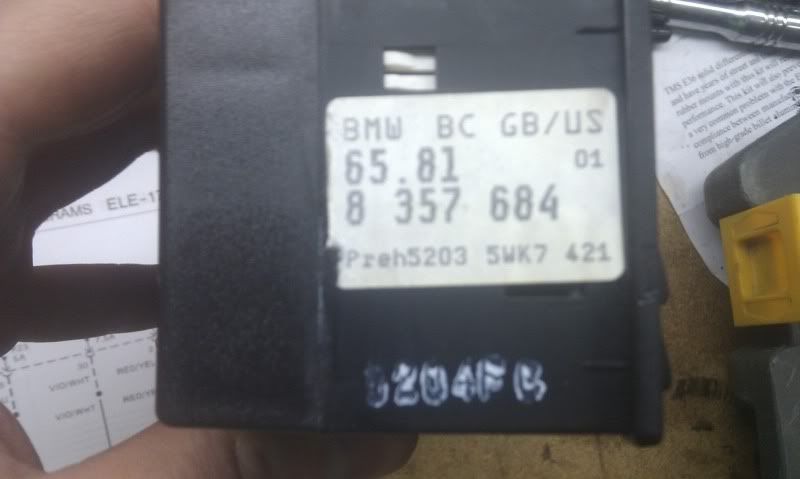
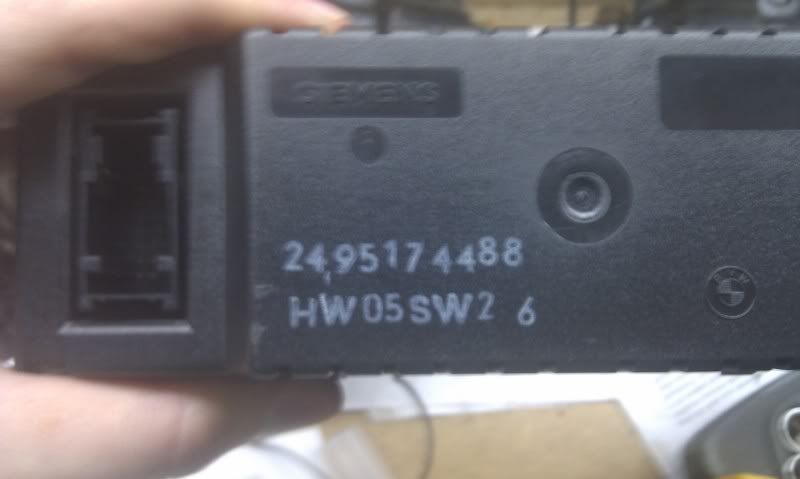
And a couple pictures of the numbers on the OBC, maybe finding a P/N will clear things up.
PS: I've been trying for an hour to flip these pictures... They're too stubborn. I'm goin to bed...
EDIT: Hey they fixed themselves overnight, how nice
Last edited by Schramm; 12-02-2011 at 12:04 PM.
Member
Looks like your doing an awesome job. I will also be rebuilding my suspension and brakes this spring. Probably will try to pack another shim or two into my lsd. Love how your gf helped cut your boot off. Now to figure out how to get my gf to help as well.....Progress looks great. Keep it up!
Member
GERAT JOB
Keep us updated
Member
Wow!
Quite the overhaul. Make sure to keep us updated with your progress--I'm sure I'm not the only one that wants to draw from your project.
Thanks.
PM me if you needE46Touringparts
Member
Subscribed.. Nice overhaul.
2001 BMW 525i 177k Autotragic - Ride for the girl
2002 Yamaha R6 - COMING BACK FROM THE DEAD
1985 BMW 735i - Daily
Member
Thanks guys,
Called the shop, nothing. Will try again tomorrow.
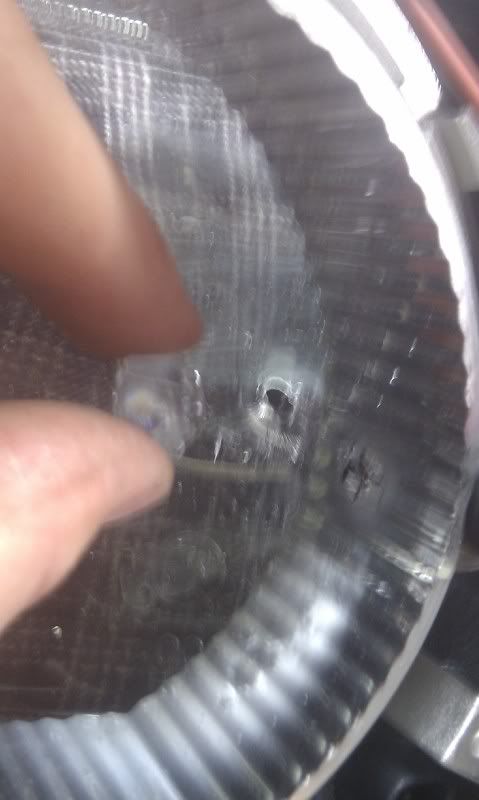
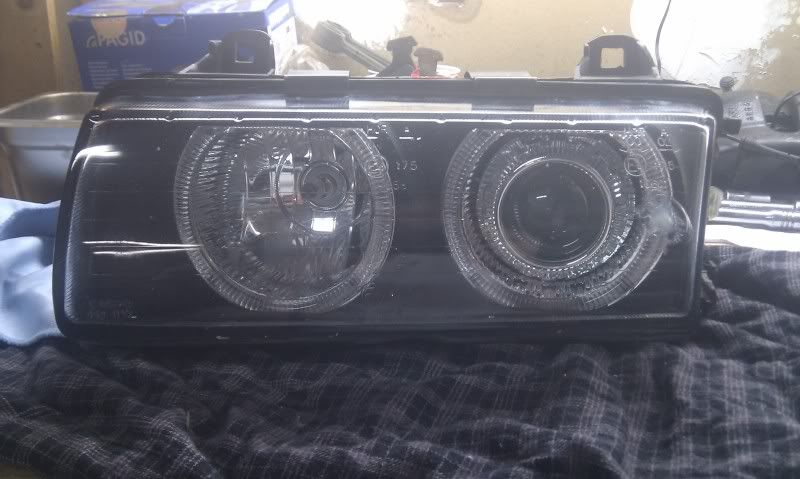
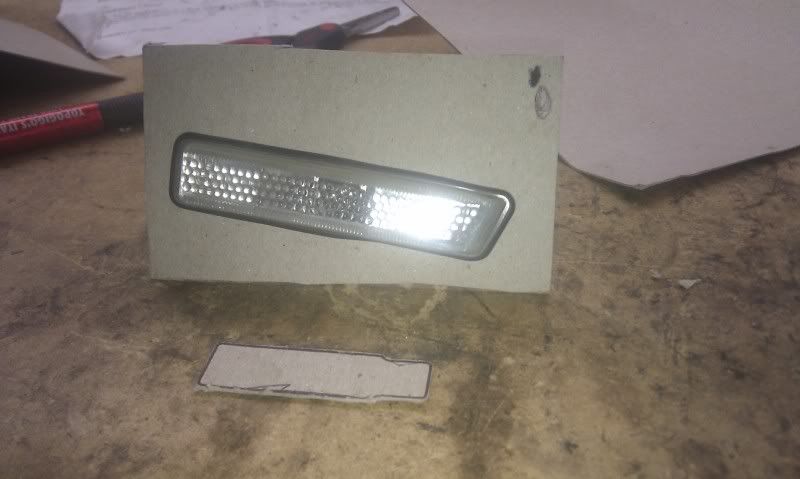
Picked up a pair of these from a local guy cheap, had a small rock hole on one of the lenses:
So to fix it, I took the lense off, cleaned it up, masked the hole and applied some clear silicone. Won't be perfect, but it will do.
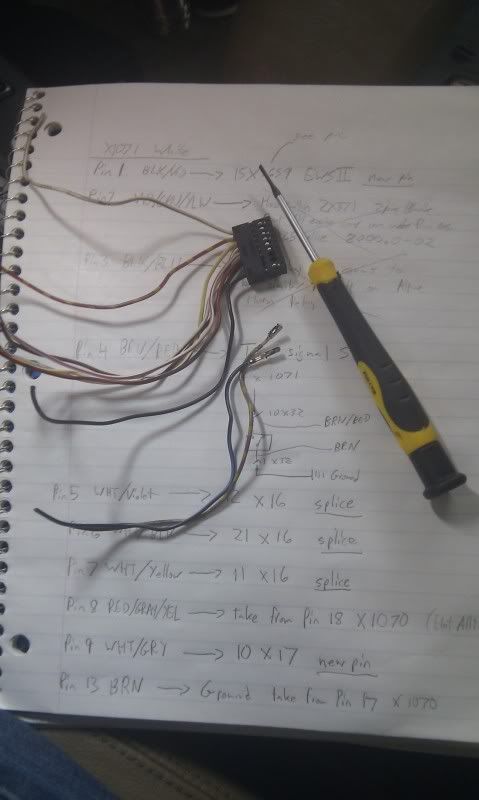
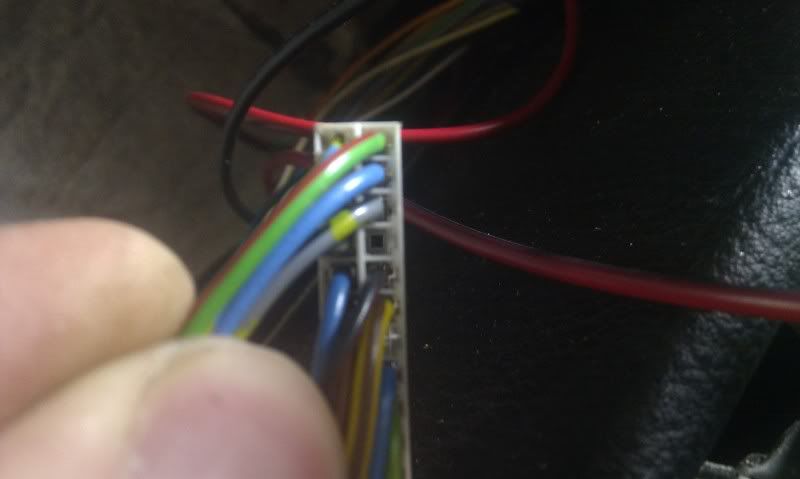
Got back to work on my OBC. My notes and the X1071 connector, removing un-needed pins:
My soldering gun died while soldering my harness, a quick easy fix. Man these are cheaply built...
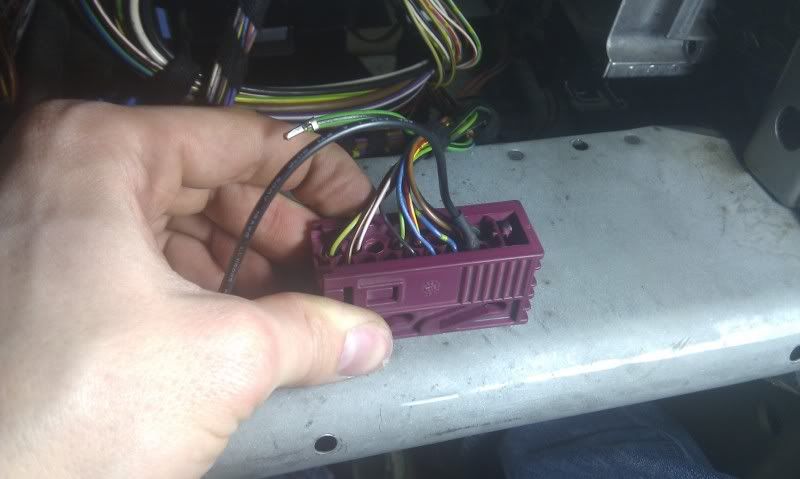
My plugs all finished, how's the electrical work look? I'd consider myself a noob at this.
I then got to work on where the wires go, ran into 2 problems: 1, I need different contact pins for both X17 and the EWS II connectors. 2, I've decided to pick up a check control stalk and wire it in, so I'll have to wait on that.
I'll update when I can, I'm about to start finals though, so work may be slow for the next couple weeks.
Member
Following.
Nice write-up.
Member
Got a little bit of work done today, but not much. Keep running into problems.
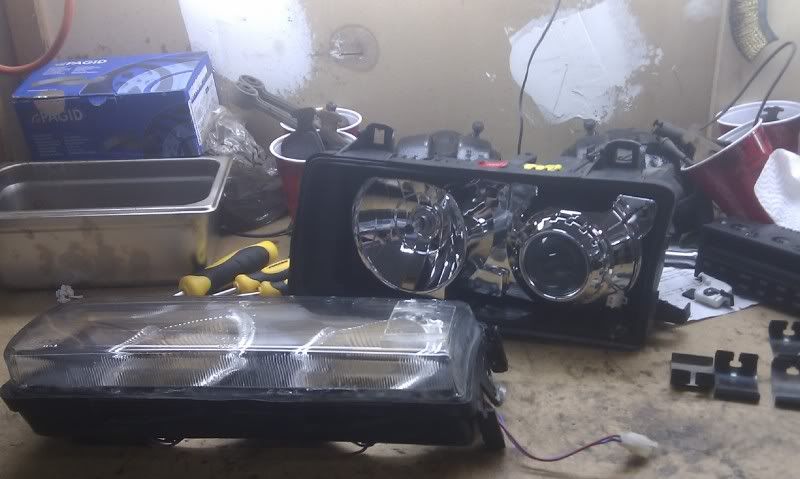
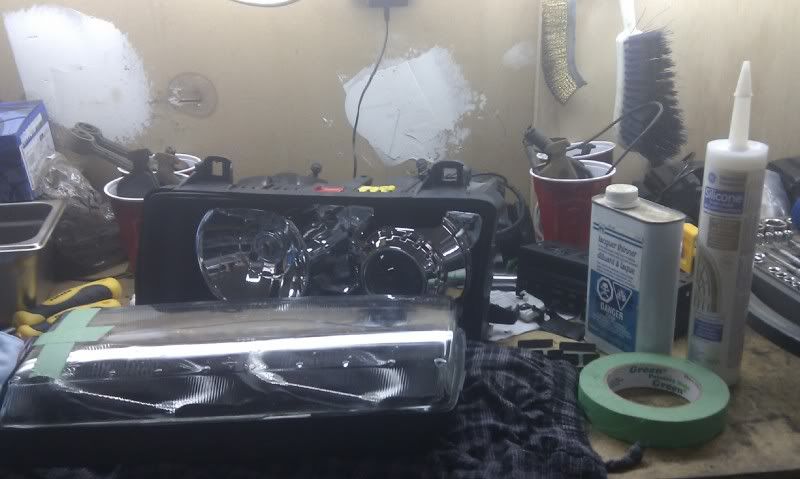
Here's the new headlight all finished up:
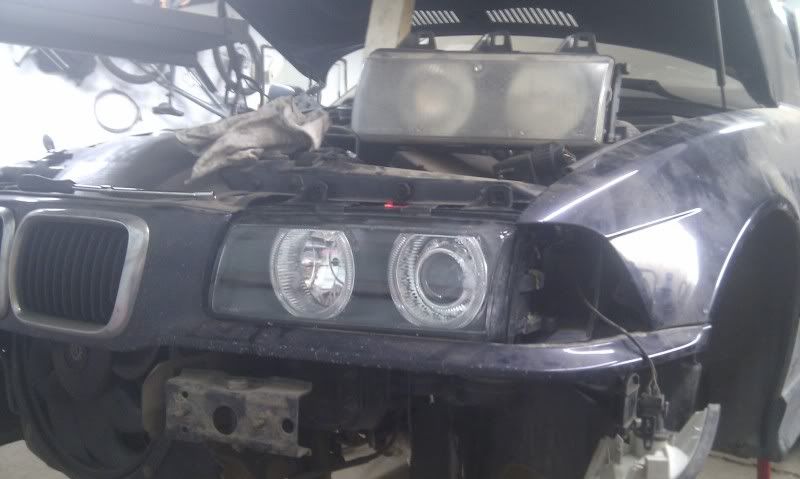
And test fitted to the car (old lights above):
Here's a new problem: the plug on these lights don't match my plugs at all, I'll either have to find something to accommodate, or do my own wiring (not looking forward to that).
It's the circular screw type plug in the middle:
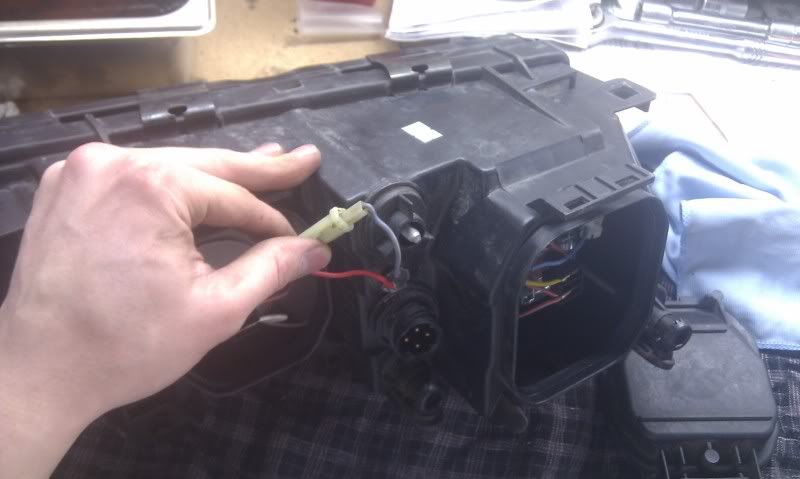
Back to the OBC conversion, I'm still hunting this pin down for the X17 connector:
I spent about an hour at BMW today going through all their pin contacts, couldn't find anything. It needs to fit into this hole:
Finally, the connector on the EWS II I did manage to find at BMW, but while installing (it didn't want to go in all the way), another wire on the connector broke off (wtf?). So my plan is to cut the hole thing off, and head to BMW to find 2 contacts for it
More to come as I complete it, but I have my finals next week, so won't get a whole lot done. Good news on the engine side of things: I'll be heading down to Calgary next Saturday (the 17th) to pick up an M54B30, M50 Manifold, and an intake cam from the M50NV, oh and the fender I need.
Speed Addict.
Holly cow you are really going nuts on that rebuild.
Member
BMW CCA Member
Awesome thread! As for the lights, you need Plug and Play (PNP) harnesses. Also...are you running HIDs with the projectors?
GL!
Member
Thanks, I found some online, just need to get them ordered, gonna grab some stainless steel brake lines as well, and I was thinking about an X-brace and strut towers. Oh and some new M3 mirrors, I found at DDM for $100, to replace my old browning ones.Originally Posted by Moron95M3

The local BMW parts and service department was a huge help in finding the right contacts I needed, and supplied me with everything I needed for free! So all I'm waiting on now is the turn stalk from BC, then the dash will go back together. Here's a pic of how it sits now:
I'll also have to start ordering my engine parts, I'll post a list of what I think I'll need when I get the chance.
EDIT:
Forgot to mention, Moron95M3, I have 2 (I think? at least 1) set of generic HIDs laying around. We test fitted my friends generic set on Friday, but the bulbs weren't the same as the bulbs in the Depo's, like didn't match up at all. I have a set from my old VFR 750, if I can find them I'll test fit them to see if the bulbs work. The bike ones would only allow me to run HID's on the lows (or high's if I really wanted) I believe. That was the problem with my friend's HIDs, they had Hi/Lo all in one bulb, were as the E36 has 2 separate bulbs.
Last edited by Schramm; 12-11-2011 at 04:24 PM.
Member
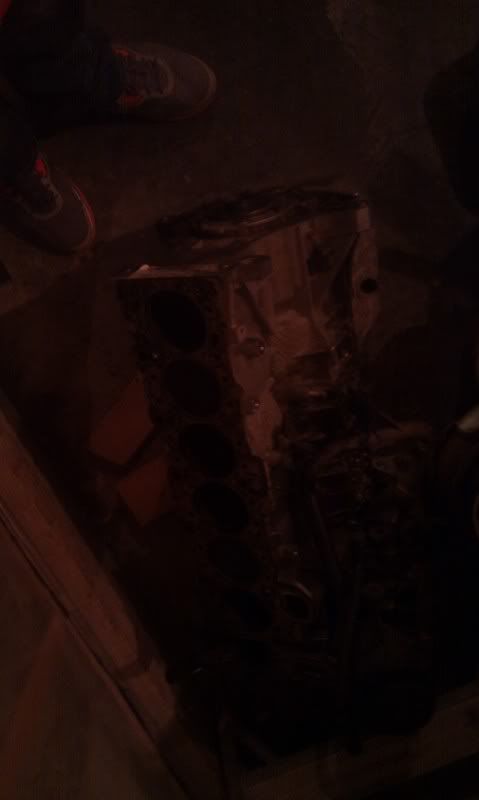
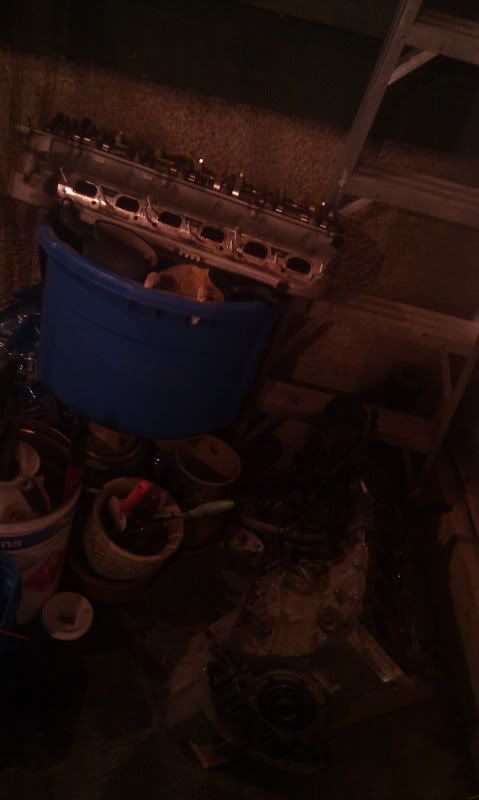
Hey, no build update, but an update on parts I've brought in. Picked up the M54 head and M54 Block along with a fender and M50 Manifold from Calgary today:
The engine is being stored at the parents until I get back from Vegas. Also ordered a bunch of parts from ECS, EAS, Understeer, and Ebay. I'll update as the shipments come in! On Christmas break now so things will start moving when I get back next Wednesday.
Member
awsome thread doing awsome keep going strong
Member
bumping this up..nice thread! did you complete the 18 obc conversion? i've been putting that off for awhile lol... Also, how do you have time to work on your car with school? That's insane! Good work man!
Member
You're a beast.......nice thread
Member
Did I catch A/T fluidstill nice thread and car.
2001 BMW 525i 177k Autotragic - Ride for the girl
2002 Yamaha R6 - COMING BACK FROM THE DEAD
1985 BMW 735i - Daily
Member
Finished the 18 button OBC, got the BC stalk from BC (lol). Here's it all finished up:
I do this stuff on the weeknights/weekends. I'm taking my masters so it's really only an 8 hour a day thing, until finals or midterms come around.
That is A/T fluid, but it's what Redline recommends for the pre-99 manual transmissions on our bimmers, because it's more viscous.
I recieved some eBay strut bars (front and rear) today, they looked high quality, solid steel like I wanted, but lo and behold they don't fit... So I'll be contacting the seller, see what we can do.
Heading out on yet another trip, will be gone til Monday, I'll get back at 'er then.
Member
You plan on doing a M54 swap?
Member
No, just a stroker on the M52, and use the intake cam from the M54.
Got a little bit more work done. The proper wheel bearings came in the mail; I emailed the people who sold me the strut bars, they offered a full refund; More parts came: X-brace, stainless steel lines, and some other miscellaneous stuff.
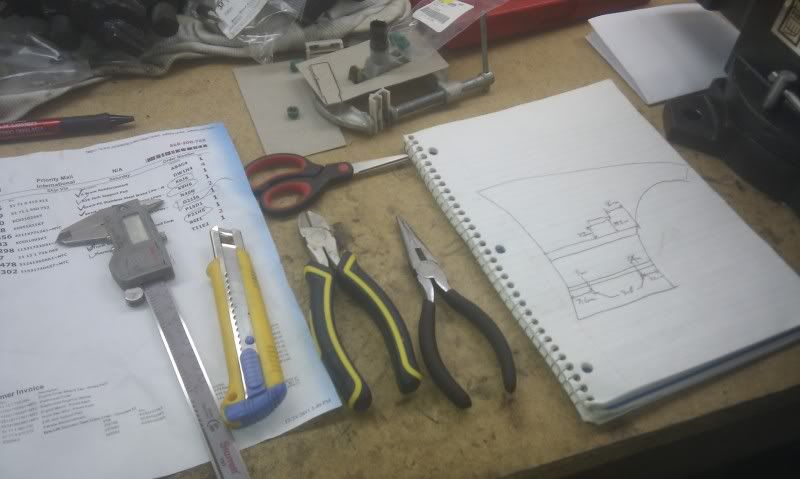
Started work on my fender, I have to cut some holes due to the fender being from a base model 94 318 coupe, so I'll be cutting a hole for the side marker and 2 holes for the side skirt.
Cutting a cardboard template from the existing hole:
And measuring everything up:
I haven't got around to cutting it yet, I need to get a centerpunch to mark the holes before drilling.
The new parts:
A calendar from the local BMW dealership (free as its last years, good for the pics) and the paint for my bodywork:
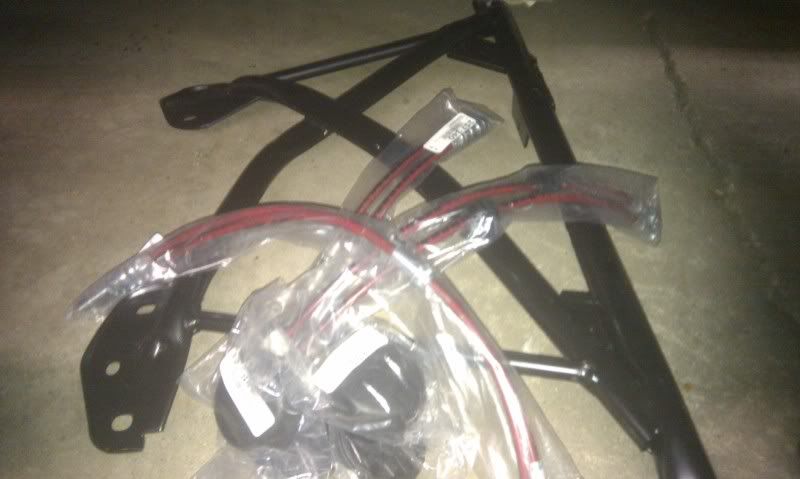
X-brace, SS brake lines, and new jack pads:
New trunk struts, while I was there I found more fraying in my wires, I'll have to re-insulated them:
New "beauty cover" for my engine bay (because I'm perfectionist):
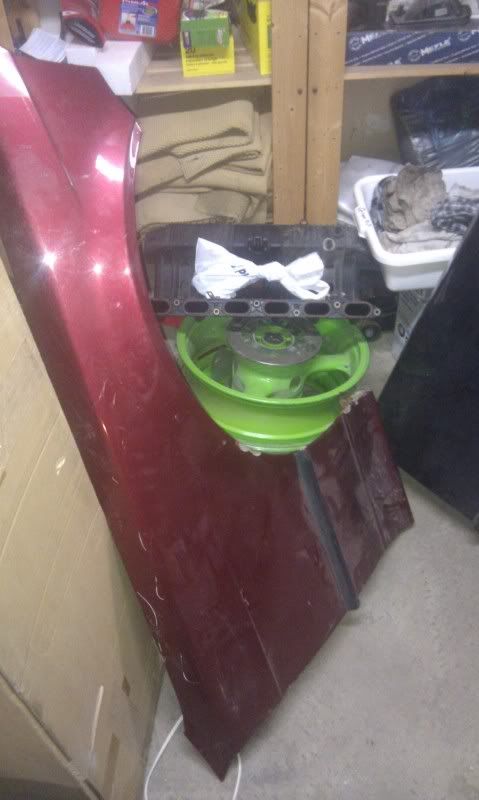
And finally I'm starting to gather parts needed for the engine work. Aluminum Thermostat housing and new engine mounts:
Still on its way is UUC tranny mounts, Short Shift Kit, Power pulleys (rogue engineering, I'll delete the fan then as well) and the DEPO harnesses. I also am gonna be recieving an 540i HFM in the mail soon (hopefully).
Now for the parts list in the engine product, I'd like some insight into what I might be missing, but here's what I have so far (pelican parts):
- Head bolt set x1
- Valve stem seal kit x2
- Valve cover gasket set x1
- Valve cover nut seal x15
- Headgasket x1
- Exhaust manifold gasket x1
- Con-Rod bolts x12
- Main bolts x14
- Oil pan gasket x1
- Front main seal x1
- Rear main seal x1
- Oil filter kit x5
- Fuel filter x1
- Bosch spark plugs x6
- Flywheel bolt x8
- Exhaust mani to cat gasket x2
- Suction pipe gasket x1
- Water flange gasket x1
- Rear crankshaft housing gasket x1
Kit, Shift lever:
- Rubber lower shift boot x1
- Locking pin for shift lever support arm x1
- Shifter arm plastic bushing x1
- Shift rod coupler x1
- Dowel pin for shift rod joint x1
- Rubber buffer for shift rod joint x1
- Pin retaining clip x1
- Crank pulley bolt x1
I will also be checking the piston rings, main bearings and rod bearings for wear, and replacing as needed. Any suggestions as to what I might have missed, or what I have that really doesn't need to be changed? I'm trying to work with a budget.
Thanks guys,
- Alex
Member
Cut the hole in the new fender tonight, turned out good:
may not be in the *perfect* position but I'm the only one that'll notice that.
Member
Wow keep going, major props. And good to know about the tranny fluid. Had me scared you were doing all this for an auto.
2001 BMW 525i 177k Autotragic - Ride for the girl
2002 Yamaha R6 - COMING BACK FROM THE DEAD
1985 BMW 735i - Daily
Member
very nice build, wish my bimmer could have that done to her.
Member
Sorry, for the inactivity. January's been busy. An update on the progress: I received my short shift lever, transmission mounts, and acorn nut from understeer today. The new bumper and fender will be painted as soon as I have time to prep and spray them (hopefully next week). While I'm at the shop spraying I will check on my suspension parts (I hope they're done, and they better be done pro-bono for the time it took). All I'll be waiting on then are the headlight harnesses coming from EAS with the other stuff.
Did anyone have any input on my parts list for the engine?
Member
Small update:
I'll be painting tomorrow, I might have to stop by the paint shop for the right reducer and hardeners though (this shit is complicated!).
Emailed EAS, they said my shipment should be in soon, it's the last one I'm waiting on.
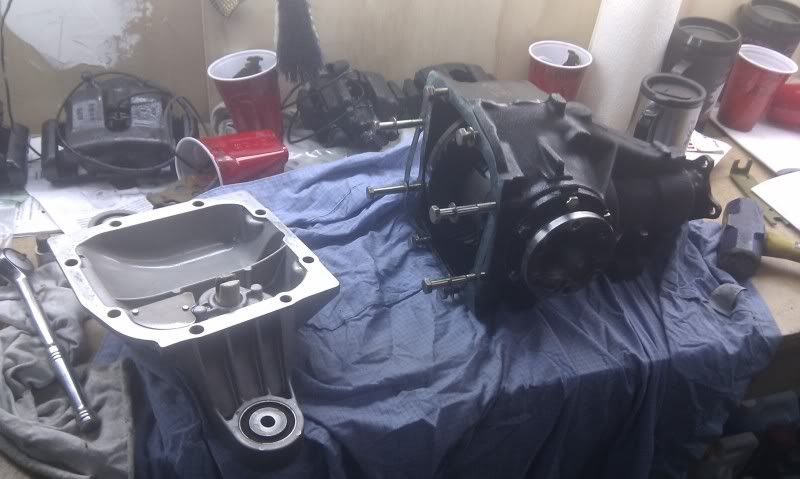
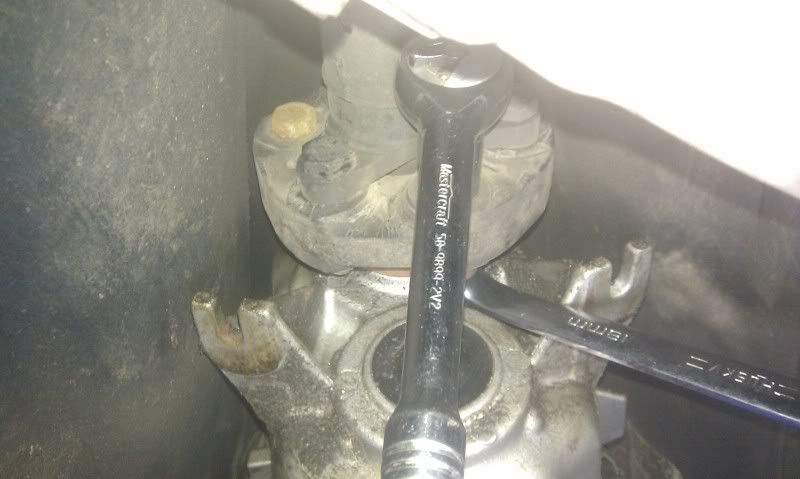
Did some work tonight. Was going to do the tranny mounts, guibo and shifter all in one, but I didn't know the Drive shaft had to be removed to do the guibo! And the exhaust manifold nuts stripped on me (of course) so I'll have to get one of those biting sockets to pull them off.
Anyways, pics of the little bit of work:
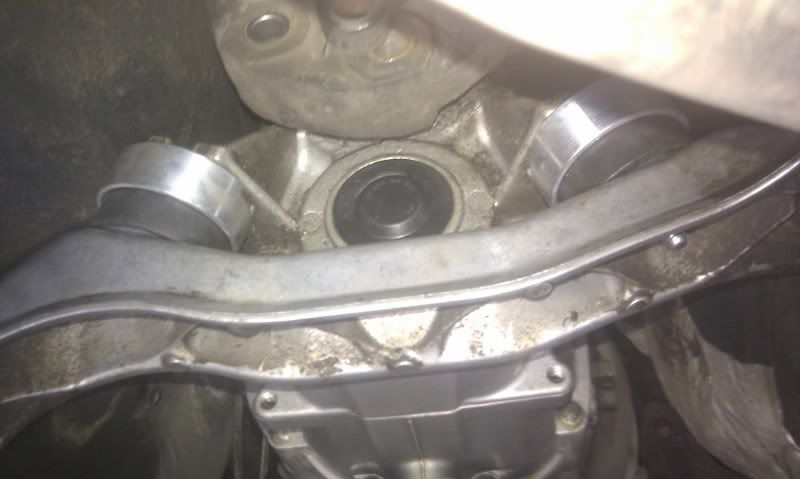
Dropped the crossbrace and old mounts. They weren't cracked but they are SOFT.
Working away on the guibo (with a BFH). Those nuts are not easy, at all.
Once I realized I wasn't going to be finished tonight, I popped the new mounts on the crossbrace and just bolted the brace to the frame so that if my jack creeps, at least I won't have my tranny and engine tilting down.
More to come as I complete this. Reading week is coming up and I gotta get this thing back on the road for March 1st.
 Posting Permissions


 Reply With Quote
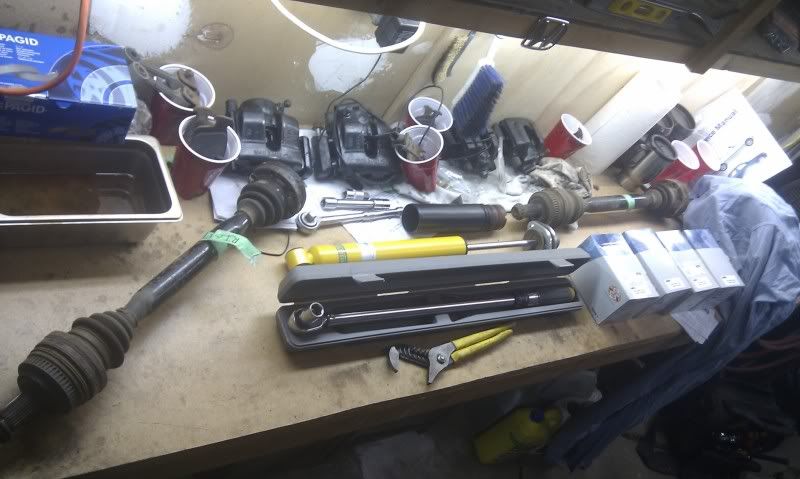


Bookmarks