BMW E31 AMBIENT INTERIOR LIGHTS MODIFICATION
I really love the orange ambient lights that are fitted to the E38 7-Series. They produce a very subtle wash of light over the centre console. My E31 suffers from the usual problems with the night-time illumination of the A/C panel and the centre vent controls. So, I thought I would kill two birds with one stone and modify the interior lighting so that I got an E38-type orange wash of light, not only for the warm glow, but to illuminate the controls as well.
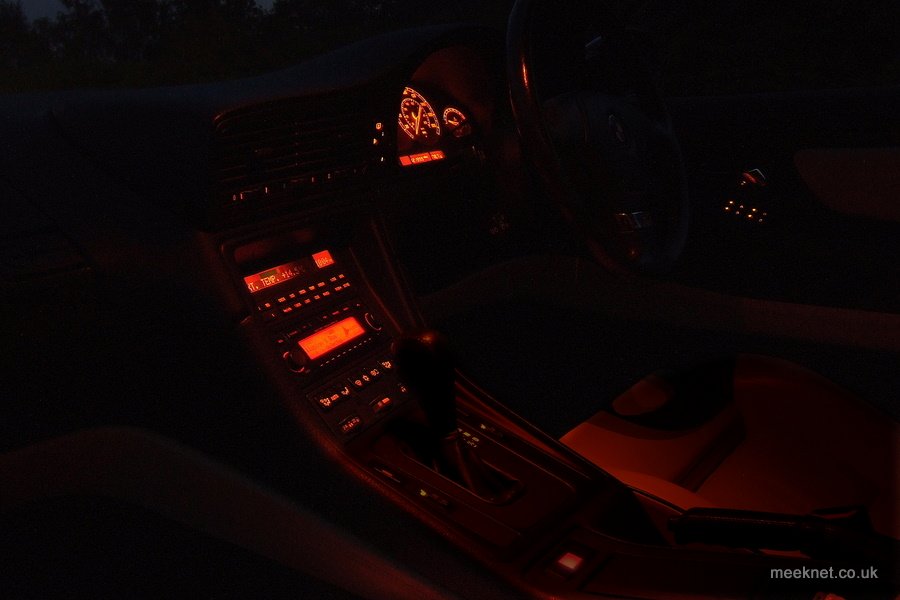
Here are the results, it is very difficult to photograph the effect, but this is pretty close to what it looks like in the dead of night, achieved by using a 15-second exposure:
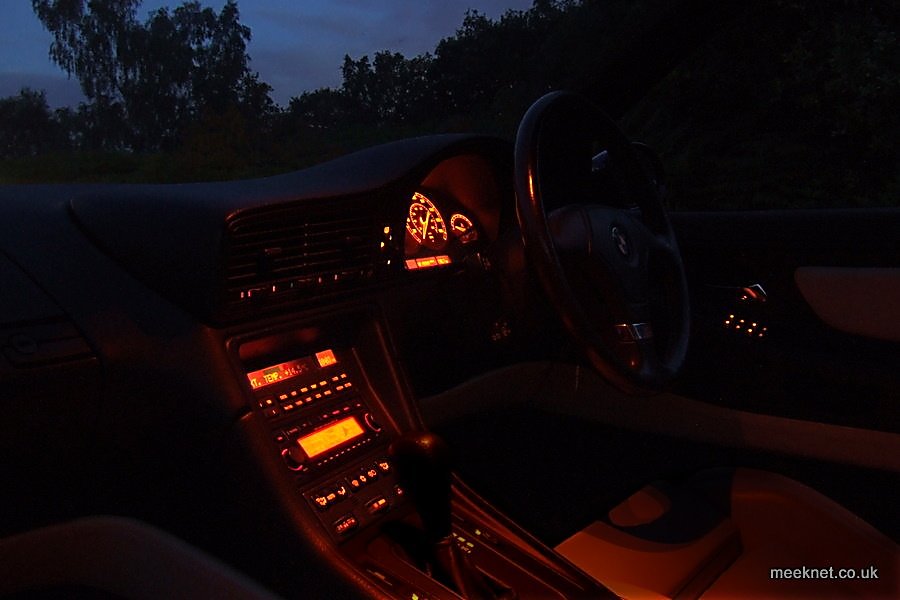
The picture shows that all the centre-console instruments are subtly illuminated so that it is easy to identify the controls at night without squinting at the dim back-lights. It is not bright enough to distract the driver at night and is very similar to the E38's ambient lighting.
The Ambient lighting stays ON all the time except when the car is switched OFF and left for 16 minutes. All interior lights are controlled by the General Module which turns off power (via a Consumer Cut-off Relay) to the dome-light after 16 minutes. This stops the interior lights being left ON and draining the battery. I have used this feature to allow the ambient lights to stay ON until the GM removes the power after 16 minutes.
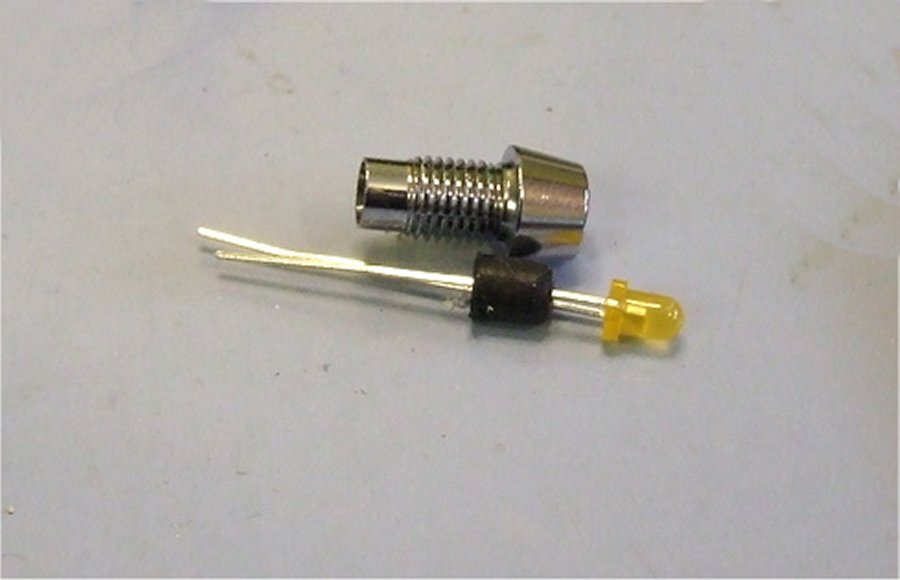
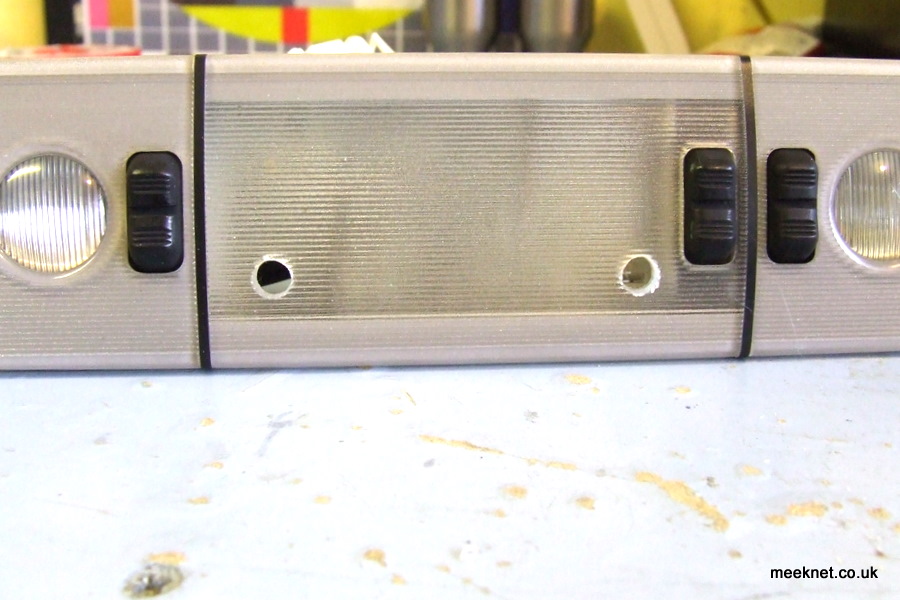
Right, enough talking, this is how I did it. I started by buying another dome-light to practice on, some 3mm orange LED's (standard 20mA/2.2V types), and a few bezels:
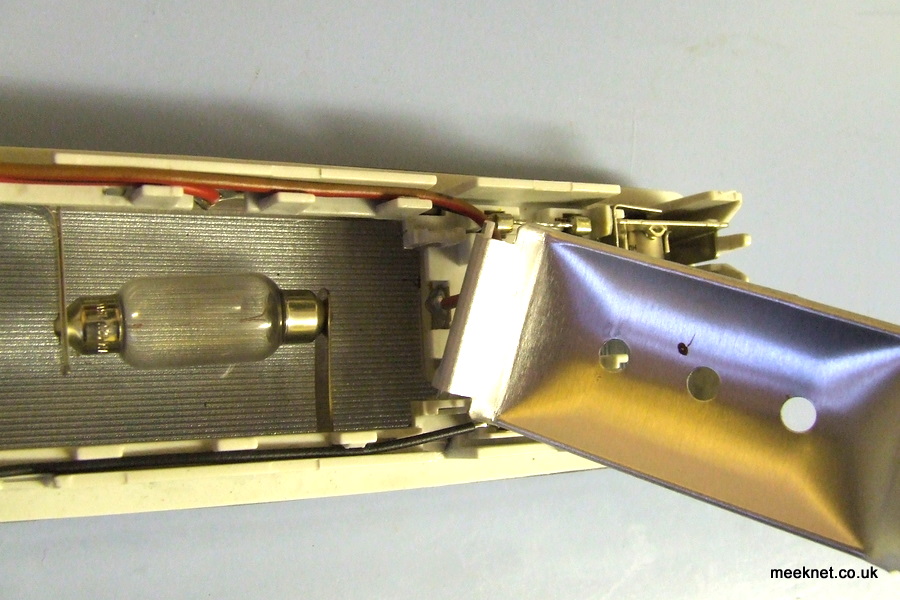
 I removed the reflector from the back of the dome light, it unclips at the side and can be removed fully:
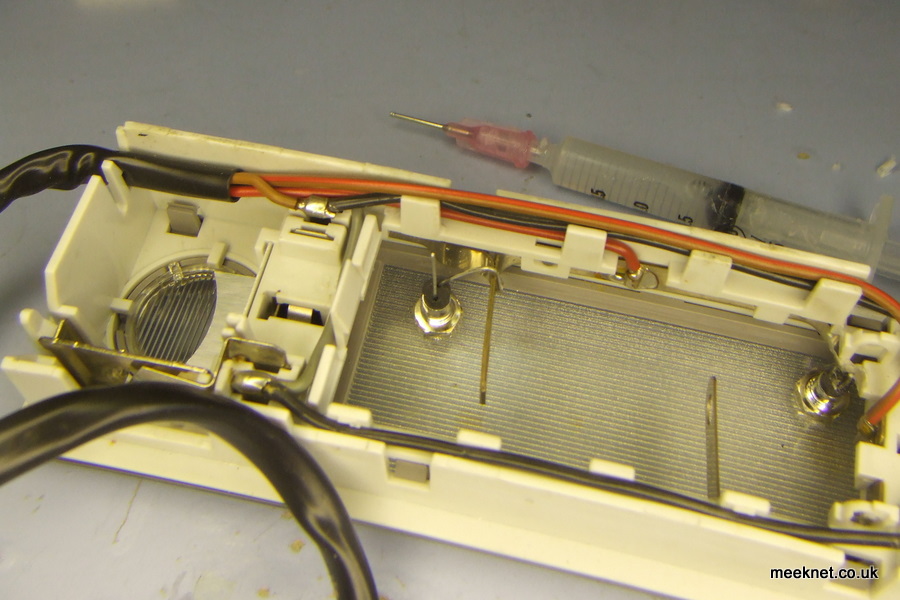
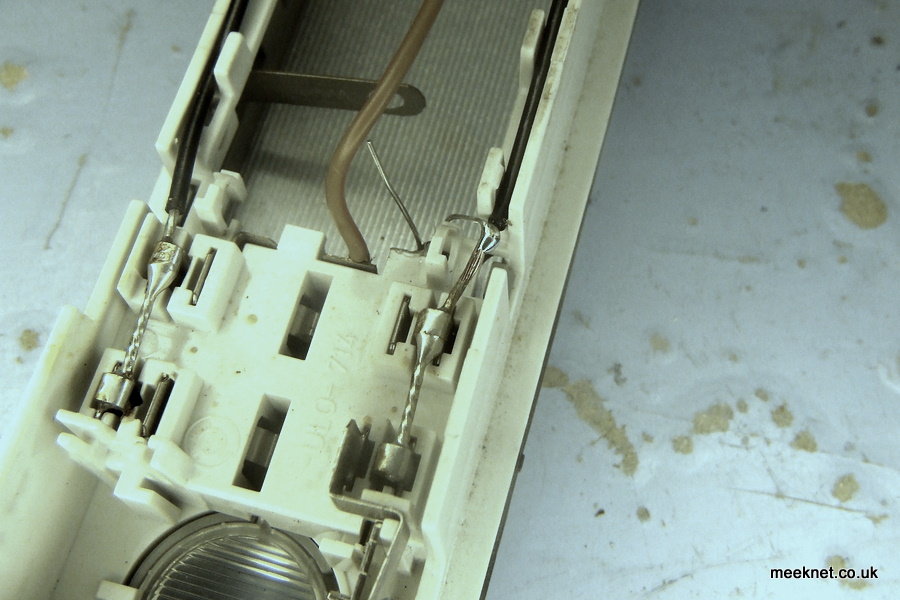
 I drilled two holes in the new dome-light as shown (well, I frizzled the hole with a soldering iron and then made it bigger with a blade from a pair of scissors really - my drills were seriously blunt):
I then fitted the two bezels, they are secured by a nut at the back. The bezels come with a rubber stopper that goes over the LED legs to hold the LED. However, the soldering of the LED's to the assembly holds them securely in place.
The LED's have two legs, one is longer than the other, this is the Anode. Connect the LONG leg to the copper-strip that holds the festoon bulb. I used a bit of wet-and-dry to key the strip and then soldered the leg:
 Note: If I were to do this again I would turn the LED 180 degrees so that the SHORT leg (Cathode) is closer to the edge of the housing - this would make the next stage easier.
I stripped back the insulation on the BLACK wire and soldered the SHORT leg of the second LED to it:
I then soldered two 1K 1/4W resistors in parallel from the SHORT leg of the first LED to the LONG leg of the second LED. I put some insulation over the first LED's SHORT leg where it goes under the copper strip. If (as explained earlier), I had rotated the LED by 180 degrees this would not be required - and it would have been neater:
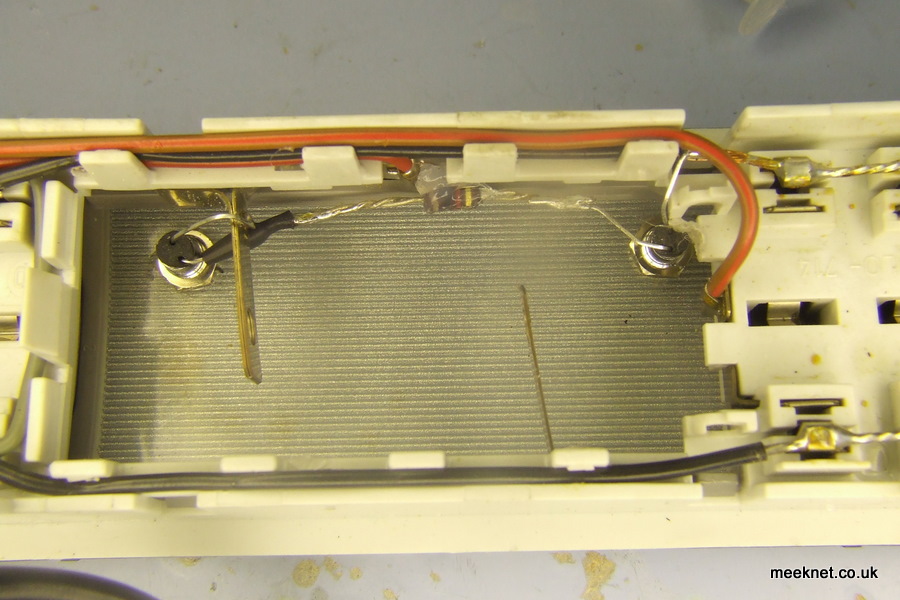 As shown above, I used RTV to secure the resistors to the side of the enclosure. I think I might do it a bit neater next time - but I wasn't sure the effect would be good enough and I was pretty sure that I would have to adjust the current through the LED's. But, the effect was perfect with the two 1K resistors (nominally 15mA with a 12V supply).
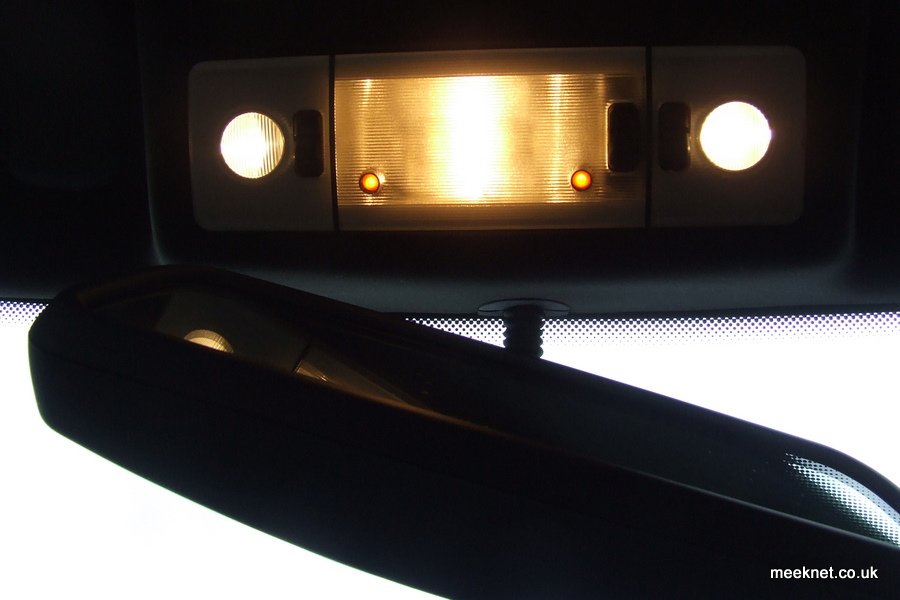
I refitted the reflector and fitted the dome light assembly back in the car. This is a daylight photograph:
As shown above, I used RTV to secure the resistors to the side of the enclosure. I think I might do it a bit neater next time - but I wasn't sure the effect would be good enough and I was pretty sure that I would have to adjust the current through the LED's. But, the effect was perfect with the two 1K resistors (nominally 15mA with a 12V supply).
I refitted the reflector and fitted the dome light assembly back in the car. This is a daylight photograph:
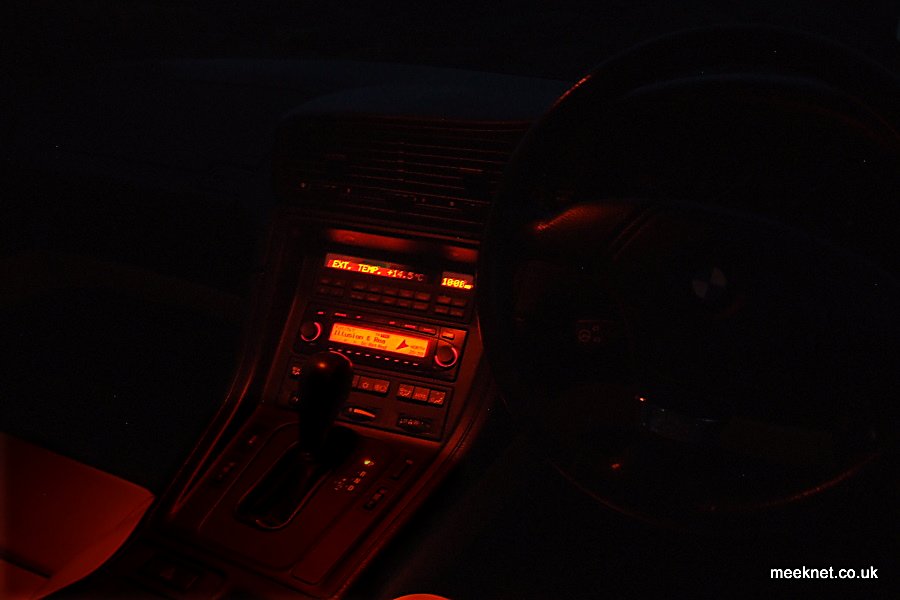
 Night view from the driver's perspective and no back-lit controls (external lights off):
 And the passenger's with the external lights off:
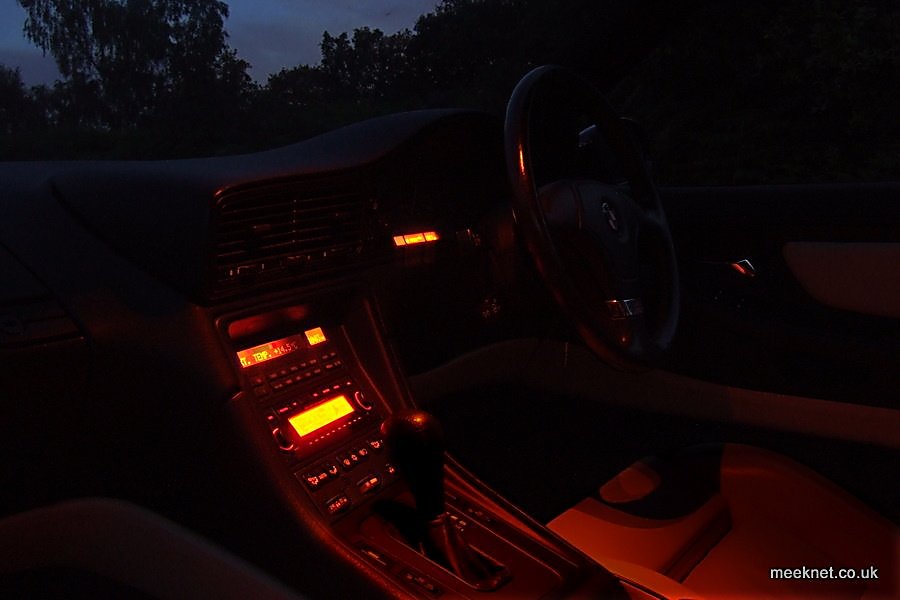 And finally with the back-lit controls on (external lights on):
 I really love the results, it makes it so much easier to find the rotary controls for the A/C at night. It also illuminates the tray in the centre-console slightly so stuff can be fished from there without groping around. This has been my favourite modification so far.
All done, time for a cup of tea.

 meeknet.co.uk
 Posting Permissions


Bookmarks