
 Member
www.LSxE36M3.com
I figure it is about time to actually start my build thread here on Bf.c
I've been posting away locally and working on my blog, but have yet to start one here for some reason... Maybe it's my slow process.
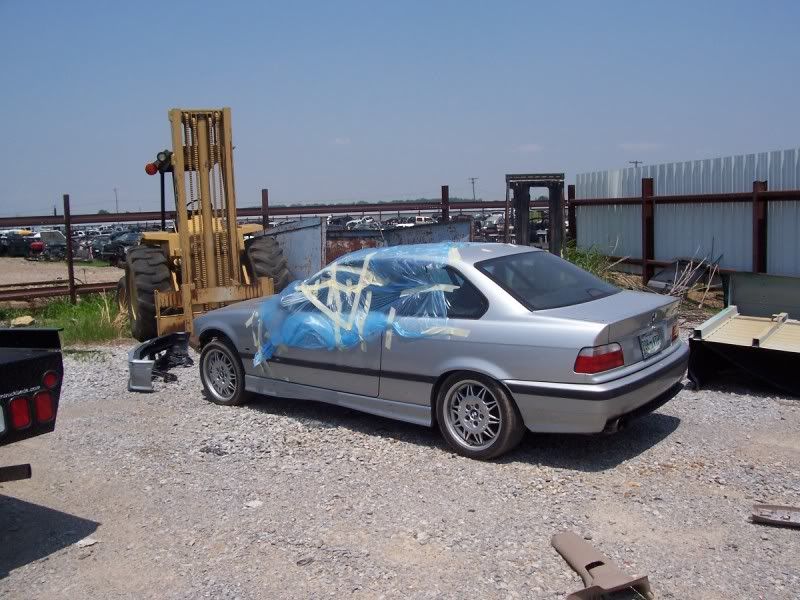
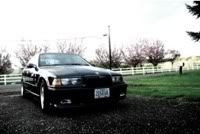
So without further Adeu, I present to you my e36 M3 LSx Swap From the beginning to now!
Built the silver car, busted motor, multiple owners, etc. Got it back through some horse trading and parted out the BMW motor and drivetrain.
Now I work at a salvage yard and snagged an aluminum blocked 5.3 and a core T56 transmission that was built by D and D with ALL the goodies. It needs a new input shaft and it's golden.
The UPS guy showed up today with the first parts of the swap...
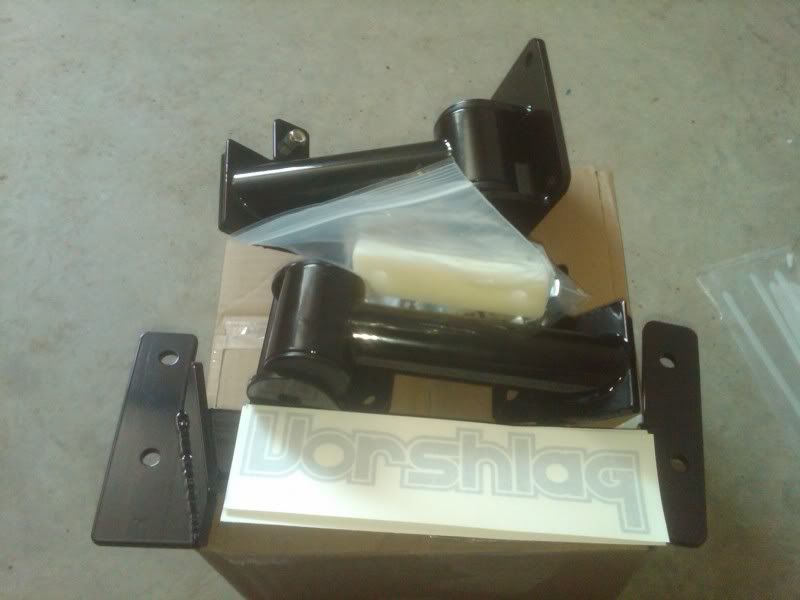
Vorshlag LS1 swap Mounts! I was originally going to fabricate my own mounts but WOW! After seeing these mounts in person, there is no way that my work would be that awesome! Tig welded, powdercoated, and beefy goodness! These guys know their stuff about LS1 powered e36 cars! They have some awesome products for other cars as well.
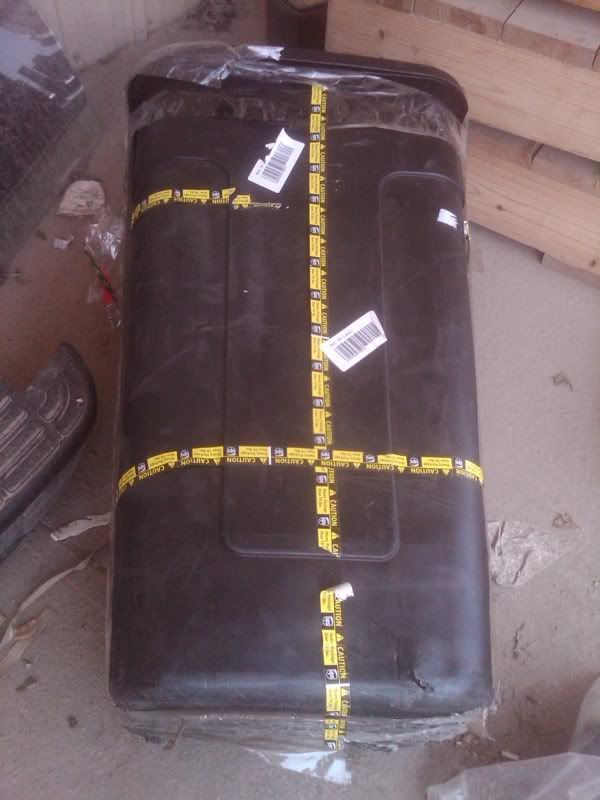
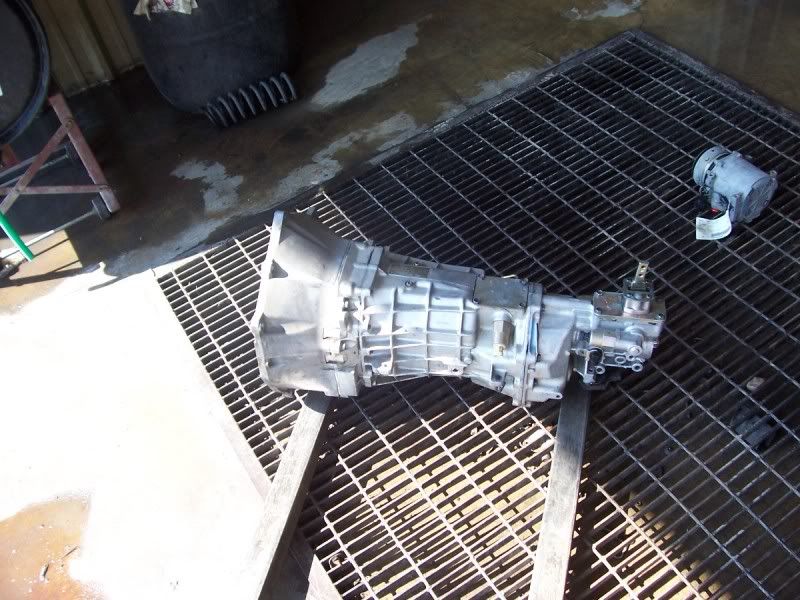
The next thing that the UPS guy dropped off today was my core T56...
It arrived in this:
I am excited to get everything mocked up now! I'm going to have to wait until Monday before I can do anything since my family is in town for the week.
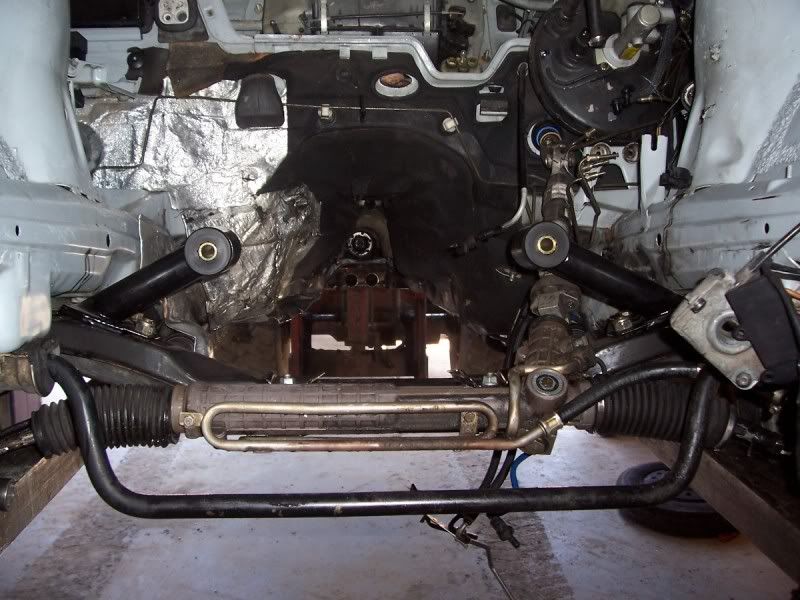
I've already started to prep the chassis, shaving the bay and cutting off all the extra brackets that are not needed. I'm also in the process of relocating the ABS pump stuff. As I would like to keep ABS.
Finally able to unpack the transmission and got it cleaned up. Purple Power and a steam cleaner works wonders.
Here's a little update:
Fuel System Planning:
The '95 M3 has a pretty good fuel system with a walboro 225gph pump in the tank and using stock lines I think that I will be in good shape.
The fuel system has a feed and return line that goes all the way up to the engine bay and enters in the driver's rear of the engine bay. This may prove to be a safety issue with header clearance.
The oem fuel filter on the BMW is basically under the driver tucked up above the chassis rail in it's own little cubby hole.
I am planning to use a 1999 fuel filter and regulator nothing bling, but proven. AN fittings on both ends and then I'll need to flare the exsisting hardlines so that the return can then be returned in this location and then only have the feed line (AN -6 braided line) going to the fuel rail.
FPR/Filter:
-6 intake adaptors:GM Part#10299146 (or Wix 33737)
(FPR), is from a 1999 C5 Corvette. Most time just ask for a fuel filter from NAPA or any parts dealer
The FBR will require fittings to adapt to traditional 3/8" lines and 5/8" return lines. One option is Russell performance
Fittings needed to adapt
(2) 3/8" fittings, part number RUS-639210 or RUS-640850
For the tank to regulator line and the fuel line connecting to the fuel rails
(1) 5/8" fitting part number RUS-640860
return to the fuel tank from the regulator
From there it is pretty much connect the dots from the stock fuel line to the filter, from the filter to the fuel rail, and from the return to the stock return line. with -6 hose.
I'm not sure what brand I am going with just yet, any ideas?
Also, edited the first post so the pictures work
Got to the shop around 8am this morning after a great birthday surprise organized by Kristin last night!
First things first, I had to get the engine bay somewhat clean so that I wasn't working in grease... Bimmer motors tend to drip oil.... YUCK!
I was also able to get BOTH windows back up! AWESOME!
Pressure washed the engine bay, then washed the Fbody oil pan.
Back inside the shop I swapped the Fbody oil pan onto the 6.0L Long block. Fit like a glove, pickup and all!
Then mated the T56 to the Long block.
Got the engine side motor mounts on...
Then it was time to remove the factory motor mounts. To make way for the Vorshlag motor mounts. They bolted in very easily!
After that It was time to try to shoe horn the T56/LSx package into the engine bay..
Needless to say it IS possible to do it without lowering the subframe... I didn't think of that idea until AFTER I got it in.
As it sits now, I've got the driver's side mount bolt in, and it's sitting on the passenger side mount. However due to the transmission jack being tied up it was not possible to get the other mount bolted up... So Monday evening I'll get that tied up and it will be in for this test fit.
Overall I'm very happy with how things turned out!
Next time I will be using the lift instead of the fork list and I'll slightly drop the sub frame for that extra little bit of space.
Needless to say, I'M EXTACTIC!!!!
PICTURES!
Apparently in my hurry to get out of the shop saturday I forgot to take one of the motor sitting in the car... I'll walk out at somepoint and take a few.
More pics...
Take today:
Sitting so docile...
Fitment... not 100% yet but ALMOST there!! It's a tight squeeze for sure!
Since the car is stored out doors had to cover up the motor for storage, hence the blue stuff....
Now it's sitting in the right place!
After a good 3 hours of work and planning I got the motor, got rid of the charchol canister, and figured out how I am going to route my fuel lines and clutch line.
I'll shut up and let the pictures speak for them selves!
Look at the engine set back!! It's almost all behind the front "axle"!
Look at the ground clearance!
I MIGHT even be able to use a Motorsports X Brace!
The lowest thing is still the sway bar, then the K frame! No busted oil pans for me!
Looking from the back side, I can see why headers are such an issue on this swap!
Passenger side - Starter will be tight, but lots of room for headers
The story changes dramatically on the Drivers side
The transmission tunnel can easily swallow the T56, I was surprised actually. There is more room to move my hand around on the transmission with the T56 then there was with the ZF!!! However two things need to be addressed. Though EASY fixes.
The shifter linkage bracket from the bimmer transmission gets in the way. I will most likely be cutting that out with the rest of the tunnel there to make for an easy shifter swap.
The other issue is just cosmetic...
I need to find a replacement for this stuff that can withstand the temperatures and water. This isn't going to cut it. Ideas?
Stay tuned for part two!
Work Space today:
After I finished fighting with the Motor and transmission I decided to plan out my fuel system. As was mentioned in an earlier post, I will be using the Corvette FPR/Filter. I ordered mine from Speedway Motors with -6AN fittings for almost HALF of what I could find them from anywhere else. Here's what I am thinking...
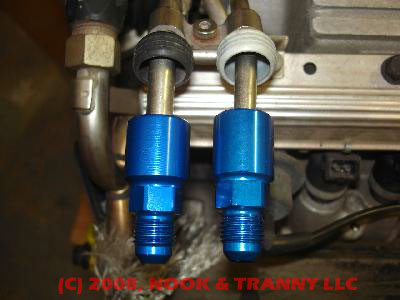
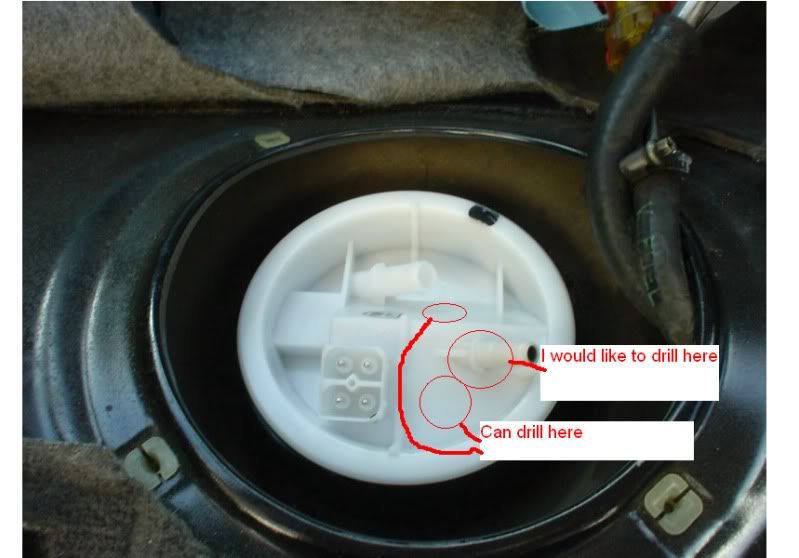
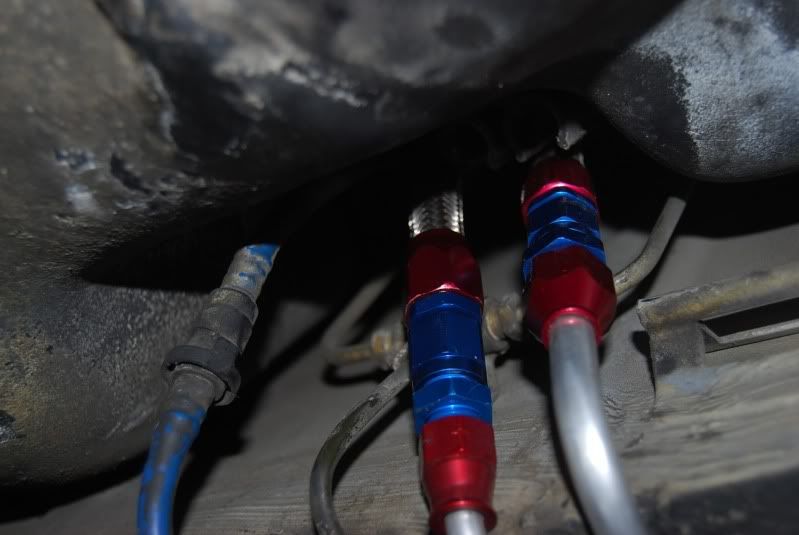
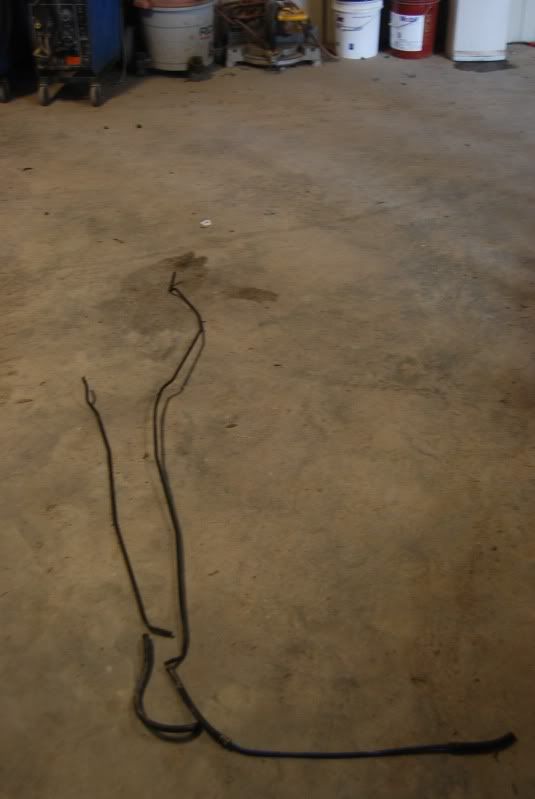
The soft lines run from the pump to this location where it is met with the hardline. The soft lines will be replaced with -6an line for both the Feed and Return. The blue line is a vapor return line and was removed just after this photo. The line furthest to the left is the rear brake line.
This is the stock location for the BMW fuel filter. This location looks to be the PERFECT spot for the FPR. I will probably replace the BMW hardlines with the proper size SAE lines so that there is no confusion and no adapters. From the FPR I will then run a single -6 AN line to the fuel rail on the LS6 intake.
It sounds pretty straight forward, so I hope it works!
Oh yeah a Walboro 225 gph pump resides in the stock fuel pump basket.
Saturday afternoon while Kristin was off with her brides maids looking at dresses, shoes, and generally speaking having a girls day. I started to attack the wiring harness.
I started out with an 01 Yukon 5.3/4L60E
The start of a Standalone... 2001 5.3 Harness
Found an awesome site to help me with the paring down of the harness.
http://www.lt1swap.com/wiringharness.htm
This guy has his stuff together!!!
Read through the pages and pages of information it is invaluable!
Check out the menu at the top of the page and click on the Wiring tab for my wiring notes, what I deleted and what I paired with the stock e36 wiring harness. I don’t want to clutter up the blog with a HUGE spreadsheet.
I pared down the harness to only the essential parts to make the engine run. I deleted all of the Emissions and transmission related stuff. I also deleted anything fuel tank related…
The start of a HUGE wiring mess!
Yeah, the blackberry takes NASTY pictures now…
Today I was able to get to the u pull it yard and grabbed two OBD I harnesses. After I finish up the teardown of the 5.3 harness I will dive into the BMW harness!
I needed to clear up a little issue that came to light… Drive by Wire and Drive by Cable motors are inherently different. The harnesses are different, the ECUs are different and at somepoint, the reluctor wheels are different.
LS1Tech.com is a wealth of information where I came up with the following breakdown:
24x – Black Crank Sensor:
24x Black CkPS
1997-2005 cars (except GTO, CTSV and a few others thru 2007)
1999-2007 trucks (old body style)
58x – Gray Crank Sensor:
CkPS Gray 58x
2006 and up cars (except LS4 and as select few others)
2007 and up trucks with single bolt cam applications and new body
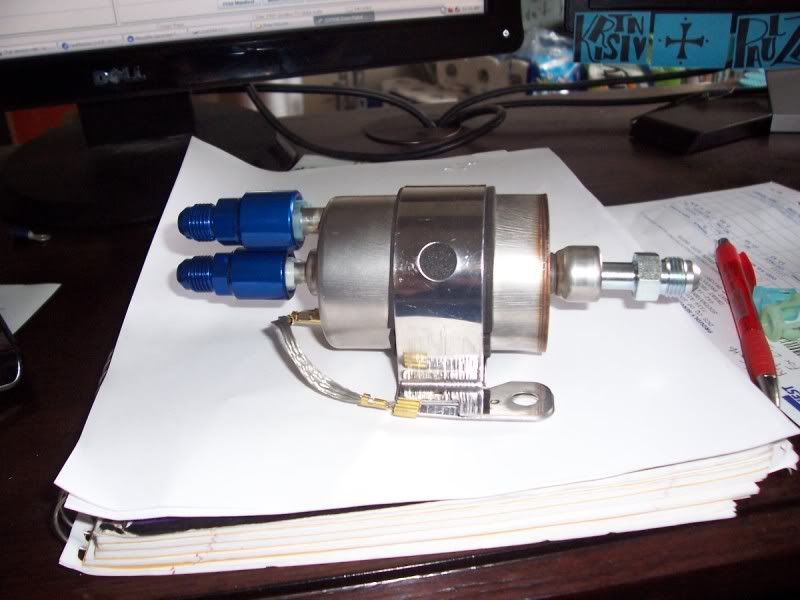
I ordered a Vette Filter, and fittings from Speedway motors!
Two day shipping isn’t bad at all! Great Prices, good selection, and fast service.
Speedway Motors - Give them a try!
Here’s what I got:
Good packaging!
Of course I couldn’t just let it sit there… 2 minutes later and it’s together!
All assembled!
Quick Parts List:
Wix Vette Filter: 33737
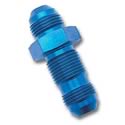
Russell -6an to 3/8″ adaptor – 640850 x2 – For Fuel Feed and LS6 Fuel Rail
Russell -6an to 5/16″ adaptor – 640860 – Return Line
Russel 3/8″ to -6 an Push on Fitting – 64940 – Outlet of Filter to -6an hose
Last edited by Pzary3233; 07-12-2010 at 11:02 AM. Reason: Automerged Doublepost
Member
Went to work on the harness last night…
Got the 5.3 harness completely disassembled, labeled and ready to be laid out on the LS6 intake… which reminds me… dude needs to get it on it’s way!
Everything laid out, with my side kick Jack.
Shortly after that while working on the e36 harness I slipped with my utility knife and gashed my thumb open… first blood of the build…
I also ordered about $250 bucks worth of stuff from Summit Racing yesterday, that should complete the fuel system and convert everything from the silly Metric thick wall tubing that is IMPOSSIBLE to flare to -6an hose, 3/8″, and 5/16″ aluminum tube.
Pics of said blood bath later.
Now this thread is caught up with everything that has been going on!
Member
you been holding out my friend, glad to see that u are so close, keep up the good work, is there a roll cage in the car?
Member
Nice!
e30 84 340i m6x powered.
e34 89 535i 5speed - current DD
e24 89 635csi - maybe a DD?
e34 93 525i (m50tu) - gone
e39 540i 6spd m-sport - gone
e53 x5 4.4l - gone
e30 89 325i (m20) - gone
16 valve E36 M3 :-0
Great coverage of your build, thanks for sharing your progress. It's coming along quite nicely.Love the color, wish mine was Silver.
To help clear thus up a little further, an engine having DBW does not indicate any special crank or cam triggers for any particular engine, nor does any particular crank and cam trigger combination indicate an engine had or requires DBW. Those trigger wheel changes are merely evolution of the LSx line and have no bearing whatsoever on whether the engine was DBW or DBC. The LSx has been ran with both DBW and DBC since its debut in 1997 in the Corvette on LS'x with all version of the crank and cam triggers and PCM's and is being incorporated more and more on newer vehicles.Originally Posted by Pzary3233

When sourcing an LSx Powertrain, just know ahead of time if you want DBW or not. If you don't care either way, thats easy, just be sure your power train comes with the PCM and harness and the pedal assy if DBW.
If you already have an engine and trans and want to change from DBW to DBC or vice versa, the easiest route is to just acquire the appropriate PCM and harness that matches your engine, (crank and cam trigger) or some tuners are offering PCM program changes along with a harness etc. LSx DBW is no more of a mystery to solve than haw to deal with auto vs manual trans. It's just another option the swapper has available to him.
Hope that helps clear up some of the DBW/DBC/PCM/trigger-wheel unknowns.
Member
Just a roll bar for the moment, it's supposed to be one of the HMS roll bars that is no longer in production. It fits VERY VERY well and even allows for a good seat position for me. (I'm 6')
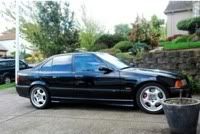
I like my silver car, but I would rather Imola or Avus.
Alas paint can cure that....
Thanks for the DBW vs DBC stuff. My worry is grabbing a motor with the wrong reluctor wheels... because then I have to swap them or spend the money on the hit or miss converter box.
So here is my little update:
This weekend is a long weekend. Originally I was hoping that I could get the car actually running with the L33 5.3 but I do not think that is in the cards. My LS6 intake has still not shown up
Instead I will be taking my time working on the fuel system and hitting the junk yards for misc pieces to make the swap even more clean. I am working on an idea to hide the bulk of the wiring harness as well!
The plan on the fuel system is to take the stock pump housing and cradle and adapt the -6 an lines and bulkhead fittings to it. Then plastic weld the original ports closed. Not pretty but will do the job.
From the tank to the hard line I will be running -6 an SS braided line.
The Feed line will be 3/8″ Aluminum Fuel line using Russell no flare -6 an adaptors
The Return line will be 5/16″ Aluminum Fuel line using a Russell no flare -6 an adaptor
The fuel filter will be connected to the hard lines via -6 an adapters.
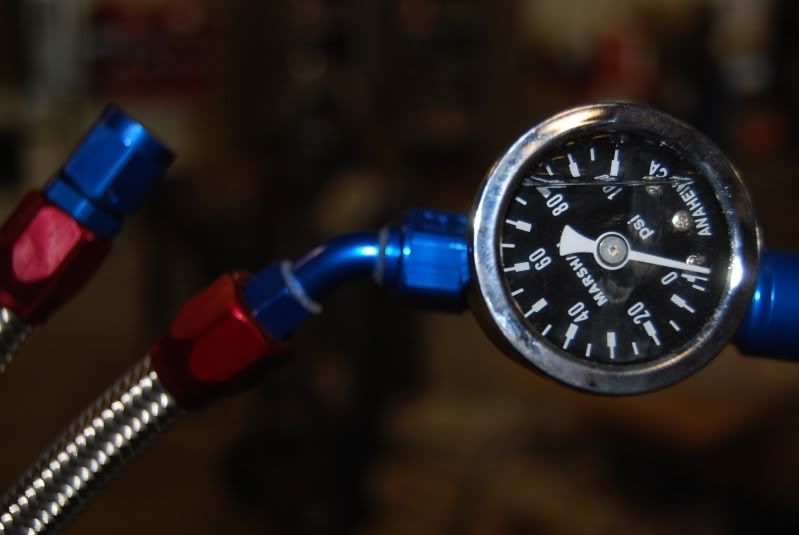
The fuel rail will be connected to the filter via Fuel Rail adapter, Fuel pressure gauge, and -6 an line.
I have a feeling that this will take me most of the day to build but I need tasks for all weekend. I am sure I will come up with other things that need to be done!
Might even get a little paint work and stuff done Well see!
This is just sitting in my office begging to be installed:
Another double post...
I am hoping that I can cut off the original "nipple" drill through the hole to enlarge it for the AN bulkhead fitting. and connect like legos.
Otherwise it will be cutting off the nipple plastic welding a few pieces together and then tapping into another flat area on the housing.
I've also found some pictures of the e46 pump housing and if it will fit close enough I may try adapting it... I've got one laying around in my parts stash.
I'll have detailed pictures and thoughts tonight or tomorrow.
Last edited by Pzary3233; 07-02-2010 at 01:31 PM. Reason: Automerged Doublepost
Member
-----------------------------------------------------------------------------------
It's gonna get merged....
Today was a great day for working on the car, not a whole lot of heat and enough air flow through the shop to make it quite enjoyable.
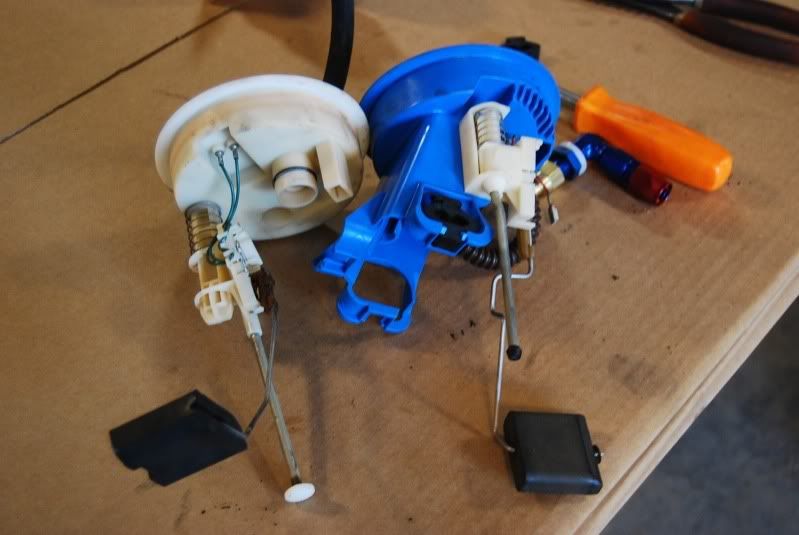
To start off with I pulled the fuel pump carrier and return line carrier to see what the story was.
The blue one is the fuel pump obviously and the white one is the return.
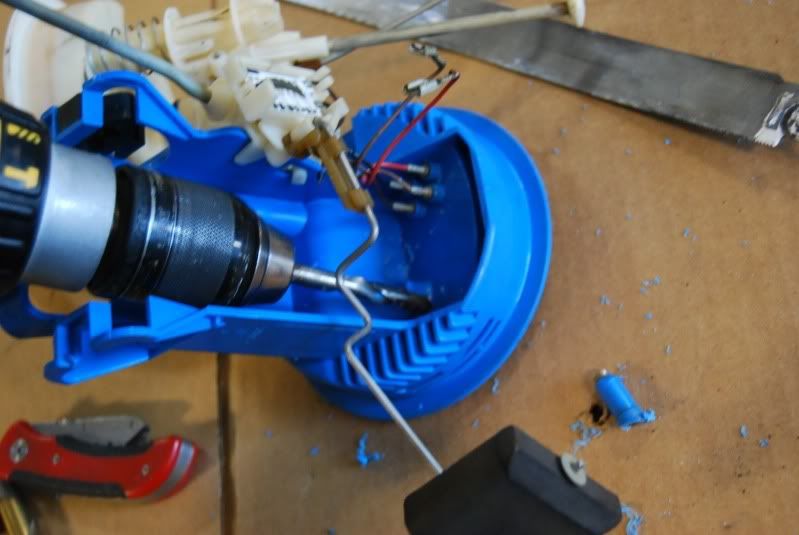
I started with the fuel pump carrier
Here is a look at the under side of the pump, notice where the line comes through the housing.
Then I drilled a ½” hole through the housing to fit the bulkhead fitting.
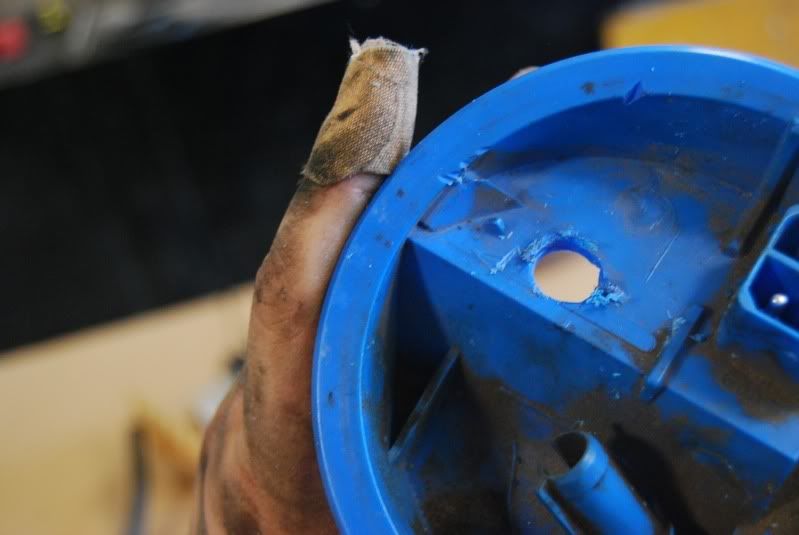
The finished product
I should really have used straight bulkhead fittings and then used a 90 degree swivel…
After I worked on the fuel pump carrier and realized that I needed to by some new fittings I move on to the pumbing of the hard lines. I bought a tubing bender which I used on the 90 degree bends but otherwise was useless…
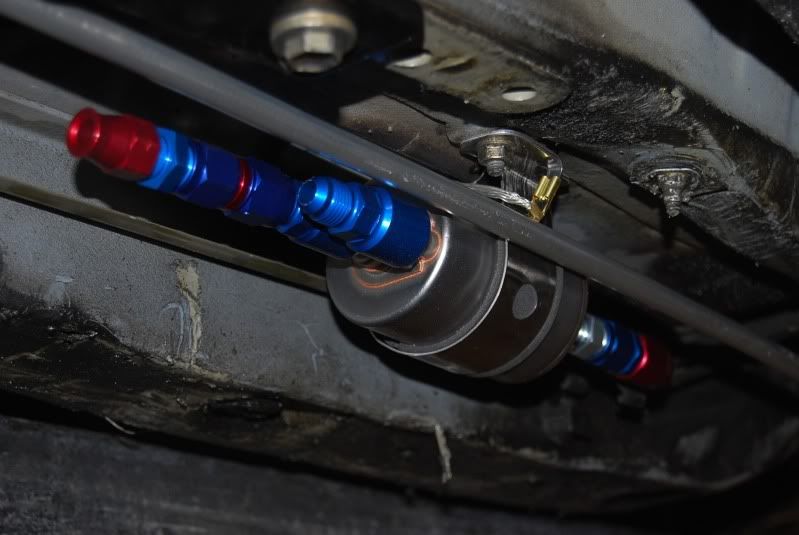
First off, the vette Filter/FPR fits VERY well in the stock filter location, I just swapped the bracket around and turned the assembly so it fit my needs.
I will make an aluminum skid plate for the filter a bit later. The plastic stock piece was torn to shreads, otherwise it would have worked well.
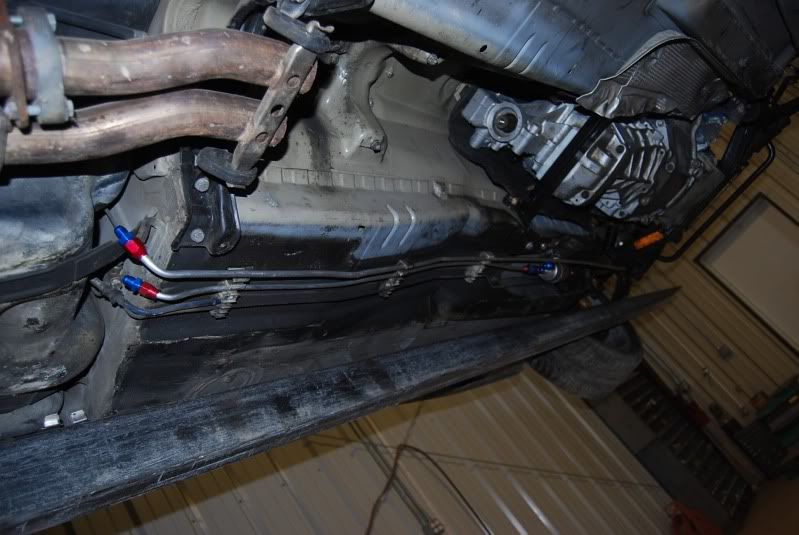
Then I started running the hardline.
I started with the rear part of the hard line. I decided to stick with the OEM routing of the lines. If I had to do it again I would drop the tank all the way down and run the hardline up to the drivers side inspection port. I may do that if I get bored sometime.
90 degree bend going up to the fuel tank
Both lines run all the way to the Filter/FPR
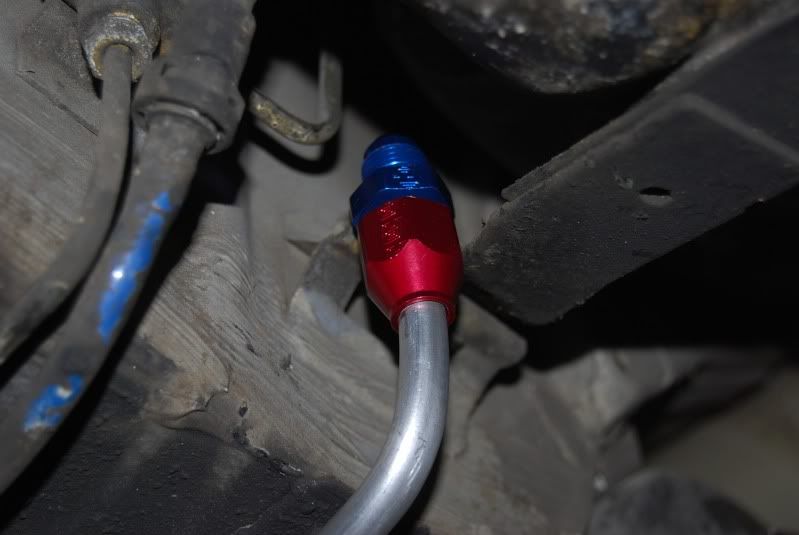
Then I worked on making the flex lines for both the feed and the return. I made them a good bit longer since I cannot work on the lines in their final place, the hard line must be loose from the car in order for me to access the fittings.
It’s a tight fit!!
Here’s a few more shots of the hoses:
All of that work done today to just replace these simple lines:
More to come!
I didn't post much info on the Bulkhead stuff. mainly because I ordered some of the wrong fittings which I need to grab on Tuesday when places open back up.
My idea will work, and work well. I am not going to use epoxy etc. the bulkhead fittings make it so that simple silacone sealant should be all that is needed.
Instead of the 90 degree fittings I should have gotten straight and then a 90 degree hose end.
That would have been the much easier approach... had I just looked at it a little more closely....
Hopefully one of the speedshops in town will be open on monday so I can get this thing buttoned up and have one less thing to worry about.
Also while I am in a posting mood, here are some random shots of the interior... rarely does it ever get shown.
The seats are going to have to be "restored" somehow...
And my bit of Euro bling:
My favorite part of the whole dash, found that in England, and paid more in shipping to get it here then for the cluster it's self! I'm going to make the oil temp work too!
Last edited by Pzary3233; 07-03-2010 at 07:55 PM. Reason: Automerged Doublepost
Member
nice work, the car is looking good, i'm missing driver side seat door panels and headliner, u even got a roll bar sweet!!!
Member
Ha, yeah, it's sitting on the apartment... the window regulator is acting up... when do they not?
the headliner I got really lucky on!
The roll bar is great, they really help stiffen the car up.
Sacked up and got my own domain and uploaded wordpress on my own hosting: http://lsxe36m3.com/
Same stuff, easier to do cool stuff!
Still has a E39
Supporting Vendor
nice web page
cars looking good too!
Member
Looks great! Keep up good work!
The more pictures the better!
Member
Yes I enjoy taking pictures as much as I enjoy working on the car, so there should be no shortage of photos!
Senior Member
Great work! Our swaps look similar
Also, you answered a question I had about the fuel system before I could ask it. Keep the updates coming!
БМВ Фанат!
I think you already got it right down in your later posts, but in this picture you got feed and return ports reversed.
- 96 328is 6.0L. (LS1 to LS2 build thread: http://forums.bimmerforums.com/forum...ad.php?2098938)
- 96 328is 5.7L. (LS1 build thread: http://forums.bimmerforums.com/forum....php?t=1289987)
- 95 ///M3 6.0L. (LS2 build thread: http://forums.bimmerforums.com/forum....php?t=1619249)
- 97 ///M3. (e46 Fender Flares/track car build thread: http://forums.bimmerforums.com/forum....php?t=1727098)
- 96 328is (Dual Fuel Pump to Surge Tank thread: http://www.bimmerforums.com/forum/sh...ad.php?1964025)
Member
yeah I figured that out pretty quick... that was before I had it in my hand... Then it is a no brainer....
Senior Member
Oops, another question.
How exactly are you connecting the fuel rail to the FPR? I see (and have myself here at home, haha) the 3/8" to -6AN push on fitting for the outlet of the FPR, and attach some hose to that via a -6AN hose end, but how are you going to connect the hose to the fuel rail itself? Mine has a push on type fitting that looks like the same size as the FPR's, but I can't find any info about it online.
Member
use a 3/8 quick disconnect, one as the one attached to the filter outlet
Last edited by mateo m3; 07-08-2010 at 03:24 AM.
Member
Exactly the same 3/8" disconnect that you use on the filter is used on the fuel rail. I may end up going with a billet fuel rail for the bling/price factor.
The Saga continues:
In order to run the LS6 intake you must either run LS1/LS6 injectors or modify truck injectors to fit the LS6 intake. Since I bought a complete intake with injectors I need to run the LS6 injectors. They use a Standard EV1 connector rather then the very odd shaped EV6 connector found on the Vortec and LS2 motors.
From ChevyThunder EV1 vs EV6 respectively
DIY Autotune http://www.diyautotune.com/ showed to have EV1 injector plugs and pins for about 4 bucks less a piece then EVERYWHERE else.
Comes with 3 pins and a connector per pack
If the stupid intake will finally come in I will be finishing up the fuel system and wiring this weekend... I don't like individual eBay purchases....
Last edited by Pzary3233; 07-08-2010 at 01:49 PM. Reason: Automerged Doublepost
Member
Today I was thinking about tracking the car and thinking about how to keep the motor cool in a high performance environment. This is a two fold issue. The first*component*of keeping the engine running well is keeping the coolant flowing and cooled.That I've got coverd with an electric fan and 2" Aluminum radiator. The other part of that is keeping the Oil within a safe operating temperature.
I started looking at different ways to get an oil cooler. You can get a cool aluminum block from many shops, but the fact of the matter is that GM made one for you!
Most people see this oil temp send or block off plate on their LSx motors
HOWEVER, GM did provide an oil cooler on some trucks. It was an option, I do not know what year, model, or option code makes one get an oil cooler but SOME did indeed have them.
Stay Tuned I have more coming today!!
Went to the shop saturday morning to work on the car. I only had a few little things to work on before I need more parts... ie LS6 intake and LS1 parts intake, PCM reprogrammed etc.
I worked on the fuel pump and return hangers today so that I could button up my fuel system. I got them both ready to go!!! I will let the pictures do the talking.
Parts ready to go...
Fuel pump and return hangers have already had the holes drilled...
Straight bulkhead fitting the 90 Degree fittings will not fit...
Straight bulkhead fitting mocked up
View from the top
Final install using Permatex Black
Test fit of the return - used a union and threaded the hanger.
Under side where the return lines attach to the Hanger
Installed with Permatex Black
After I finished up the hanger assemblies I went to put the 90 degree earls fittings on the hose which originally had russell fittings... I HATE Earls fittings... They are much harder to install then the Russell fittings. I will be sticking with Russell from now on. So off to order more fittings... bummer!
I mocked up the oil cooler block and took some good pictures so everyone can get a good idea of what is going on with it. Header clearance MAY prove to be an issue so we'll cross that bridge when it comes.
"Oil Cooler Block and lines from a Vortec 5.3
Comparison between the block off plate and cooler block
Mocked up on the 6.0 Block... POSSIBLE header clearance issues
I also got a nifty little part from Speedway motors that screws into where the oil level sensor originally went. This fitting has an 1/8" threaded hole in it for an oil temp sensor. Awesome! One less thing to have to try to adapt.
Great idea for an oil temp sensor!
Once done with those small little things I worked on removing the MB Quart crossovers from the glovebox and hiding them inside the dash.
Just laying in the hole for now, they will be properly mounted soon...
When tuning the PCM one needs an OBD II port to connect... So to make it a clean install I found a great place to connect it. *With a little bit of trimming the OBD II Connector will look factory in that location. Not to mention I can use the ground and power wires from the flash light plug!
The flash light plug hole makes the perfect spot for the OBD II port!
From there it was just cleaning up and watching some other guys at the shop put a 4.3 V6 into a Jeep TJ Wrangler. My intakes should be here this week! Awesome!
And as always check out my Blog for more information beyond what I post in my build thread!
www.lsxe36m3.com
Last edited by Pzary3233; 07-12-2010 at 11:01 AM. Reason: Automerged Doublepost
Member
i need to get one of those OBD II plug, any info on wiring this plug thanks, everything else is looking good
Member
You can get one out of any 95+ GM.
Or:
Here I will outline building your own fuse block and attach relay sockets. This is a general guide that will work for most any wiring harness. I use this same basic setup for LT1, LS1, Vortec Trucks etc.
First off, the parts you will need to build the fuse block and OBD2 Diagnostic Port.
OBD2 Port Plastic Connector, 16 Pin www.mouser.com 829-12110250 1
http://www.mouser.com/ProductDetail/...ZMW9Zvmg%3d%3d
Terminals - for OBD2 port www.mouser.com 829-12129373 4
http://www.mouser.com/ProductDetail/...ijGsa8YA%3d%3d
Terminal Lock - secures terminals www.mouser.com 829-12160437 2
http://www.mouser.com/ProductDetail/...2O9yLCmA%3d%3d
OBD2 DIAGNOSTIC PORT WIRING
All OBD2 port's for LS1, Vortec Truck are the same.
Pin 2. - Serial Data - FROM the PCM.
Pin 4 & 5 - GROUND - Usually only pin 5 is needed, however some scan tools/code readers will need GROUND on pin 4 as well.
Pin 16 - 12v+ BATTERY - Power from 12v+ Battery source.
Grabbed all my info from this dude: http://www.lt1swap.com/fuseblock_obd2port.html
When my car is running I'm going to give him a donation since his site has helped me SO MUCH!
16 valve E36 M3 :-0
Paul,
I hate to be the bearer of bad news, but over the counter silicone sealants such as Permatex are not compatible with gasoline. Service tech 101, gasoline eats/dissolves/swells and ultimately changes the state of over the counter silicone sealants over time, definitely not a sealant to use on fuel tanks, fuel systems, fuel lines, etc.
There has been some discussion regrading a Dow Corning sealant, #730, (fluorosilicone rubber paste), that is supposedly gasoline resistant, but at $80 for only 3oz, ($155 for only 5.7 oz) it is not cheap.Hylomar is another sealant that seems to be popular for sealing fuel systems, as are paper and rubber gaskets.
http://www.ferrarichat.com/forum/sho...hp?p=139433877
http://www.eng-tips.com/viewthread.c...138588&page=20
Sorry for the bad news, hope you are able to catch it in time and find a suitable sealant.
Last edited by BRAAP; 07-12-2010 at 12:33 PM.
Member
Braap,
I read the label on the silicone that said it was safe for fuel systems... but if that is the case, then I'll change it!
THANKS!
16 valve E36 M3 :-0
I would definitely research it first. I do know the the Permatex "Ultra" line of RTV sealants, (Blue, Black, Copper, etc), are a newer more advanced and resilient silicone, I love it for applications that call for silicone sealant, but as I understand it, still not gasoline compatible.
Member
After a sketchy deal that fell through on eBay I located one through work for 100 bucks. I couldn't believe the price so I called and asked them about the intake, one day later it's here!
LS6 Intake
It came with some sensors that I am not sure of what they are... seems like they are all vacuum related.
Not sure what this sensor is...
The other sensor I am not sure about...
Money Shot
Anyone have a clue on the sensors? I am not aware of needing them..........?
 Posting Permissions


 Reply With Quote


Bookmarks