
 Member
So you need to put some attention into those headlamp buckets eh? Well here is my step by step guide to how to rebuild them once they are stripped. Stripping is a reversal of the rebuild!
So why you ask did I strip down perfectly functional headlmps? The answer to that is preventative medicine, or, in particular, a pre-emptive strike on those pesky adjusters and the spontaneous combustive nature of the wiring looms.
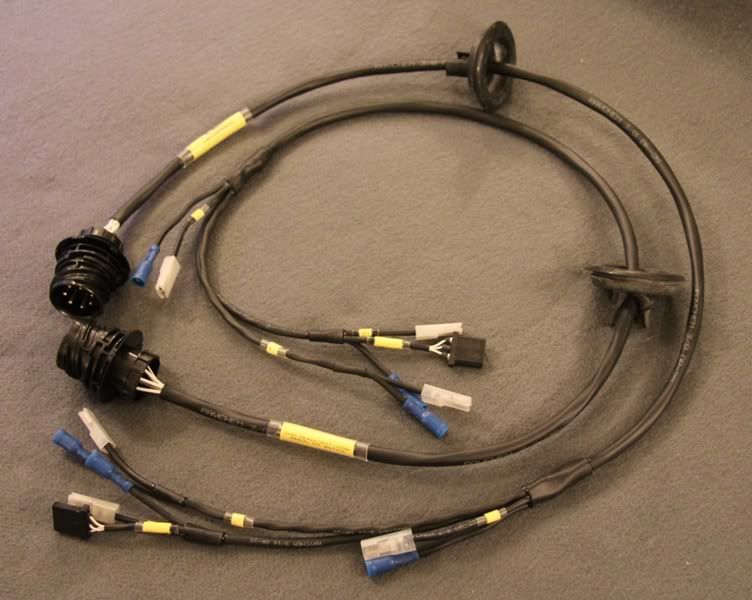
You are all aware I make a couple of bits and pieces for our cars but I have to say, electrics are not my forte, and my soldering looks like parrot $hit. I therefore approached this company to carry out some inspections and to manufacture some race spec, mega quality plug and play headlamp looms.
http://www.wiringlooms.com/
This rebuild is with the prototype looms that will now be going into production for me. I have requested a batch of 10 pairs initially. If you are interested, let me know. Looms are all clearly labelled......
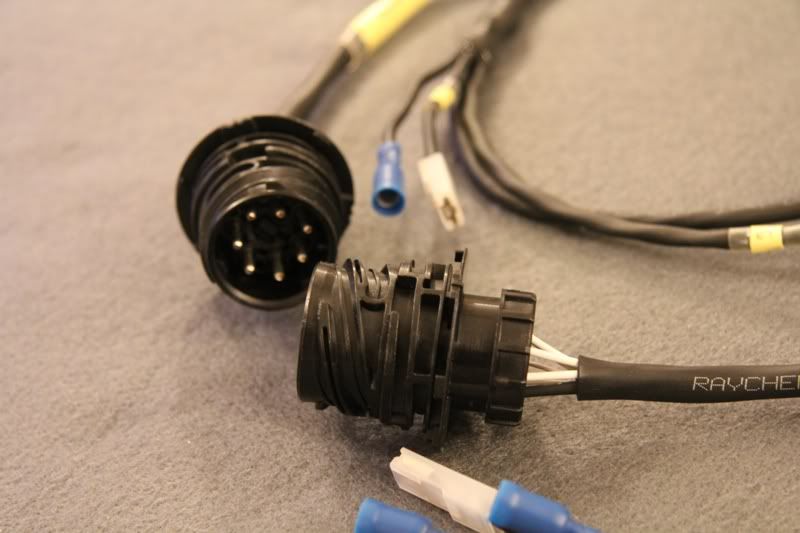
Come with all new connectors.....
And are properly sealed from the elements.
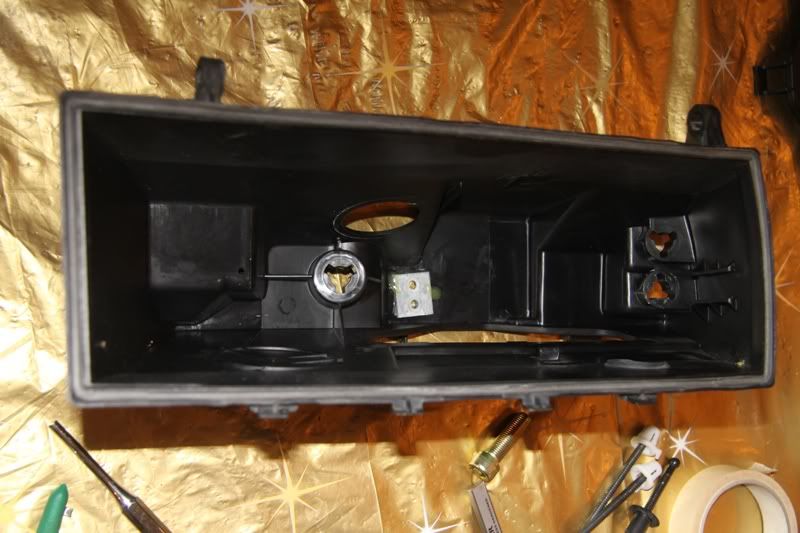
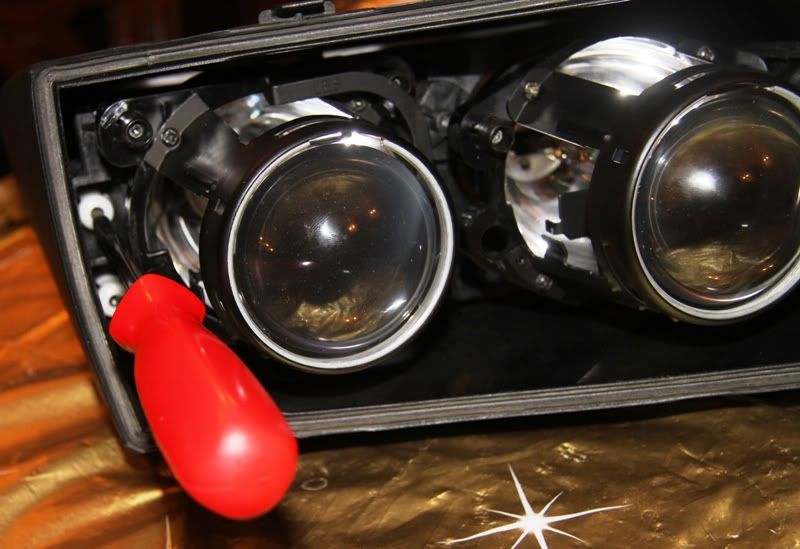
So this is where we start from, the main components of the lamp, excluding the glass and adjusters.
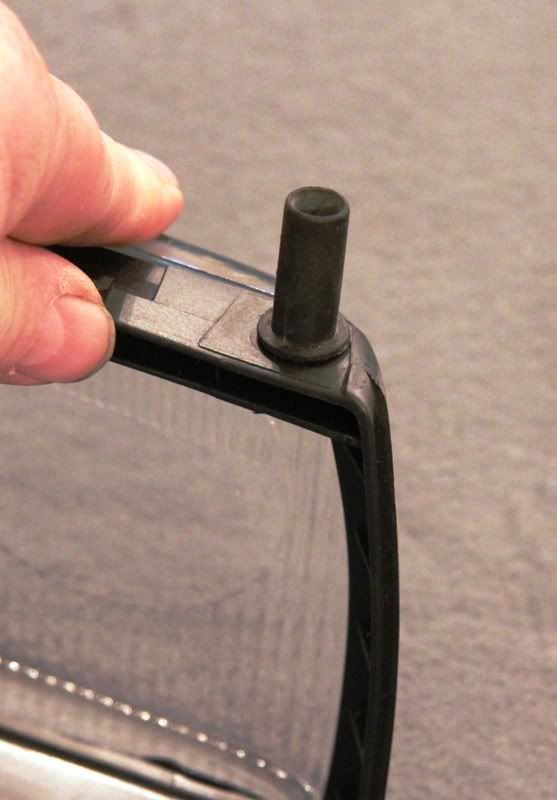
After cleaning up all the components, using a little liquid soap, refit the headlamp glass rubber drain tube with a twisting action........
So that it sits nice and square like this.
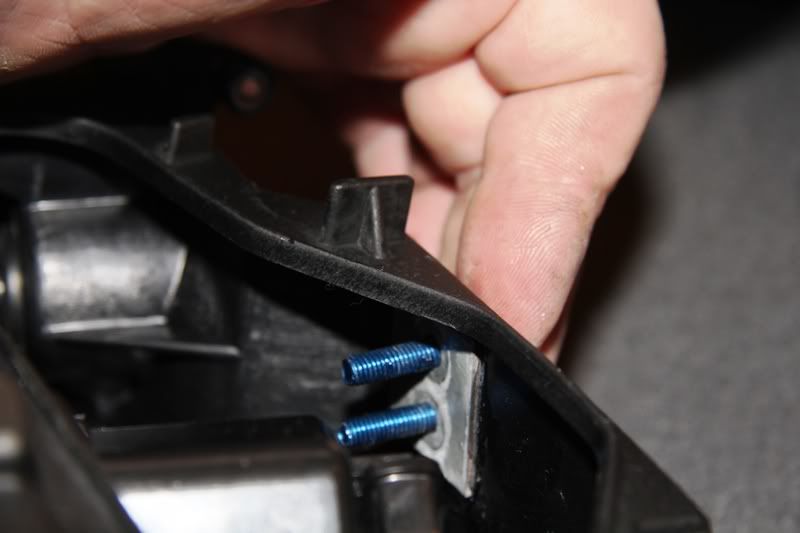
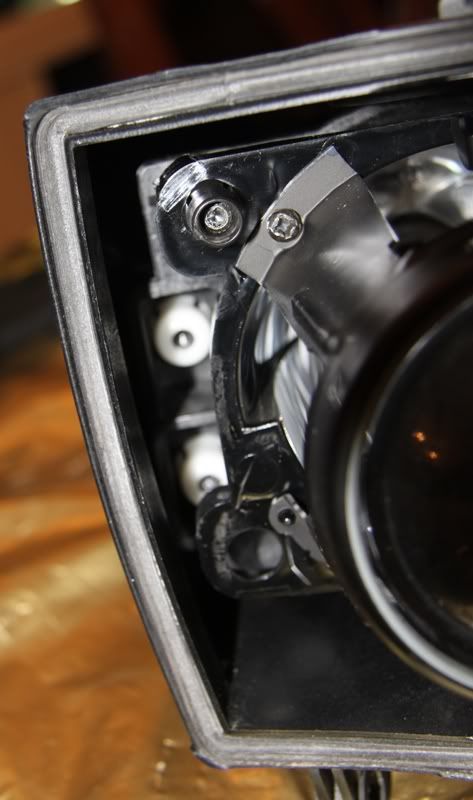
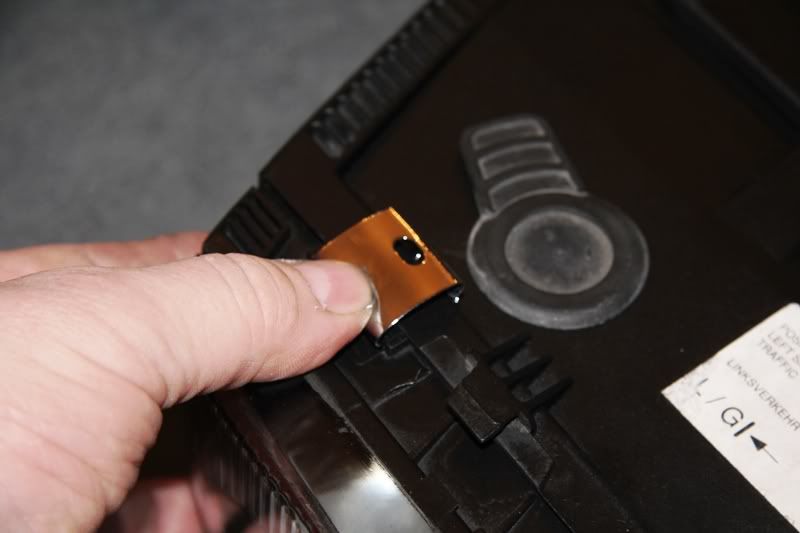
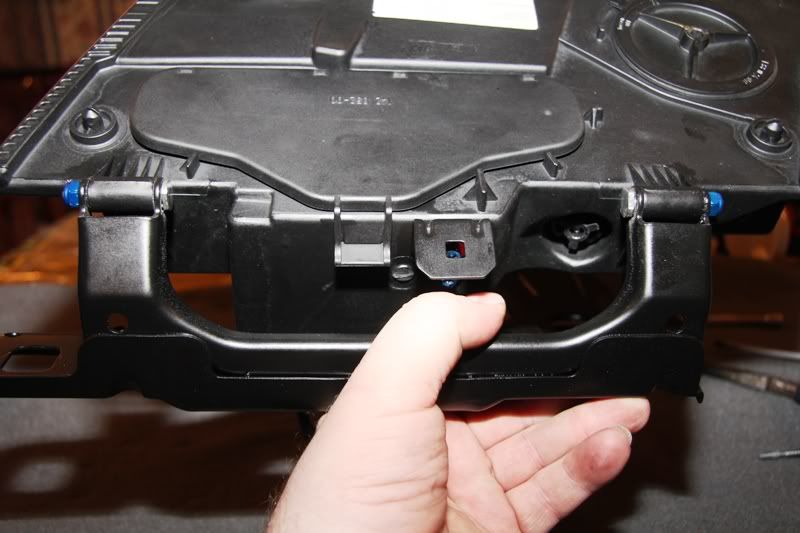
Inside the shell, you will notice an area where a small metal plate goes with 2 holes......
Apply some adhesive to the plate and using the 2 attachment bolts as guides..........
Stick the plate in position.
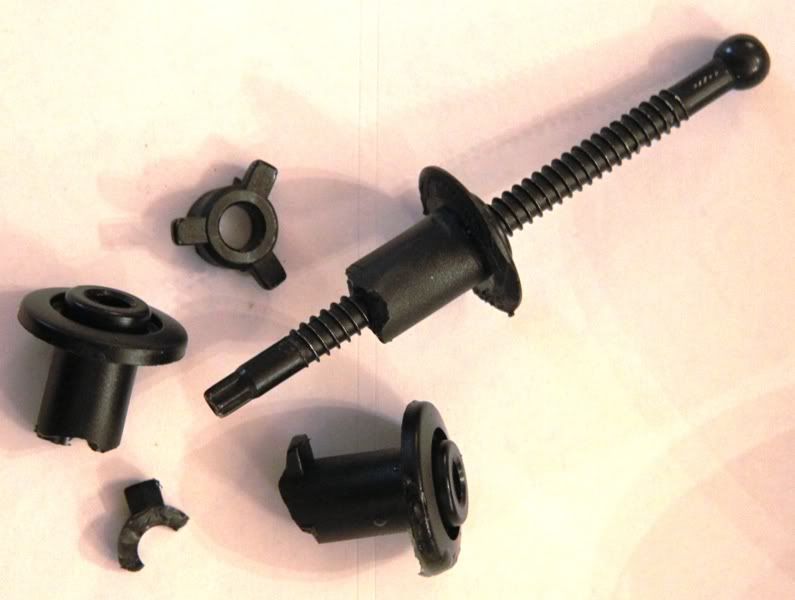
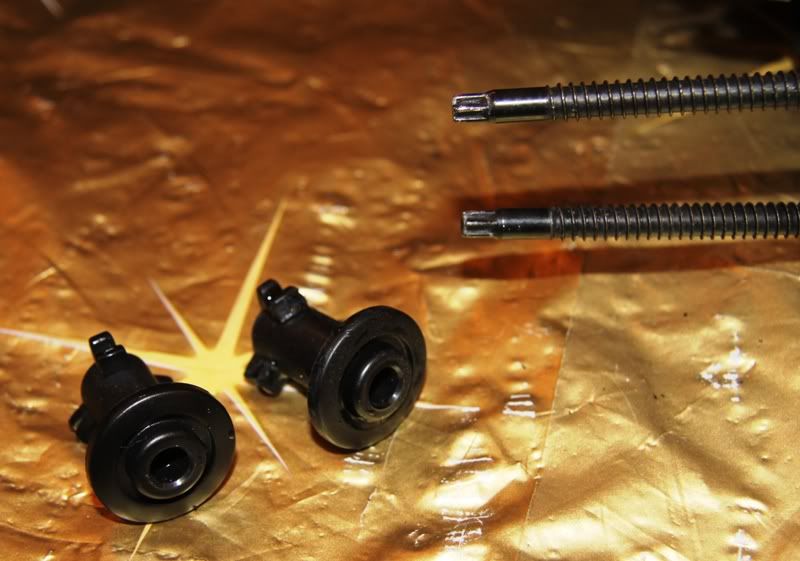
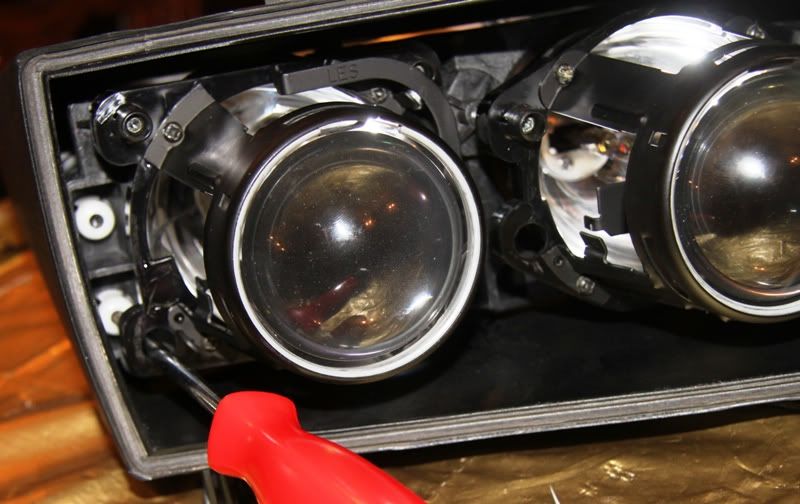
Now I thought I was quite smart, so I purchased 6 new adjusters, 4 of one type and 2 of the other............
And proceeded to break the whole lot.......
Trying to refit the lens assembly. BUT, there is a trick to doing this without breaking them....
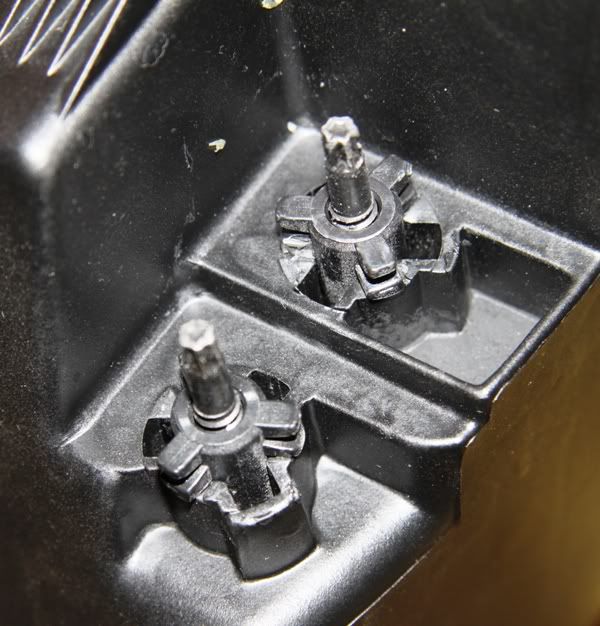
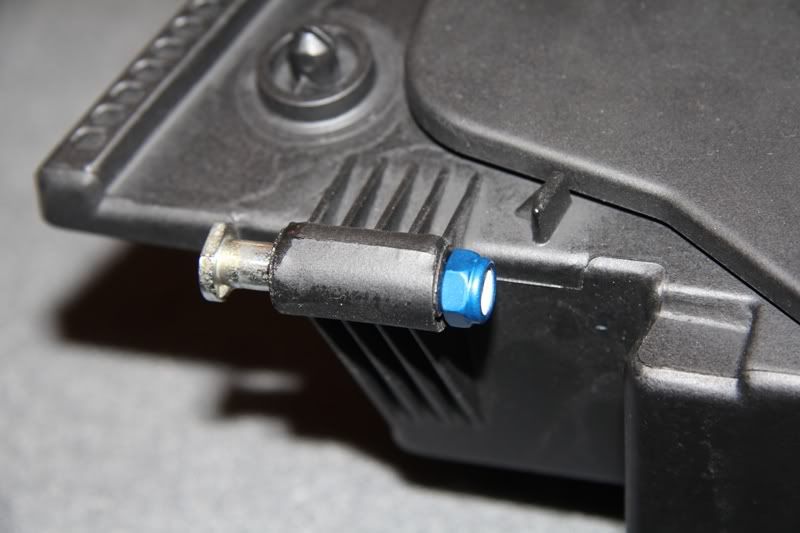
The ball end has a TX25 socket in the end......
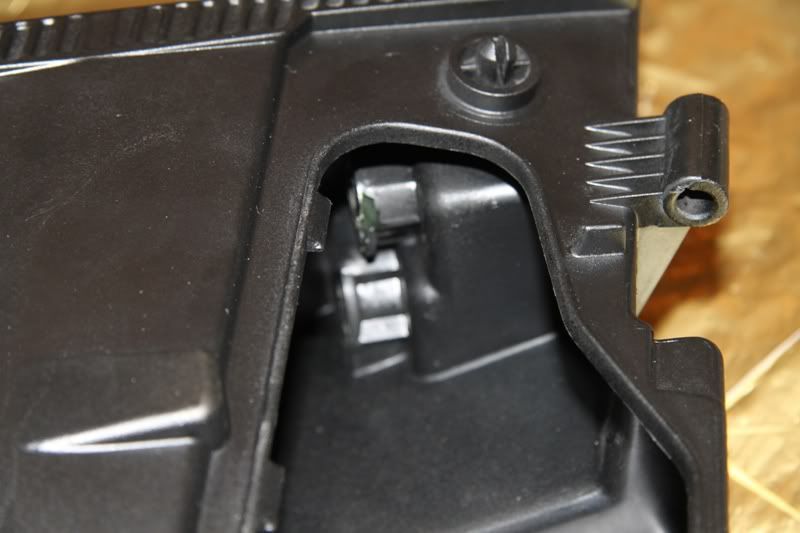
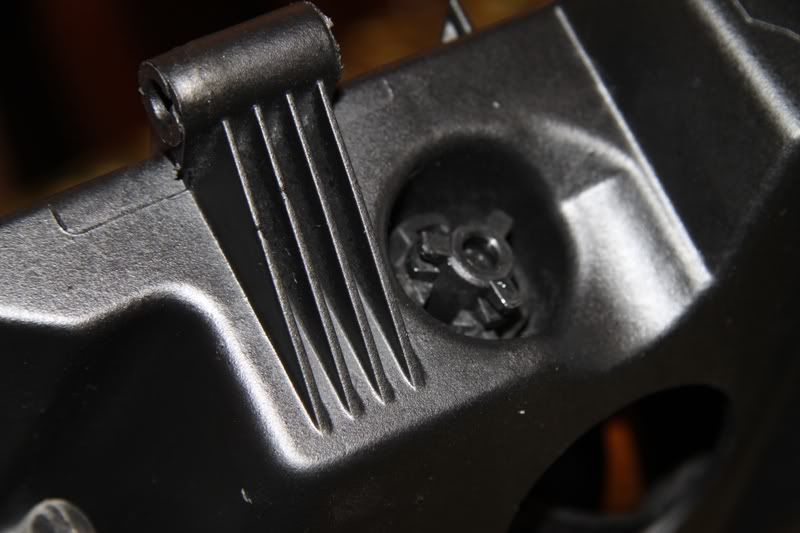
Through the bulb replacement access panel, you can see the sockets where the 3 prong castellated adjusters go.
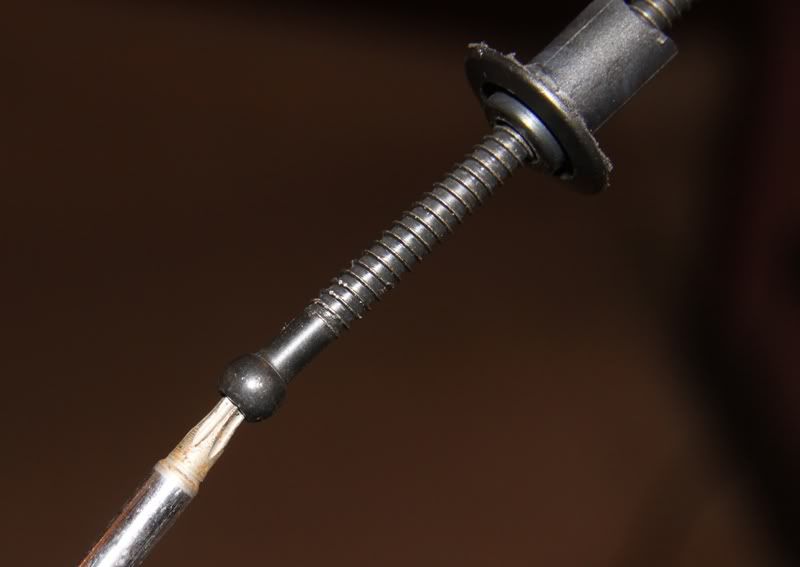
Remove the adjusters from the ball and screw.....
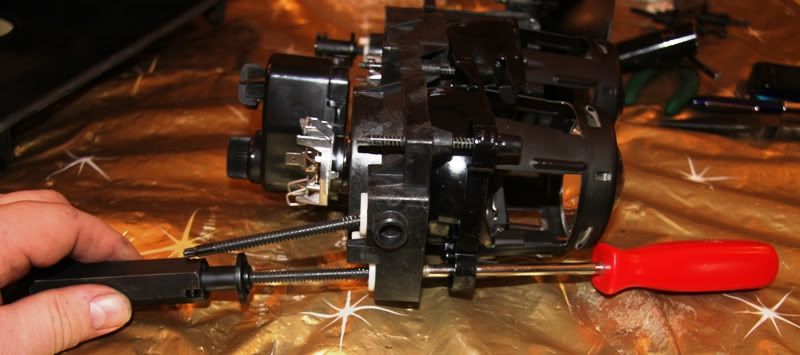
I did this by assembling the adjuster into the lens pod and then using the special tool 63 0 020 and a TX25 screwdriver, unscrewing the fitting.
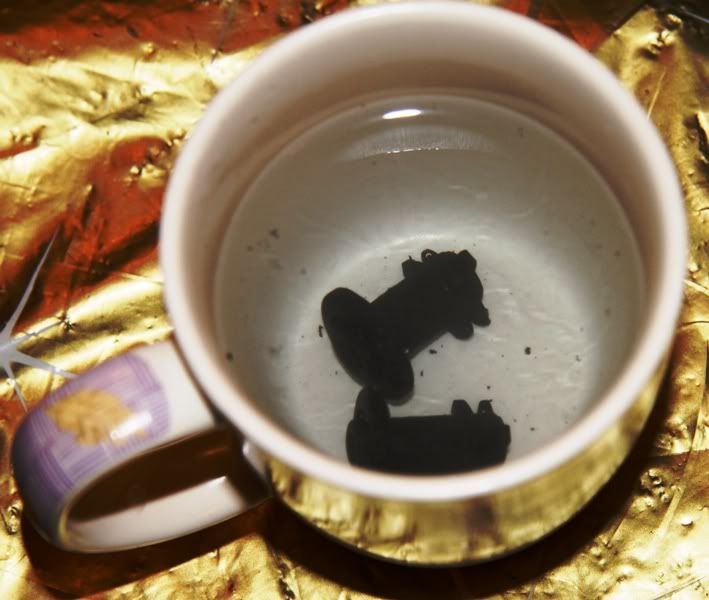
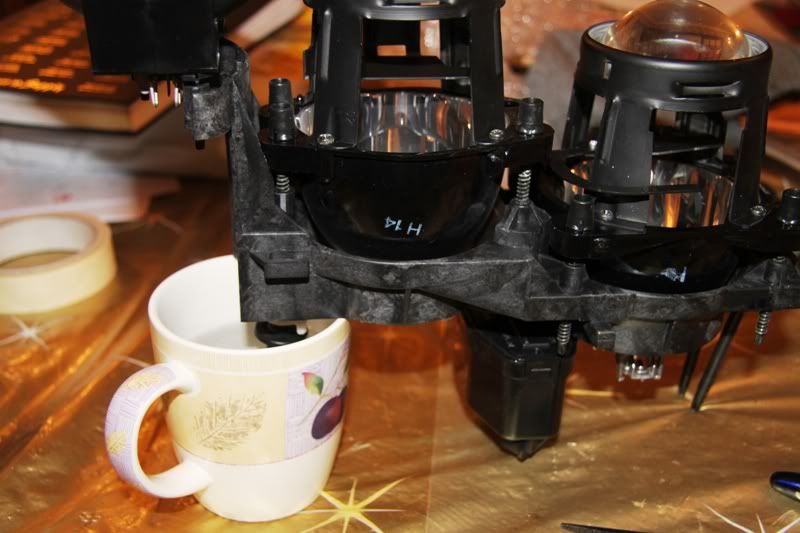
NOW, the secret to not breaking those adjusters is drop them in a mug of BOILING WATER.....
Then working quickly whilst they are still hot, insert them into their respective sockets and give them a CLOCKWISE turn, (viewed from the rear) with tool 63 0 020, to click them into position.
And with the 3rd short adjuster already fitted to the lamp, dunk that into a mug of boiling water too......
And with the ball sockets and screws refitted to the lens assembly already, guide in the 2 screws to just align with the adjusters....
And push through the 3rd adjuster and lock into position as with the previous 2 whilst it is still HOT.
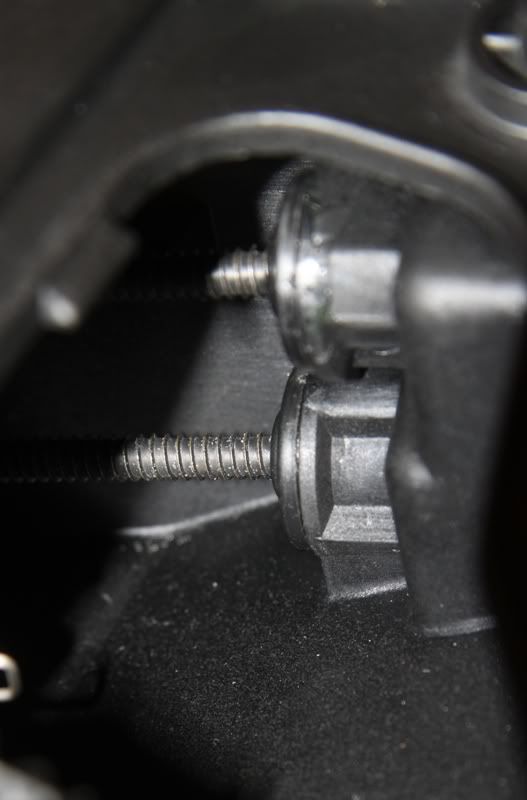
You can now see the 2 out-of-focus ends of the balls inside the white sockets. If the pic was actually in focus, you would see the TX25 ends visible!
So now with your TX25 screwdriver, you can begin to screw in the lower adjuster........
Followed by the upper adjuster......
Until they appear on the outside of the rear of the shell. Do a few turs of each at a time rather than all on one so that the lens assembly sets back fairly square.
You can now check or replace the seal on the glass and then using a sliding action with your finger,
refit the glass with the 6 clips
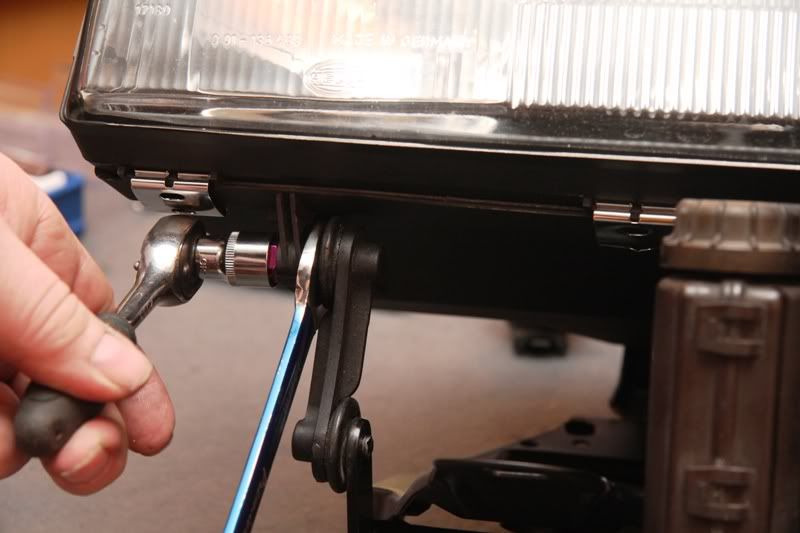
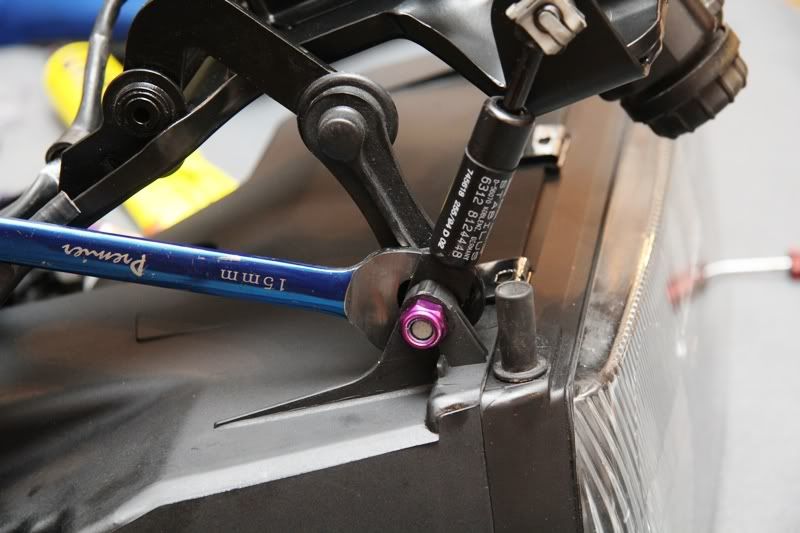
After lightly oiling the pivot bolts and bushes, making sure they are free to turn....
You can refit the shell to the mounting.
Together with the damper and linkage using tool 63 0 010
And nipping up the M10 FINE THREAD nut.
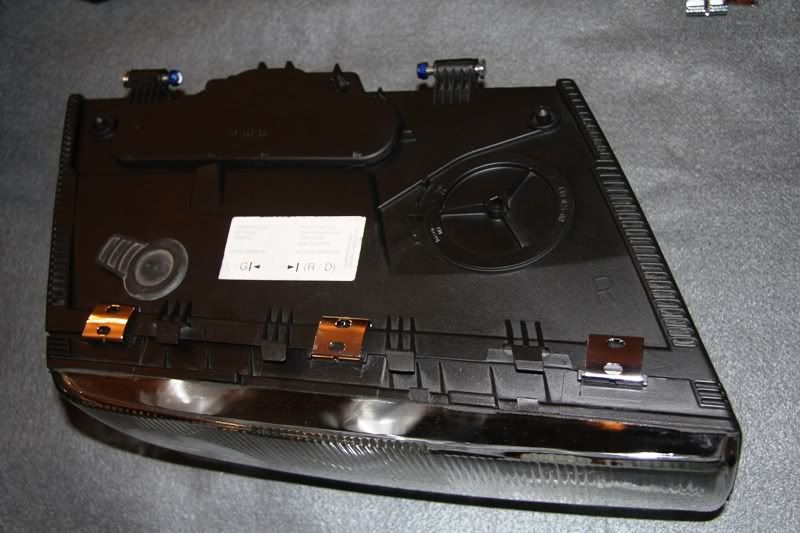
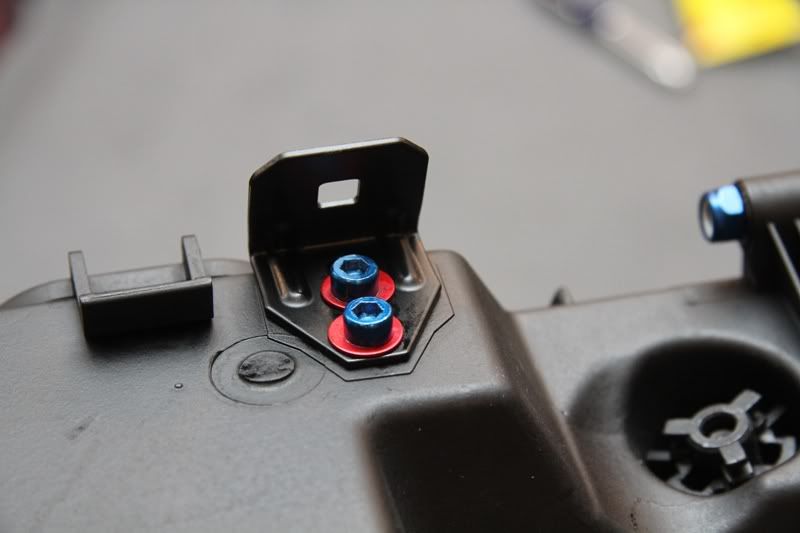
You can now refit the headlamp cover bracket to the small plate you stuck in earlier without trying to align the bolts, plate and nuts all at the same time.
Like this.
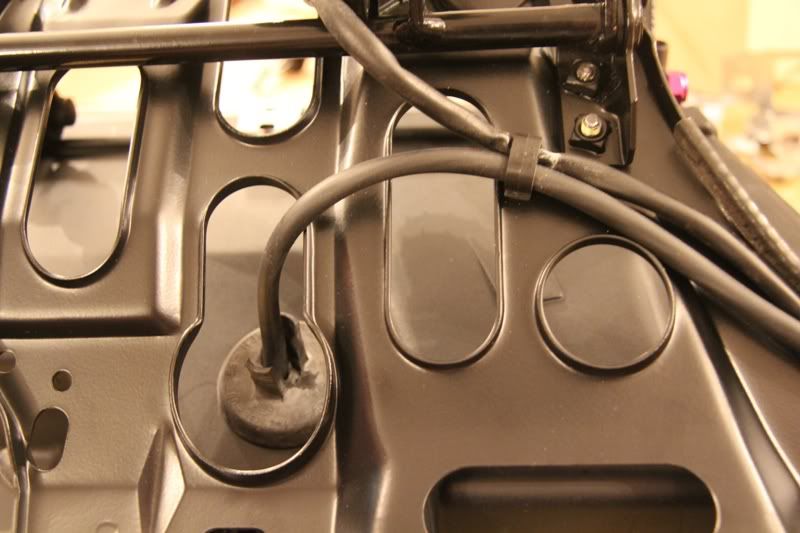
We can now secure the 2 looms, one headlamp, one lift motor together with the plastic clip...
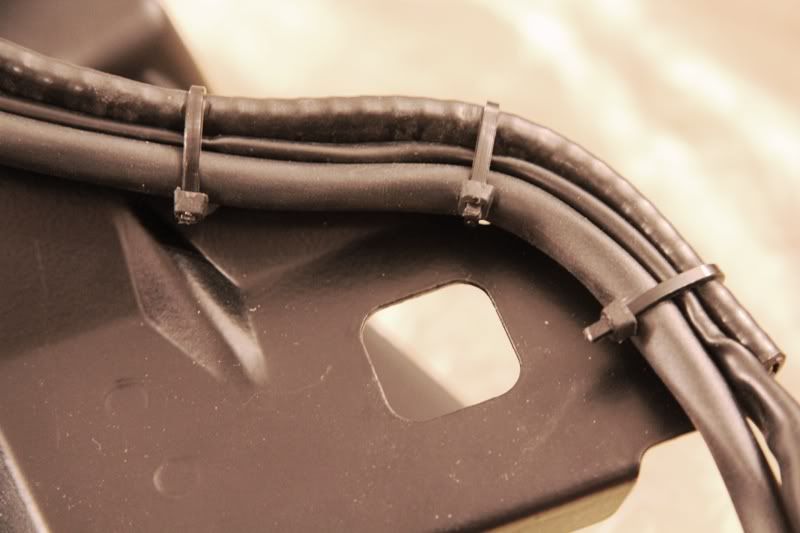
Followed by three cable ties here....
8Tech
Last edited by IcemanBHE; 05-29-2010 at 08:27 PM.
 Posting Permissions


Bookmarks