
 Member
Ok.
This was my first time installing a suspension.
Disclaimer...
So, some of the things I did may or may not be correct, or the way others might do.
So, proceed at your own risk.
I first ordered all my suspension parts that I needed.
I wanted EVERYTHING to be new and fresh, so I bought ALL new bolts, nuts, washers, spring pads, and mounts.
I also used Beisan System's front and rear suspension DIY:
Front Struts (E39)
Rear Shocks (E39)
Front - Parts I used:
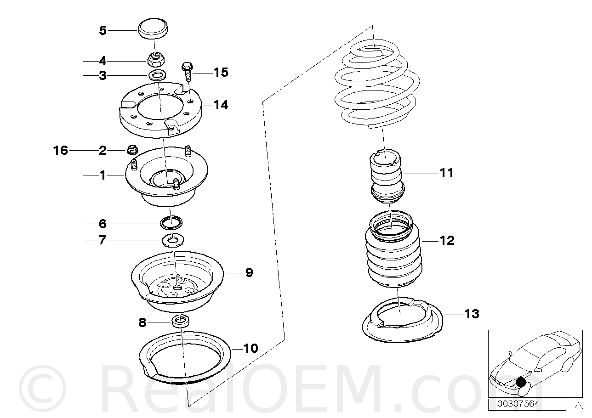
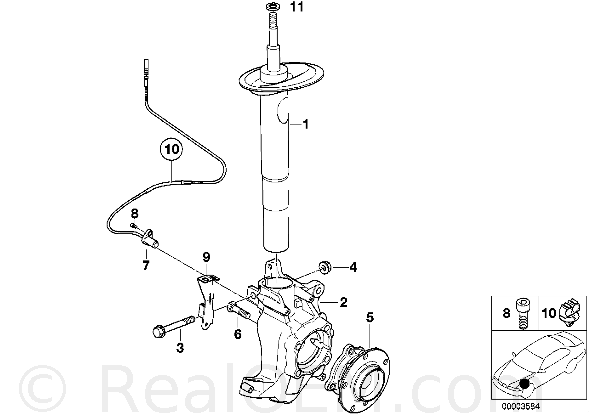
Real OEM Front strut diagram and parts:
http://www.realoem.com/bmw/showparts...56&hg=31&fg=10
Parts I used were (reference the Real OEM diagram above:
1. H&R coil-overs p/n 50418.1
http://www.tirerack.com/suspension/s...8.1&perfCode=S
Description: / Real OEM #/ Part number: / Quantity:
Covering caps/ #5 / 31311139453 / 2 (mine were missing)
9/16" Grade 8 / #3 / 2 (from Lowes)
lock washers
Front mount nuts/ #2/ 07119904295 / 6 (3 per side)
Front mounts/ #1 / 31336752735 / 2
(Guide Supports)
Dust protection / #6 /31331110196 / 2
collar
Flat washer / #7 / 31336776760 / 2
Collar screw / #3 (below) / 31306779823 / 2
(pinch bolt)
Self locking / #2 (below) / 33326760374 / 2
collar nut
Note:
There was no need for front spring pads, front bump stops, or the large strut nut at the top for these coil-overs.
The OEM front strut nut (#4 above) is 21mm, but the H&R's came with a 22mm nut.
Ref:
http://www.realoem.com/bmw/showparts...55&hg=31&fg=10
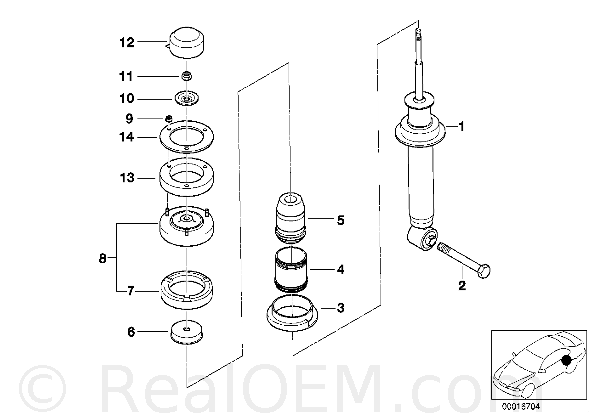
Rear - Parts I used:
Ref:
http://www.realoem.com/bmw/showparts...48&hg=33&fg=45
Description: / Real OEM # / Part number: / Quantity:
Plate / #10 / 33521092986 / 2
Self locking collar nuts / #9 / 07119904295 / 6 (3 per side)
(rear mounts)
Rear mounts / #1 / 33521091710 / 2
(Guide Supports)
Supporting cup / #6 / 33521090282 / 2
Rear bump stop / #5 / 33531093094 / 2 (M-sports suspension)
Protection tube / #4 / 31331137932 / 2 (not really needed)
Hex bolt / #2 / 33521092072 / 2
(pinch bolt)
Note:
There is no need to buy the rear spring pads because the rear mounts come with the upper spring pad, and the coil-overs do not need the rear lower spring pad.
Tools:
Harbor Freight is your friend!
I used the Harbor Freight ball joint separator to take off the tie rod.
It worked great!
Copied tools used in Beisan System's DIY:
Needle nose pliers, large flathead screwdriver
16mm combo wrench, 18mm combo wrench
5mm Allen wrench
10 mm socket 1/4”, 13mm socket 1/4”, 16mm socket 1/2”, 18mm socket 1/2”
1/4” ratchet w/ extension, 3/8” ratchet, 1/2” ratchet, 3/8” torque wrench (24 Nm [17.5 ft-lb] - 110 Nm [81 ft-lb]) w/ 1/2” converter, 1/2” breaker bar (18”)
Optional: Long socket extension 1/2” (not shown), for wheel carrier leverage.
Note: I utilized my 3/8” torque wrench (17”) w/ 1/2” converter instead of my 1/2” torque wrench (22”) due to the functionally easier to use arm length. A 1/2” torque wrench would also work well.
Paper towels, glass cleaner, brake cleaner
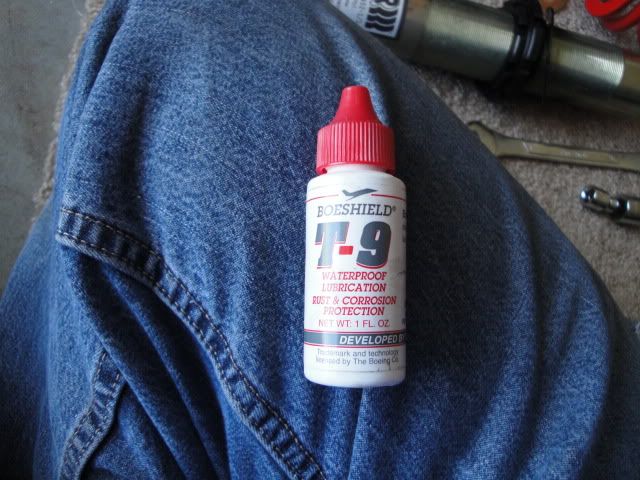
Spray lubricant, graphite based grease (Sta-Lube, Synthetic Grease, CRC), towel
Stainless steel wire brush, 2 x 2ft small gauge rope, 4’ x 1” mounting tape
Not shown: floor pad (old quilt), 2 x wheel carrier stands (bucket & 2 wood blocks)
Front Strut Work:
Note:
Use plenty of this!
(Required)
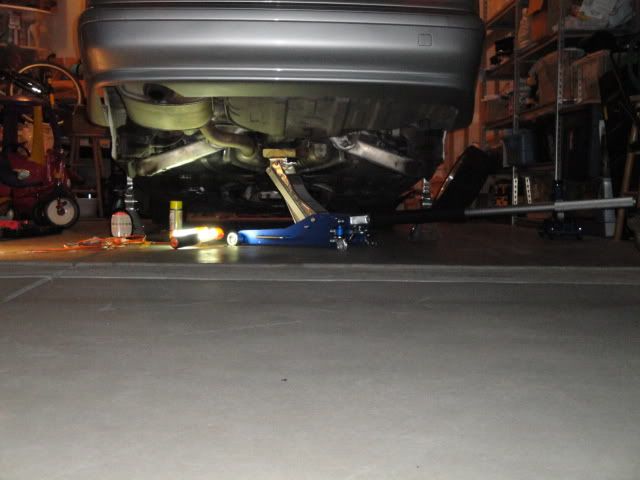
1. Lift the car on all 4 sides. I backed the rear up onto ramps, and lifted the front onto jack stands.
2. Follow the Beisan Systems DIY.
3. Removing the brake caliper from the hub:
4. Removing the front sway bar links:
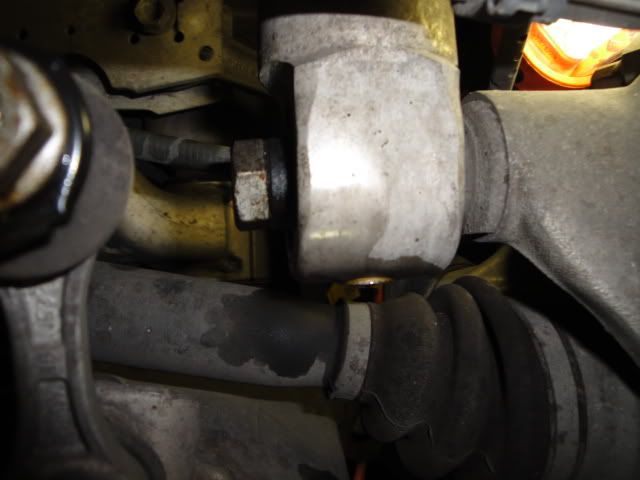
5. Removing the tie rod:
6. Removing the strut collar bolt/nut:
7. Removing the nuts at the mounts (passenger side shown):
8. Took out the OEM strut assembly - all clear...
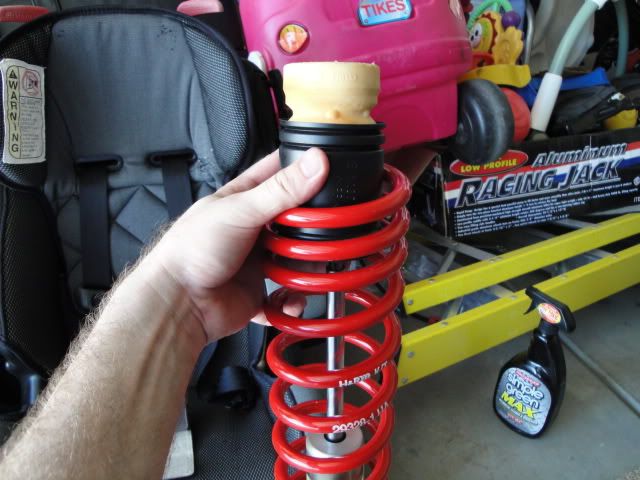
Time to assemble the front H&R struts!
Tools used:
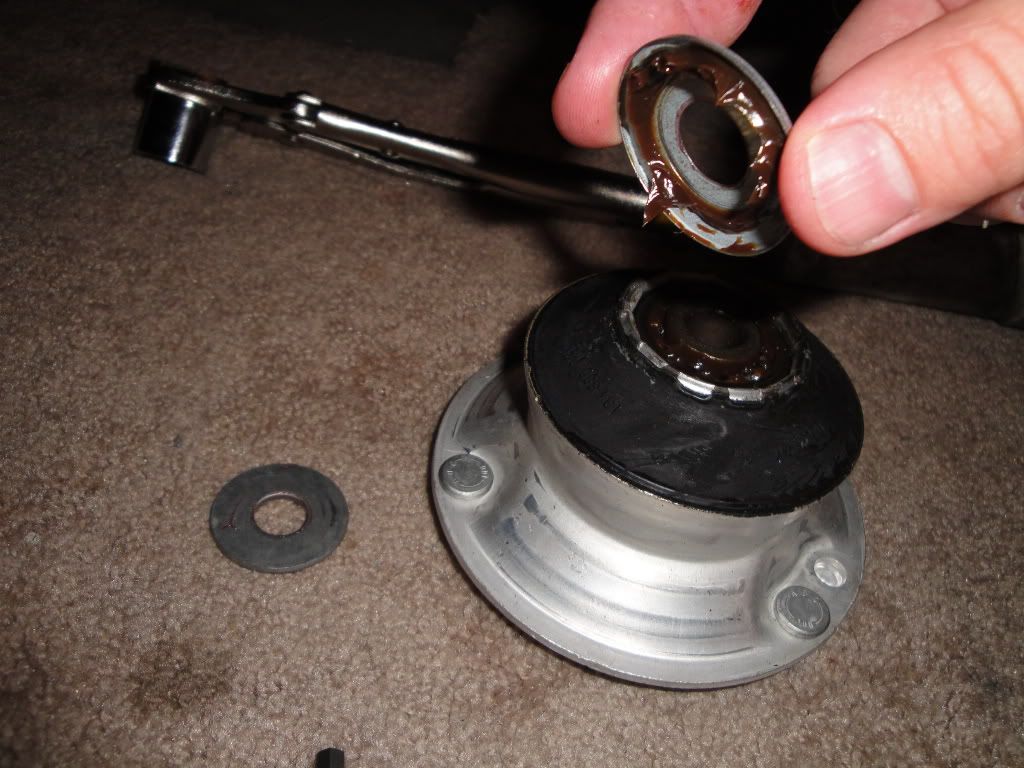
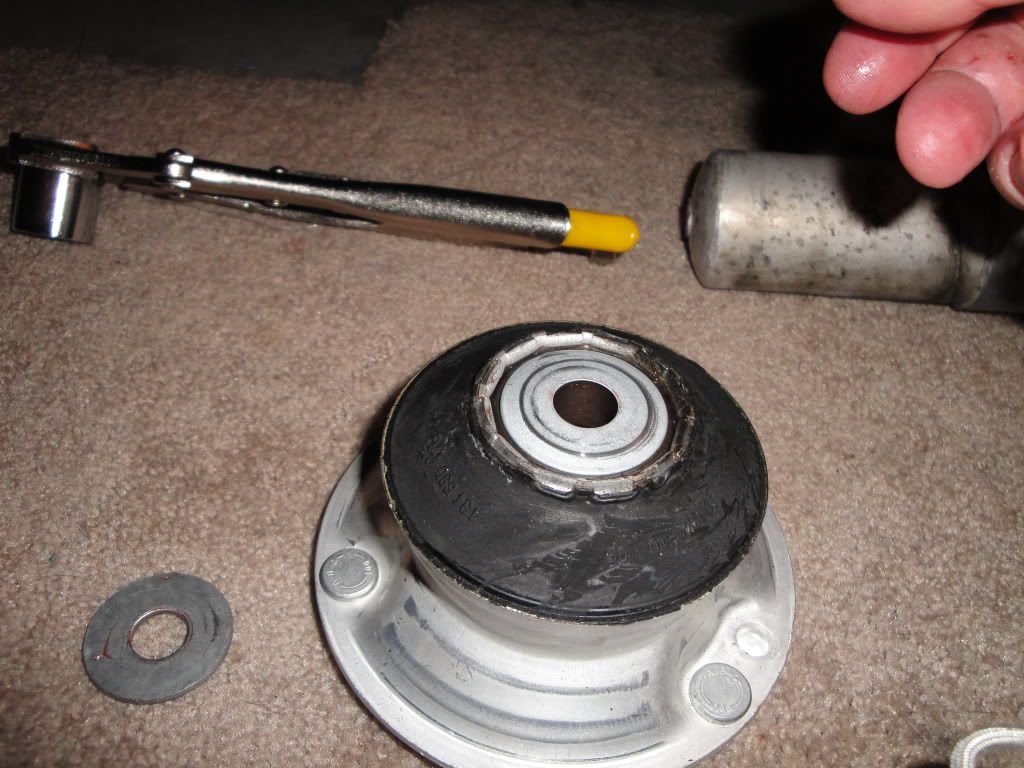
New mount with grease capped washer and flat washer:
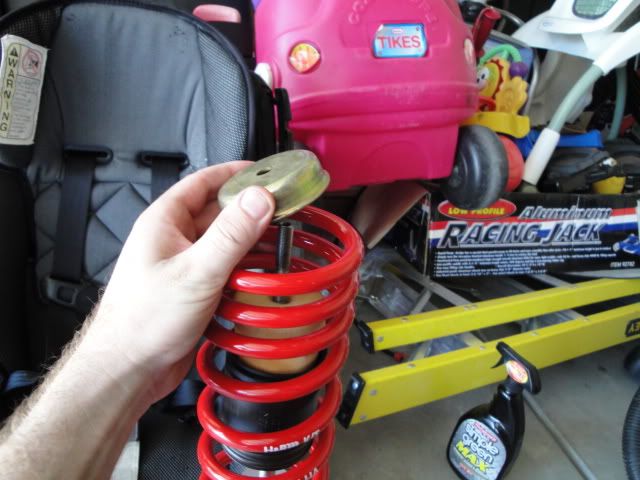
Upper spring perch with spring pad slid onto the strut, flat washer, then grease cap washer with the mount on top:
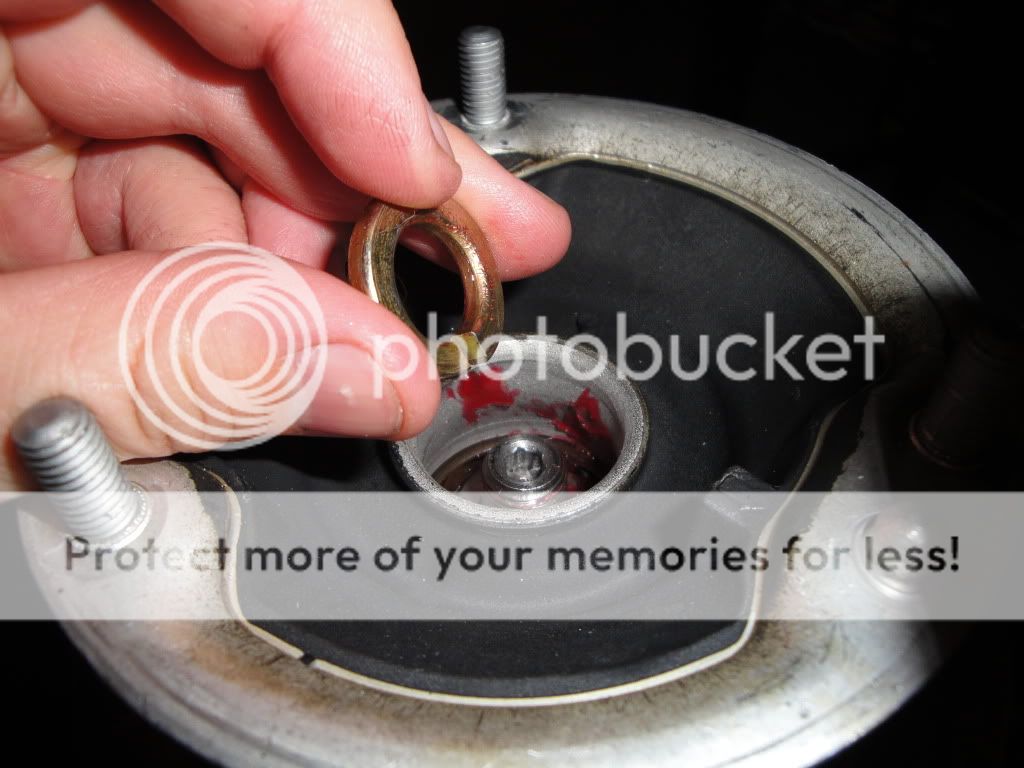
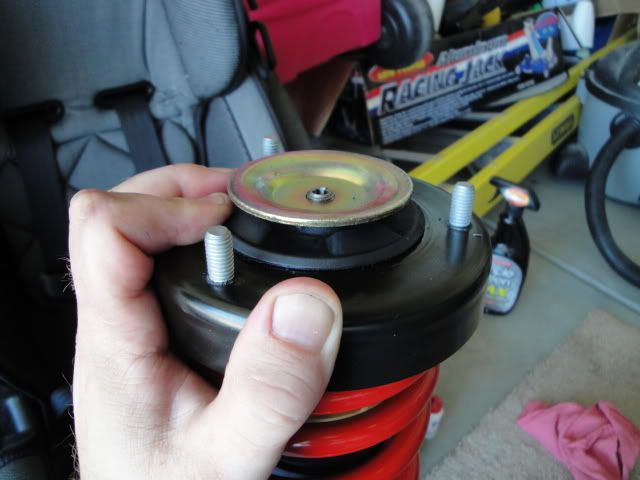
Placing the new 9/16" grade 8 lock washer on:
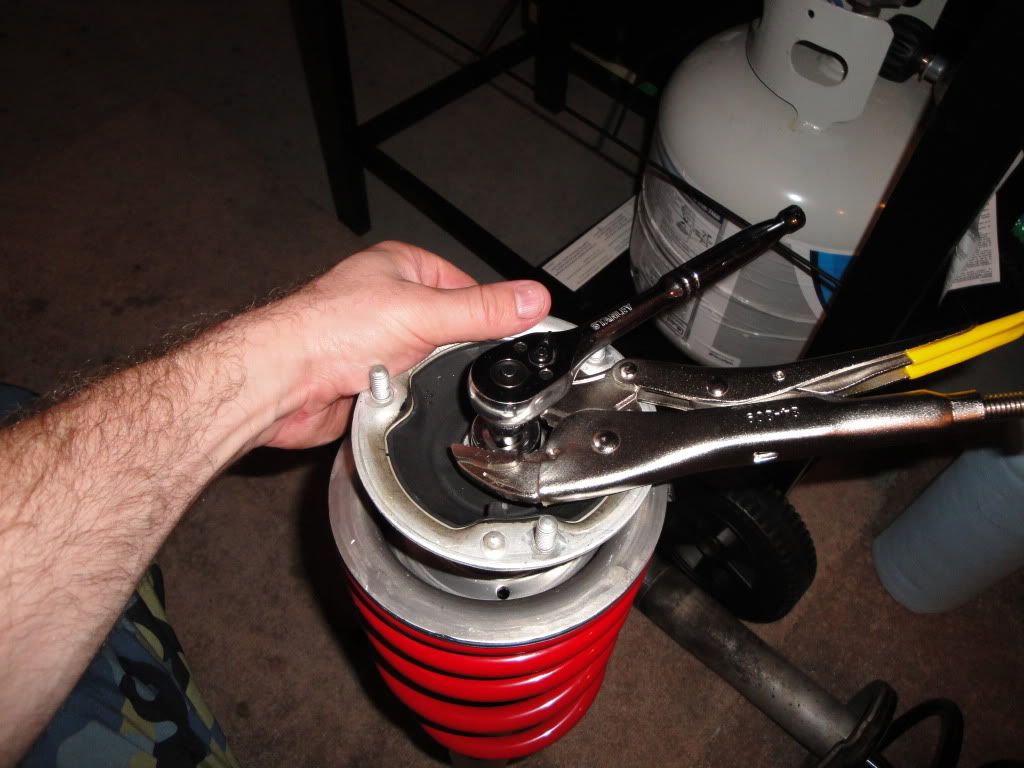
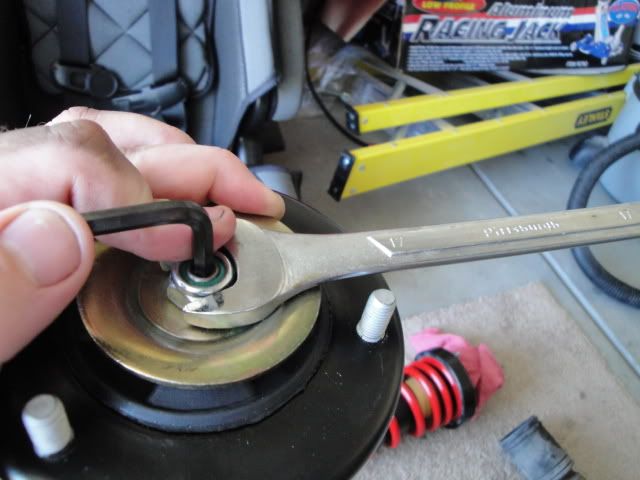
Putting on the new 22mm strut nut from H&R:
Tightening it down:
Notice, I did NOT use a torque wrench!
Just tighten the nut until you feel it stop.
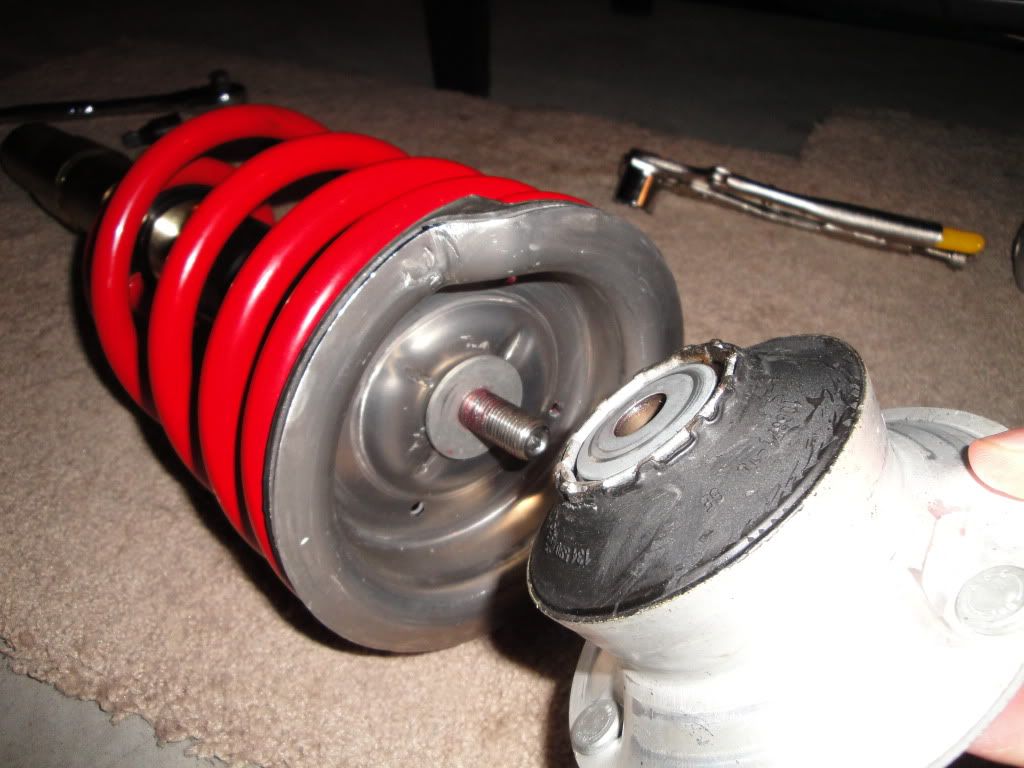
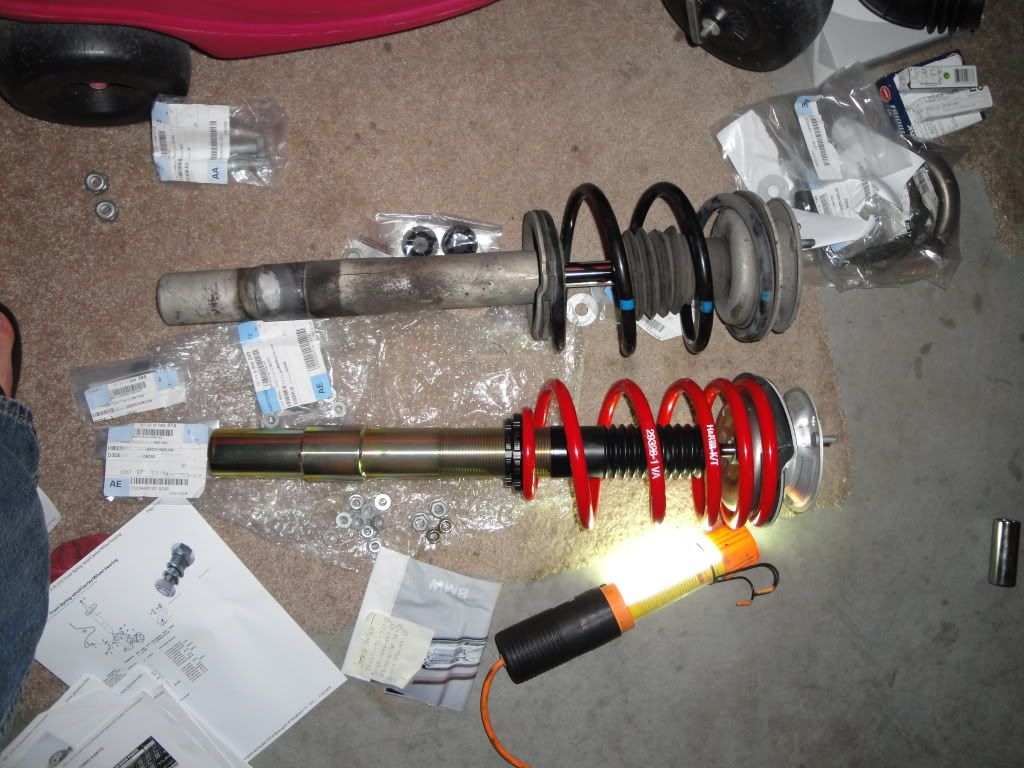
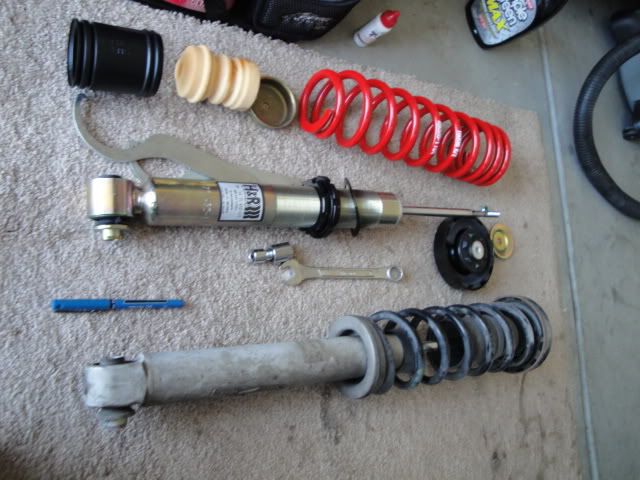
Old and new:
Slide that baby in!
Note: I greased the mating surface of the strut and steering knuckle.
Tighten up the top mount with (3) new locking nuts:
Re-install per Beisan Systems DIY.
To be continued to the Rear shock install...
Last edited by Jason5driver; 10-04-2019 at 01:23 PM. Reason: Automerged Doublepost
Looking for an E39 belly pan , passenger front inner fender liner
Wet finger to ya Errr
Great write up, I like the detailed pics that you use.
2002 540iA
19'' Linea Corse Z2S - H&R Sport springs with Koni Yellow - DDM front bumper - 6000k fogs - Predator ICE V3 - 55w 8000k Lowbeam - Y pipe and silencer delete
Doing the impossible.....
Very nice Jason.
Crazy Cracker
BMW CCA Member
Nice work! Any reason you picked H&R over Bilsteins?
Beams on beams
Great writeup, the p/n should be a big help to anyone!
AW|Byzanz
Member
Rear Shock Work:
Note: Tools used for the rear were the basically the same as used for the front.
Please reference Beisan System's DIY.
From Beisan Systems:
Note: 3/4” size is specific to indicated spring compressor
Paper towels, brake cleaner, glass cleaner
2 x 9 1/2” long (2x4) wood block, Graphite based grease (Sta-Lube, Synthetic Grease, CRC)
Stainless steel wire brush
Not shown: floor pad (old quilt)
Note: 9 1/2” wood block length is for 16” wheels and standard suspension. Other configurations will likely need a length adjustment
The block of wood is ESSENTIAL in keeping the rear lower hub from moving up.
1. I removed the rear seat, as was shown in Beisan System's DIY.
2. I lifted the car up. This time, I put the rear on jack stands.
Note: the front was NOT easy to drive on the ramps, due to being so low.
My car would simply push the ramps away with the bumper, because the bumper would come in contact with the ramps before the tires could.
I used some cut pieces of 2x wood and jammed them in-front of the tires, in order to clear the bumper.
3. I removed the rear fender liners. I can not understand why so many people gripe about this IMO. My rear liners were easy to remove. Same goes for the removing the rear seat. LOL!
Pictures/descriptions:
Fronts all done, just need to do the rear:
(I know, the front bumper is a mess!)

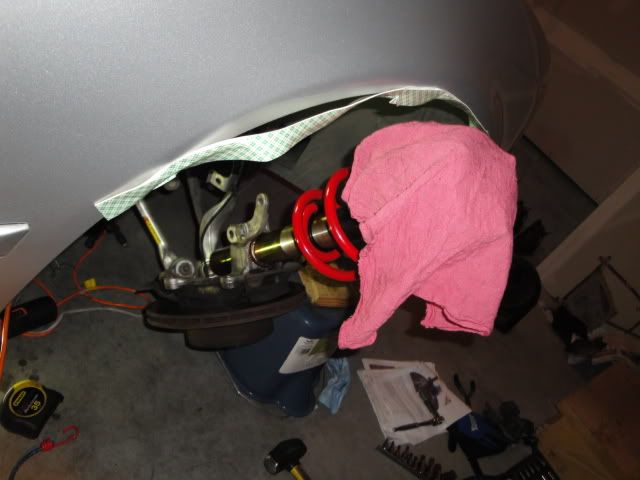
Rear/ hiney is in the air/ jacked up:
My special work space:
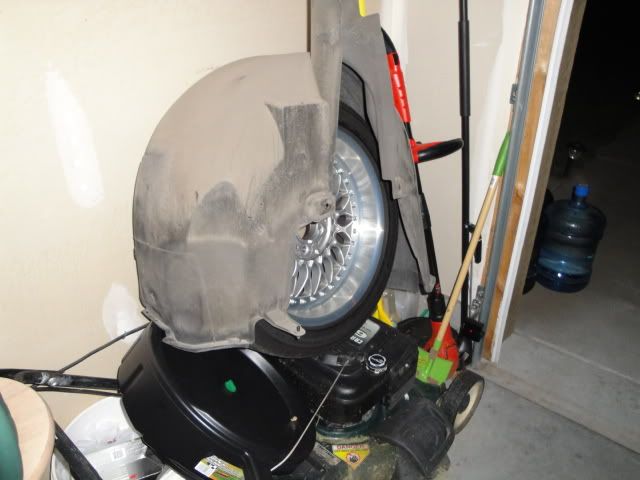
My special wheel liner storage:
9 1/2" cut piece of 2x wood blocking used to keep the rear hub extended, and not move up:
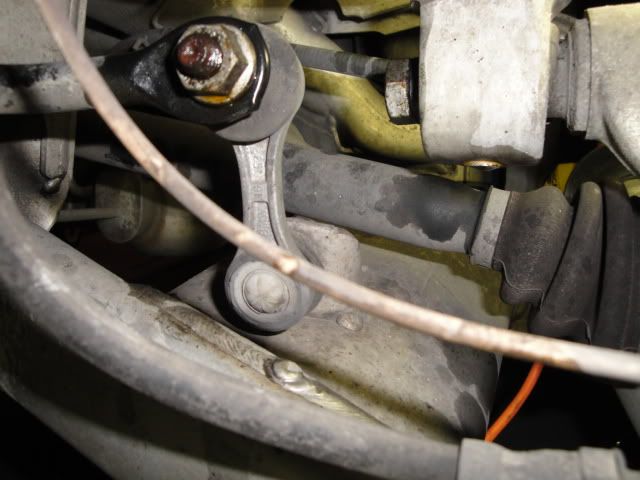
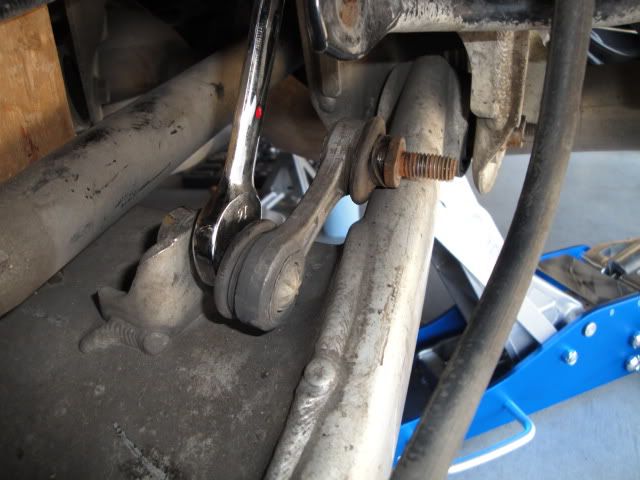
I removed the rear sway bar link in order to access the lower rear shock bolt easier:
Sprayed PB Blaster on the rear shock bolt, and going to take it out:
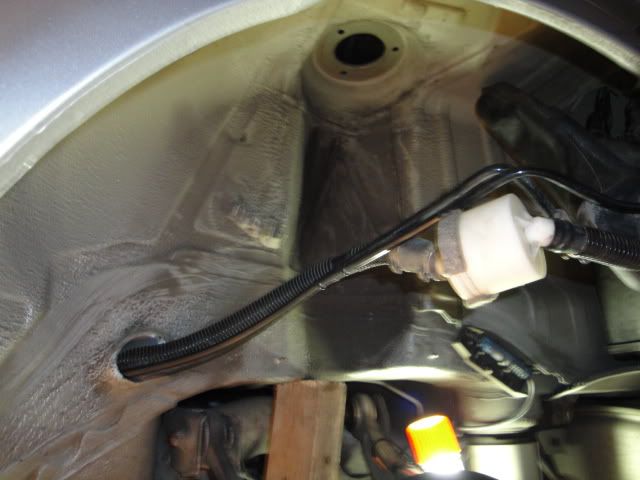
Dropped the evaporator tank, then the rear OEM shock (driver's side):
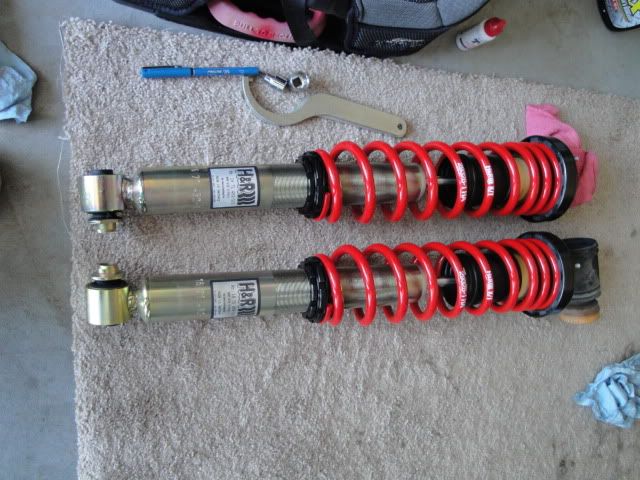
Time to assemble the new H&R rear shocks!
Old and new:
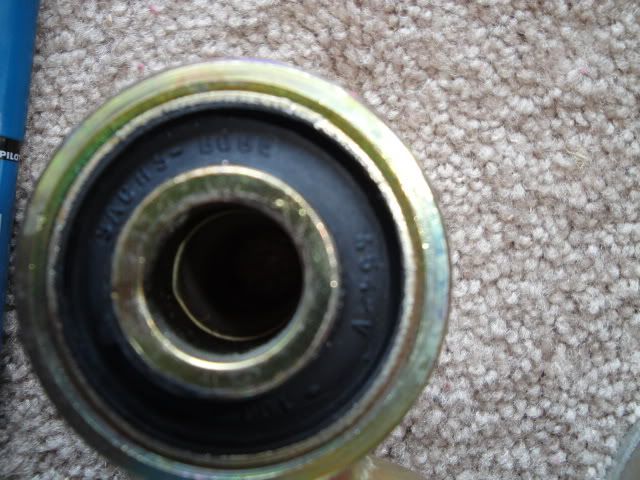
Notice: The H&R shock bushing is made by Sachs-Boge:
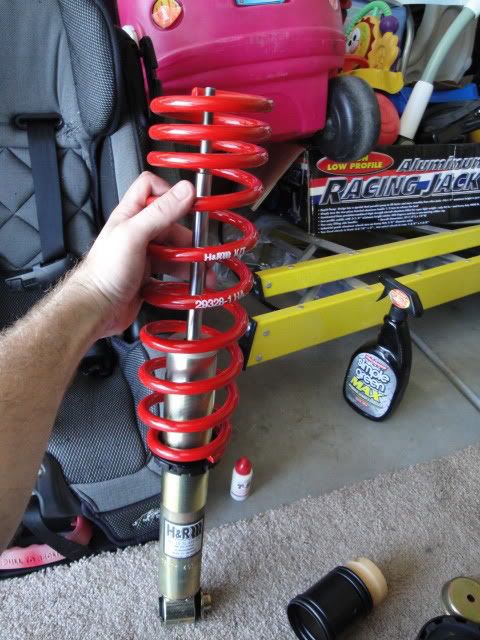
New H&R rear shock with spring:
Rear bump stop and cover sliding on:
The bump stop cap going on:
Sliding the rear mount on:
Notice that end of the spring slides flush to the seat of the spring pad end/mount.
Placing the large washer on:
Tightening down the rear mount top nut (tighten until you feel it stop):
What a pair!
Please note to use the thread lubricant on the coil-over threads provided with the H&R coil-overs:
Inserting the new H&R shock (notice, it seems to be a tad shorter than the OEM one):
Got her in:
Ok, now the hard part...
Trying to torque the rear lower shock bolt with the weight of a much lowered car... LOL!
I had originally installed the rear sway bar link, be later realized that I needed to remove it again to torque down the rear shock bolt!
I could barely get (1) one click out of my torque wrench, while I was squeezed/pinched between my hub and the concrete garage floor, but I finally got it torqued to 94 ft-lbs!
Got an alignment the next week.
The H&R coil-overs were surprisingly easy to install IMO.
The hardest part for me was getting ALL of the parts and cleaning everything.
Impressions...
Well, at first, when I only installed the fronts, and not the rears, and after driving the car, the ride felt like a Cadi...
I loved it!
However, after installing the rears, the ride stiffened considerably IMO.
I could feel EVERY imperfection on the road.
For a while, I was seriously considering selling the H&R's.
My car is a daily driver, and a family hauler, not a track machine, however, I do like to have fun.
So, I decided to give the suspension a little time...
A lot more tinkering with the adjustable heights too...
The ride seemed to soften up quite a bit, especially after being loaded down with the whole family.
According to Jared's and my opinion, we think the Bilstein valving is so heavily compressed and wound up in there, it takes a wee bit of time to loosen everything up.
The ride is still more stiff then the OEM sport suspension, but I do love driving the car!
The acceleration is almost instantaneous, with no more lag.
Thanks for the many numerous talks with Jared, BimmerFiver, and mmm635/Michel.
mmm635/Michel has Koni Sports with H&R springs on his 525i.
After talking more with Michel, it seems that my ride comfort and heights are nearly the same as his setup/adjustments.
I still may sell the H&R's...
I do love the car lower, however my wife HATES it.
However, one thing the represents how a BMW drives IMO was how the car feels like you are driving 20 mph, while you are actually driving 100 mph...
The car has lost a lot of that, since I can feel every imperfection on the road.
I may go to Koni Sports....
Or, I may go to a FULLY adjustable coil-over (KW...or something else...).
Once I got a taste for the coil-overs, it is hard to go to anything else...
EDIT - 29 May 2014:
I measured the heights of 3 to 4 stock E39 sport models at my local mechanic's parking lot.
I found that the non-weighted/non-loaded OEM sport height for the E39 Sport inline-6 is ~23.5" front, and ~22.5" rear (~23.75 front, and ~22.75" rear with 18" wheels).
EDIT:
Additional Information from this thread, post #185:
http://forums.bimmerforums.com/forum...1273479&page=8
I did some research on the OEM spec heights.
I referenced my Bentley manual, and it lists the 525i sport at 23.1"-F (fronts), and 22"-R (rears) at "normal" loaded position.
Measurements from above = ride height from the center of the fender arch to the bottom of the wheel rim (per the Bentley Manual).
"Normal" loaded position is similar to aligning the car with the weights.
The measurements in the Bentley are measured from the upper top arch of the fender, to lowest wheel-rim-lip to tire edge (nearest to the ground).
Measure ride height from the center of the fender arch to the bottom of the wheel rim - per the Bentley Manual.
"Normal" loaded position is similar to weighing the car for an alignment, but it is .....
1. 150 lbs in each front seat
2. 150 lbs in center of rear seat
3. 46 lbs in the trunk and
4. A full tank of gas
So, from what the Beisan Systems DIY says, the difference between the weighted height, and the non-weighted height is a 1/2".
I called H&R and showed them some pictures and gave them some heights.
They requested that I raise the front 20mm (approx. 3/4").
So I did raise the front 3/4", but lowered the rear 3/4".
I found out that the H&R spring rates for my coil-overs are 325-F, and 205-R.
Also, the rep at H&R said it was very important that my car be within the parameters of:
1-1.9" drop for the fronts, and
1-1.7" drop for the rears, from the OEM spec heights.
I could not figure out why my car rode so stiff/ rough when raked (the front lowered more than the rear).
However, once I raised the front 3/4", and lowered the rear 3/4" - per H&R's request (flattened out the stance), the car road MUCH better!
Very much like OEM sport!
This is what I think was happening...
I think that because the front was significantly lower than the rear (HUGE rake), the front struts were binding and NOT dampening/ compressing correctly.
Something about how the rear of the car sits has a HUGE affect on how the car handles!
The car still rides a little firm, but it does not crash over the bumps/ pot holes like it did.
I am thinking that if I flatten out the car more, by lowering rear that extra 1/2", the car might ride even better....
So, according to what I have figured out....
If I want to drop the car 1":
Fronts = 22.6"
Rears = 21.5"
If I want to drop the car 1.5":
Fronts = 22.1"
Rears = 21"
My MAX drop according to the Bentley's stock height spec (23.6"-F, 22.5"-R - non-weighted)
and H&R's spec (1-1.9" drop at the fronts, and 1-1.7" drop at the rears) is:
Fronts = 21.75"~Rears = 20.75"~
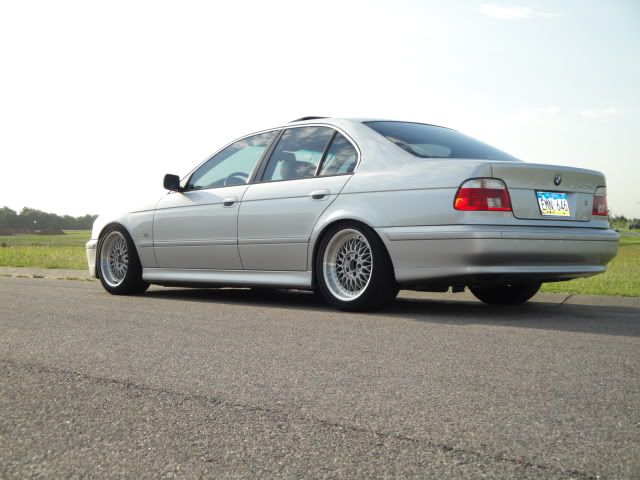
The heights shown in these recent pictures are 21.75"-F, and 21.5"-R.
I basically dropped both the front and rear 3/4" from H&R's requested height.
However, now, of course, the ride is not as nice...
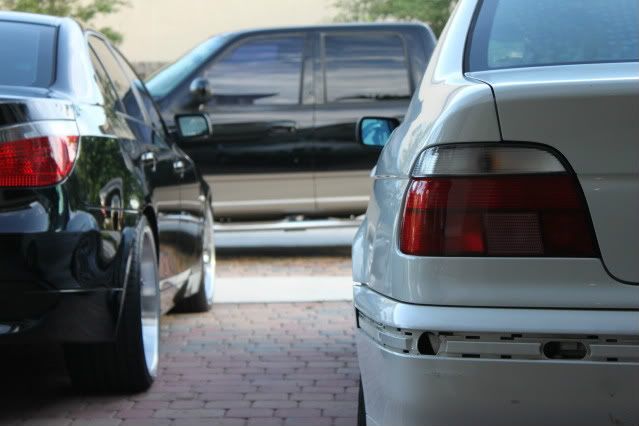
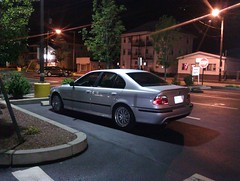
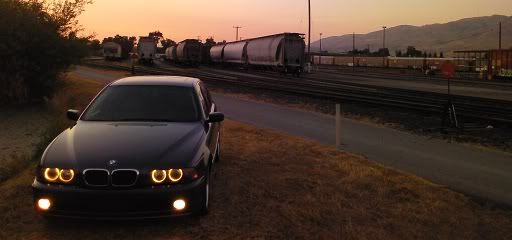
A couple of finished shots:

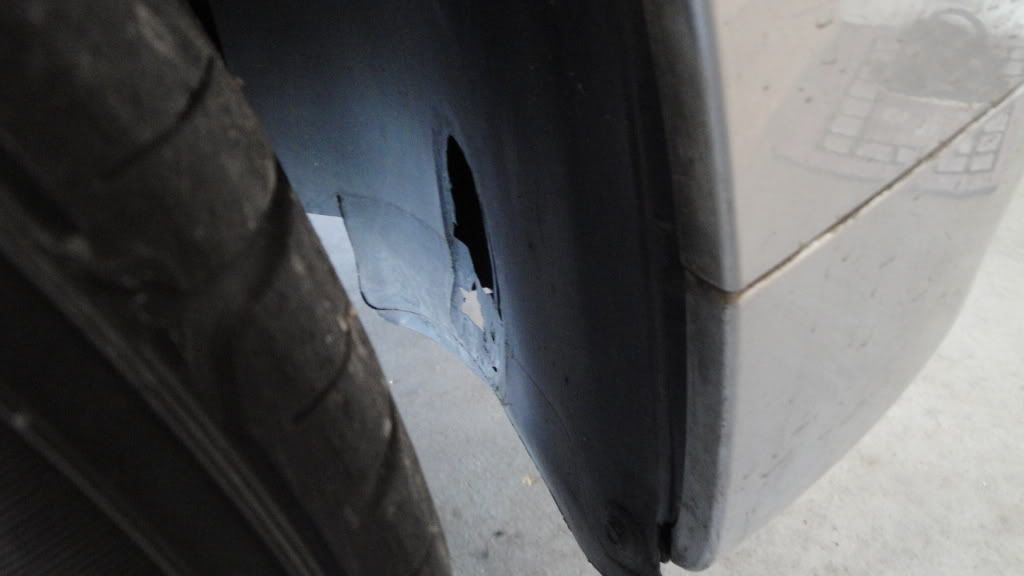
This can happen if your bumper hits the edge of your driveway:
(Ask me how I know... LOL!)
Picture of the old/original suspension:
Thanks!
Jason
Last edited by Jason5driver; 05-29-2014 at 05:16 PM.
Looking for an E39 belly pan , passenger front inner fender liner
Member
Jason you da man!! now all i need is the coilovers LOL
Member
Instead of the Plastic ramps you can you pieces of 6x6 cut to the right length and then use 2x4 nailed to them as a chock. Then you don't have to worry about driving anything up on ramps and 6x6 can be stacked, are very stable and will never, never collapse. To this day no matter how big a jack stand I have ,I'm spooked underneath them. Not so with the 6x6 pieces of wood. A hurricane wind could hit the car and it is not moving at all!
Member
I approve, Jason! Good job
Member
I was thinking about installing coil overs myself and thanks to ur write up Im gonna, so hopefully u did it all correct! lol Good job
working with steel
Very nice concise and organized writeup.
I can now see why that front suspension requires the special tool or the visegripped socket. My upper strut mounts are different, and I can access that nut with a box end wrench.
Member
Thank you for the write up, well done.
Member
I went crazy like you and did everything brand new last June. The difference was night and day. All new mounts, spring pads, bearings, nuts, bolts, Bilstein Sport Shocks/ Struts and H&R Sport Lowering Springs. This all in addition to end links, X5 thrust arm bushings, anti-sway bar mounting brackets, and associated hardware. New 255/40R17 rubber all the way around too. The difference is insane. Yeah baby!
Member
Thank you!Originally Posted by 1BADBM

What are you getting?
I agree.
I plan on making my own ramps.
Thanks V!
Well, I can still drive my car, and the wheels have not fallen off, so I assume the install is correct.
That, and the numerous pictures I sent to H&R were also approved!
Thanks!
I wish mine were that easy!
Thank you!
Yes, I agree the ride now is night and day difference!
Looking for an E39 belly pan , passenger front inner fender liner
Member
First off thanks for the great write up and review!
I'm actually surprised the H&Rs aren't to your liking. I've ran them on various VWs and Audis in the past and have always found them to be a good compromise between a street and track setup. The Koni coilovers were always way too firm, the KWs bouncy and the Vogtlands just plain old stiff. I could understand if you were running PSS's, but suprised on the H&Rs.
At any rate be sure to post back up once you've driven on them some more and allowed them to settle etc.
Member
Thanks!
Like I said, I think the valving in the tubes are so firmly packed in there, that it takes a while for the suspension to loosen up and break in/ settle...
I do love to drive the car...
I am not sure if this applies, but I did drive in a friend's E34 M5 with Koni Sports set to full soft and H&R sport springs, and the ride was a little more stiff than my car's IMO.
However, the chasis' are different, but both cars are I6's/ 5's...
Thanks!
Jason
Last edited by Jason5driver; 01-16-2010 at 02:38 AM.
Looking for an E39 belly pan , passenger front inner fender liner
Member
I was thinking about that after I had posted.. The last car I put them on was an 04 S4, which was somewhat bouncy on the highway with the oem suspension. With the H&Rs for the first two weeks it was a bit stiff, but has definitely softened up since then.
Keep us posted though. I'm looking to pick up an E39 relatively soon and was considering the H&Rs as one of the first upgrades.
Member
Thanks!
I think the majority of my problem with the ride is from my crappy Good Year F1 all-season tires.
I think the ride WILL greatly transform after I replace the tires.
Other suspensions I would also look at besides H&R's are Ground Control and TC Kline's.
What model E39 are thinking about?
Thanks for the responses!
EDIT:
Note:
The information below pertains to setting the car's height:
Additional Information from this thread, post #185:
http://forums.bimmerforums.com/forum...1273479&page=8
I did some research on the OEM spec heights.
I referenced my Bentley manual, and it lists the 525i sport at 23.1"-F (fronts), and 22"-R (rears) at "normal" loaded position with stock 17" wheels and tires.
"Normal" loaded position is similar to aligning the car with the weights.
The measurements in the Bentley are measured from the upper top arch of the fender, to lowest wheel-rim-lip to tire edge (nearest to the ground).
Measure ride height from the center of the fender arch to the bottom of the wheel rim - per the Bentley Manual.
"Normal" loaded position is similar to weighing the car for an alignment, but it is: .....
1. 150 lbs in each front seat
2. 150 lbs in center of rear seat
3. 46 lbs in the trunk and
4. A full tank of gas
See attachments (below):
E39 Bentley Manual - 300-14 - Ride Height.jpg E39 Bentley Manual - 300-15 - Ride Height.jpg E39 Bentley Manual - 300-16 - Ride Height.jpg
So, from what the Beisan Systems DIY says, the difference between the weighted height, and the non-weighted height is a 1/2".
So, you will need to add 1/2" to the Bentley's heights above to compensate for not loading weight into the car.
I called H&R and showed them some pictures, and I gave them some heights.
They requested that I raise the front 20mm (approx. 3/4").
So I did raise the front 3/4", but lowered the rear 3/4".
I found out that the H&R spring rates for my coil-overs are 325-F, and 205-R.
Also, the rep at H&R said it was very important that my car be within the parameters of:
1-1.9" drop for the fronts, and
1-1.7" drop for the rears, from the OEM spec. heights/NON-SPORT SUSPENSION/ STANDARD SUSPENSION.
EDIT:
IMPORTANT....!
Recently, I have found out from the H&R technician, that H&R's height range requirements are measured from the NON-SPORT E39 I6 models (E39 I6's with STANDARD suspension)...!
__________________________________________________ _______________________________________
I could not figure out why my car rode so stiff/ rough when raked (the front lowered more than the rear).
However, once I raised the front 3/4", and lowered the rear 3/4" - per H&R's request (flattened out the stance), the car road MUCH better!
Very much like OEM sport!
This is what I think was happening...
I think that because the front was significantly lower than the rear (HUGE rake), the front struts were binding and NOT dampening/ compressing correctly.
Something about how the rear of the car sits has a HUGE affect on how the car handles!
The car still rides a little firm, but it does not crash over the bumps/ pot holes like it did.
I am thinking that if I flatten out the car more, by lowering rear that extra 1/2", the car might ride even better....
So, according to what I have figured out....
If I want to drop the car 1":
Fronts = 22.6"
Rears = 21.5"
If I want to drop the car 1.5":
Fronts = 22.1"
Rears = 21"
My MAX drop according to the Bentley's stock height spec (23.6"-F, 22.5"-R - non-weighted)
and H&R's spec (1-1.9" drop at the fronts, and 1-1.7" drop at the rears) is:
Fronts = 21.75"~Rears = 20.75"~
The heights shown in these recent pictures are 21.75"-F, and 21.5"-R.
I basically dropped both the front and rear 3/4" from H&R's requested height.
However, now, of course, the ride is not as nice...
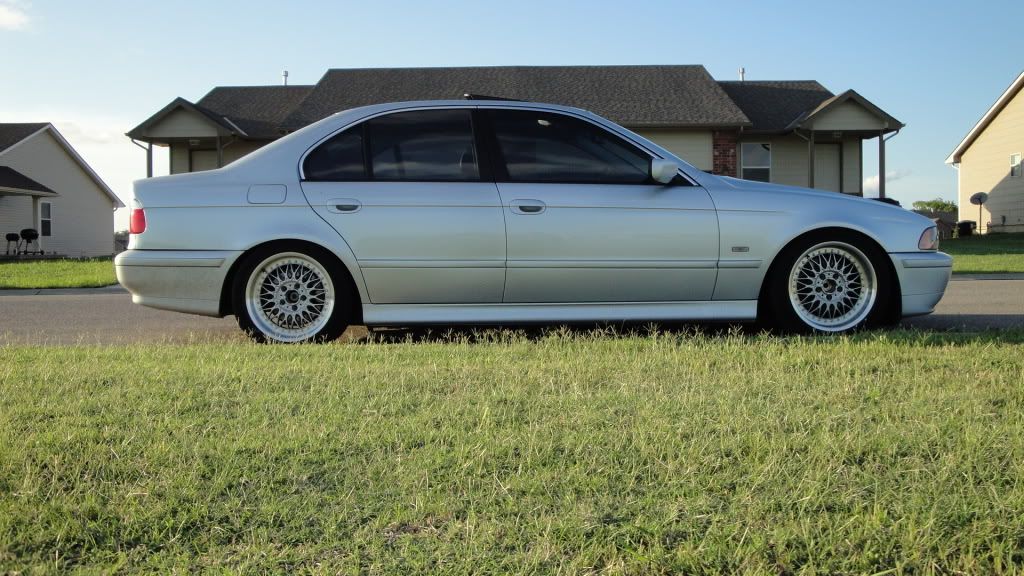
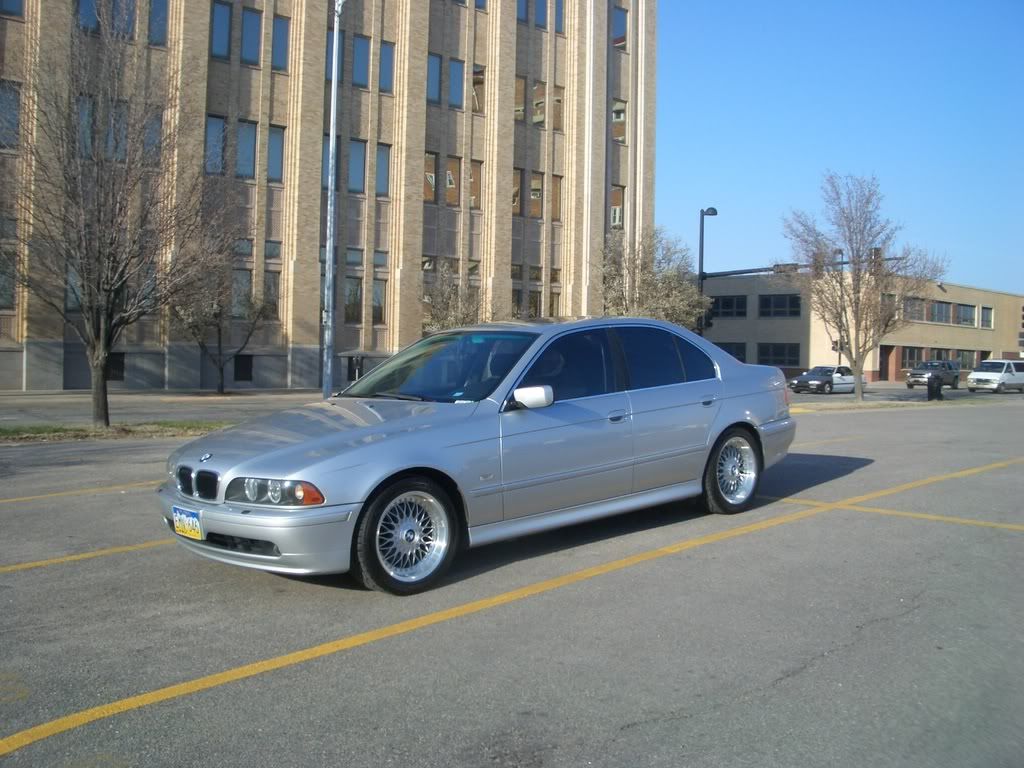
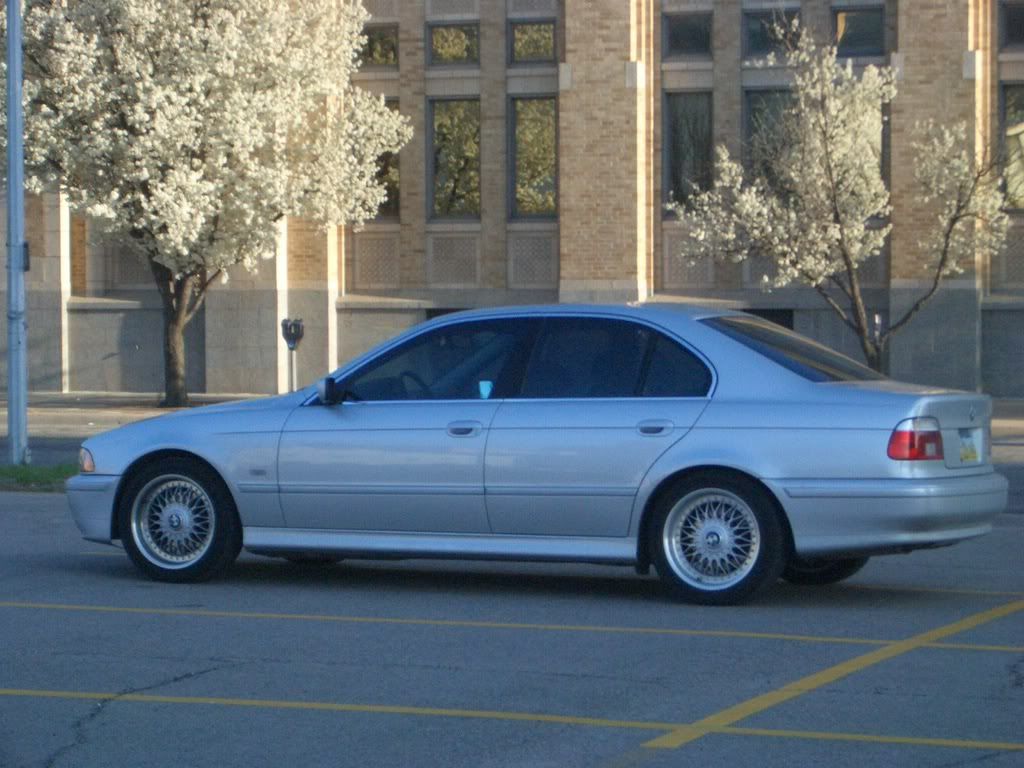
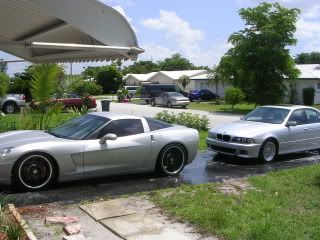
Here are some pictures after I adjusted the car per H&R's request:
These pictures below are of the car at higher heights (3/4" higher - front & rear) than what the posted above.
Previous to what the car is now.
(And, yes, I do realize these shots are all of the same angle...)
Jason
Last edited by Jason5driver; 08-23-2013 at 01:59 PM.
Looking for an E39 belly pan , passenger front inner fender liner
Member
If you sell them drop me a line...
If I have the funds at the time I will take them
License Revoked
Member
Don't worry... If I sell them, I will let you know.
Thanks!
But I think you have me WAY beat!

Looking for an E39 belly pan , passenger front inner fender liner
Member
Most likely a 540i/6
Member
Jason5driver,
The H&R setup doesn't have a firmness adjustment knob on them right... ?
Member
Unfortunately, no.
My coil-overs are only height adjustable...
Looking for an E39 belly pan , passenger front inner fender liner
Member
i have H&r Coil overs as well but mine are blue whould they be the same thing?
 Posting Permissions


 Reply With Quote


Bookmarks