
 Member
After searching through thread after thread looking for info on how to replace my rear shock absorber support and not finding a single DIY(or any relevant pictures of a before and after), djervin and I said "@#$% It" and decided to dive right in. The plan was, and as of right now still is, to drill out the spot welds and then bolt the new shock absorber support in place using the spot weld holes. The reason for bolting it in and not rewelding is the fact that our cars are notorious for this failure and if this happened after 10 years and 150k miles, then I will be ready to do it again in another 10 years/150k miles just with less headache. If after trying the bolt fix I decide it is not the best course of action I will edit this first post! For those of you wondering how hard it is I will just say it is not hard, but tedious(BMW seam sealer is a b!tch and even after you scrape the majority of it off there is residual left on the metal that still makes finding the spot welds tricky...I believe Dustin compared it to an Easter Egg hunt!). If you follow this thread though and learn from my mistakes, then you should have no problem and Dustin and I have done our little part to make bf.c a better place. Just to make it clear...this is the driver side shock absorber support and there are 16 spot welds...Dustin and I were not sure how many there were and every time we thought we found them all...guess what...we didn't! So...here we go!
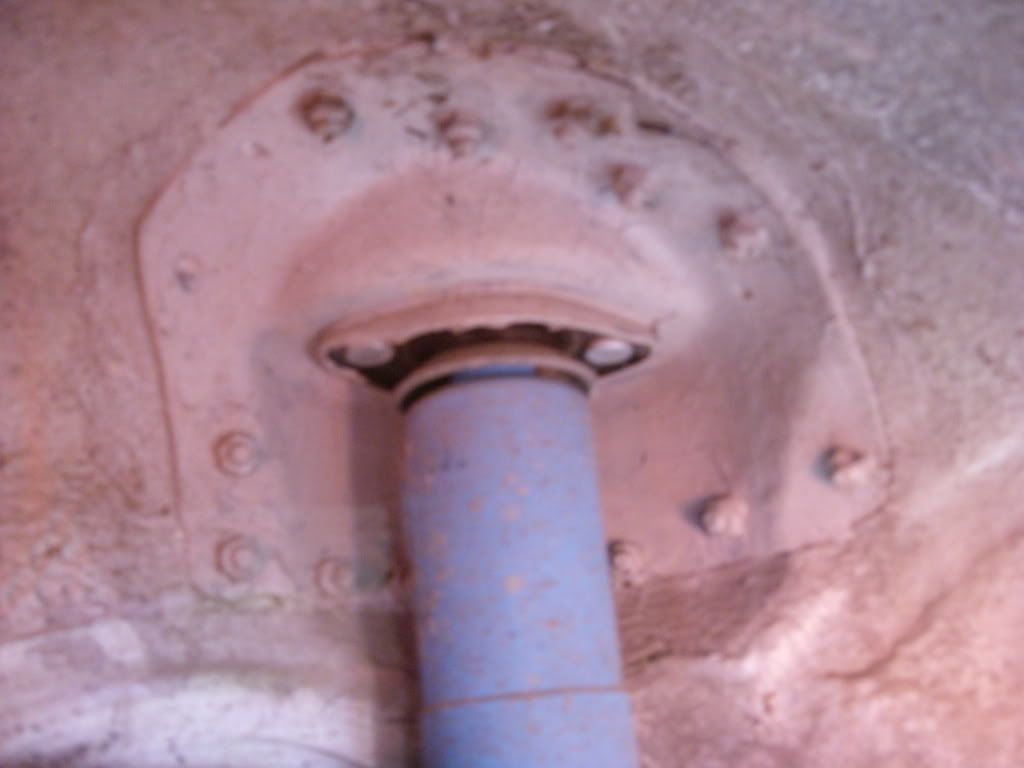
Dustin and I start on a road trip to Philly to pic up a set of rims. Stop to get gas. He notices tire is low. Decide to hop on the freeway to go to another gas station that has free air. On the way there I hear an interesting new sound. I love new bad sounds! Pull up beside the pump. I go to play with air, he goes to look in the truck. I look at him while untangling air hose and ask what he sees. He says I dont want to know. Just from him saying that, I already know. I come look...this is what I see.
Drive the car home (carefully, I wouldn't recommend it, but I am much cooler than most people!)
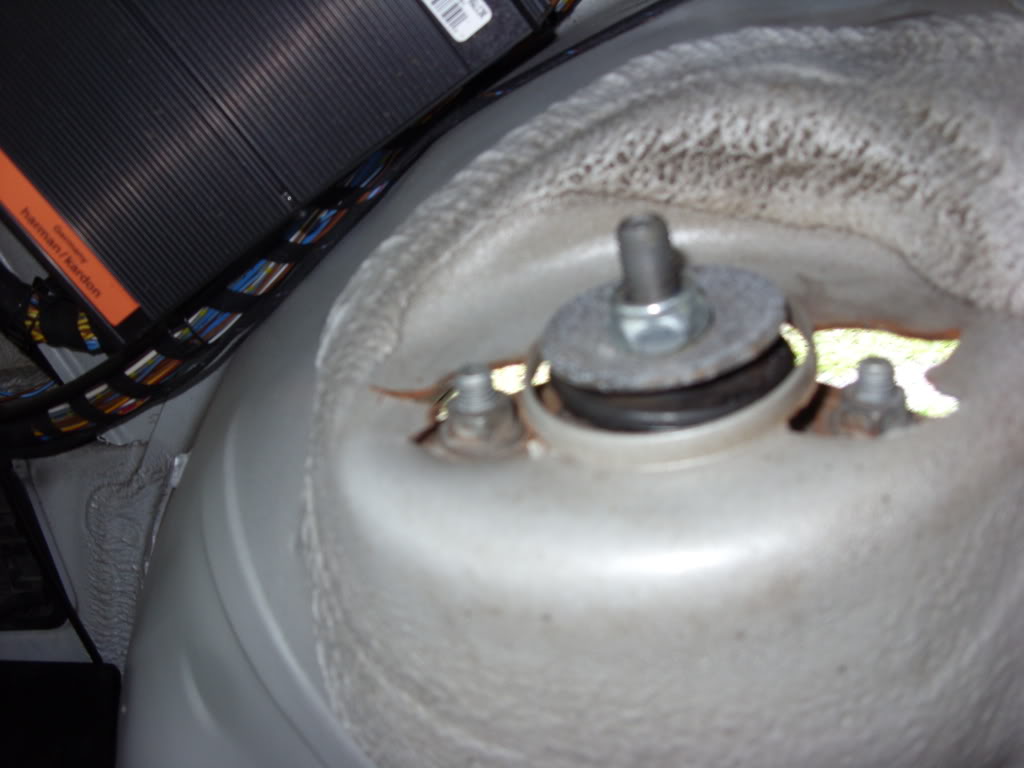
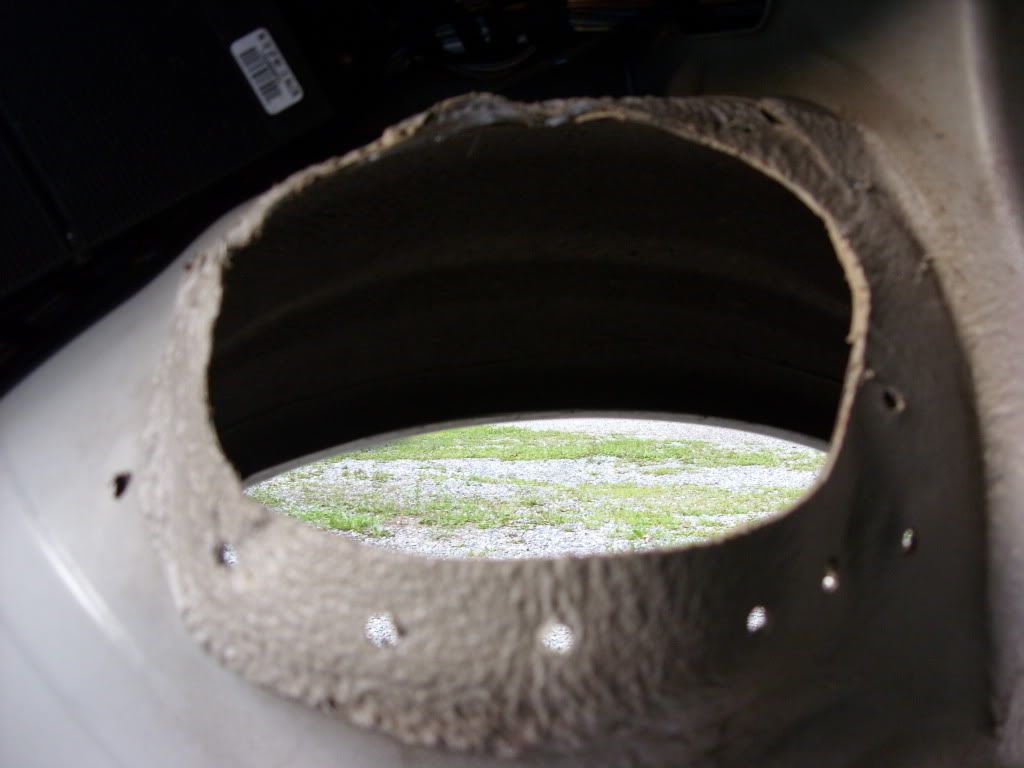
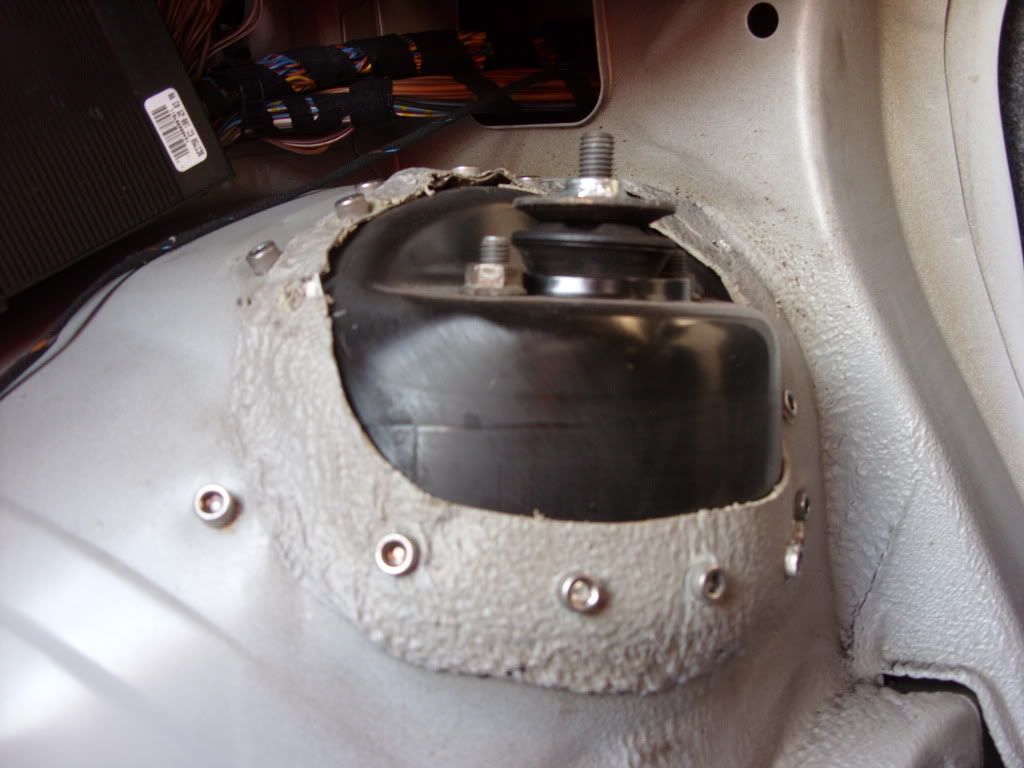
Next day...jack up the car...take off the wheel...this is the view from the wheel well...
Order the parts from the local dealership because they will A)have them in stock or B)have them the next day. The only other place that I would buy them from would be BavAuto, but you will have to wait since it is a special order part(I was told it would ship in 2 weeks :/ ) The parts are crazy cheap, probably because BMW realized the dropped the ball when it came to engineering the shock absorber supports! The next order of business was scraping off the seam seal/undercoat. Here is a pic of starting! I would follow the outline of the piece with a razor and then scrape off the vicinity of the spot welds. Learn from my pics!
Starting...
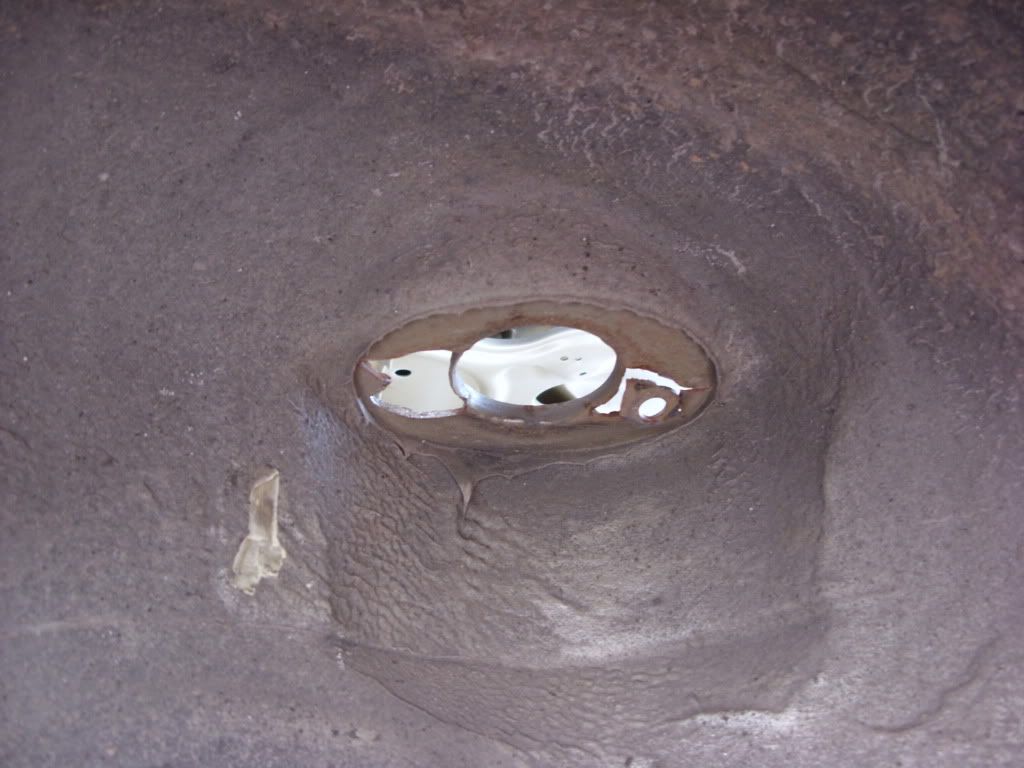
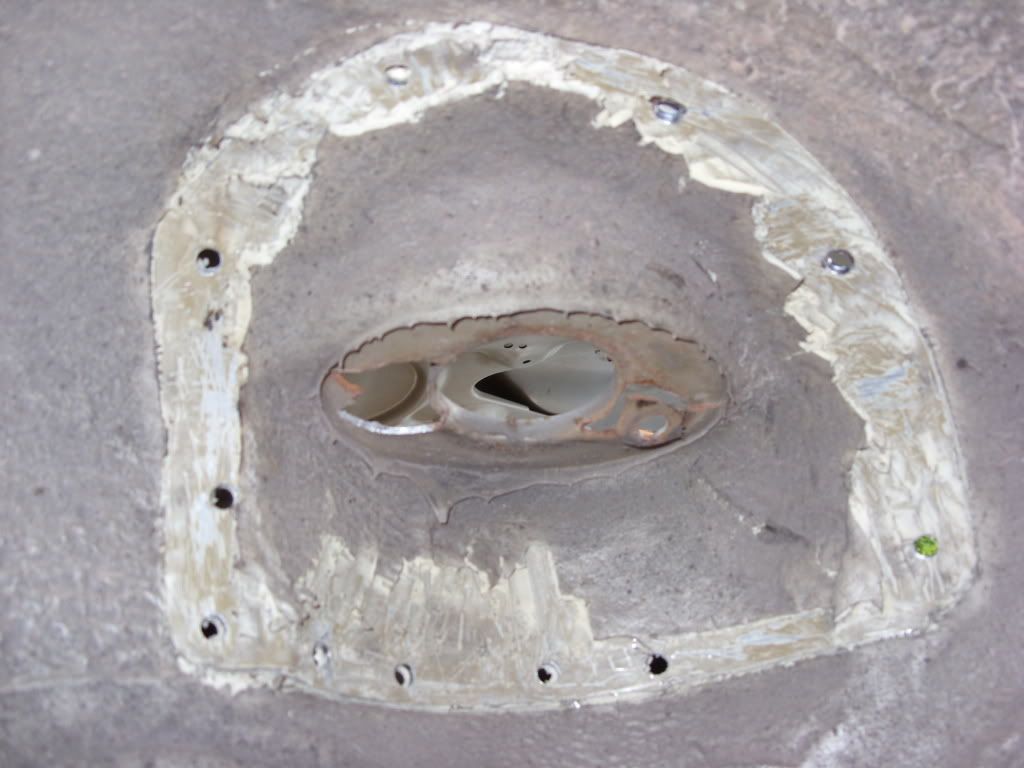
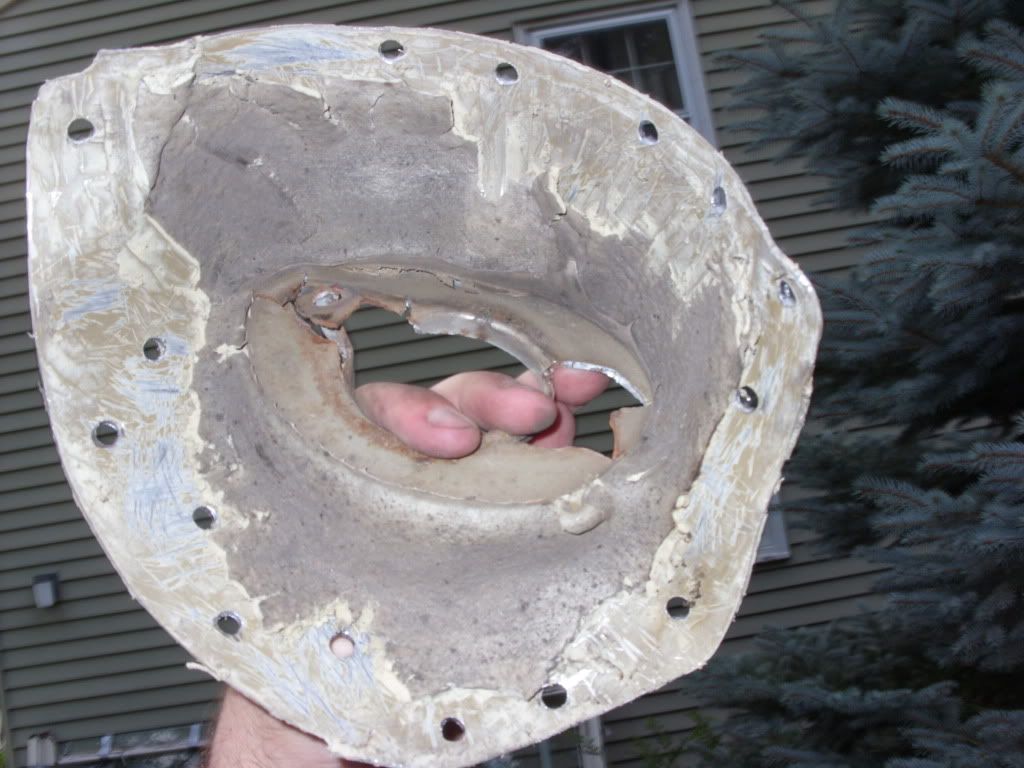
Once you have fount all 16 spot welds start drilling. I know it is hard to drill into your baby, so find a friend...give him a beer or two...then he will do it for you...that's what I did! Note: we used a 1/4" bit to drill them out...while that removed most of the the "meat" of the weld, it could have been bigger...I think I MAY step it up a hair when I drill the new support for the bolts. Here are some pics of all the spot welds drilled out and the support removed. I just took a 2.5# baby sledge and went to town on the old part. We found the 4-5 spot welds we mixed in the process! AGAIN...LEARN FROM OUR MISTAKES! 16 spots people!
Thought I was done...
Yeah...definitely missing a handful! Dustin and I counted 16 spot welds when we were done!
This pic shows all the wholes we drilled out...minus one...can you find!
If you said in the upper left hand corner give yourself a hand!
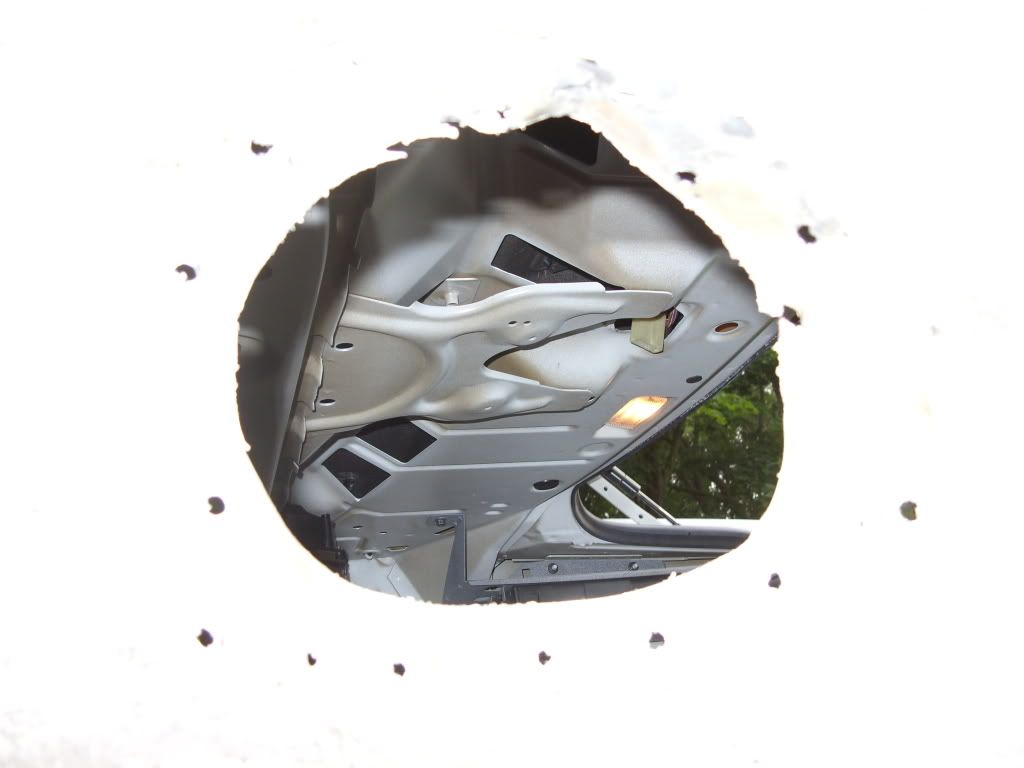
Pic from the wheel well
Pic from the trunk
I will try and get some pics of the support installed...the game plan is to line up the bottom of the support...use white out through the spot weld holes to mark the spots...drill the new support for the bottom holes...install the new support with the new hardware on the bottow only...press support into final place...mark all remaining holes that need to be drilled...remove piece again... drill remaining holes...final reinstall...brush on 3m seam sealer on both interior and exterior...spray exterier with undercoating overtop of the exterior seam sealer if necessary...reinstall shock absorber...enjoy! I will try to get finished pics up for you guys. Good luck brothers!
If you don't like what Dustin and I did, we respect your opinion, but don't come on here just to bash us. I am sure there are things we could do differently and we would appreciate to hear what you have to say. If you just come on here to bash this thread though I am pretty sure Dustin will have no problem flying to wherever you rest your head at night just to beat your a$$. Sorry about that...I am just tired of people hating on the forums!
Last edited by MauiM3Mania; 11-04-2010 at 03:50 PM. Reason: profanity
Maintenance FTW
You caught that before it got really bad! Time for some new RSM's and reinforcement plates (or rear shock tower bar, your choice)
Looks like you're doing a quality repair job. I'll be watching your progress!
Member
DUDE YOU DID IT ALL WRONG!
Selling my E500 Olympus $350(OBO), let me know if you're interested!
Member
Just an FYI for those that want to weld it back in. There is a spot weld drill bit available which makes drilling out spot welds a lot easier. It is available at Harbor Freight among other places. It allows for drilling out the spot welds without drilling through both pieces of metal. That'll make welding it up again easier. It is pretty easy to the find spot welds if you grind off the seam sealer down to painted or bare metal. Good luck with the finished repair. I'd like to hear how the bolted in piece holds up. I have welded in a couple already. I'll continue to weld them in tho. Its not bad if you have access to a welder. It doesn't take long to plug weld up the the holes.
Member
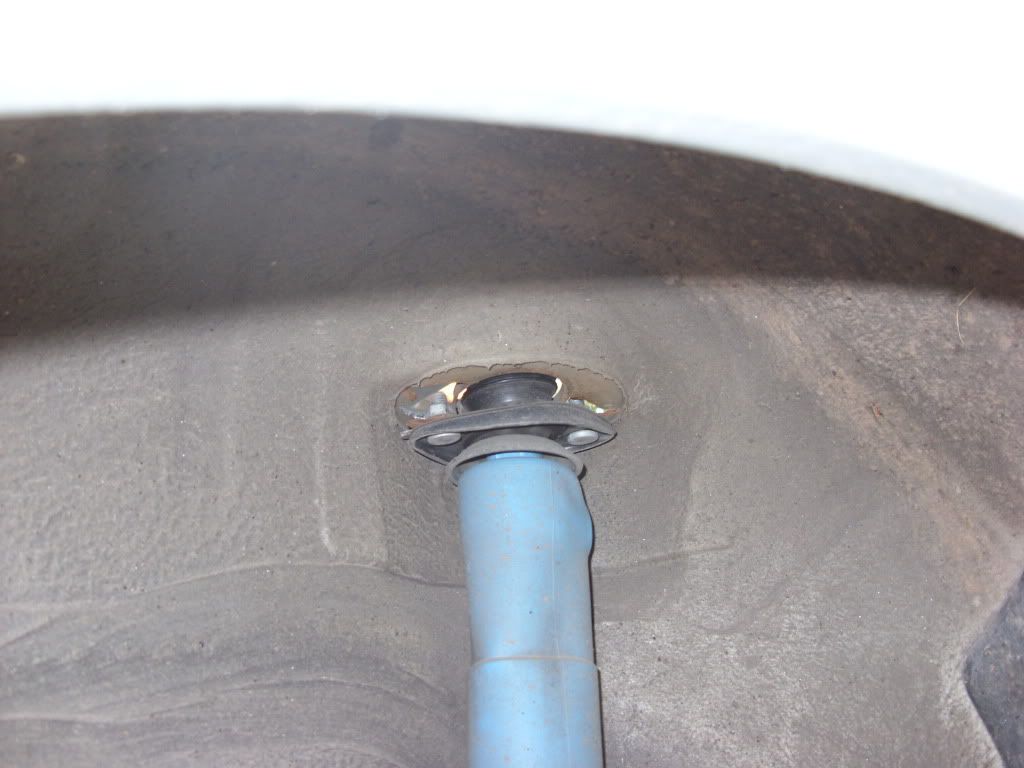
I saw my link referenced in another post and realized I never added the photos after my first try at the shock towers. Here are the pics for you guys! Remember how I said to get ALL 16 welds...the ripples at the top are from where the metal pulled from still being welded. Happened along the bottom as well but as you can see from the photos i straightened that shiiiiii right out...this is before I straighted the top with pliers and two hammers! now it looks right and tight and to be quite honest looks heavy duty like part of some bad ass tank! Sorry for the blurry wheel well shot, but I just wanted to give you guys an idea what the 3M seam sealer looked like to give it that OEM finish. The seam sealer was the most expensive part for the project, took the most time to do and in all honestly was the hardest part of the project. If you buckle down and hit it hard you could probably have all of this done in less than an hour if you dont need to make any runs midway through!
Last edited by mmyohe; 10-31-2009 at 09:11 AM.
Maintenance FTW
^ You need to weld that in, IMO. While I appreciate the simplicity of the bolt-in method, welding really is the only way to go here.
Alpinweiß-Trash Lux-Hater
stop posting those pics of your egregious hack job.
nutserts? c-mon guy....
current = '99 Estoril/Mulberry M3 Coupe :: past = '97 Alpine/Anthrazit M3 Coupe
Maintenance FTW
And you still didn't get some z3 plates on there...
Alpinweiß-Trash Lux-Hater
because that is a clown repair performed by a clown.Originally Posted by shaeff

current = '99 Estoril/Mulberry M3 Coupe :: past = '97 Alpine/Anthrazit M3 Coupe
Member
how is this a hack job? 16 spot welds OR 16 grade 8 nuts and bolts?
as you can see from the wheel well pick they sit totally flush...two separate peices that WERE spot welded together are now attached with 16 grade 8 bolts and nuts...you do not need to cut anything! what dont you understand? Why would you cut anything...old piece drops out...new piece goes RIGHT in...as i said in the pic it buckled due to me missing a spot weld...I was learning...as you can see from the bottom of the pick everything sits FLUSH...you are an idiot who loves loves loves his welding...needs to be welded blah blah blah...no...it needs to be attached...whether spot welded again or bolted...both get the job done, but hey...wait...when it happens again in another 60k miles who has to re-drill and re weld? You...you has to remove 16 bolts and reinstall the new piece? oh yeah...me! You are a tool who has NO idea what he is talking about you clown!


Last edited by mmyohe; 10-31-2009 at 11:29 AM. Reason: Automerged Doublepost
Alpinweiß-Trash Lux-Hater
stop spamming.
welding physically alters the metal and strengthens it. drilling holes weakens it.
end of story.
you are a hack.. thanks for those pics.
current = '99 Estoril/Mulberry M3 Coupe :: past = '97 Alpine/Anthrazit M3 Coupe
Wait, what?
Very true....
While it will probably hold for street driving, and stock shocks etc... do MUST get z3 reinforcement plates, or it WILL happen again.
http://education-portal.com/welding_training.html
Last edited by Hova; 10-31-2009 at 01:47 PM. Reason: Automerged Doublepost
"Be who you are and say what you feel because those who mind don't matter and those who matter don't mind."
-Dr. Seuss
DIY BMW Tools. Charlie For President
Member
You guys have done this so many times...how much thinker is the new plate from BMW compared to the one that originally came on our cars? Just curious...and can I see pics of the ones you guys replaced...especially your VERY first one!
How am I spamming? You can keep on bashing people for being innovative. Seriously though...show me some pics of your "superior" job...thanks cupcake
Last edited by mmyohe; 10-31-2009 at 02:25 PM. Reason: Automerged Doublepost
Member
Hmmm...interesting for sure. In the Aircraft industry we use rivets, Hi-Locks and Bolts, for easy of repair and keep weight down. In this application, I would probably reinforced it with the Z3 kit, welded it and gone with a proper mount like I have. (GC) I never worry about it going anywhere since it has lots of hi strength metal on both sides. If you beef it up, it shouldn't be something you need to think about. My car used to be a track car, now a DD with over 170K on it....
John
'95 Hellrot M3 w/Dove
AA Euro HFM Stage II (w/21# Injectors & Software) W/Gen III Exhaust - URI Crank Pully - FDM w/3 Row M Coupe Rad - 3.23 LSD - Vogtland Club Spec/Koni SA - UUC Red w/Enforcers - TMS Shims/Rear Camber Bars w/QA1 inners/Sways - VMC F/TMS R End Links - X-Brace - Perf Ultimate/SS Brake Lines - GC Tower Mounts/RTAB Shims - ZKW's w/5000K Hid - Fog Delete - Alpine 9847/Pioneer TS-C130R Kevlar Components/Pioneer PRS-X340/Stealth Box's/Wired Zune 120GB - OE LTW CF Sills/Glove Box Plate - Staggered Black M-Spoke II's w/235/40 (front), 255/40 (Rear) Nitto NT05's - Rolled Fenders!
***Got a '95 M3? (actually pretty common on all years! Even happened to Racer Seth Thomas!) Check Your LSD! http://forums.bimmerforums.com/forum...d.php?t=390209
Alpinweiß-Trash Lux-Hater
thicker i think you mean.. not much.
current = '99 Estoril/Mulberry M3 Coupe :: past = '97 Alpine/Anthrazit M3 Coupe
Sartorial Member
I wouldn't trust this on my own car. Maybe it works, but why take the chance?
Weld in a new section and then get some real shock mounts with proper reinforcement plates. A plate will distribute the force over a much greater area, rather than just the two bolt holes.
NA FTW
meh, just found out tonight that this happened to me:
this thread seems to be the best i've found so far on figuring out how to fix this, so thanks OP!
EDIT: i should mention that i'm on stock suspension with ~112,000 miles on it.
Last edited by jworms; 02-20-2010 at 01:06 PM.
UUC EVO III SSK | M50 Intake Manifold | Conforti 3.5" CAI | AA Software | 3.5" HFM (unplugged)
Fan Delete | Strömung Exhaust | UUC Stg2 Ltw Flywheel | X-Brace | AA Track Pipe | 3.46 Differential
1/4 mile: 13.3@104.2mph; 8.6 in 1/8; 2.04 60' | Best 1/8 mile: 8.3@83mph; 1.81 60'
Dyno: 242rwhp/232rwtq SOLD
Member
i hear duct tape works good too...
im glad i put new RSMs with Z3 mounts in before shit hit the fan with my car.
Member
mmyohe - I like the cut of your jib!
I have the topside re-enforcement too now but that doesn't seem like much of a re-enforcement.
Does anyone offer an underside re-enforement plate like the ones offered for the front strut towers? I think re-enforcement from the bottom would be better than from the top.
Member
ouch...
The BMW Mechanic
Any more info on the Z3 reinforcements everyone here is mentioning? Are they stock Z3 shock mounts, or weld in plates?
Avus Blue 95 M3. Many mods, including Northeast Rust Mod.
Member
the Z3 reinforcement plates are for BEFORE any cracks start to happen. It's a plate that goes over your shock mount bolts, then you tighten the nuts down after the larger surface area plate is in place.
Jworms: did that occur WITH Z3 reinforcements in place?
Member
I did this 2 years ago and figured that i should stack 2 mounting plates, tack them together to thinken the sheet metal then weld back to body. On top of that i used GC shock mounts. I figured that is definatley going to hold up for a long while. I would recomend this method to anyone else doing this project.
NA FTW
no, it occurred with all stock components -- no reinforcements
definitely getting the reinforcements after i get this mess fixed.
here some better pictures of the carnage thus far:

Last edited by jworms; 02-20-2010 at 09:27 PM.
UUC EVO III SSK | M50 Intake Manifold | Conforti 3.5" CAI | AA Software | 3.5" HFM (unplugged)
Fan Delete | Strömung Exhaust | UUC Stg2 Ltw Flywheel | X-Brace | AA Track Pipe | 3.46 Differential
1/4 mile: 13.3@104.2mph; 8.6 in 1/8; 2.04 60' | Best 1/8 mile: 8.3@83mph; 1.81 60'
Dyno: 242rwhp/232rwtq SOLD
Member
I think I'm going to get my cage guys to plate the top of the shock towers. In case I want to do rear coilovers down the road (though I probably won't).
 Posting Permissions


 Reply With Quote


Bookmarks