
 Crazy Cracker
BMW CCA Member
Crazy Cracker
BMW CCA Member
To Timing
Now this was interesting. Ended up doing this twice when testing failed miserably the first time. Here are some of the basics. I still recommend getting a Bentley manual when doing any of this. There are some special instructions that I will not get into, but this should give a good idea of the procedure.
Interesting enough if you follow the directions. Most if not all of these parts can only go in one way. This gave me a bit more peace of mind when I figured that out. Thank you BMW engineers.
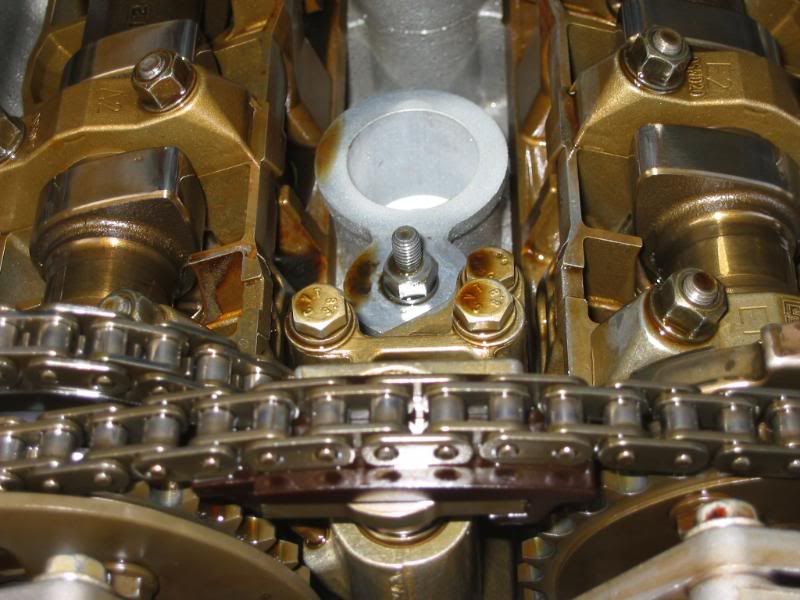
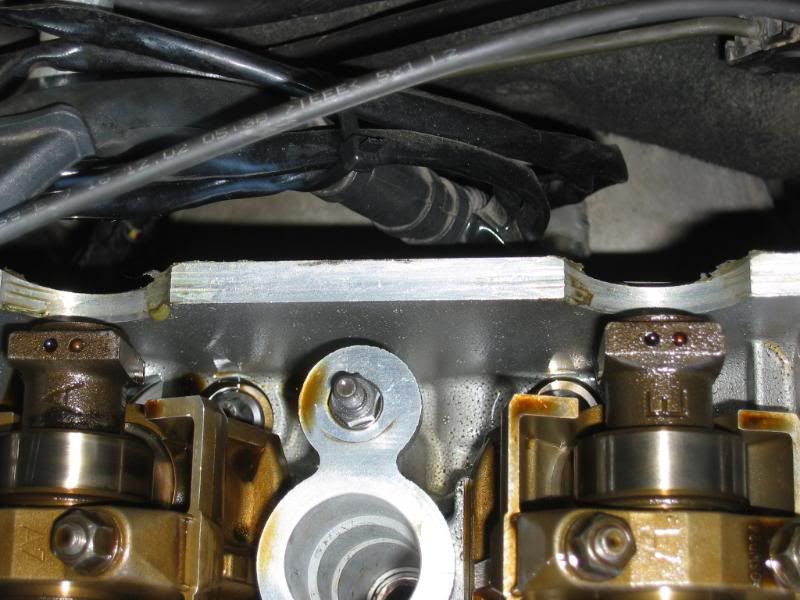
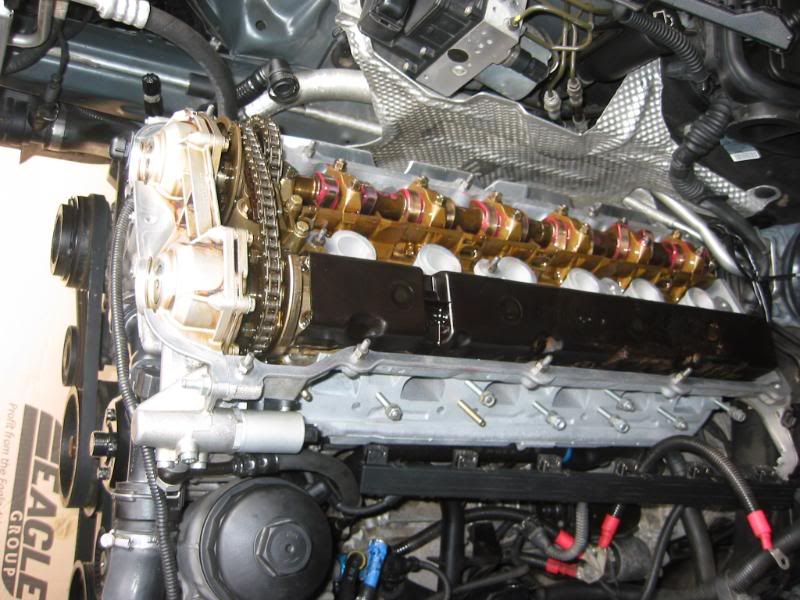
Cam lobes at top dead center, TDC
Also on the rear of the cam there are a couple of dimples to denote TDC.
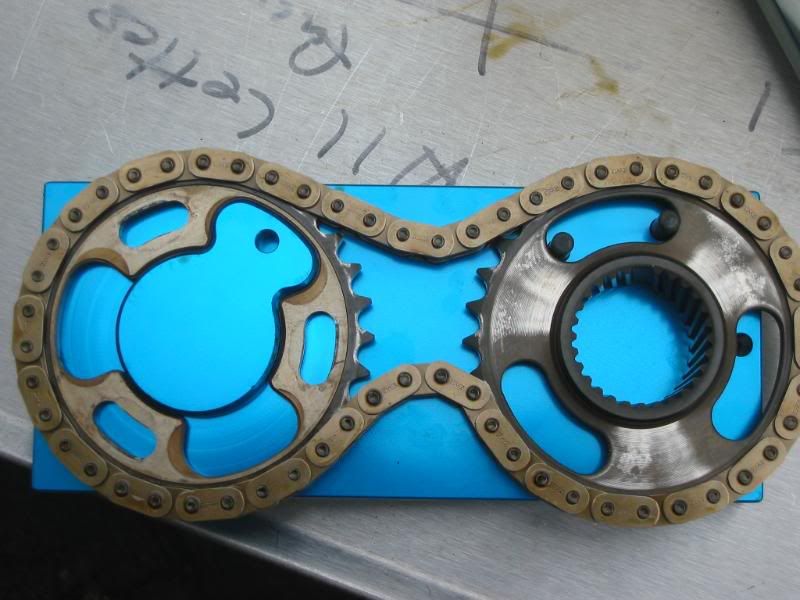
A= exhaust cam
E= intake cam
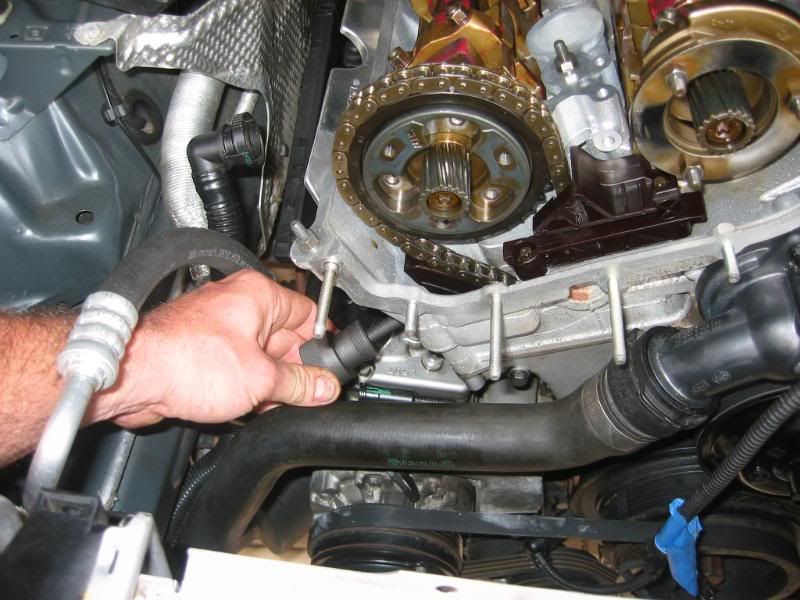
Placed the sprocket & timing chain on the exhaust cam. Set the index mark to the platform of the head. Set finger tight tension on the special tension tool.
Secondary tensioner back in.
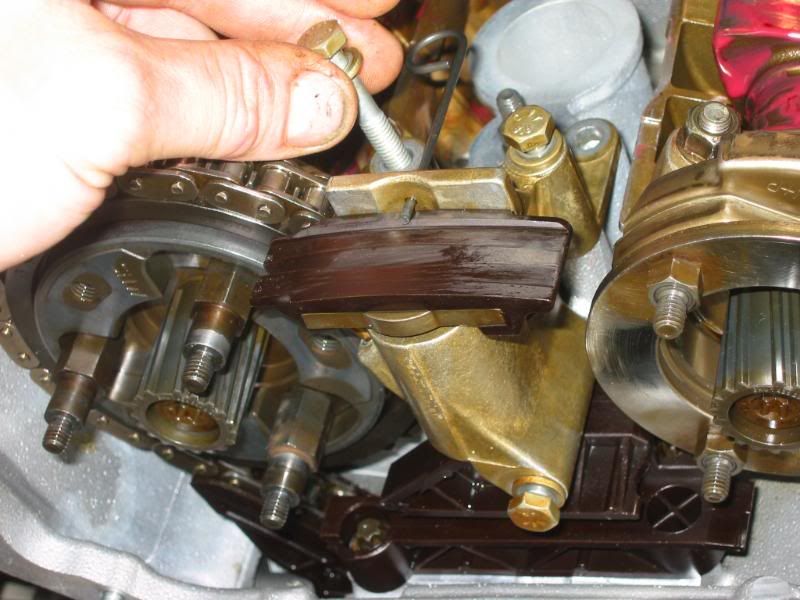
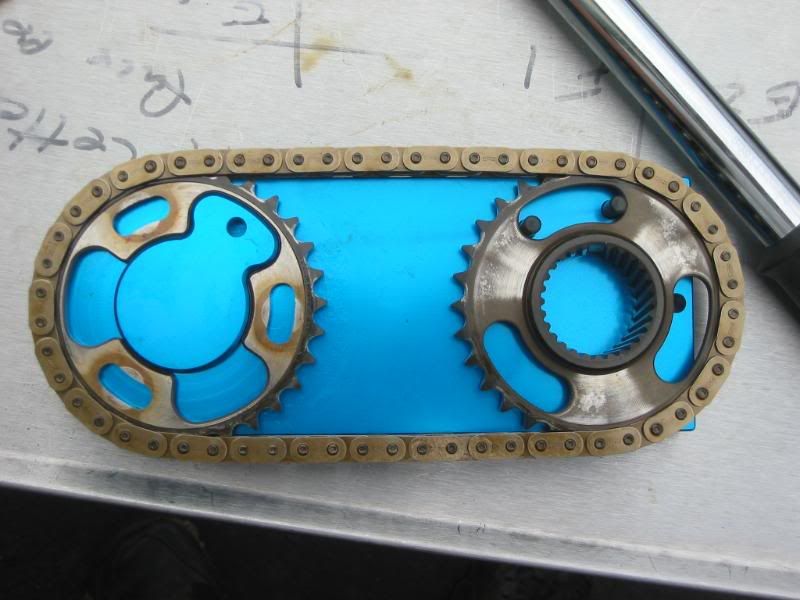
Assemble the exhaust sprocket.
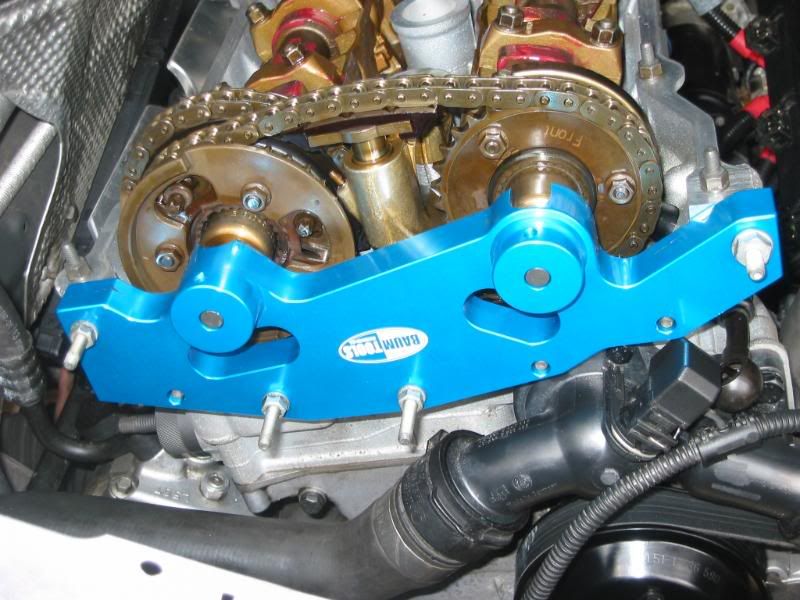
Special jig for the secondary chain.
The left side of the jig slides to add tension to the chain.
http://www.botme.com/botme/en/iphonegames/bmw-530.htm
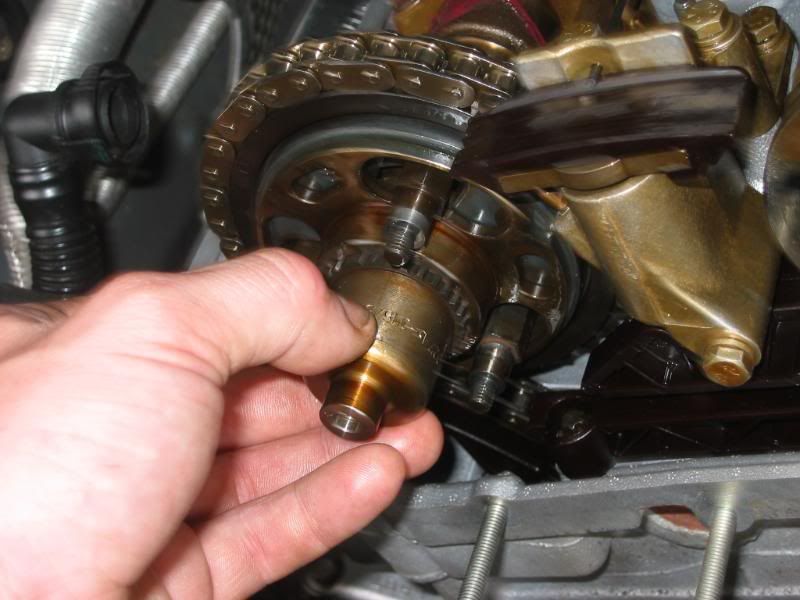
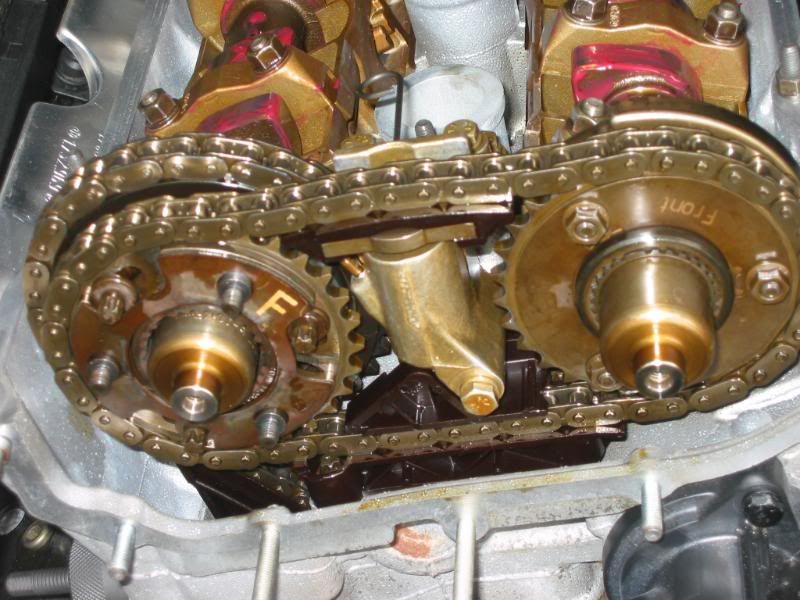
Insert chain, and place dome thingy into intake cam assy. Remove tensioner pin. Pull exhaust dome thingy out.
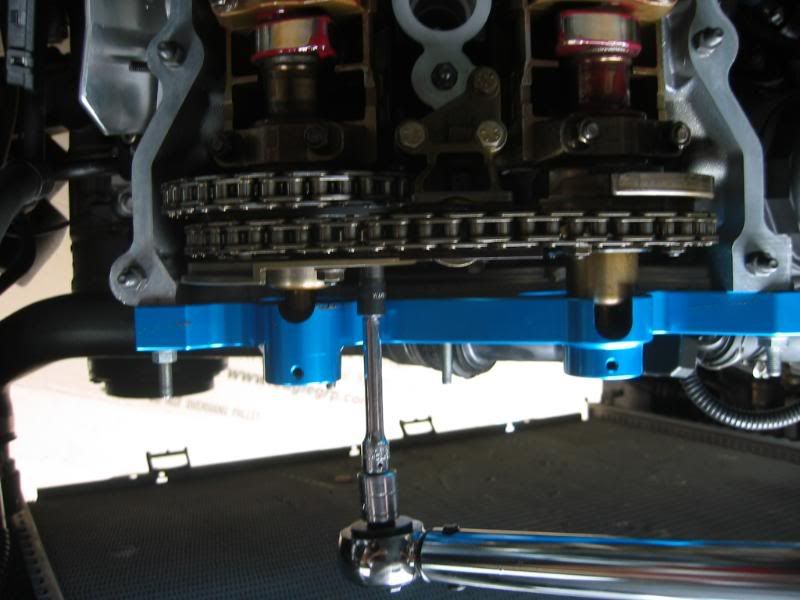
Torque timing chain w/ special tool.
Vanos jig
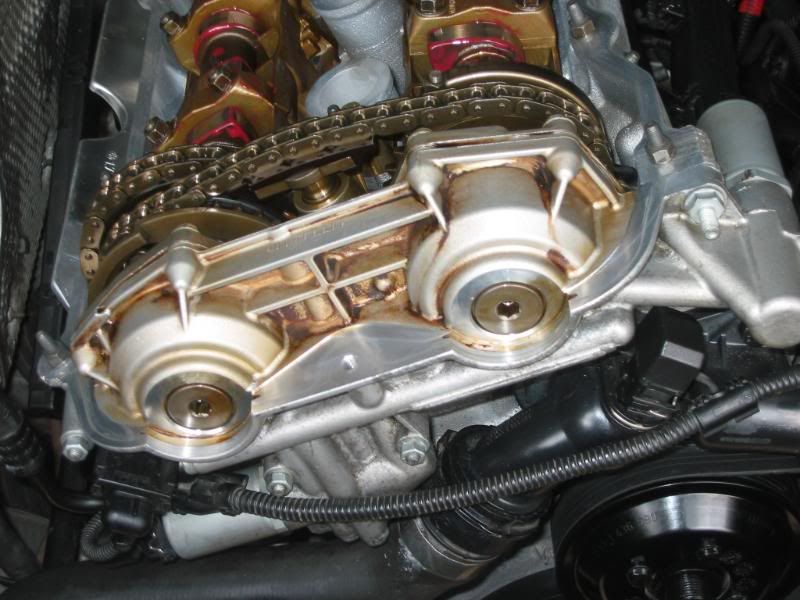
Domes should rest on the inside of the notches
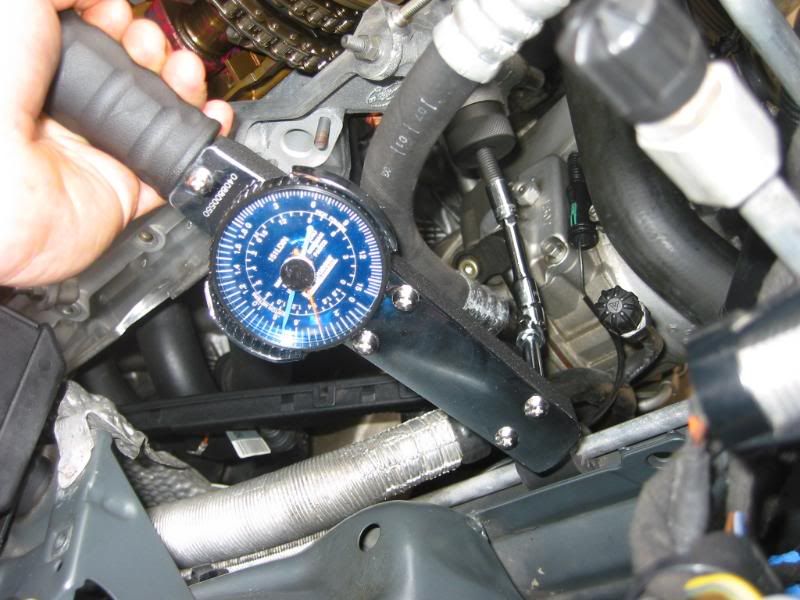
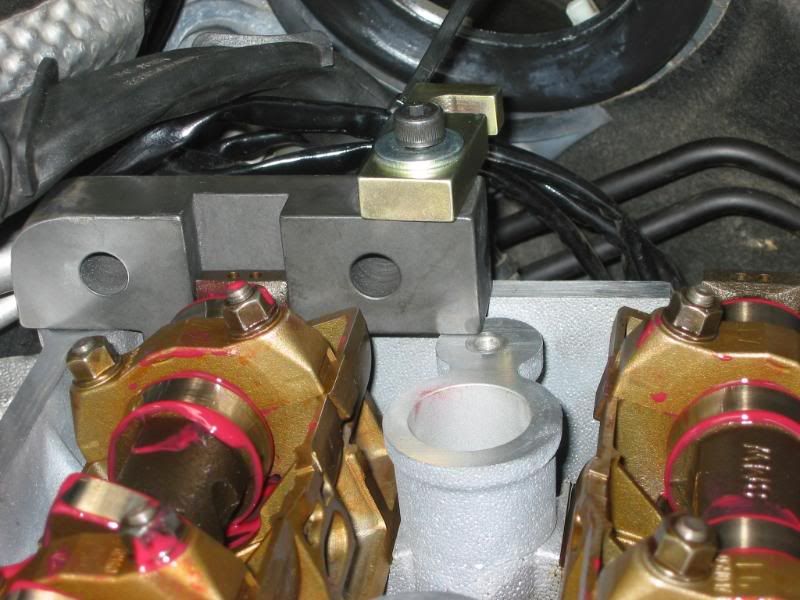
Rotate the crank twice. Use the cam locking tool to check the position of the exhaust cam at TDC. There is a TDC mark on the balancer that lines up with the block. Also the cams should be at TDC. The tool should lay flat on the head with no assistance. The intake can be a little askew (1mm or so). If neither of these prove out. Then START OVER with the timing. It sucks, but an once of prevention is worth a pound of cure.
If all proves out then the timing is done.
So here was over 50% of my cost in doing this DIY. Tools.
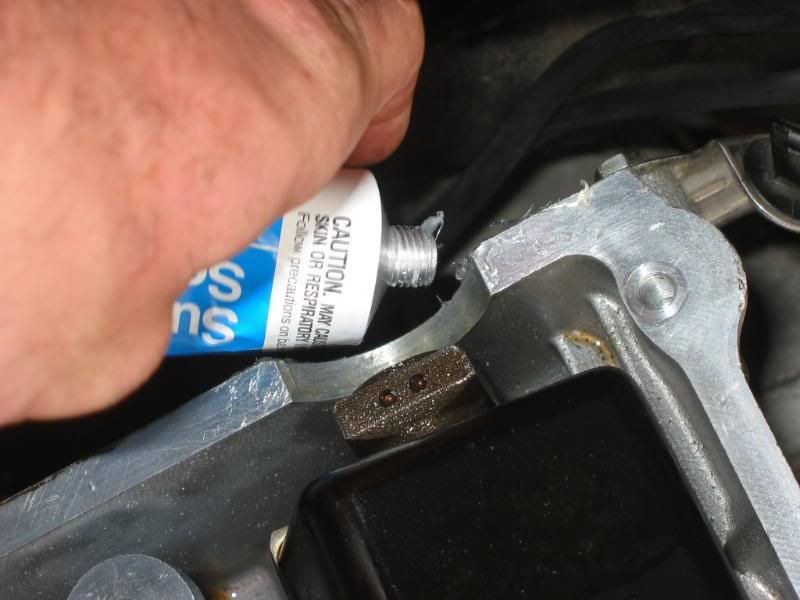
Another note in timing. If when proving out the timing on the cams, they are flat with the deck. Make sure the balancer is in TDC. Not slightly off a few degrees, so the balancer has to be moved to get the TDC pin in to lock the crank. Se the pic below. It is incorrect for proper timing. The torque on the timing chain tensioner tool was incorrect.
Last edited by Jackcat559; 12-02-2009 at 06:26 PM. Reason: Automerged Doublepost
Member
Nice work!
Last edited by DuffmanE39; 06-10-2009 at 12:34 AM.
Crazy Cracker
BMW CCA Member
Finishing the Head
Installed the vanos assy and buttoned up the head. Dosed the cams & lifters with oil.
Note the different dome positions.
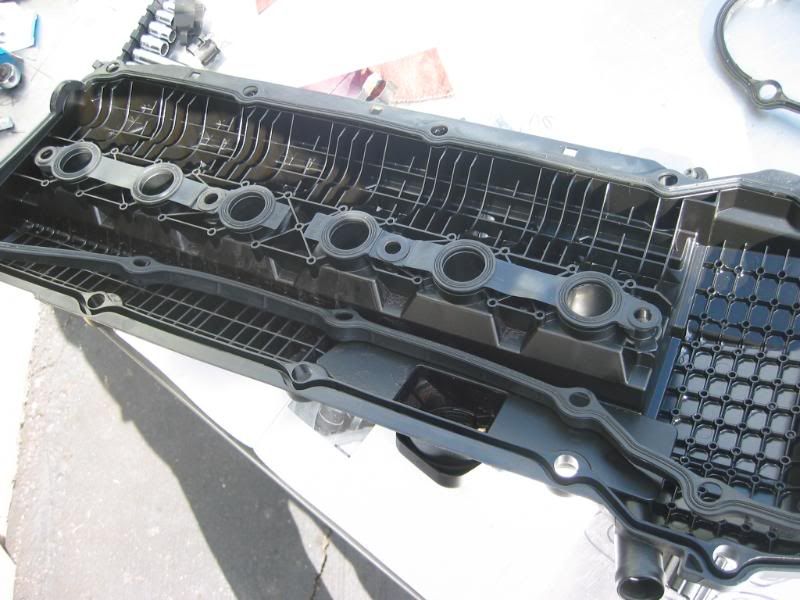
Use the same sealant here on the valve cover gasket as on the vanos gasket, 3M(TM) Super Silicone Seal 08661 Clear, 3 oz Tube [ame]http://www.amazon.com/gp/product/B000PEWCWA/ref=ox_ya_oh_product[/ame] Also Pelican mention that the 2 dimples are an indication of the cams being at TDC (top dead center)
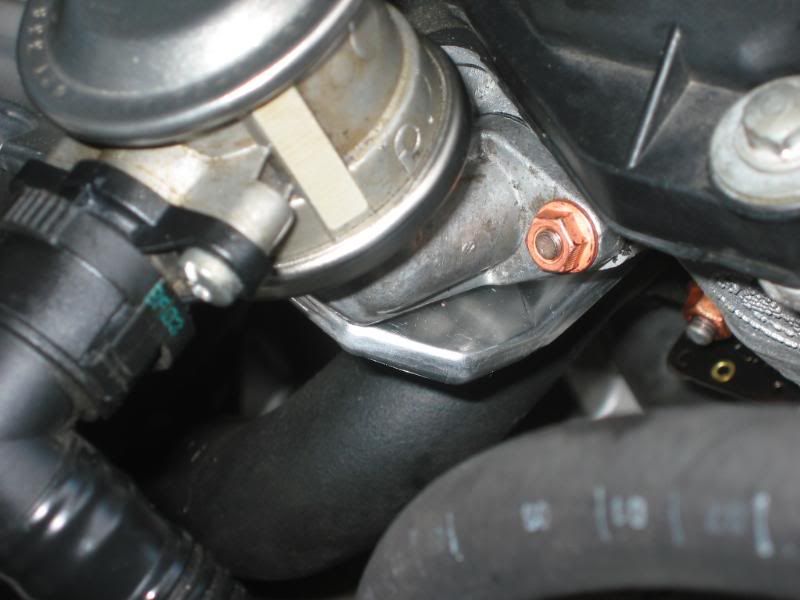
New nuts here also.
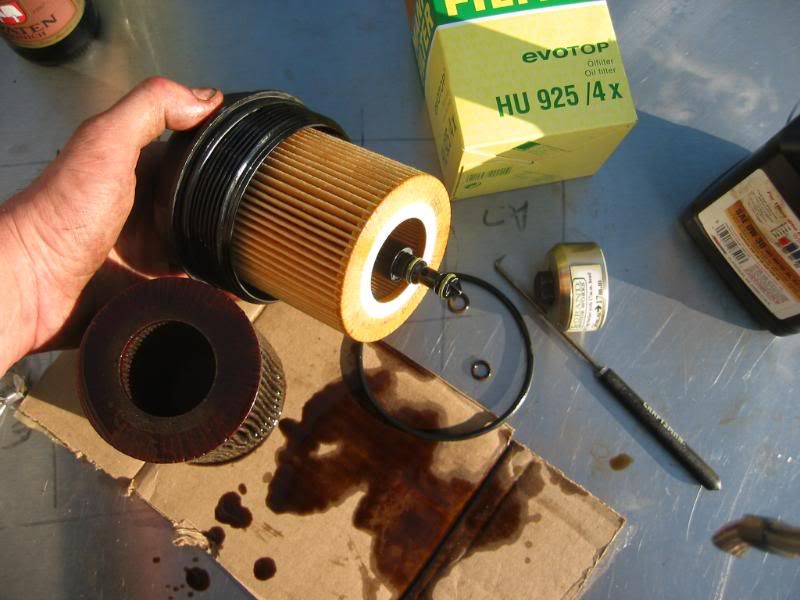
Changed all the o-rings with the oil filter
Member
BMW CCA Member
Nice work. Thanks for documenting.
Member
Looks great!
1984 318i/man./Tornadorot*
1990 525i/man./Alpinweiß*
2001 525i/SP/PP/man./Cosmosschwarz/Sandbeige*
2002 X5 3.0i/SP/PP/man./Sirius/BT/Titansilber/Sandbeige*
2006 330i/6sp man./SP/PP/CWP/Sirius/Blackline/Rear Fogs/Arktis/Grau*
2001 525i/step./PP/CP/CWP/OEM Sirius/OEM BT/OEM AUX/M5 Rear Sway/Bilstein HDs/Rear Fogs/Schiefergrün/Sandbeige
*retired
Crazy Cracker
BMW CCA Member
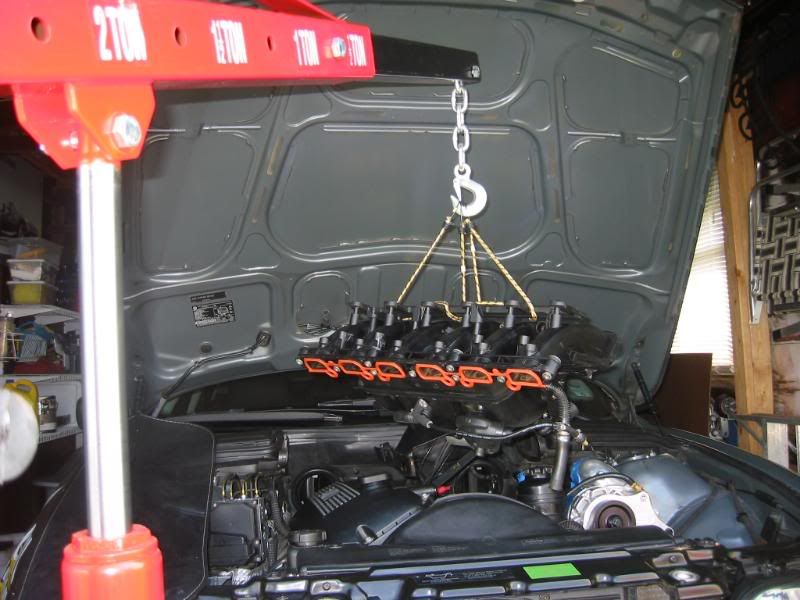
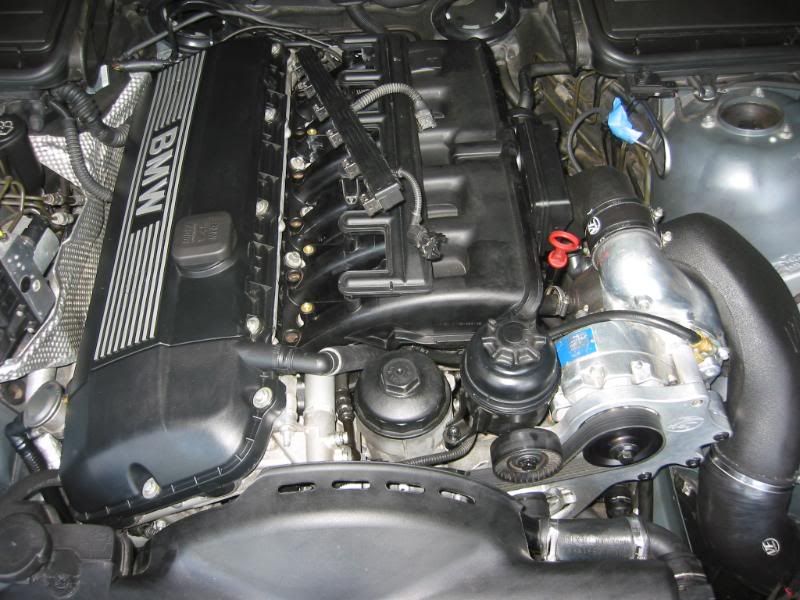
[B]Das Intake Manifold[/B]
Oh man all those connectors can be difficult to reattach. Especially the lower hose return to the CCV. I hind sight, I would attach the return hose to the CCV first. Then after the manifold is in place, attach the other end to the oil pan.
I found out way later: If you leave the alternator and power steering reservoir off all the electrical and oil separator connections are easier to access.
The blue tape on the ends of everything has paid off. Hard to miss a connector with it on there.
Defiantly connect the fuel rail (with new o-rings on the injectors), and vacuum hoses to the manifold before installing. Also connected the supercharger tube to the throttle body first, and then removed it because it was getting in the way of reaching everything under the intake manifold.
Slowly lowered the manifold, and held it a few inches above the final position. This left enough room to reconnect everything.
Installed and torqued down. That last bit of blue tape is the fuel line fitting.
Last edited by Jackcat559; 10-30-2010 at 06:56 PM.
Member
Soon!
Looking for an E39 belly pan , passenger front inner fender liner
Member
Start your engine!
Crazy Cracker
BMW CCA Member
I need a beer
Member
Here you go.Originally Posted by Jackcat559

Crazy Cracker
BMW CCA Member
I'd like to thank Mad dog 20/20 for his help on this last bit. I owe you a tall beer next time we're out at a CCA event.
Where to begin....
Topped her off with fluids, and went over everything. Going over it all just gave more doubts. Was that set of bolts torqued? Did some blue tape get missed during re-assembly?
It was close to sundown. The local weather service issued a tornado warning. Dark clouds came from nowhere. Winds whipped up (seriously). This was a good a time as any. I bolted up the wheels , grabbed the fire extinguisher from the truck, and connected the battery. Jumped in the drivers seat and turned the key.
It all went black. Very black. The garage isn't wired for electric, so it was really black. FFFFFUUUUUUUGGGGGGEEEEEEE!!!!!! "Oh man I really forgot something" was what came to mind. Then " OH FUDGE I TOASTED IT" shortly followed. This happened in nano-seconds.
Grabbed the flash light and went to the battery. Here's another tip. When are all excited to start the car after a project like this. Use a 10mm socket to tighten the battery bolt down, so it doesn't come loose.
After that it started. If I hadn't been warned by Garret I would have continued to poop my pants. The first few minutes / starts the car is a little ruff. Idle, loud lifter tick, hesitation, you name it.
Oh it doesn't end there either. The exhaust manifold gasket smokes too!
This all eventually works itself out. Heres's a video of the second & third starts. The exhaust bounces off the back of the garage like a megaphone. Probably going to take it to the local hot rad exhaust shop to be toned down a bit soon.
[ame=http://s40.photobucket.com/albums/e235/Jackcat559/?action=view¤t=119-1928_MVI.flv][/ame]
Touch smoother
[ame=http://s40.photobucket.com/albums/e235/Jackcat559/?action=view¤t=119-1930_MVI.flv][/ame]
Dudley (new pup)& I went down to the local chapter BMWCCA weekly social for a victory lap. One guy recognized the car for here. How cool is that?! Though I think the new puppy friendliness scared him off. The car ran well. Lifter tick is lessening. Although now I have a code for the MAF during random start ups. Never replaced it. Maybe it's time. Nothing else popping up.
Anyone know how to reinitialize the key?
Last edited by Jackcat559; 12-02-2009 at 06:29 PM.
Member
Dude!! That is awesome!!!!!!!!
Nice work!!

Last edited by DuffmanE39; 06-12-2009 at 01:26 PM.
Crazy Cracker
BMW CCA Member
Thanks the whole start up was kinda fun / funny. Then to end up doing all that, and the didn't work. Oi vey.
Status Quo!
Try to run the car on carsoft or similar. There will be codes that will not set off the engine light. Plus this will give you an idea on what the engine is doing. When you first started her up, there will be a whole slew of codes stored in the system.
Another FP5241 Creation
Parting out M54 Engine. Intake and all. Cats avail as well. PM ME!
Yes I Stole It!
i'm glad to see it was a success and you saved yourself a hell of a lot of money!
Member
That is awesome this all worked out?????What would you estimate the final cost to be of the project? Would you give any advice now that you have made this all work.
Crazy Cracker
BMW CCA Member
Thanks DuffmanE39 the re-intialization worked well!
Hey Gumb's my buddy down the street has an OBDII scanner. I see if any other codes pop up. The peak tool seems to cover most things.
I estimate with having basic tools on hand, about a 50%+ savings.
Member
Mad Cat. What do you think I could possibly be doing wrong. I followed the instructions from the bently manual to set the timing. Rotated the engine 2 times to TDC. Test the cam postion with the lock. The exhaust side is off by about 1 inch. I have tried this 3 times now with the exact same results.
Maybe I have the TDC flywheel lock pin in the wrong place? The pin does lock the flywheel. I only have 3 round holes and at TDC it is about 2 inches from those holes.
Crazy Cracker
BMW CCA Member
Who's Mad Cat?
Are the geared dome splined shafts pulled out so they are meeting the inside of the vanos jig? And are you rotating the engine with the jig in place? Is the TDC on the balancer lined up with the mark on the block, and both cams at TDC?
Member
How is she running?
Looking for an E39 belly pan , passenger front inner fender liner
Member
Sorry JackCat. I guess you can see what kind of mood I am in. The geared domes are pulled out fully. I am rotating the engine with the jig in place. The balancer only has 3 round holes and TDC does not line up with these holes. I just did it again for the forth time. Same result. I overexagerated the 1 inch. The cam lock is only off by about a 1/4 to 1/2 inch.
Crazy Cracker
BMW CCA Member
She's running well. I trying to resolve one issue now. I'll post up when I have solution
Well at least you didn't call me Mad Cow,or something.
Are you using the holes as TDC, or the actual 'O / T' mark, as listed on page113-45 of the Bentley?
After tightening the primary tensioner guide, with the special tool to the specified inch-pound spec. Is the triangle mark on the exhaust cam sprocket still lined up with the top of the head, or has is moved?
Last edited by Jackcat559; 06-17-2009 at 07:27 PM. Reason: Automerged Doublepost
Member
The arrow is still aligned. I don't have an O/T mark. I will post some pictures.
Crazy Cracker
BMW CCA Member
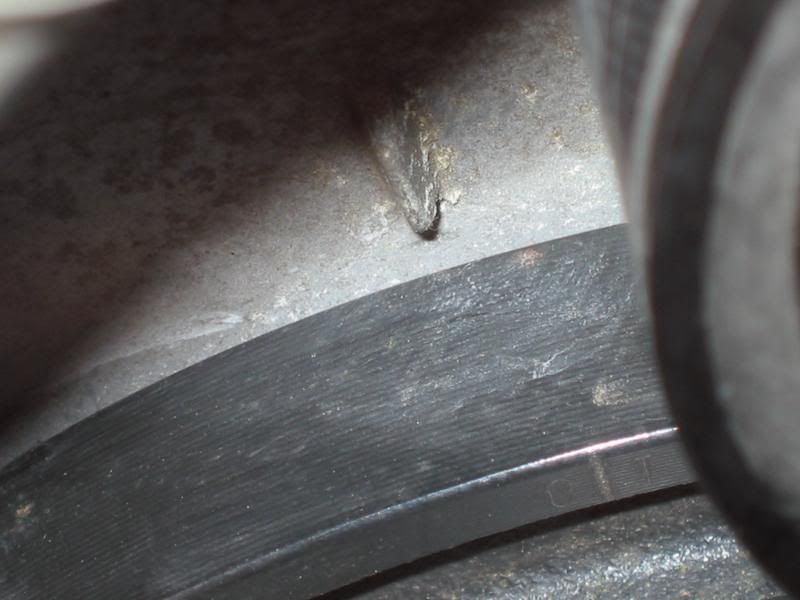
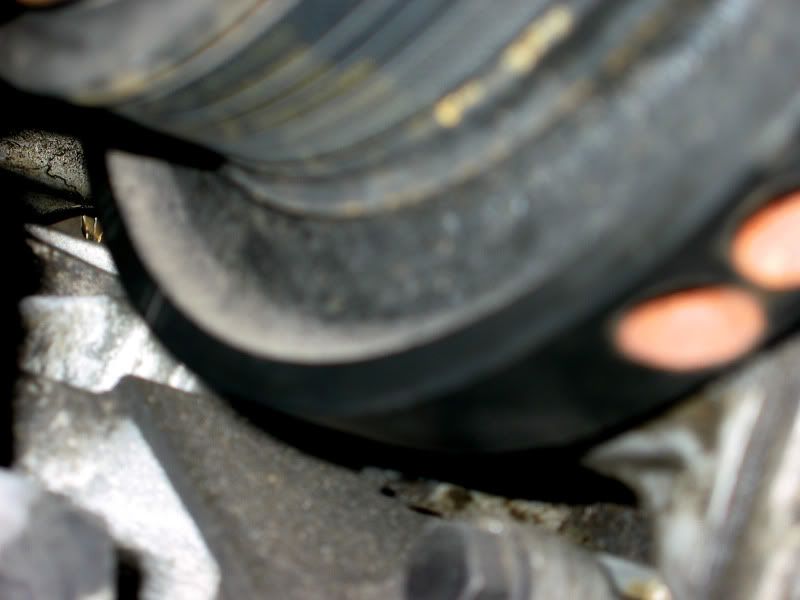
Ah ha. That's it. Mine was next to near impossible to see / find. It was so hard to see, that I only saw it with a 100 watt bulb when it was close to the mark on the block. This was not near the dimples. Also it was not in the same spot as in the pic from the manual.
.....Moments later after the augmented post......
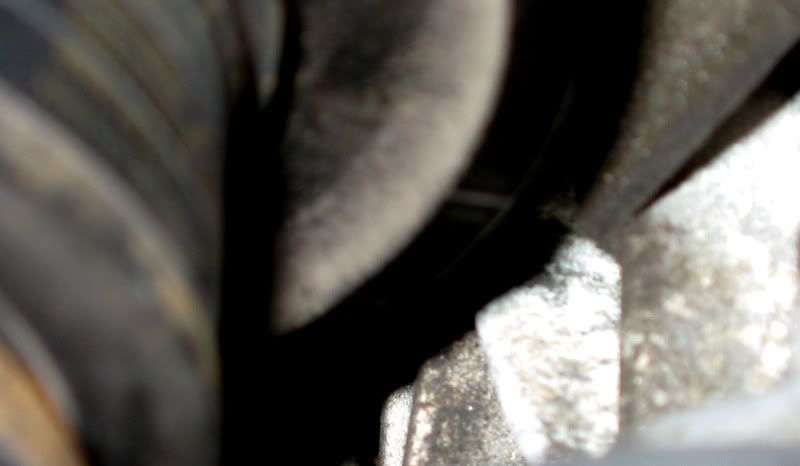
OK. I should get some good Christian points for this. Fresh from the garage in my jams. These are taken from under the car with the contrast bumped up a bunch. The 'O/T' mark is about 30 degrees from those dimples, and on the front, not the top. With a few years of dirt & oil no wonder it's hard to find.
Last edited by Jackcat559; 06-17-2009 at 08:48 PM. Reason: Automerged Doublepost
Member
I guess 5 is my lucky number. Took all the gears off and started from scratch. Results came out perfect this time. Thanks for your help. Time to fire this thing up today.
She fired right up. What a relief.
Last edited by allgoodsystems; 06-19-2009 at 01:29 PM. Reason: Automerged Doublepost
 Posting Permissions


 Reply With Quote


Bookmarks