
 Member
Below is my experience of swapping US-style to Euro bumpers on 1983-1987 US/Canadian car.
Car is '86 Canadian bought with cracked front bumper and air dam, rear panel was rusted bad in usual spots in the bottom of taillights openings, some rust developed also on rear wheel arches.
Outside seems not bad:
But with taillights removed:
I purchased used euro front and rear bumpers with brackets, front fiberglass airdam, rear fiberglass apron and trim pieces from different sources.
Parts I got:
Donor of front bumper, side skirts and air dam:
Package arrived from Germany:
Closer look. I didn't knew yet what rust I will find, but I started to feel weird when I discovered that fog light were silicon glued into the front airdam.
Later I found that front bumper is too rusty. All rubber pieces were not usable as well and went directly to the trash bin.
Rear apron came from fellow Toronto 6 owner. It looks very narrow in comparison with rear bumper. How will it fit?
How it supposed to be bolted? It's definitely looks not like M-tech rear apron I was told it is.
Turned out that rear apron is differ from M-Technic and had to be bolted to the car body and not to the rear bumper.
It was found by GRNSHRK that apron was made by BMP Design, Bob also provided nice scan from old BMP design catalog.
Both front air dam and rear apron were taken to fiberglass specialist to reinforce the structure and get rid of cracks.
Anyhow, I got two front bumpers in different states of straightness and progressing rust, one a little bit twisted rear bumper which I could not take apart because of stupid welded in reinforced bar requested by US laws, odd fiberglass rear apron which I didn't knew how to mount, fiberglass airdam and some rubber and fasteners also in different stages of disintegration.
Last edited by chevale; 10-27-2008 at 12:08 PM.
Val (a.k.a. chevale)
Stuff For Sale
Member
Parts needed
Front bumper:
- Cental and side parts of the bumper itself, 3 parts of chrome moldings.
- OEM right and left mounting brackets.
- 4 M10 bolts with length about 80 mm and 8 washers to mount bumper euro brackets to subframe.
- New fasteners to assemble the bumper. I don't remember exact details, generally just count what assembled bumper has. In my case I decided to change all fasteners, sometimes it's not necessary.
- Mounting bolts for rubber strips and front spoiler. I am not sure if they are available in places like Brofasco (those bolts have thin quadrant heads). If possible, substitute from other sources. BTW mounting kit for front bumper is available from BMW (51129056465) but I don't remember how complete it was.
- 2 front bumper seals (51111839358). BTW I never installed them...
- 1 Syntetic Strip (51111910327)
- Depending from the rubber parts condition, new center (51111904457) and side strips (51111866407 and 51111866408) might be needed (
- Same goes for the right and left end pieces (51111866409 and 51111866410).
Rear bumper:
- 3 pieces later style rear bumper was used. At some period of time reinforcement bar was welded inside the bumper which make disassemble impossible.
- 2 rear bumper brackets (usually came with bumper).
- Rubber strip (1 piece).
- End right and left caps (51121886607 and 51121886608).
- Clips for rubber strip (51111826894). Available from BMW only. Count amount of holes in the bumper and order some extras.
- New fasteners might be needed for bumper assembly.
- 4 M8 bolts (about 50 mm), washers and nuts to bolt bumper to the car body.
- If you like to keep OEM euro look, rear rubberized filler needed. I didn't used it.
- Some kind of euro rear apron.
Bumpers removal:
To remove front bumper, front airdam has to be taken out first. It's relatively easy job, a lot of screws and it's going off.
Then the top rubber filler panel as well.
Rubber US-style end pieces should be taken out easy but in my case fasteners were too rusted and I ended up ripping end pieces off the car and then cut out fasteners.
Bumper itself will came out with front bumper shocks if 4 bolts will be undone: 2 at the end of bumper shocks accessible from under the bumper and two big ones accessible from the engine compartment.
I was not able to undo the big ones, they were taken out later in bodyshop.
To remove rear bumper, plastic US end pieces have to be unbolted (I was able to undo only the top bolts accessible from the trunk area, underside bolts were too rusty and there was no other choice but cut them off.
Then 3 big bolts from the trunk area to release 3 rear bumper shocks have to be undone and US bumper with rear apron can be pulled off.
Bodywork and bumpers mounting:
I decided not to use original Euro rubber filler plate that goes above the rear bumper, but asked bodyshop to fill the area with metal.
Holes for rear bumper bracket bolts drilled, lip on rear panel above US-bumper cut, gap above euro bumper welded. One expensive part less to use.
Rear apron and bumper bolted on and primered. Unfortunately I was not able to make photos when work was done, but bodyshop said it was a major PITA to make it fit.
Front end:
US-style rails cut off, extra openings made in sheet metal to let euro-brackets go through, holes drilled for brackets mounting to the front subframe:
Front euro-bumper assembly (courtesy of alpinacsi).
How euro brackets have to be attached to the front bumper is shown very good on this image.
The following pictures (courtesy of OJ) showing how front bumper bolted in euro-car. Pay attention that subframe clear cut just st the level of front wall.

Last edited by chevale; 02-02-2012 at 10:31 PM.
Val (a.k.a. chevale)
Stuff For Sale
Member
Semi-final results (still have to install some trim pieces and front license plate)
Car was repainted below decals, used Zender side skirts installed at the same time.
More info, pictures, questions and answers in initial thread here:
P.S. I wanted to thank members of BigCoupe.com, Roadfly and Bimmerforums for answering my questions, providing pictures and sharing info about their experience.
Without GRNSHRK, bpoliakoff, alpinacsi, donudel, 87635CSi, Taylor M and others I shamelessly forgot I would never finish this conversion.
P.P.S. If someone knows who is manufacturer of front air dam I got, I would really appreciate the info. It's fiberglass made with ventilation holes under fog lights. Definitely not OEM.
Last edited by chevale; 09-12-2008 at 10:53 AM.
Val (a.k.a. chevale)
Stuff For Sale
Member
Great work and a great post, Val ! And it was a pleasure to help you with the transport from Germany of the parts.
YGM too.
Taylor
Member
Very interesting! This is one of those procedures you hear about but you wonder what it really looks like when you're in there. So it's good to see some pics. The impression I get is that the rear is trickier to do than the front, which looks reasonably straightforward.
Member
Thanks for the insight. Friend stopped by today to ask if I'd be interested in the euro bumpers from a euro car he may buy. So I may be going through this myself should he buy that euro. I know it's a PITA conversion, but the payoff is so worth it.
Member
thanks so much for the write up and pictures!!!!
i will be installing my euro bumpers this winter and i'm glad now that i have a better idea how to do the install. the front doesn't look that bad but the back looks like a real pain. i ended up getting a older euro bumper from an e12 based car, it looks a bit more simple to attach to the rear of my us-spec car than the wrap around style euro bumpers.
has anyone installed one of the original "stubby" rear euro bumpers on their us-spec car?
Member
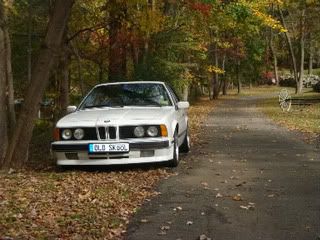
Since there is a new interest for US to Euro conversion, there are some latest pictures for your enjoyment:
In the pictures car is sitting on ST springs with Bilstein sports. Since then I changed the springs to M635 springs to bring car a little bit higher.
While it's not looking as cool as on pictures above, I have no worries about hitting things with front air dam.
Last edited by chevale; 10-27-2009 at 04:46 PM.
Val (a.k.a. chevale)
Stuff For Sale
Member
Thanks for reposting this Val it will be very helpful...!
A worry not to be taken lightly as the expense of new foglites and the airdams themselves, not to mention the constant worry would be a load off of anyone's mind!I have no worries about hitting things with front air dam.
Cheers!
Ran
Lover of Sharks
Moderator
It is a unique look, and a really nice job. Can't wait to see it at the next SESF
Member
Do you have any pics of the M635 spring installed.
just got a set of the euro M635 spring as well a well and was wondering how high the car sits.
I decided against installing my H&R springs ,
the oil sump looks like it could be easily damaged
thnx.
Member
good info glad someone bumped this. also i believe i have the same ACT wheels and car color. just need the euro conversion now. :4ngie:
Member
After one year delay, below are the pictures with M635 springs and Bilstein sports. Trunk is quite loaded, usually it sits a little bit higher. (Different Remotecs too - not staggered with Contis DW 225/50/R16):

Last edited by chevale; 10-17-2012 at 04:11 PM.
Val (a.k.a. chevale)
Stuff For Sale
Member
I have been over your thread numerous times...just staring at pics for when I actually start my euro bumper conversion. I ripped the US benches off a couple of weeks ago and have not had time to really mock things up.
I am having problems mounting the rear trim pieces (the 3 black pieces that you omitted by having grafted in steel, which looks great btw).
This conversion is definitely not as ez as my e28 euro bumper conversion was. This is gonna take a while....
Your car looks awesome! Love it!
Last edited by Eemueekmu; 10-18-2012 at 07:44 PM.
Member
i personally am not a fan of side skirts however your efforts are to be commended. Your shark looks fantastic Nice work!
Member
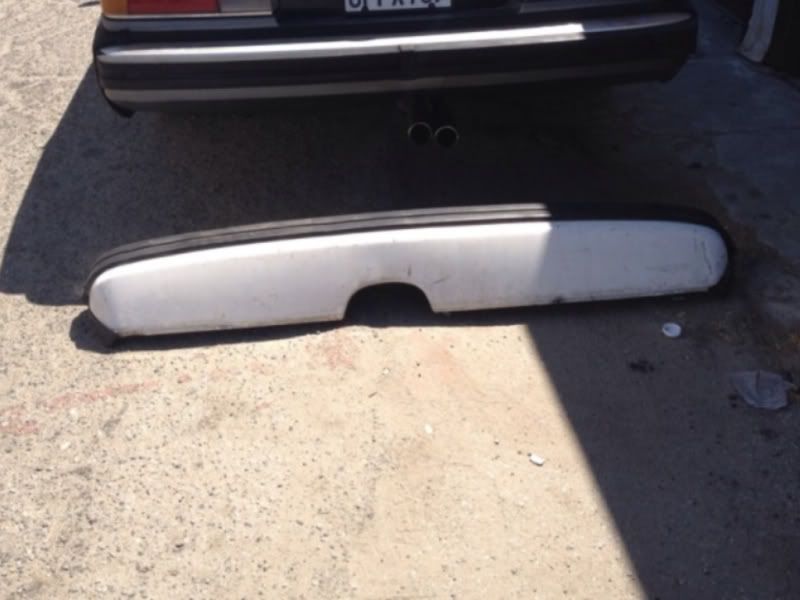
I'm about a week from putting Euro bumpers on my '83.
Apparently, through dumb luck, I acquired bumpers from an E12 based car. So instead of the slender wraparound rear bumper, I have this:
I'm told this means I have a lot less work to do. Cut new holes to bolt the bumper itself in place, fill in the trim holes on the side behind the wheel wells (or acquire the euro side trim), and it's done - no cutting the metal lip above the bumper for fitment. I'll find out if that's true, and post pics either way.
'83 633CSI manual balticblau/perlbeige
'89 Mercedes 300CE diamintblau/mondria
94 Mercedes E320 Coupe Schwarz/Palomino
'07 Volvo S60 2.5T vide grön/beige
Member
Amazing!!!
[/IMG]
Member
You will still have to trim the lip under the tail lights, or it will be there sticking out. I have seen one person leave it with the US black rubber trim on it below the tail lights. Not perfect, but maybe an acceptable compromise if it means not cutting/painting. (pics below)
Also, the euro side trim for early cars is NLA for at least one side already.
79 Alpina B7 Turbo Coupe #096
79 Alpina B7 Turbo Coupe #124
80 635csi
80 323i Baur
Member
Ah, okay. If its just a matter of trimming back the lip and cleaning up, that's not too bad. Thanks for those pics, you can see what needs to be done on the side pretty clearly too.
'83 633CSI manual balticblau/perlbeige
'89 Mercedes 300CE diamintblau/mondria
94 Mercedes E320 Coupe Schwarz/Palomino
'07 Volvo S60 2.5T vide grön/beige
Member
I did the euro bumper conversion on my old car that is in my sig pic below, it is a very nice upgrade but is a ton of work to do correctly. I ended up replacing the whole rear apron and spot welded it all back together... I miss that car sometimes!
I spent over 100 hours alone restoring the front bumper and spoiler.
'85 635csi euro conversion SOLD
'81 euro 635csi undergoing restoration
'75 e12 hotrod under the knife
'91 ///M5 daily driver
bk_burnout@hotmail.com
Brent
Member
I got a e24 and planned the euro bumper swap BECAUSE I watched your build process and how your car turned out on mye28.comOriginally Posted by bkburnout

Sure looks ez in the pictures.....damn pictures.
It's taking me longer than I thought. Not impossible, just more work the I expected.
Member
Thanks man, best of luck with the conversion, it is a lot of work but when you are done you will be glad you did it... These cars look sad in US trim IMO.
'85 635csi euro conversion SOLD
'81 euro 635csi undergoing restoration
'75 e12 hotrod under the knife
'91 ///M5 daily driver
bk_burnout@hotmail.com
Brent
Member
I plan to wrap it up all by next weekend.
I just installed a set of front and rear strut braces last night. You made them for me a while back.
Last edited by Eemueekmu; 10-21-2012 at 09:01 PM.
Member
That is a heck of a job you did, it turned out very nice indeed, great job, if you ever pass by montreal sometime, i would like to see it if possible.
Member
I'm in the middle of installing the rear trim above the chrome bumpers and want to make sure the center section is positioned correctly;
What is considered the "top"? The smooth edge or the edge with a little bit of a lip?
 Posting Permissions


 Reply With Quote


Bookmarks