
 Member
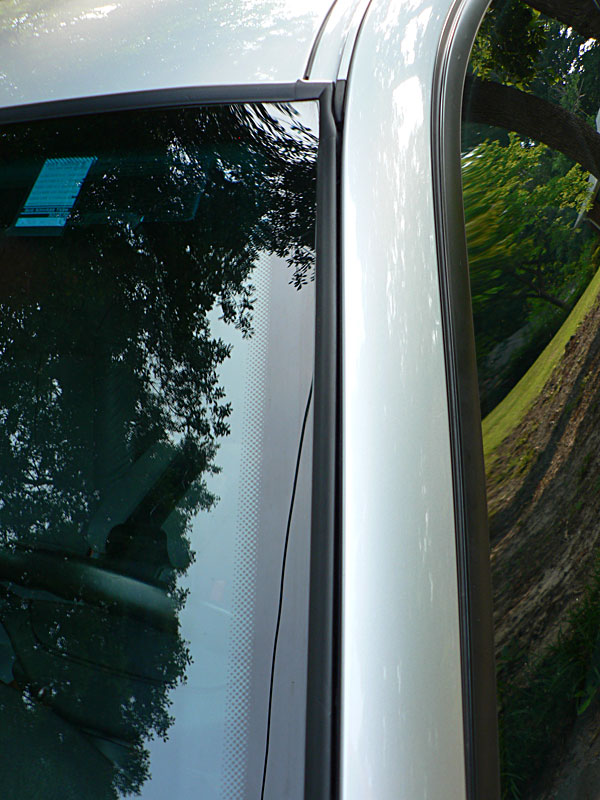
I had the typical crumbling windshield trim and was getting tired of looking at it. Purchased new trim (BMW calls it windshield cover, part 51318159784) for a whopping $28.42 online. 30 minutes later, looks like band new. I love inexpensive and easy stuff like this
Also, I'd like to replace the front door/window trim as mine is torn and looks like this...
Can someone confirm that this part is #5 at the link below??
http://www.realoem.com/bmw/showparts...60&hg=51&fg=20
UPDATE - changed out the window edge seal here -> http://davegraham.net/DIY/doorseal/
Thanks!
|dg
Last edited by dgz32; 10-17-2008 at 01:16 PM.
Who's Next?
Not sure what #5 is, but it may be an updated part. I used part #8 shown here, but real oem shows it as NLA. There must be a new one to solve the wind noise issues a lot of owners were having. Anyway I got it at my (albeit overpriced) dealer and they were about $100 each.
http://www.realoem.com/bmw/showparts...28&hg=41&fg=40
To clarify, the windshield trim can be replaced without windshield removal? Awesome!
997 Carrera 2S..the choice of 2 out of 3 Top Gear presenters.
Member
Interesting. How difficult was it to replace?Originally Posted by IslandS62

And yeah, does not require windshield removal like the dealer would have you believe. No sealant on the trim at all, the profile is an L-shape which hooks just under the lip of the glass to hold it in place.
Member
Nice job, it looks fantastic! Too bad you didn't post pictures of the removal and install process...
Did you just get the "cover" or was there anything else to be aware of (I noticed that the "corners" also look new and fresh)? Also, were there any problems getting the old one out and the new one in? I need to do this ASAP cause I, too, am getting tired of it making my car look like a typical beater!
'00 540iA Sport w/235k+ Original TCG's, Vanos and transmission.*Trans failure at 244k+...FS Now
Who's Next?
Easy. Old seal pulls right off after you use a small screwdrier to remove the retainig pin (fronts only). Then just spray some soap water on the new part and press it in, you can't install it worng. Trickiest part is loosening the window trim to slip the seal under it at the front. Once you take the old seal off you will see how its done....use a plier to GENTLY squeeze the retaining clips for the window trim and pop it up just a bit. Slip the new seal under it and re install the trim and recrimp the clips. 20 minutes max per side.
997 Carrera 2S..the choice of 2 out of 3 Top Gear presenters.
Foot in mouth disease
Where did you order it from online? Best I've been able to find was $80 last I checked.
TIA
9/30/2007 - 200,000 Miles!
11/29/10 - 300,000 miles and counting! 4/10/2012 - 332,635! 01/14/2013 - 350,000 miles! 10/25/15 - 395,872 End of the Road
Never explain yourself... Your friends don't need it and your enemies won't believe you anyway!
Member
I remember seeing a post on another forum re this DIY, had pics and everything. Of course now I can't seem to locate it! It was a maroon E39 in a garage. Anyway, I thought about pics, but honestly it was soo easy.
Here's the quick run-down if it helps...
There is a strip of metal in the rubber trim running the length of the A-pillars and the top. The upper left and right corners do not have the metal reinforcement. BTW, the trim is a single piece, corners and all.
To remove, carefully pick away at the corners until you can see the metal reinforcement. Use a pair of small needle-nose pliers to CAREFULLY grab it and slowly pull it up and out. Don't force it, or pull too hard. Be VERY careful not to nick the bare glass edge. I actually used a tool similar to a dental pick that had a loop in the end. With this I was able to get up under the trim and lift. Anyway, you should be able to pull each section (both A-pillar and top pieces) out as three pieces. The corners took a bit of picking.
I then cleaned the area, first with a wet/dry vac and a small attachment, then used Simple Green to clean the "gutter", and finally waxed the area (while I had the trim off). Be careful with cleaners, you do not want to use anything to upset the windshield glass seal. I'd imagine anything water-based would be ok.
To replace, start with one of the upper corners, then proceed down the A-pillar. There is a triangular piece of rubber trim at the bottom that you'll need to pull up a bit so the windshield trim will snug-up down there, then push it back down, it'll mate up with the groove in the windshield trim when done correctly. Next push the windshield trim in as you move to the other side along the top. Repeat on opposite A-pillar.
One other thing, since the profile of the trim is an L-shape, you'll need to angle it as you're inserting. Then push it into place, pressing as you move along. Using the heal of you palm helps. I used a little wooden skewer to push pieces of trim all the way in at the corners. Last thing, I used a light coat of spray silicone when I started, thinking it'd be difficult to insert - only used it on one side. So you don't really need it.
That's it!
Member
Crown Auto. They seem to be my favorite lately.
https://secure.webmakerx.net/Default....crownauto.com
Foot in mouth disease
Thanks a bunch!! Just ordered, can't wait to get this done.
11/29/10 - 300,000 miles and counting! 4/10/2012 - 332,635! 01/14/2013 - 350,000 miles! 10/25/15 - 395,872 End of the Road
Never explain yourself... Your friends don't need it and your enemies won't believe you anyway!
Member
From the realoem link there, #5 looks like the chrome. I think this might be #7, 51328207183
Anyhow, I have the same problem on my driver door. I'd be interested if someone has done this repair so we can nail down the part #.
Also, crown has been good for parts. recommend them as well.
Member
Awesome. I'm telling you, it is so easy.
I'll see if I can't find that thread from a while ago...
Found it - starting at post 86. And again, I wouldn't use any petroleum-based products.
http://www.bimmerfest.com/forums/sho...=147492&page=4
Last edited by dgz32; 06-03-2008 at 08:43 PM.
Member
Number seven, huh. 5 has chrome, shadowline, and high gloss shadowline variants (and good gravy, that high gloss is pricey!). I'm gonna have to poke around a little more. Maybe a visit to the dealer might be in order...
Member
im so happy i saw this, just order one.
Member
num 5 from realoem.com looks to be chrome trim, not the rubber seal. (the color next to it says chrome. thanks for the tip! I need to do this on mine and my brothers car!
Member
http://www.realoem.com/bmw/showparts...28&hg=41&fg=40
number 8 is the seal
Member
Looks like number 8 (51217010171 and 51217010172) has been replaced by part numbers 51210402745 and 51210402746, so says Crown. What's weird is one is $39.43, and the other is $38.08.
Guess I'll be ordering these soon enough! Thanks all for the help.
Member
take pics for a diy..
Member
I will this time
Member
I just replaced my 2000's windshield 'cover', the rubber trim that goes up the sides and over the top of the WS and will pass along some things I encountered.
First, my 9 year old original, disintegrating trim was well-hardened by the hot NC sun. The top part would not budge. I sprayed it with a car wash concentrate, let it sit for an hour and the liquid loosened/lubed it enough for removal.
Installing the sides was easy but the top part was a bitch. I had to lube it with the carwash concentrate and 'roll' it in using a piece of PVC pipe. Although I cleaned everything up pretty good without using solvents, there might have been some old trim sealant or adhesive on the WS edge interfering with the install. The reason I mention this adhesive is because I notice the new trim has it on the inside of the 'U' shaped channel that fits against the end of the WS glass.
I'm going to put the car out in the hot sun soon and go over the new trim again to make sure it is fully seated.
Diesel Fitter
#7 & #18 are the rubber seals you want to replace. #5 is the metal piece just below those rubber pieces you want to replace. Your #5's are 'SCHWARZ' (black) instead of CHROM.
Contributor
Suscribed. My passenger side front door looks exactly the same. Please let us know when you get this done!
Need no Education
I love it, I will have to take some time out and put some in!!
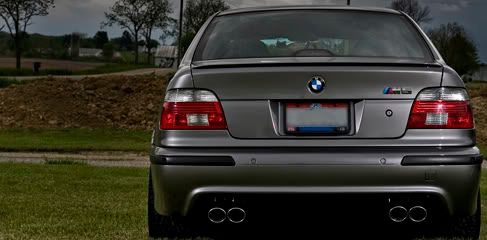
My 528 is a German Tank..
My 2008 Chihuahua is Blue deal with it
Always teaching now getting paid for it.
Member
So I'm sure this will come across as a retarded question but I'll ask anyway. OP listed only 1 part number and 30 minute fix. Subsequent posts mention multiple part numbers and having to take out a metal strip, does this metal strip come included with the part listed in the OP 51318159784? My concern is water seepage into the cabin if done improperly. Thanks
Member
Metal strip embedded in new trim - metal strip is exposed in the old trim as the rubber part of the trim crumbles away while removing.
Actually you could remove the cover trim and go without it and you wouldn't have water leakage. It's not a seal - the windshield sealed at factory with sealant that you don't (shouldn't) disturb while doing this fix.
Hope this helps.
I can't believe I've had my 528iA sport 14 years and counting . . .
Member
What NMsport said. The metal strip is embedded in the long pieces (A-pillars and roof), but not in the corners. Many folks will tell you that it does seal the windshield and that the windshield will have to be removed. It does not. It really is a very simple job. That 30 minutes was with me cleaning up the channels before installing the new trim.
 Posting Permissions


 Reply With Quote


Bookmarks