
 Member
Well, I replaced my CCV finally...
Let just emphasize..... "finally"...
The job was NOT fun.
The ONE electrical plug in-front of the Vanos was especially hard to take off.
The old CCV hoses were a pain to take off as well.
I tried to disconnect the old hose without breaking them, but finally gave in after a LONG time, and broke the locking rings to the hoses!
I did not have to modify the cold weather CCV.
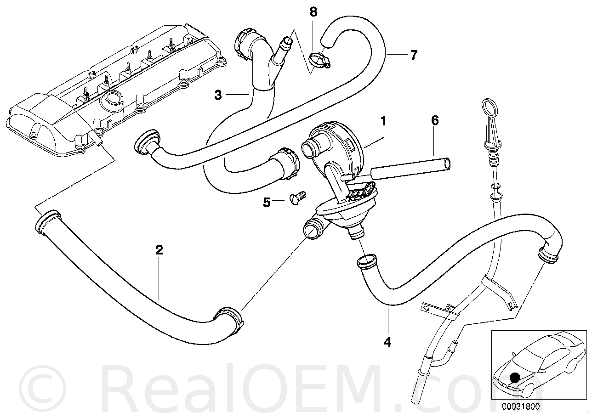
One key thing to do, that will help take off the old hoses, is to take off the air distribution piece on top of the intake manifold (#5 below)!
I highly recommend replacing the Air Distribution piece (#5 below) if you plan on replacing the CCV!
BimmerFiver's thread for replacing the Air Distribution Piece:
Intake Distribution Piece I6 (CCV/Vacuum) with Pics/Star Wars
bimmerfiver
Ref:
http://www.realoem.com/bmw/showparts...79&hg=11&fg=40
That will allow you access to the (2) top hose connections, and let you clean the massive filth under there.
And, I found an easy way to connect the small 'S' hose (#3 below) that connects to the air distribution piece from the CCV.
Ref:
http://www.realoem.com/bmw/showparts...94&hg=11&fg=15
First, you install the cold weather CCV WITH the long hose the goes to the front of the valve cover CONNECTED to the CCV (#2 above).
Then snake the 'S' hose (#3 above) in.
If you buy the cold weather CCV kit, the 'S' hose (#3 above) ,the valve cover hose (#2 above), and #6 above will come with the kit.
Leave #2 connected to the cold weather CCV.
Turn the S hose back so that it is parallel the ground, which then allows you to twist connect to the CCV.
Turn the S hose up towards the air distribution piece connection.
That will lock in the hose.
Also, when replacing the O-ring on the dip stick, slide the O-ring on the dip stick first, don't push the ring into the oil pan.
I cleaned everything, so it took a LONG time...
However, I noticed my old CCV was still in good shape, and so were most of the hoses.
Plus, I have NO mayo build up any where.
I only found a little bit of yellow crud in the valve cover/CCV hose connection.
No build up in the dip stick either!
All was very clean.
However, I did notice some gritty sand/oil within the intake manifold after I removed the DISA valve...
Some pictures:
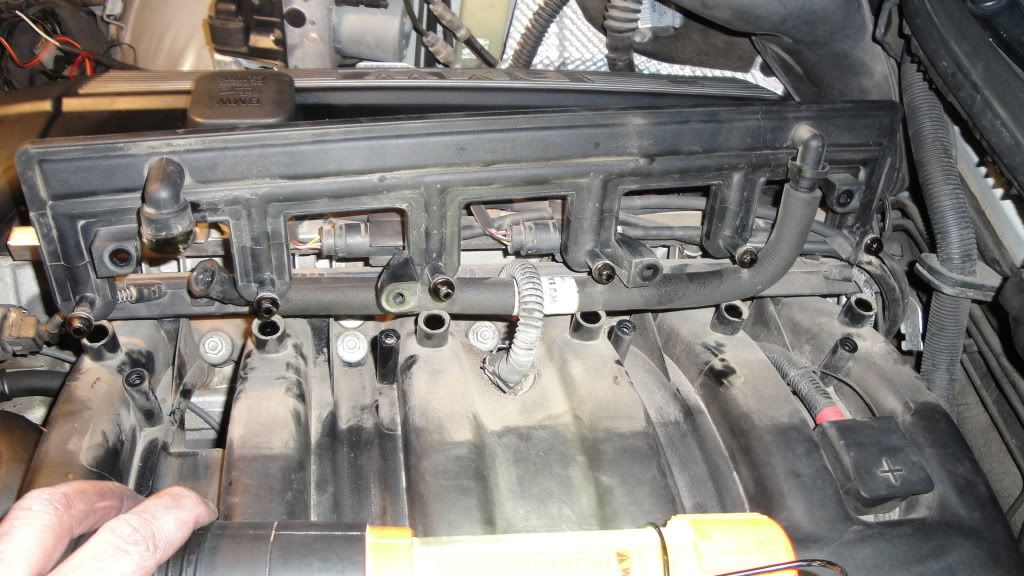
Valve cover CCV hose disconnected:
(Notice a little gunk in the valve cover...)
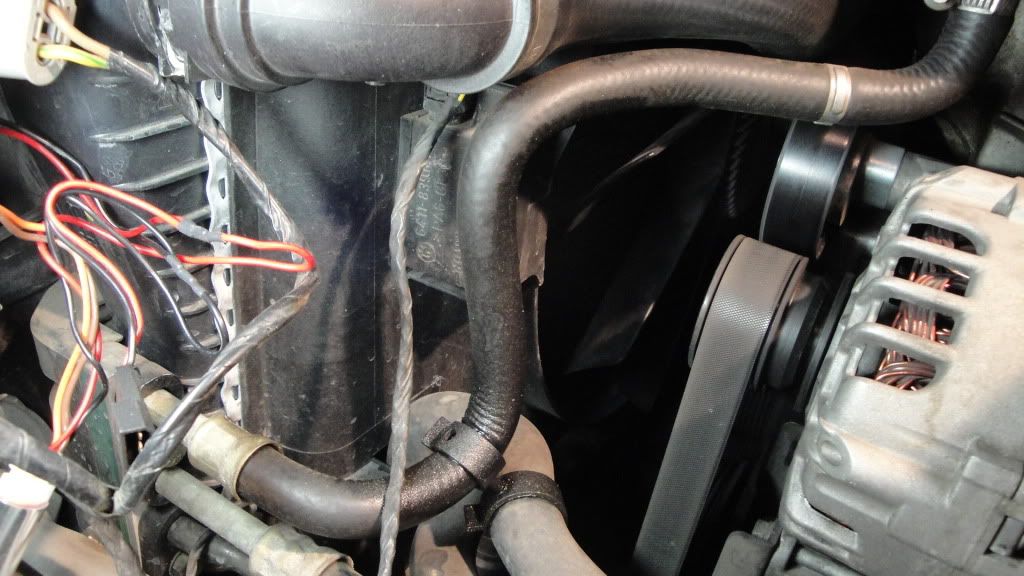
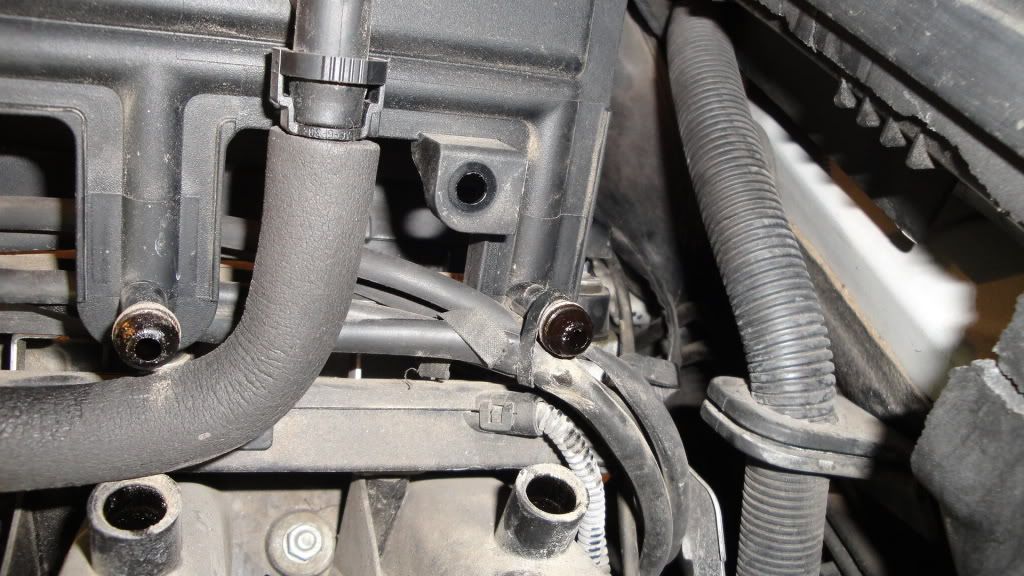
Leaky power steering hose:
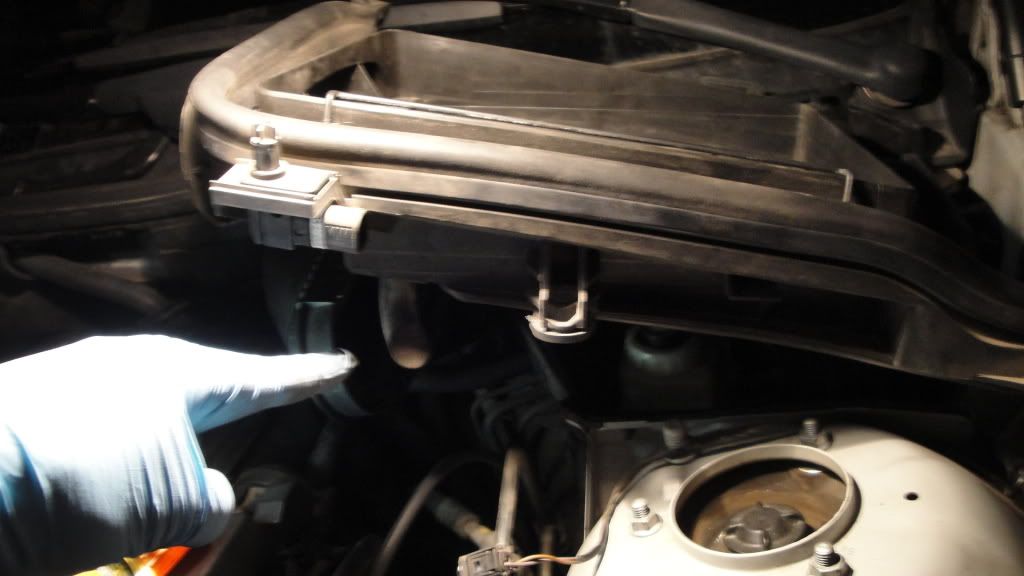
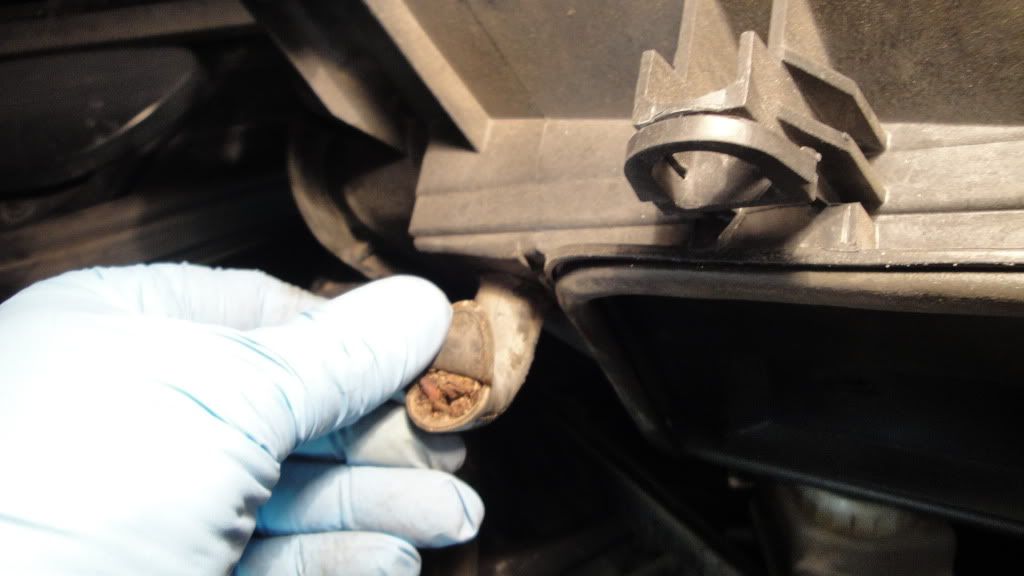
Cabin filter drain hose - plugged:
Note: A plugged cabin filter drain hose can cause the compartment with the brake booster to freeze-up, and get contaminated.
Feel free to ask BimmerFiver about this... LOL!
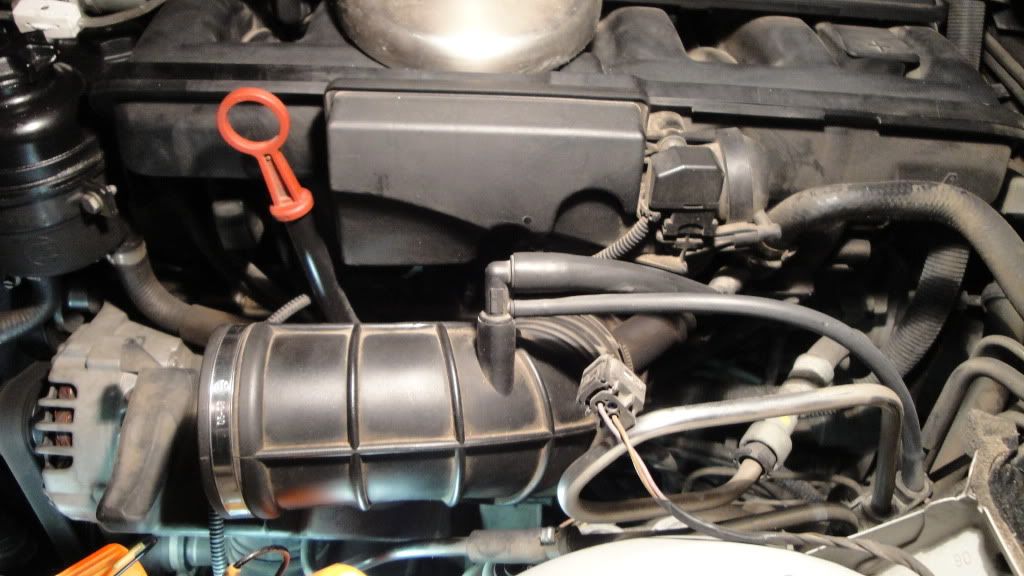
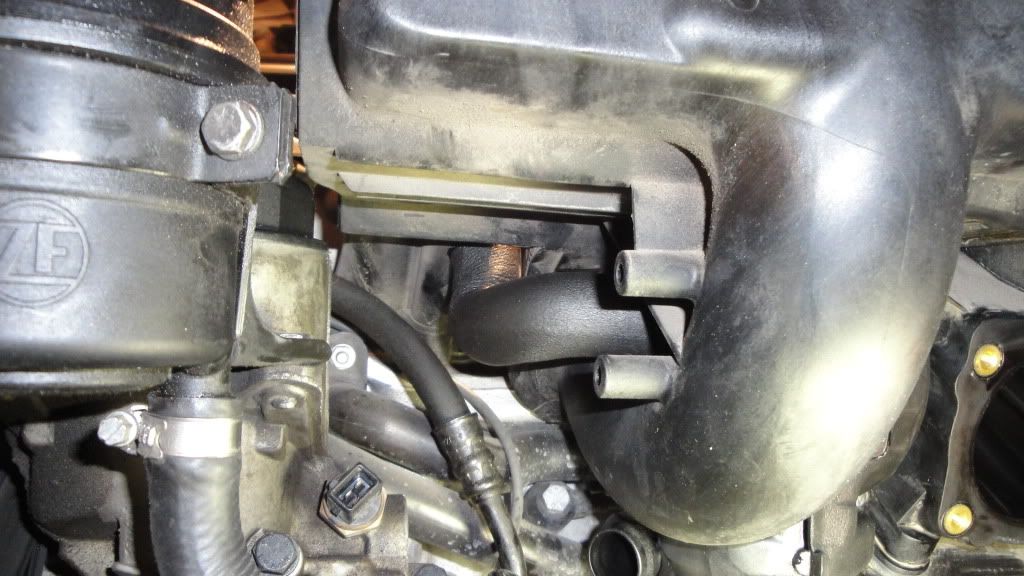
Removing the Disa Valve:
Hole where the Disa Valve was, and where the gritty oil was:
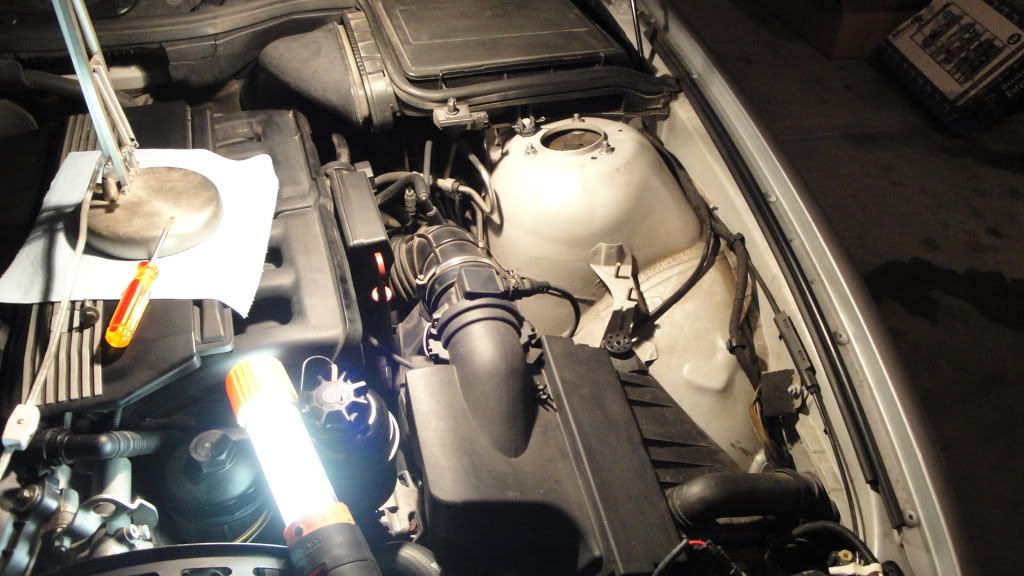
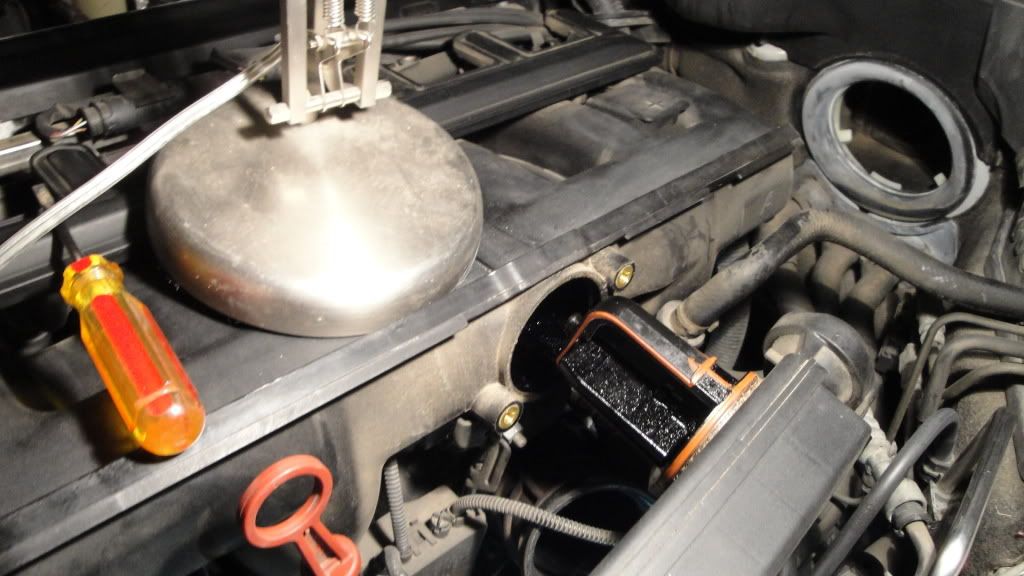
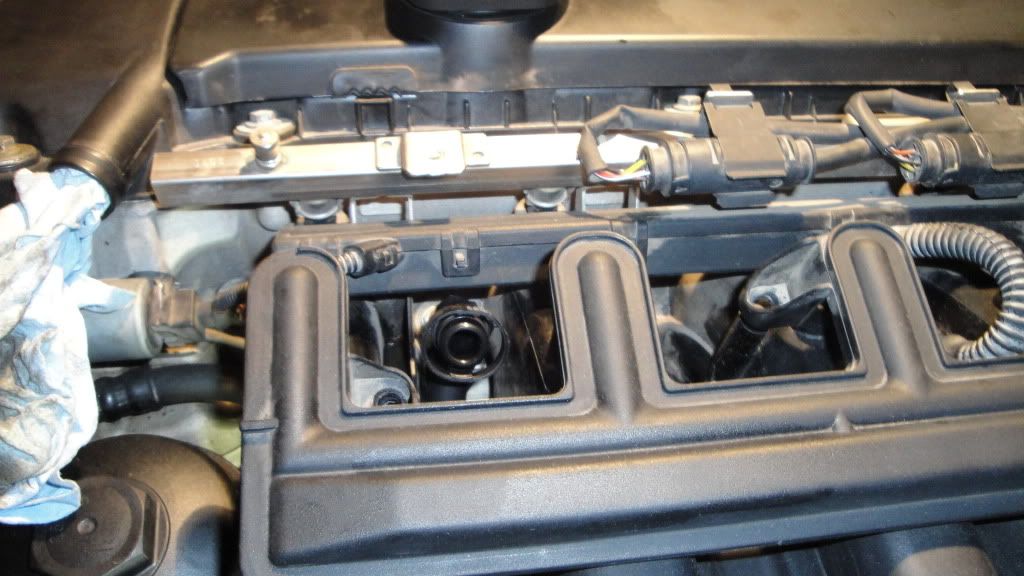
Lifting up the Air Distribution piece:
Throttle body is off.
Just need to pull out the ICV to be cleaned.
The ICV is that silver thing below the blue shop towel.
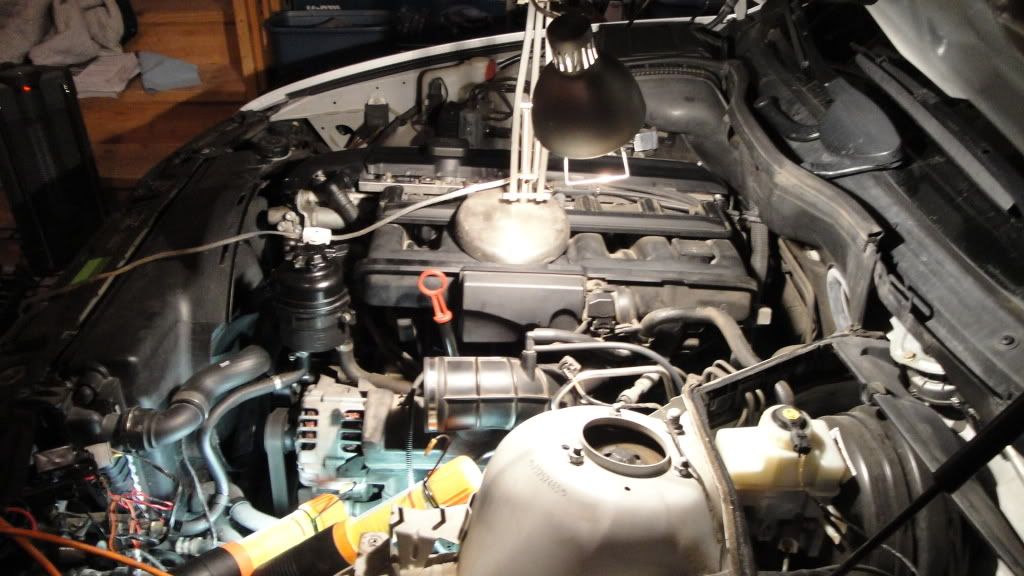
'S' hose pushed back in order to twist connect it to the CCV:
'S' hose under the intake manifold, connecting to the CCV:
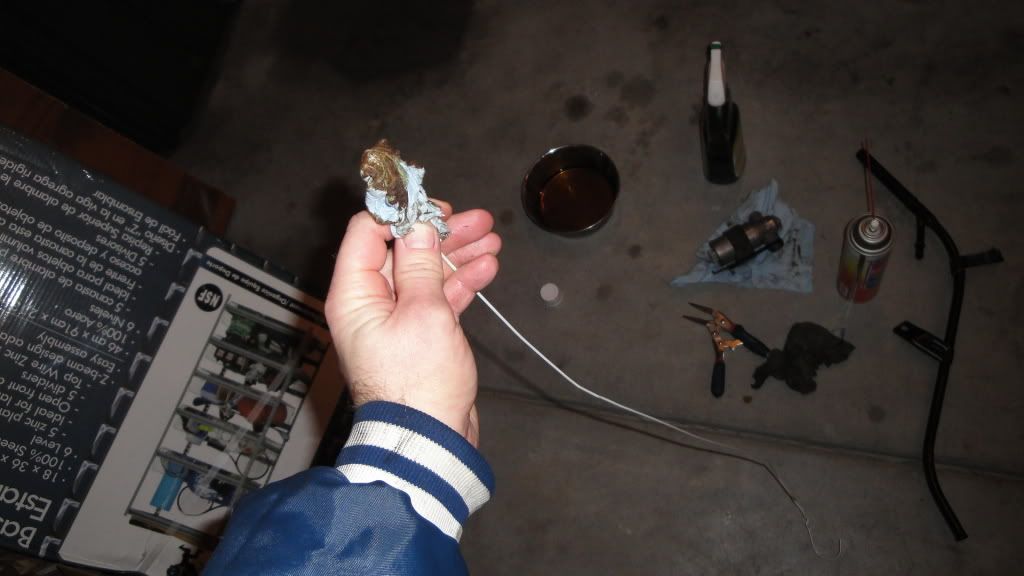
I also unwound a clothes hanger and pushed it through my dipstick tube in order to clean it, similar to cleaning a gun:
I replaced ALL of my air intake elbow hoses too.
Thanks!
Jason
Last edited by Jason5driver; 02-18-2011 at 01:08 PM.
Looking for an E39 belly pan , passenger front inner fender liner …
Member
Great work Jason, I will be doing this very job on a 525i in the morning, and will certainly take your tips with me. Hopefully it will go that much smoother.
Member
totally agree on the not FUN part. I did attempt to take out the distribuation piece, but that is tight. Some how I manage to install the "s" hose without taking the piece out by puzzling the hose for awhile. I too have to break the old hoses. they're impossile to disconnect. I also put some electrical tape to the Disa valve for a better seal and replace the throttle gasket.
 ((( in stereo ))) E39-Sold, E36-Sold, 2x E30 -current
Member
Great job Jason--no it's not fun--but I know you feel better having finished it.
just putting everything back together after installing the ccv valve is a back breaker any more. Great work
Member
Good tips!
Oh yeah, and make sure the plastic is aligned when you reinstall the cabin air filter housing.
I have to say I enjoyed doing the CCV job though. Perhaps that's because of my Audi background where every stinking project was nightmare.
Member
Did you not remove the intake?
2007 Carerra S
2009 E91
1990 Toyo PU - POS
2000 E39/5
1976 911
Member
Good to hear!Originally Posted by Mark@EACTuning

Thanks!
Jason
I also replaced the throttle body gasket.
And, thoroughly cleaned the ICV, throttle body, and Disa Valve.
Just make sure the weep holes are cleared on the cabin filter housings...
No.
However, after lifting the air distribution piece, and noticing how dirty everything was, I do want to remove the intake manifold, replace the gaskets, and clean out the inside of the manifold, however, I do not know how to clean the inside of the manifold...
Also note, the air distribution piece is hard to take off at first, because there are small o-rings that get dried up/hard and stick to the manifold.
I had to pry my arm up under the piece, and slowly break it free.
It will crack at first, from the o-rings breaking free from the manifold.
Last edited by Jason5driver; 01-08-2010 at 06:14 PM.
Looking for an E39 belly pan , passenger front inner fender liner …
Crazy Cracker
BMW CCA Member
Nice work!
Member
Thanks!
I am sure it is nothing compared to a head removal or a cam replacement!
I would love to be able to upgrade the engine though...
Just scared to tear open the engine...
I have never done that before...
Thanks!
Jason
Looking for an E39 belly pan , passenger front inner fender liner …
Member
May the Force be with you.
"I'd smash that (Jennifer Connelly) like a failed coup in sub-Saharan Africa."
~Macktheknife in my epic Jennifer Connelly OT Thread
Member
Verified PITA job, the next time I do an M54 CCV my price is going up.
Just a couple things I wanted to add, did a cold weather CCV on a 2001 525iT today. The S shaped hose (number 3 in the realoem diagram Jason has posted above) That came with the cold weather CCV was over 1 inch shorter than the factory part once the insulation was removed from the hose and the two compared side by side.
After fighting to secure that hose for what seemed like an eternity I removed the insulation and compared it to the old hose. It was over an inch shorter, which is why it was being such a pain. I blew the old hose out with some MAF cleaner and compressed air and reused it-from there it went together like butter. The S shaped hose is too short in the cold weather CCV kit, BMW probably saves a nickle on plastic and laughs at the techs who have to fight with the thing.
Beyond that everything went smoothly, I didn't cut any hoses or anything, it all came right apart.
Member
BMW CCA Member
Good job Jason.
I just did this on my M52TU touring and most of your pictures look similar.
I replaced the non-cold weather parts with BMW non-cold weather parts (exact same). Originals lasted a long time ... wasn't going to make it complicated and run into an issue where a different version might not fit (as posted by Mark).
I did the oil filter housing gasket at the same time so had a lot of room coming at the CVV job from the front and side.
*FWIW, my "S" hose rotated right in to the CVV in the same process as you describe. Was easy to get together ... though I was certain based on reported DIYs this would be the toughest part ...
Last edited by jase007; 01-09-2010 at 09:57 PM.
Member
Indeed!
Cabin filter plug cleanings are a tribute to you Sir!
I think my original 'S' hose and new cold weather hose were the same.
I test fitted both, in order to confirm how it would connect after I installed the CCV, then connect the hose in a tight space.
IMO, I think your hose was defective.
I think my new #2 hose (real OEM diagram) was shorter than the original...
I had a SERIOUS fight/problem with the #2 hose (real OEM diagram)!
The insulation on the new hose made it VERY difficult to snap into the CCV.
The original has an accordian flex on both ends of the hose, but the new hose only has it on the valve cover end!
So, the alignment of the new hose HAS to be perfect!
It took a VERY long time to connect that hose!
I had to remove the oil filter housing cap in order to gain a little more room.
That is why I recommended leaving that #2 hose connected to the CCV when installing the new CCV.
Thanks!
Yep, the 'S' hose was the easiest to my surprise.
But, the other #2 hose was my nemisis... LOL!
That, and the electrical plug infront of the vanos that does not have the metal release clip.
Thanks!
Jason
Looking for an E39 belly pan , passenger front inner fender liner …
Member
nice job Jason
where you get this cold weather CCV kit ?
Member
Hello Jason!
Somehow I missed when you posted it originally.
Excellent tips. Question:
Did you replace the air distribution piece with a new unit, or you changed only the O-rings?
Also, here are some of Rajae's comments that might complement this type of work.
Looking for a DIY? Parts? Check this out, it might be your ticket
Stable: e92is, e53 N62, e46M54B25, Tribby & e39 M54B30 R.I.P.
Heavy wheels SUCK!
Good job! I removed my intake mani and replaced the mani gaskets and injector o rings. It was cheap and I was already in there so what the hell. It was good to remove my mani cause I got a nice look at the back of my valves. They where clean as a whistle with 120k!
1999 E39 Touring Sport and 3 pedals
Member

Member
Was your CCV clogged? Took any pics of it?
Also, have you had a chance to ride it? Big improvement?
Member
What prompted this replacement?
Member
Thanks!
I wiped off the air distribution piece.
I still need to replace it.
Reference BimmerFiver's write-up.
I really did not feel like removing the intake manifold because:
1. I already spent a ton of time trying to take the CCV off.
2. I did not want to introduce any problems taking it off. If it works fine-leave it alone theory.
I would like to go back later and clean out the intake manifold though.
Thoroughly.
Yes, indeed!
Surprisingly, no, my 2nd CCV was in pretty good shape!
No gunk.
However, the plastic on it was very brittle.
My previous (2) CCV's were the typical CCV.
I did the recent replacement with the newer cold weather CCV.
I did notice a difference.
My car idled and accelerated better.
I can tell when the CCV goes bad or when there are vacuum leaks because I can hear a hissing/ whistling noise when I hit the gas.
Thanks!
Jason
Last edited by Jason5driver; 02-18-2011 at 01:19 PM.
Looking for an E39 belly pan , passenger front inner fender liner …
Member
going to buy this cold weather CCV from EACTuning ( Part# 11617534237 )
Vent Valve Assembly
Crankcase
(Cold Climate Version)
Includes:
(1) Insulated Vent Valve
(2) Insulated Hoses
Mark / Jason anything else needed for this job ?
How about Vacuum Hoses ... looks like it is not part of package ...
Last edited by champaign777; 04-21-2010 at 02:25 PM.
Member
The part number you listed always confuses me because I forget which part numbers it includes. If you look the parts below up individually on our site you will get everything you need to do this top to bottom.
This parts list was found on the fest in fudman's M54 write up.
• 11 61 7 533 400 Pressure Regulating Valve - CCV (insulated)
• 11 61 7 533 398 Vent Pipe (insulated)
• 11 61 7 533 399 Connecting line (insulated)
• 11 15 7 532 629 Vent hose (insulated)
• 11 61 7 504 536 Return Pipe (insulated)
• 11 43 1 740 045 O-Ring, Oil Dip Stick Tube to Oil Pan
*parts list updated 02/15/2011 to reflect current part numbers for a couple of the insulated hoses. Thank you to member zarbat007 bringing this to my attention.
Last edited by Mark@EAC; 02-15-2011 at 04:17 PM.
Member
There is no need to get ALL of that.
Just get the CCV cold weather kit, the (2) additional hoses, and the dip-stick O-ring.
I would also get the air distribution piece too.
Looking for an E39 belly pan , passenger front inner fender liner …
Member
excellent job on completing the job and for the write up. I plan on doing this myself all the more better as I plan to replace the oil filter housing gasket too at the same time.
You say she idles better. Mine idels well but starts up at about 1 then drops down a bit after a minute and stays there. Not sure if that is normal or perhaps you cleared that up.
Member
That's your secondary air pump at start-up.
It's normal.
Looking for an E39 belly pan , passenger front inner fender liner …
 Posting Permissions


 Reply With Quote


Bookmarks