
 Member
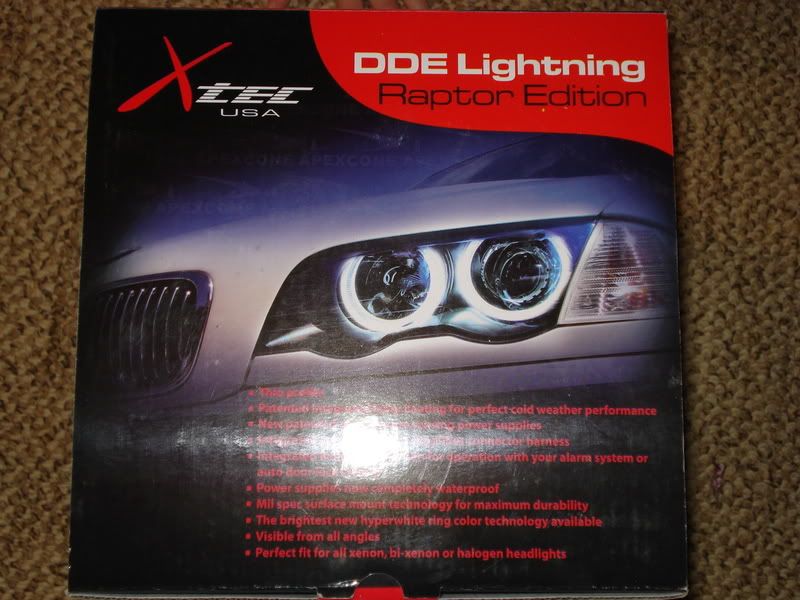
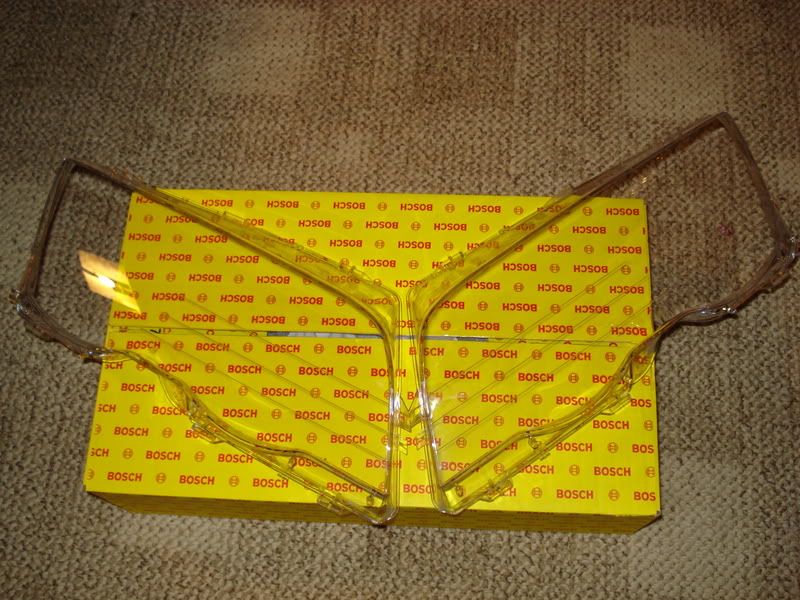
So I got These for Christmas:
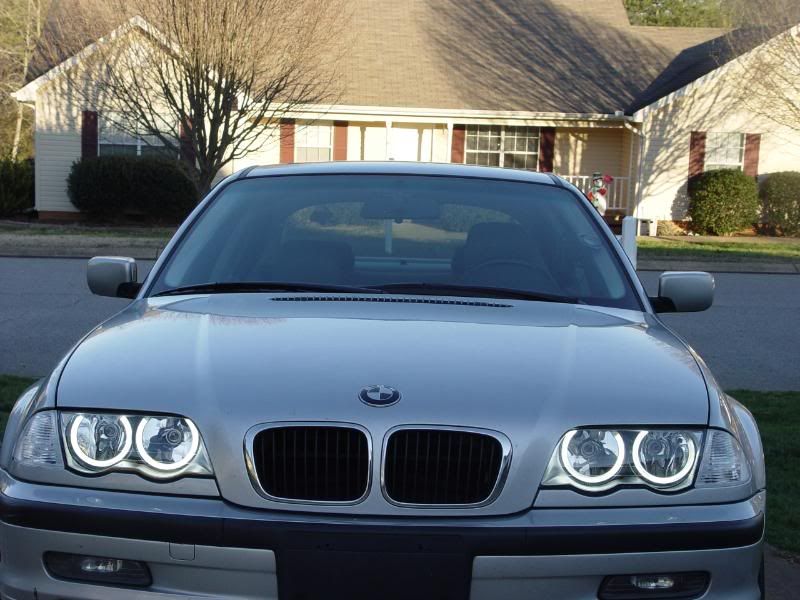
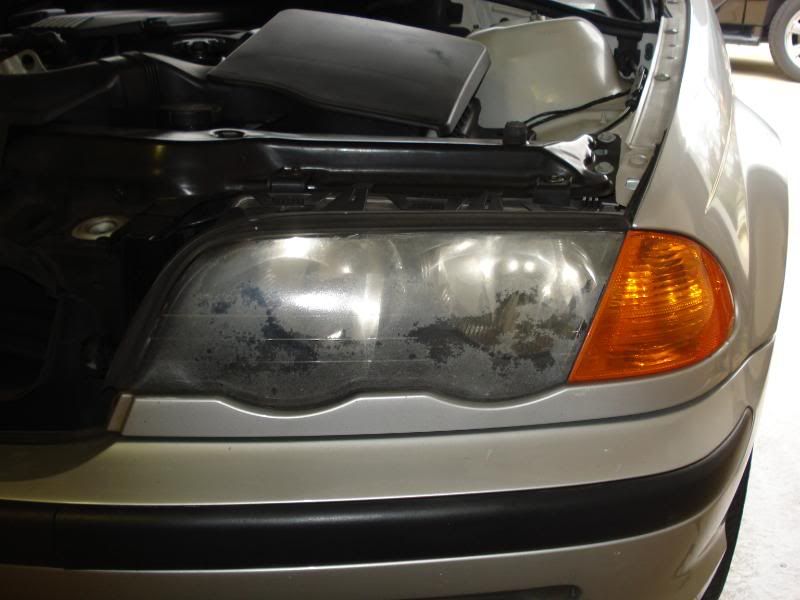
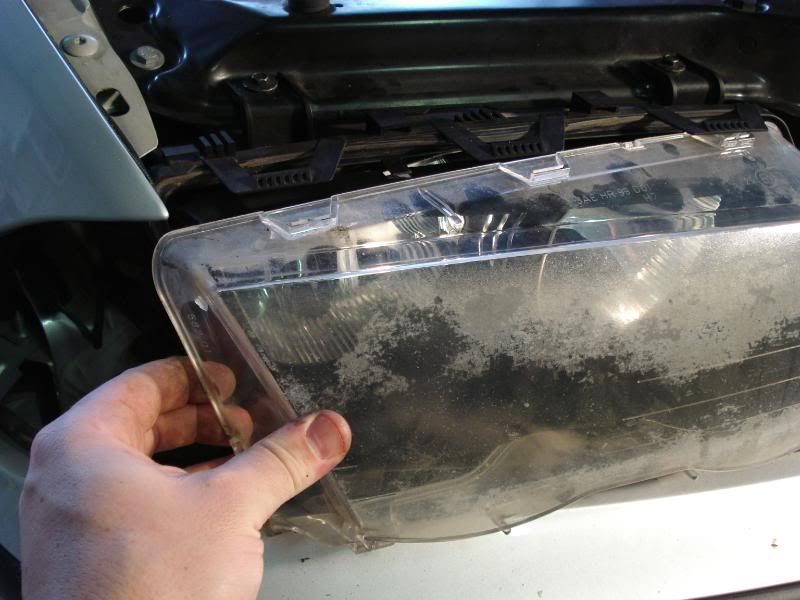
Because my head lights look like this:
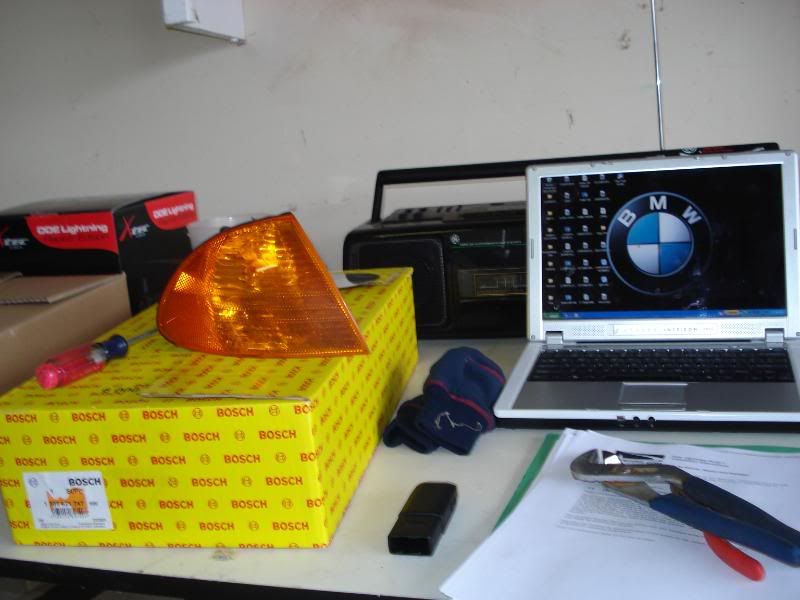
First is my work station:
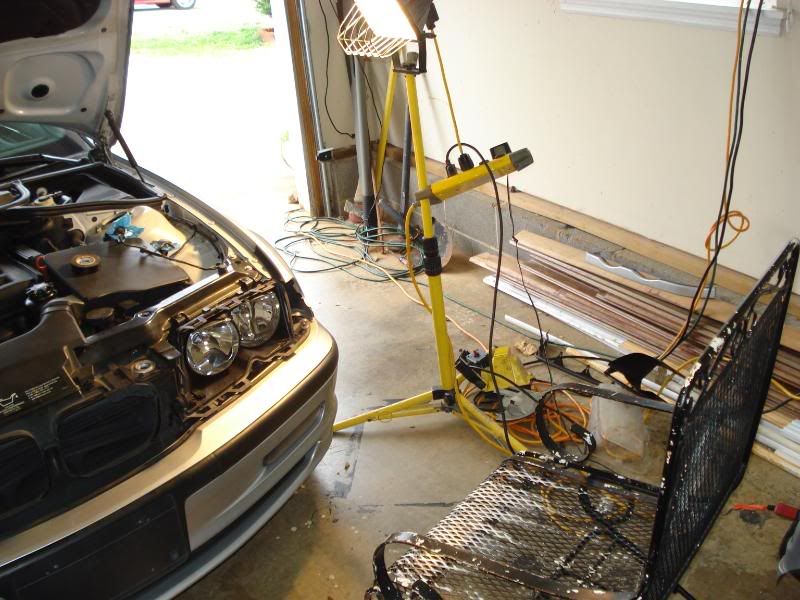
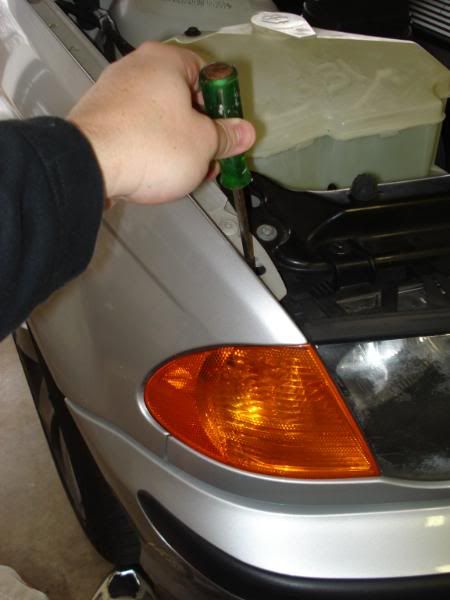
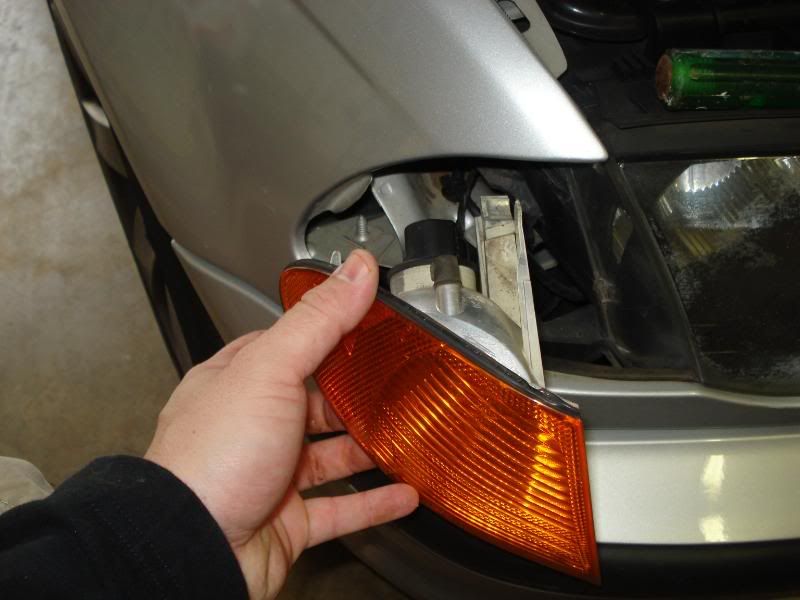
The first step was to remove my front corners. I have a pre face lift so it was easy to do with a screw driver as shown here:
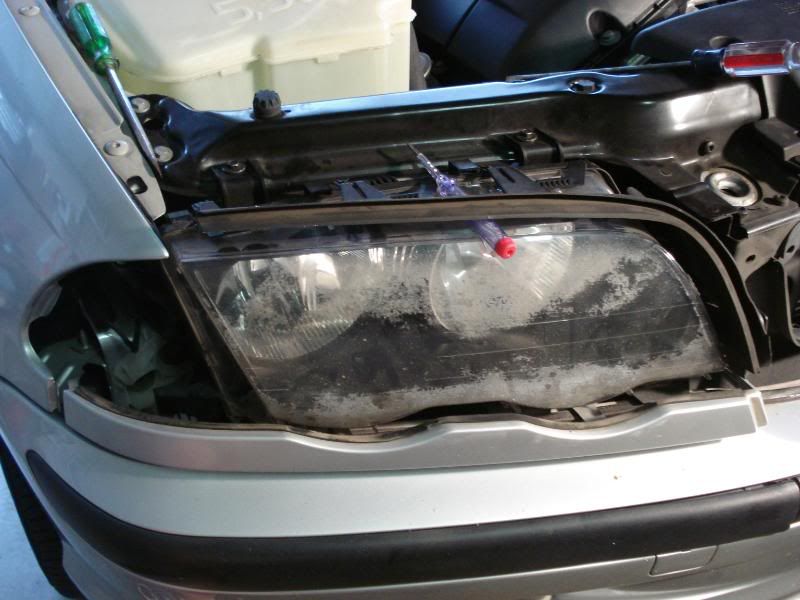
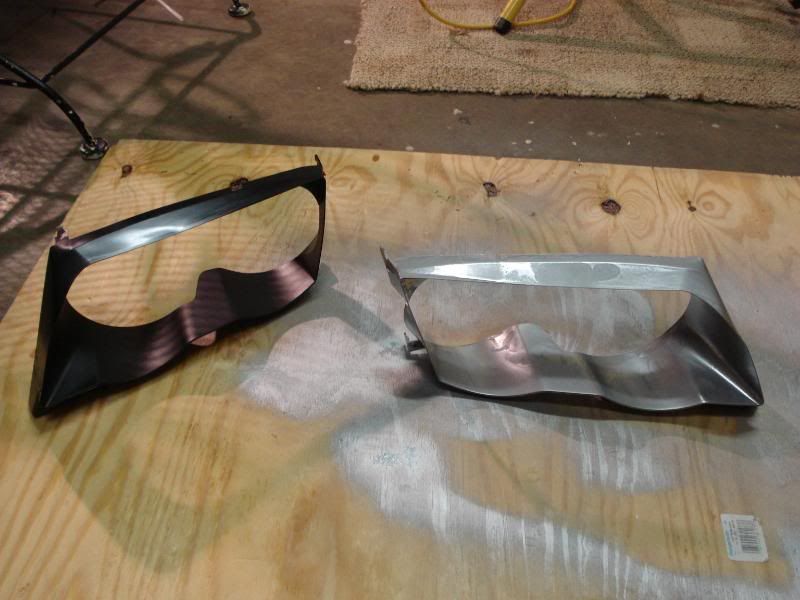
The next thing to do was to remove the upper and lower gaskets on the headlight as shown here, there are a few tabs you must find and pop off to get these pieces off the most difficult one is the last one neded to get the bottom lens cover off (last photo):
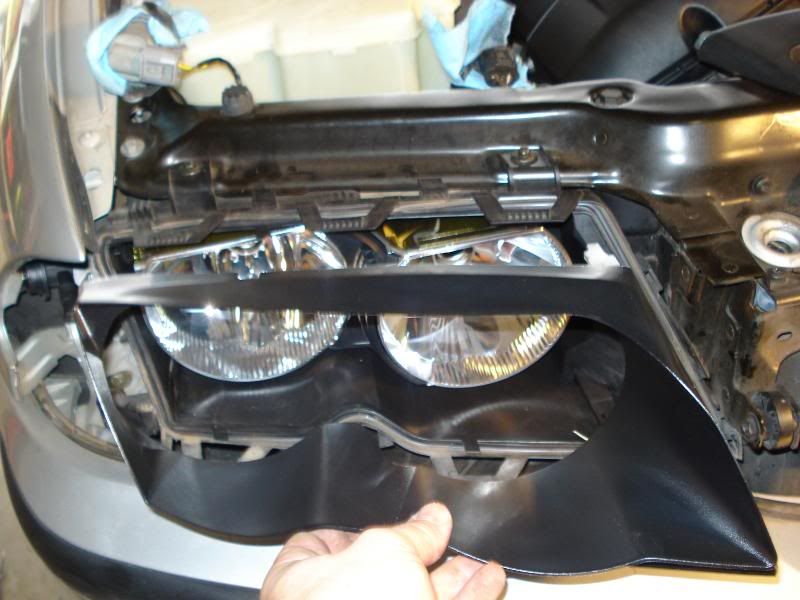
Next you need to take your lights out of the back of the headlight. We all know how to do this and I wrapped mine with garage cloths to prevent skin oil and breakage:
Then you need to pop off the lenses, just undo the clips and pull the bad boys off as shown below. Be careful noe to tear you gaskets while doing any of these steps.
Next you need to remove the vanity piece from inside the lens, paint it now if ever wanted silver vanity inserts (I did) the picture is the first coat:
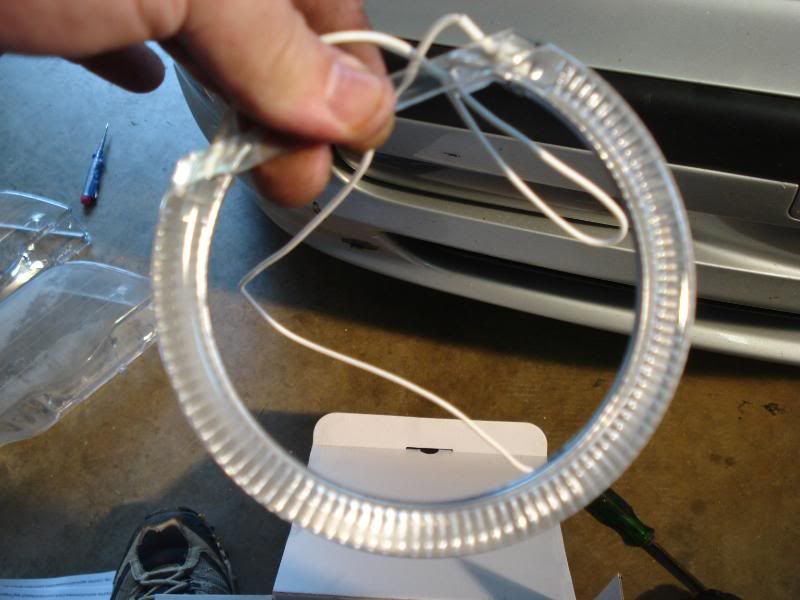
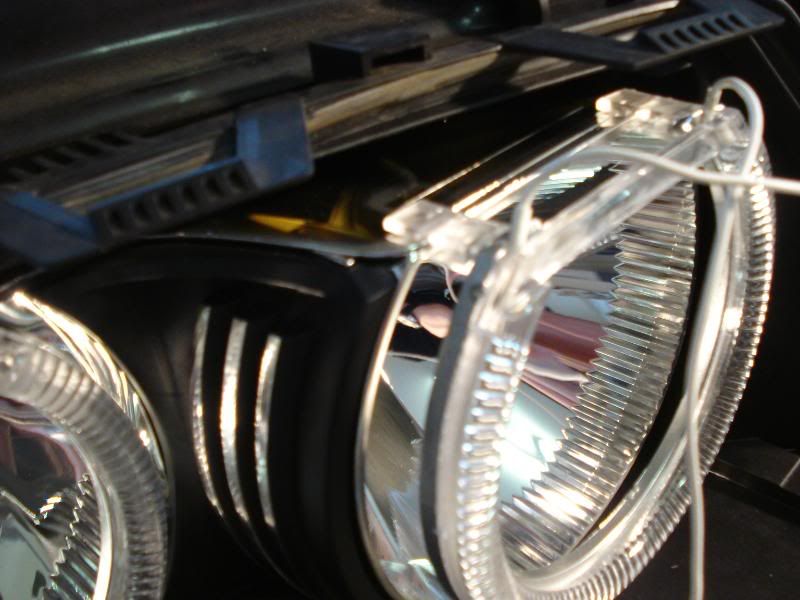
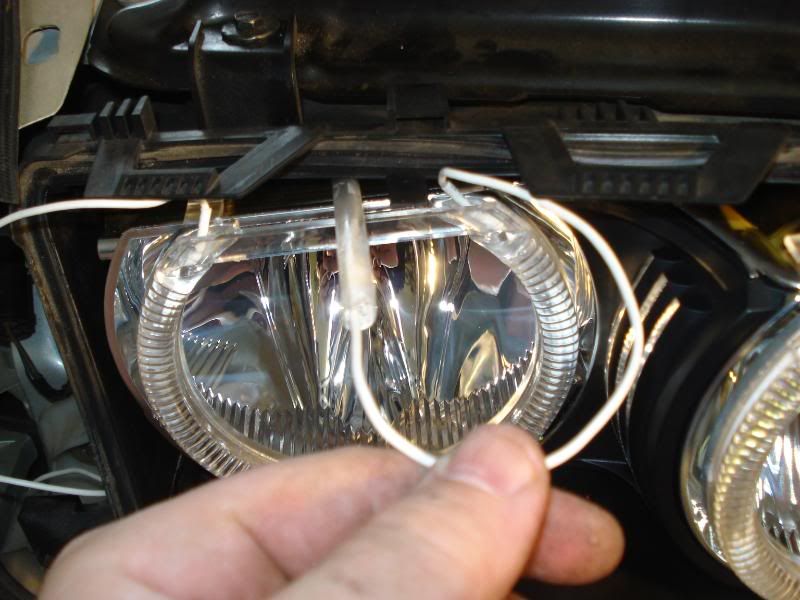
Ok, so now that we have this bitch of a head light torn appart its time to get down to bidness (not business, bidness). Locate your halos:
Next you need to snap the ring onto the fist notch (there are two). This first notch keepd the halo on the light while you center it up. Once centered you pop it onto the second level notch. this takes some force but with a small screw driver you can pry it in safely. The first photo shows the ist clip level and the second shows the 2nd and final position:
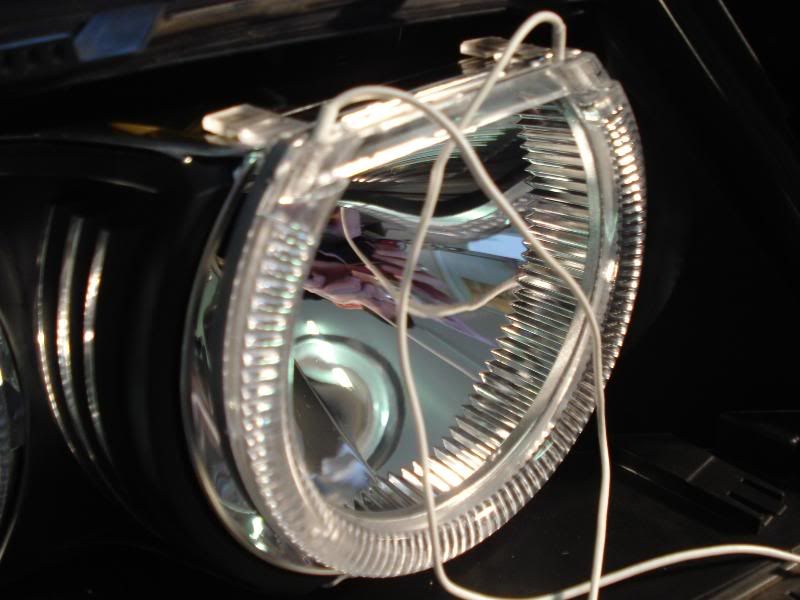
Now we must thread the wire from the Halos out the back of the lights. I am very proud of my engineering in this step so don't make fun of it. To do this I used a straw & speaker wire as a conduit to thread the wire over the refelctors and out between the gasket and the opening for the lights:
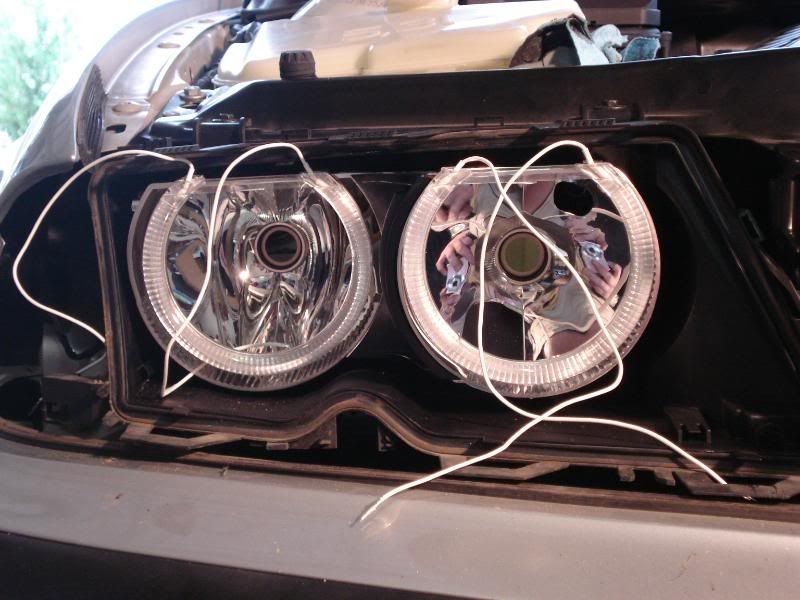
So once the Halos are installed its time to reinstall the lights and make damn sure our gaskets are sealed were the halo wires leave the back of the headlight housings:
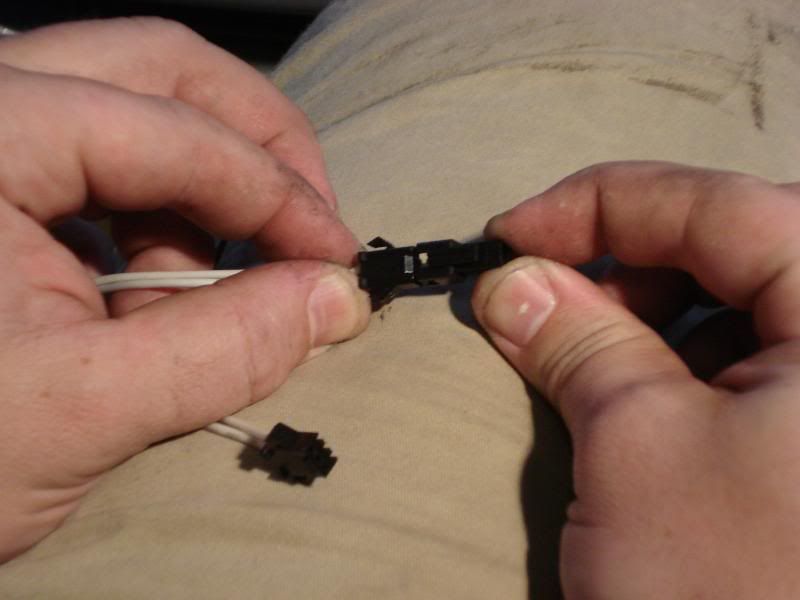
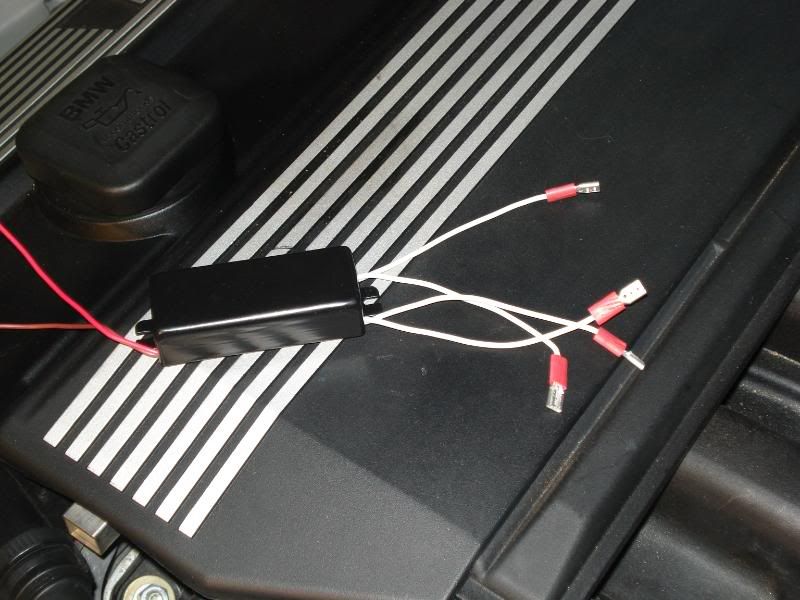
Ok so now we need to wire these bad boys up, break out the harness and ballasts that they came with them right? Only one problem, the connectors they provide don't match up as shown below so I had to fit new ones on from the hardware store (the red ones on the ballast):
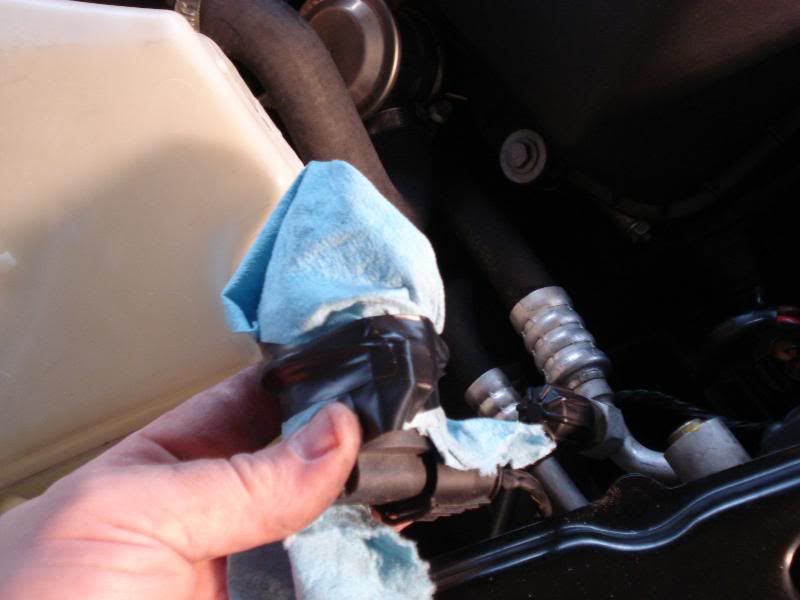
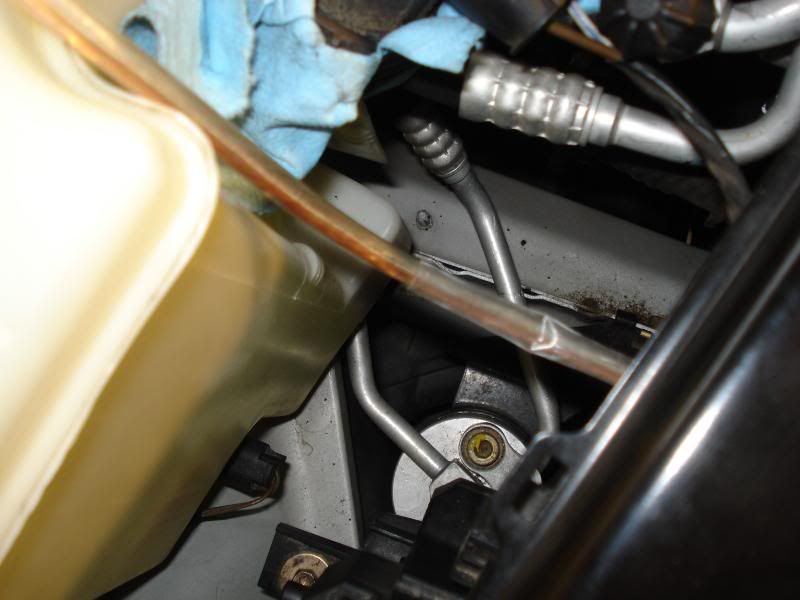
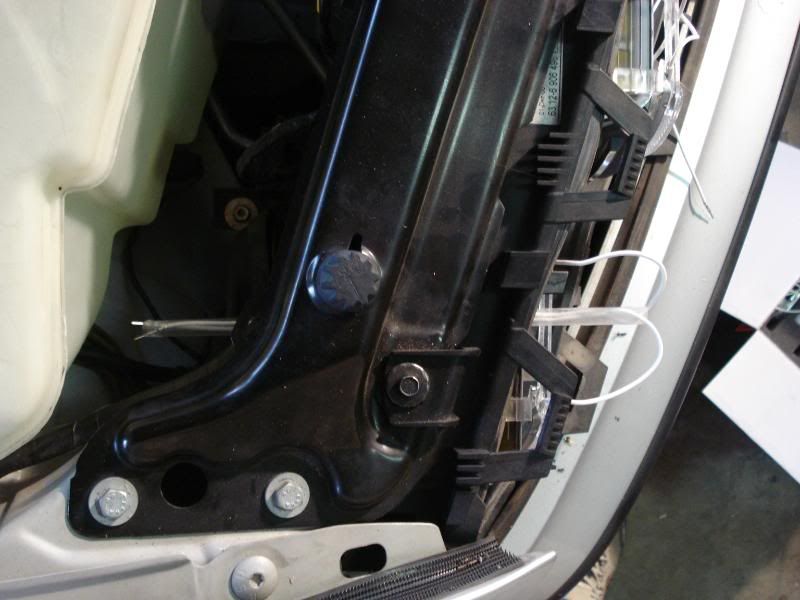
Next you need to hook the Halos up to the ballasts with the new clips (no picture) but if you can get the ones they supply to work go for it (I couldn't). THE VERY NEXT THING YOU NEED TO DO IS DISCONNECT THE BATTERY IN THE TRUNK. You are going to be hooking up the wireing harness to the jumper point in the engine bay and ground it to the strut as shown below.

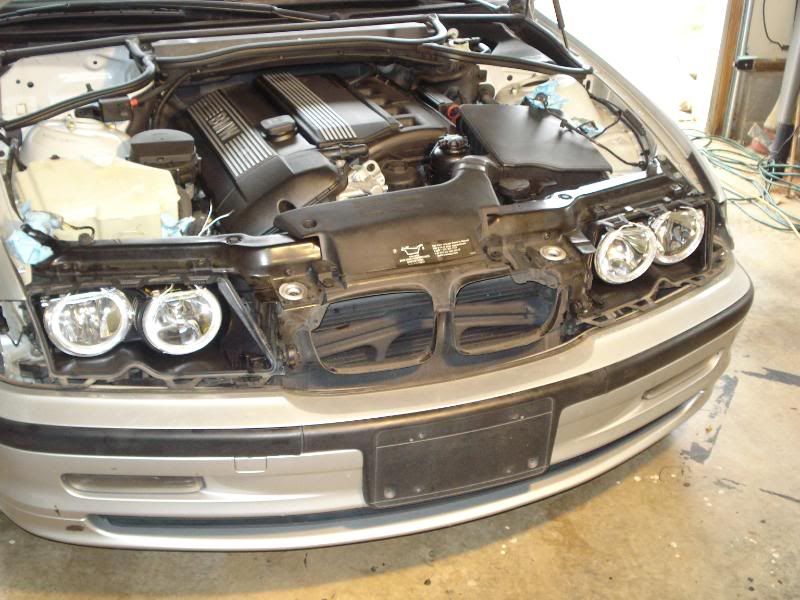
Once this is hooked up and you have connected the ballasts to the harness to need to route the control wire into the control box located in the engine bay (it is the plastic box located toward the driver held down with several screws). You need to use the wire tap provided in the kit to connect the control wire to the White and Red striped wire with Yellow dots on it as shown (the blue thing is the side by side tap and the red wire is the control):
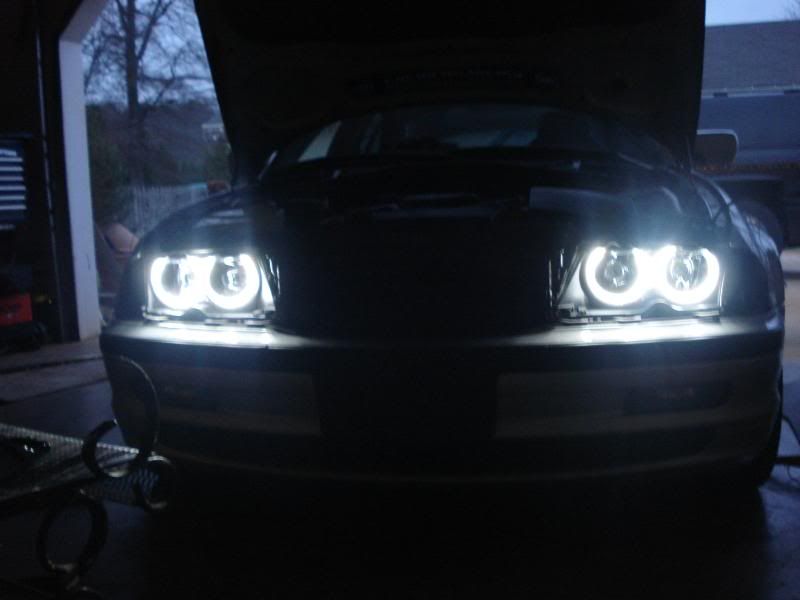
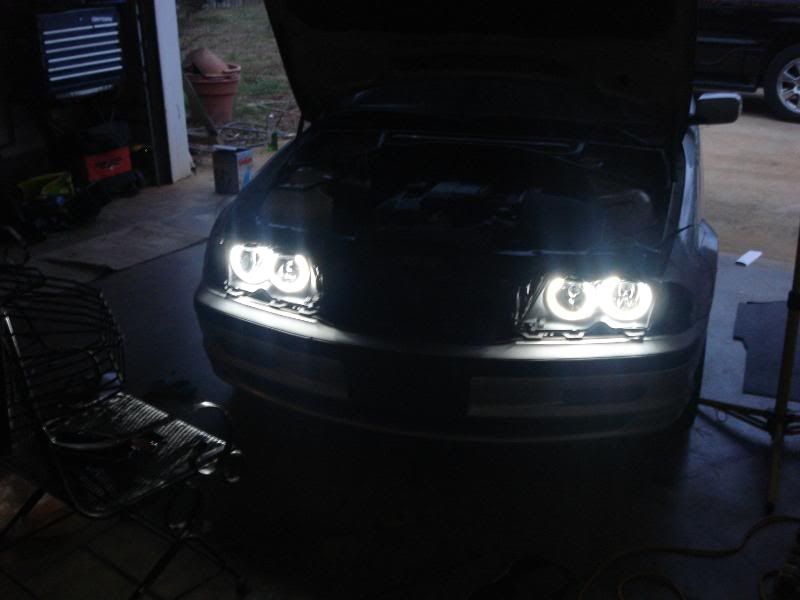
Close the box, reconnect the battery, turn the car on and watch these things light up:
Finally we snap the vanity lens back in (painted or not) then put the lens back in place making sure to keep an air tight seal, put the gaskets back on, snap in the corner signals and your done. I have some before and after pictures below for comparison.
Member
nice write up.
looks damn confusing but the outcome looks real nice.
do you have HIDs?
Auto-X Junkie
He doesn't Halogens.............Originally Posted by dnjs626

I would get more pics and that focused on wiring the angel eyes to the postive battery terminal, and to make sure you ground everything, etc....I kept my battery in......lol
WHY DID YOU GROUND IT THERE?!?!?
And to the ECU
Why is the red wire electrical taped?
Its sopose to be plugged into the side of the T-Tap

2015 ProSolo STX Class Champion
Member
nice man props,
Member
Everything was done per instructions. I haven't attached the remote on yet cause I'm lazy and it really isnt necessary.
Paramedic
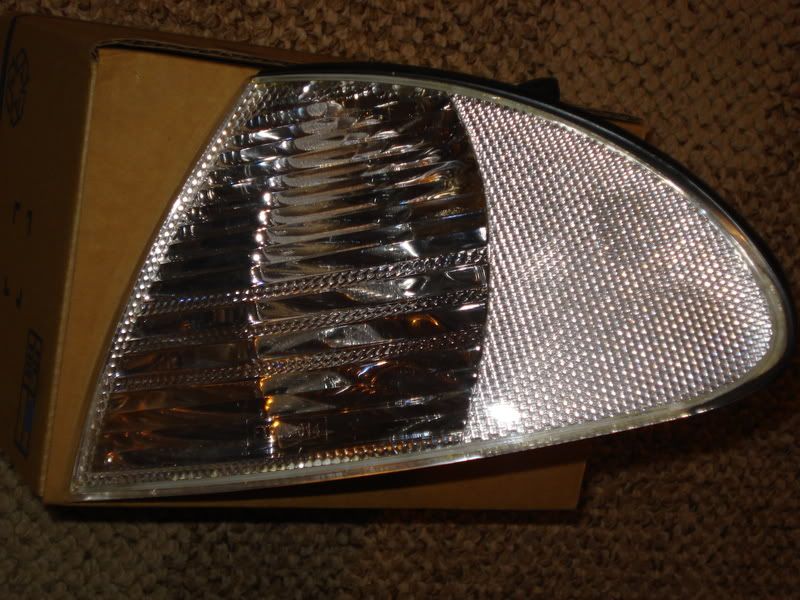
So are these angel eyes are good quality? Where did you get them, and where did you purchase your new lense cover for the headlights?
Auto-X Junkie
that one isn't from the remote, it shouldn't be able to reach across the engine bay, I believe that is your wire for the DRLs......
2015 ProSolo STX Class Champion
Member
No offense but I know what Im talking about. You cant see the remote wire in any of the pictures.
Member
They seem to be, its been in the teens in the mornings for the last few weeks here and they light up no problem. I got the angel eye kit from understeer.com for 90 bucks and it comes with the remote on feature that lets makes light up when you hit unlock on your car & also they stay on for about 30 seconds after the car is turned off for a walk away effect pretty cool. I turned off my light last night on a back road when it was pitch black out and they were enough to see about 15 feet of road, dimly. The lens are Bosch from pelicanparts.com.
Member
Thanks and no I have standard light.
Member
Looks good! I have the almost exact same car (TiAg, pre-facelift, halogens) and I've always wondered what it would look like to just put rings in there.
Can you post a picture of what it looks like to also have the low beam headlights on too?
Member
I can tonight. It is a bit of a difference when the Halogens are on. Its like a yellow light accented with a white ring. I thought about the xenon upgrade but I like it if my bulb goes out I can go to autozone and get one for 12 bucks. I did the rings more for the effect when the light are off, I love them.
Mr. Steal yo girl
your lenses looked like carp
Mr. Steal yo girl
The ones on the right look like they need to be adjusted
Auto-X Junkie
Ok, the T-Tap, is there anything plugged into it? That one red wire electrical taped up should be plugged into it to have your DRLs
2015 ProSolo STX Class Champion
Member
Yeah but Im not poping that all apart again, they looked fine when I first put them in. Plus I'm not sure how youy "adjust them" they are clipped on and have no movement to them.
PS: It was 10 degrees outside when i took that picture, would that have anything to do with it?
Member
The remote wire is coiled up in the empty space toward the passanger seat. that is the control wire you see taped up. The connection may not be made the way you made it but that tap they gave me was a side by side wire tap, not a T tap. Unless I am totally missing something. You lay one wire in one side of it then lay the other in the other side and snap the clip shut. The tap can only allow the wires to be parallel not perpendicular.
Last edited by SilverBullet325; 01-04-2008 at 11:27 AM.
Mr. Steal yo girl
its wierd that theyre like that if theyre clipped in right...and your luck to have them work in that weather at all
Member
Im guessing the cold might keep the ring from illuminating fully cause when I installed them it was 60 outside and they worked just fine. We shall see.
Mr. Steal yo girl
they should be lighter...aka not as strongly lit
Member
Not sure then, when it warms up a bit I'll go fiddle with them.
Member
Great, definitely looking forward to it!
herbert the pervert
hmmm 90 bucks you say? hmmm... they look good for that cost. if it doesnt look bad with halogen lights (waiting for that pic) i'll prolly get them... who needs xenons? lol
Member
They don't look as good as with xenons but they look pretty good.
herbert the pervert
well depending how they look i have to judge to see if its worth an extra $400 for them... plus install... because idk nada about electrical matters and i'll leave that to the indy shop by my house
 Posting Permissions


 Reply With Quote


Bookmarks