
 Member
This How To was performed on a 1995 BMW 540i that was produced in the month of September. There could be slight variations between models and years as there were different Differentials available across production of the 5 series if memory serves me correctly, but overall this should be a basic outline.
__________________________________________________ ______________
NOTICE: I do not take responsibility for your safety nor potential damage you incur upon your vehicle. I provide this information with the intent of providing free information on how to perform this automotive service. This is not guaranteed to be the best means of performing this work and you should express extreme caution while underneath a vehicle as well as exposing yourself to HAZARDOUS automotive fluids. Wear safety glasses, use rubber gloves, dispose of used fluids in an environmentally safe fashion and support your car on a level surface with the proper equipment.
__________________________________________________ ______________
Materials Needed List:
1) Bucket or Oil Drain pan.
2) 14mm Allen Key - I found this in a 3 piece kit at Autozone. It included 12mm/14mm/17mm Allens already in sockets that you'll need to remove. You'll have to cut your 14mm in half to fit it. I couldn't not find this in any other locations (Tried Sears, Pepboy's, Autobarn, Home Depot)
3) 3/8 Drive Socket w/14mm Socket (shortest possible) and/or 14mm Wrench.
4) 2 quarts or 1.9liters as specified in Bentley manual.
5) Differential Fluid, available at Pepboys. You'll need 2-3 Bottles of fluid. I used Mobil 75w90 Oil.
6) 6 foot rubber hose, small enough to fit within the differential fill hole.
7) Penetrating Oil is a god send, use it. When something like this hasn't been opened since it was built, it kinda stays budged.
Note:
The Bentley Manual specifies the following
525i and 530i ..................... 1.7 Liters (1.8 qt)
535i and 540i ...................... 1.9 Liters (2.0 qt)
Prep -
1) Drive the car a few miles to warm up the fluid for easier draining
2) Get the car jacked up on jack stands, all four sides to allow for level surface.
3) Using a grinder, cut your 14mm Allen into 2 pieces, one slightly longer than the other.. That way, one can be used for the socket and the other can be used for a wrench. If you are buying the 3pc kit from Autozone, you'll need to put the allen with its socket into a vice grip. Taking a hammer and using a chisel or flat head screw driver, knock the socket until the Allen falls out. Now your ready to cut it.
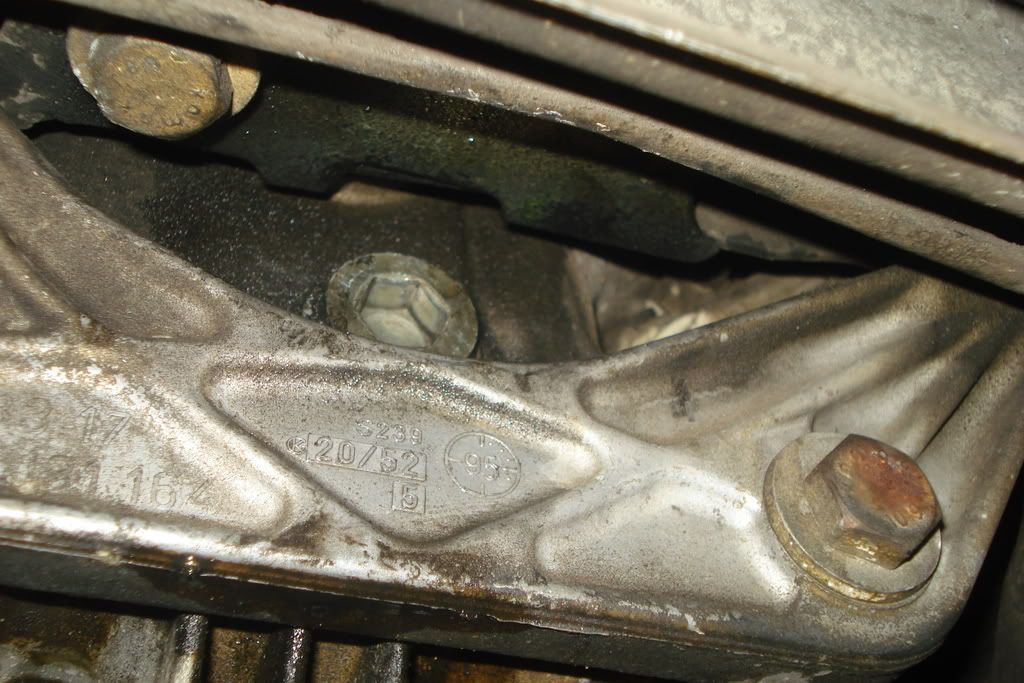
Fill Area
This a picture of the Fill area, you should make sure you loosen this plug first otherwise, you'll have a nicely drained diff and no way to fill it.
Photograph #1
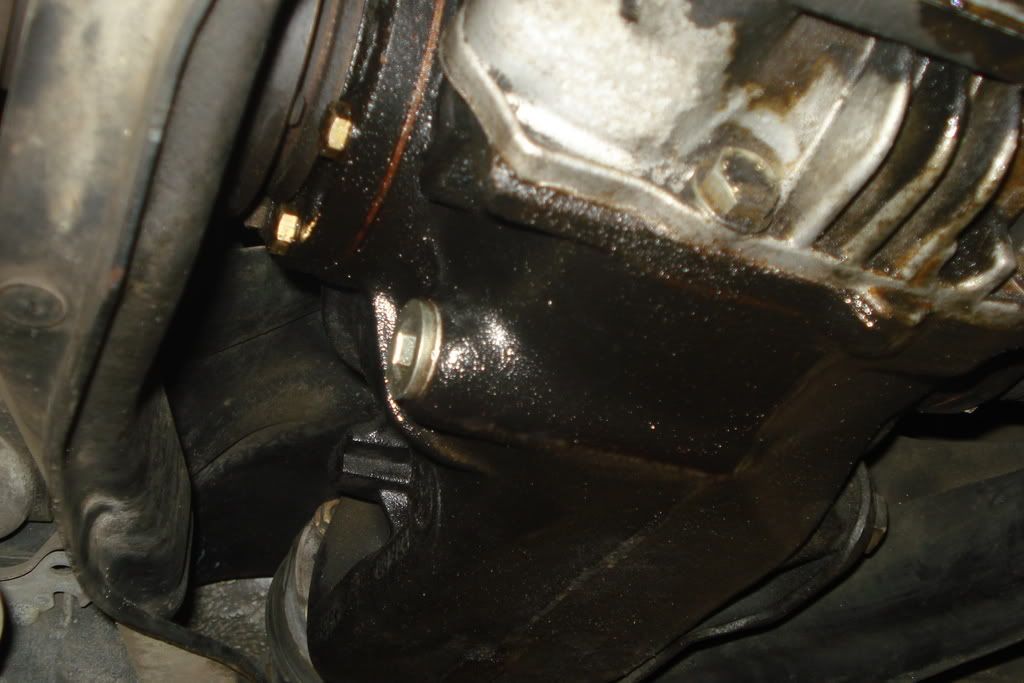
Drain Area
This is your drain area, after loosening the Fill plug, now you can proceed to loosen the drain plug. Have your gloves on and your bucket ready.
Photograph #2
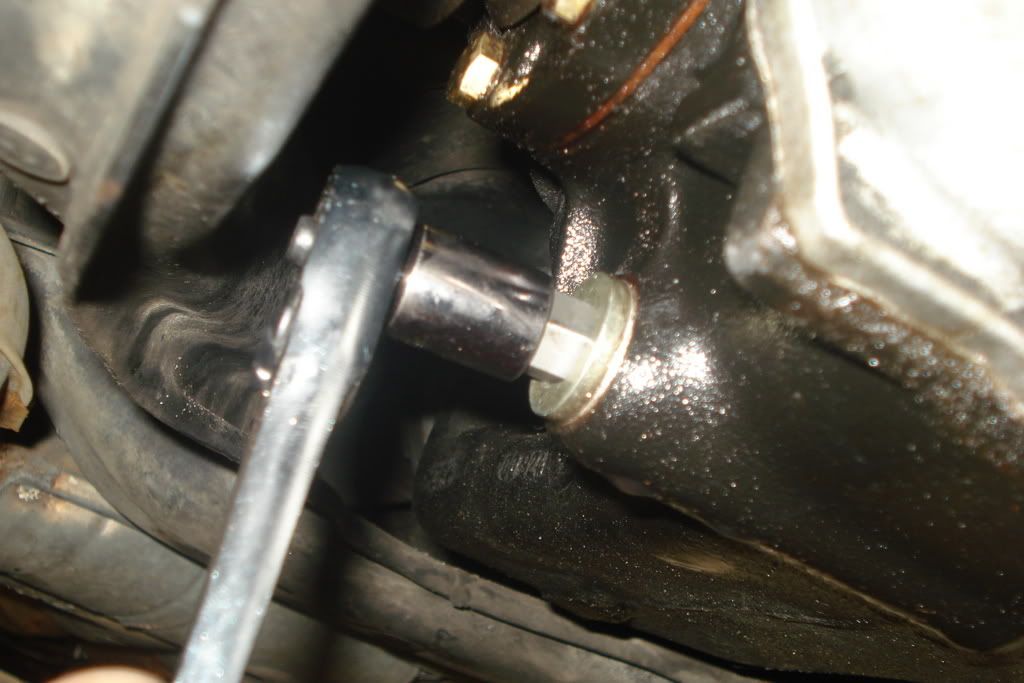
Shot of Drain Plug being loosened:
Notice the minimal distance between the back of the ratchet and the plate? This is one of the reasons you cut the Allen. It just won't fit in there on a socket without cutting first. Once again, same for the fill plug.
Photograph #3
Near Success: Fluid being led to its disposal by gravity
Not too pretty is it? Thats a 125,000 Miles on what was likely the same fluid from day 1 of this car's life. Notice how thick and unclear the fluid is. Nasty.
Photograph #4
Not Photographed but not forgotten:
Now your differential is bone dry and ready to be filled. Replace the drain plug back in place nice and snug.
At this point its useful to have a second person. Using the 6 foot rubber hose, insert one end into the differential at the Fill area in Photograph #1.
(The second person is there to hold the hose in the fill hole as well as let you know when your overfill point is reached) Place the tip of the gear lube fluid bottle into the hose and stand up from under the car. Your now facing your trunk and holding the bottle with the hose attached.
With the bottle inserted into the tube and now upside down, take a knife (or wire cutters) and pierce a large hole in the bottom of the bottle to allow gravity to once again make short work of the fill process. Your lube should be traveling successfully into the differential and your nearly done. Keep filling until some oil starts to spill out of the fill area. Remove the hose and replace the fill plug, tightly. Make sure your drain plug is tightly in place while your there as well. Don't forget to clean up any spilled oil.
Your done!
You can now drive your car, don't forget to check in a few days if there are any leaks now and a few days later, this is why its important to clean the oil off the parts when you finish initially.
Hope this helps some folks out. If I missed anything important, please post it and I'll add it to the post.
Member
good write up
just thinking about my diff the other day
- 1994 530iT: M60B40'd + 5spd conversion , 18" Style 32's, deleted resonator, angel eyes, Voltglands, Erebuni ACS body kit, 10" sub and amp, Alpine deck, 255lph fuel pump, 6K HID.
- 1984 635CSI: 92 535 M30 5spd, Koni Yellows, Eibachs, Magnaflow cat + catback, short throw shifter, Style 5's, 2x 10" subs. STOLEN! yea my baby's gone
I am TD
Bump, one of the last things I need to do.
Landing gear inspector
I don't know HOW MUCH I can stress this, people... OPEN YOUR FILL PLUG FIRST.
If anything happens, and you have your fill plug out, but the drain plug is stuck... no biggie.
If you drain first, then realize that your fill plug is stuck, you strip the threads trying to break it loose, etc... Not a good situation.
If this how-to is going to be archived (as it should be), I think that should be made very clear very early on... just my two cents from personal experience.
Originally Posted by dallasfan824
Member
Haha. So true. I put stress on the first two steps about releasing the fill first. However, there will always be that one black sheep that goes and screws it up.. *sigh*
As a follow up on this post, I was in Pepboy's and noticed that they sell suction pumps which cost less than $10 bucks. Since I haven't used it I can't tell you much other than that, but Its suppose to make life Hella easy on the filling up procedure. Look into this on your own, but I'll tell you one thing.. If it works, I could've saved myself a lot of kitty litter as a result of spilled fluids.
My next How-To will be either Oil Pan Gasket replacement (Lower, which is cake) and valve cover gasket replacement + spark plugs.
I know these are simple task to a good amount of you folks, but some of us like to have a lot of visual reinforcement + step by step procedural listing. Bentley helps a lot, but one picture in black and white per section sometimes doesn't do enough justice. Hope my next few will be good.
Member
I have a 540 and it says 2 quarts for the stock diff. I now got a large case 3.15lsd. Does anyone know how many quarts needed for it?
-Леха
Member
I thought it required straight sae90 weight. This is what the napa guy told me atleast.
Member
Anyone have a better picture of the 14mm "tool" one needs to craft for this job? I'm having a hard time visualizing it.
TIA and great DIY write-up
 Posting Permissions


Bookmarks