
 Member
So I picked up a locking storage rear center armrest from Beliq off a E32 a few months back and came up with a few plans for it but first I had to make it fit. The issue with the E32 armrests is that the mounting tabs on the backrest are in the wrong location (Higher up on the E34 and low on the E32). This means you have to swap the E34 armrest mounting bracket to the E32 and lose the locking element that some of the E32 armrests come with. . . I don't like the idea of losing the locking feature because its pretty darn annoying when you nail the brakes and your rear armrest slams down. So I figured it was worth looking into a way to fix the issue and maintain the E32 locking feature. Here is my solution.
Safety Disclaimer: You're on your own! This is my documentation of how I modified the back rest. I take no liability for anything you do wrong or if this causes issues on your vehicle or if you get injured during or after the install due to the modifications.
Tools and Materials:
- Atlas L845-M6
- Hog Ring Pliers
- Phillips and Flat Head Screw Drivers
- 19mm Wrench
- Center Punch
- Drill
- 5mm Drill Bit
- 10mm Drill Bit
- Round Metal File
- Loctite 246
- X-Acto knife or razor
- Side cutters
- Safety Glasses
Part Numbers and Quantities:
- 4X Atlas AELS8-610-4.2 threaded inserts (Rivet nuts)
- 2X 52201978009 (These are the mounting tabs, you can reuse your old ones or buy new)
- 4X 52101817063 (These are the new screws, you can reuse your old ones if in good condition)
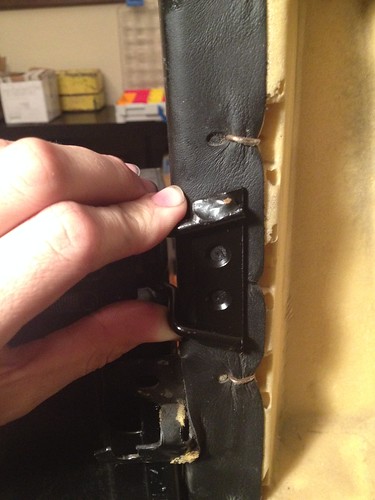
You start out with the E32 Armrest in the down position with a mounting tab attached to it so you can mark the centers of the bracket holes like so.
DIY_SARMod_Bracket_Location by 93FIM5, on Flickr
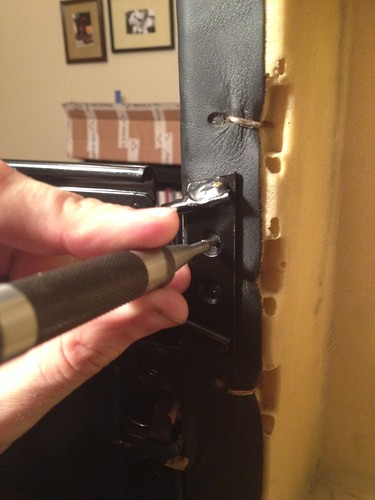
Once you have the centers marked you use a center punch to mark where your new holes will be for your threaded inserts.
DIY_SARMod_Hole_Mark by 93FIM5, on Flickr
With the hole centers marked you trim the leather with your razor like so to allow the threaded inserts to be installed.
DIY_SARMod_Leather_Trim by 93FIM5, on Flickr
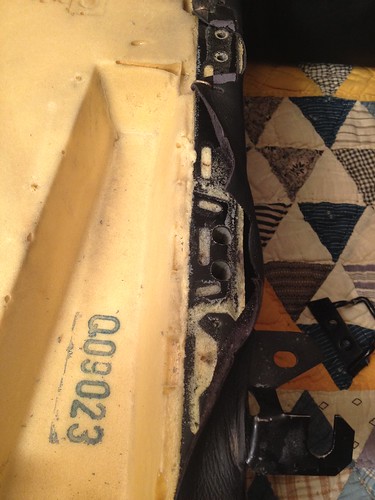
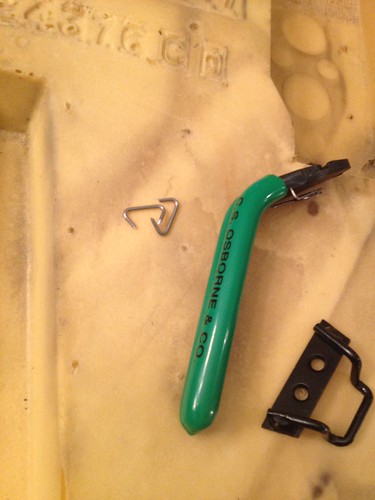
With the leather trimmed and your holes marked next you cut off the hog rings immediately above and below your holes to allow you to clean up any shavings from drilling first your 5mm holes and then your 10mm holes, should look like this.
DIY_SARMod_Hole_Drill by 93FIM5, on Flickr
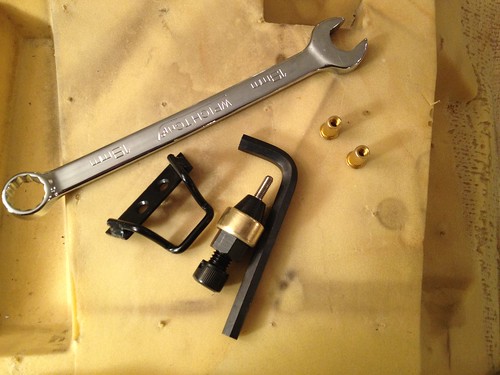
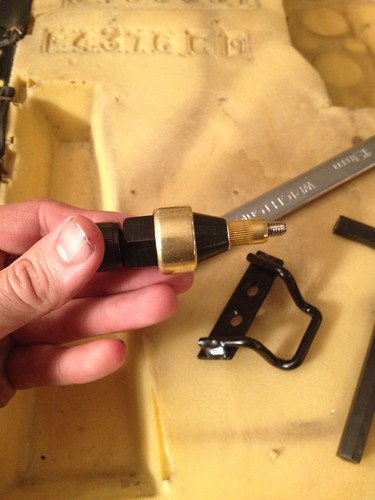
After the holes are drilled you setup your insert tool to press you threaded inserts in place. Here are your tools, inserts, and mounting tabs.
DIY_SARMod_Inserts_Tools by 93FIM5, on Flickr
Tool setup.
DIY_SARMod_Rivetnut_Setup by 93FIM5, on Flickr
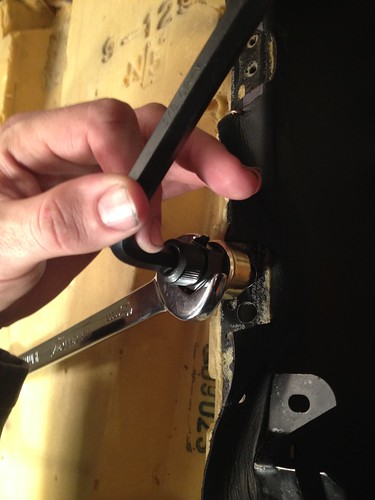
Insert in place and being installed.
DIY_SARMod_Rivetnut_Install by 93FIM5, on Flickr
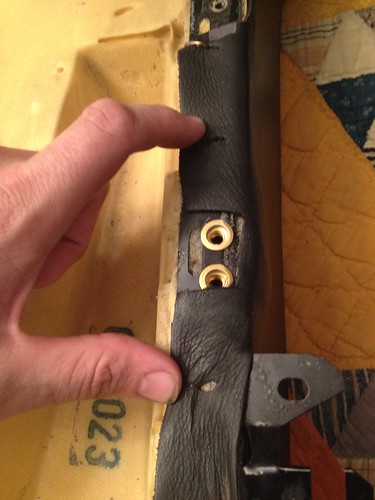
Inserts pressed in.
DIY_SARMod_Hog_Ring_Position by 93FIM5, on Flickr
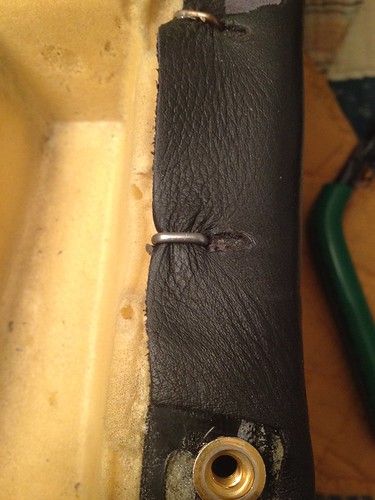
Once the inserts are installed you next re-stretch the leather and secure it with your hog rings.
DIY_SARMod_Hog_Rings_Ready by 93FIM5, on Flickr
Stretched and installed.
DIY_SARMod_Hog_Ring_Installed by 93FIM5, on Flickr
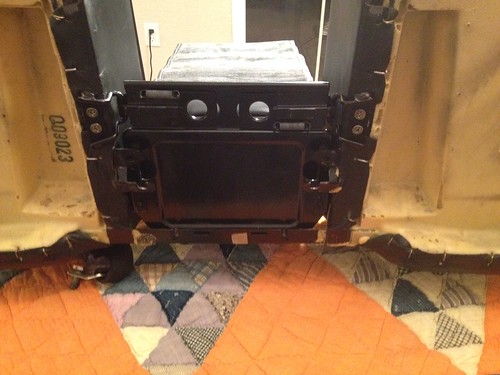
The last step is to add Loctite 246 to your screws and mount your tabs in place. Should look like this when you're finished.
DIY_SARMod_Rear_Final by 93FIM5, on Flickr
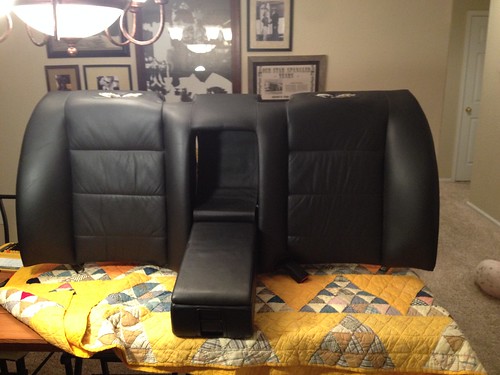
And from the front.
DIY_SARMod_Front_Final by 93FIM5, on Flickr
Quite happy with the final result, let me know if anyone needs the inserts as there is a minimum buy and I'm happy to supply some inserts and possibly help with the tool. This keeps the locking feature of the E32 armrest and doesn't require any major rework of the backrest or building custom parts. Thinking next I'll build a cup holder setup into the armrest along with integrating the electric rear sunblind control switch, and maybe some USB power ports well see.
Last edited by 93FIM5; 11-24-2013 at 02:44 AM.
"You may all go to Hell, and I will go to Texas."
Davy Crockett
www.Angry-Ass.com
My Build Thread Part 1, Part 2
DIY E31 X-Brace Mod and Install
DIY Rear Seat Backrest Modification for E32 Armrest
 Posting Permissions


Bookmarks