
 Member
I am new to the forum. This is actually my first post ever. I think this is my first car post ever in any forum. I read them a lot but never actually posted on one. Well there is a first time for everything. So down to the issue.
I am having some a AC/Heater problems and before I tear my dash apart to get to the blower/resistor I want make sure I test everything else. Now I think it's the blower because it was working sometimes then died. When it would come in and out it would make this squeaky sound like something was up with the bearings, but you never know. So I took my glovebox apart to find the k4 relay to test it. Ughhh can find it though. I know #87 is suppose to be yellow/green and according to the diagram #86 green/purple, #85 brown. I can't find any relay that's yellow/green on 87 let alone any other corresponding colors. Help? It's a 1997 740il. I will post a picture picture of what I am looking at in about an hour or so.
William
Member
 Moderator
Moderator
Moderator
Welcome William. Here is a thread where I have gathered info on this subject:
http://forums.bimmerforums.com/forum...wer-motor-info
Member
Thanks for the reply. You guys are really awesome. I should have done this a long time ago.
Psjr: That's the picture I started with but mine doesn't look like that.
Mayo: that's a lot of info. Awesome info nonetheless. I am going to go over that thoroughly. Some of the pics are the same I have seen and mine doesn't quite look the same.
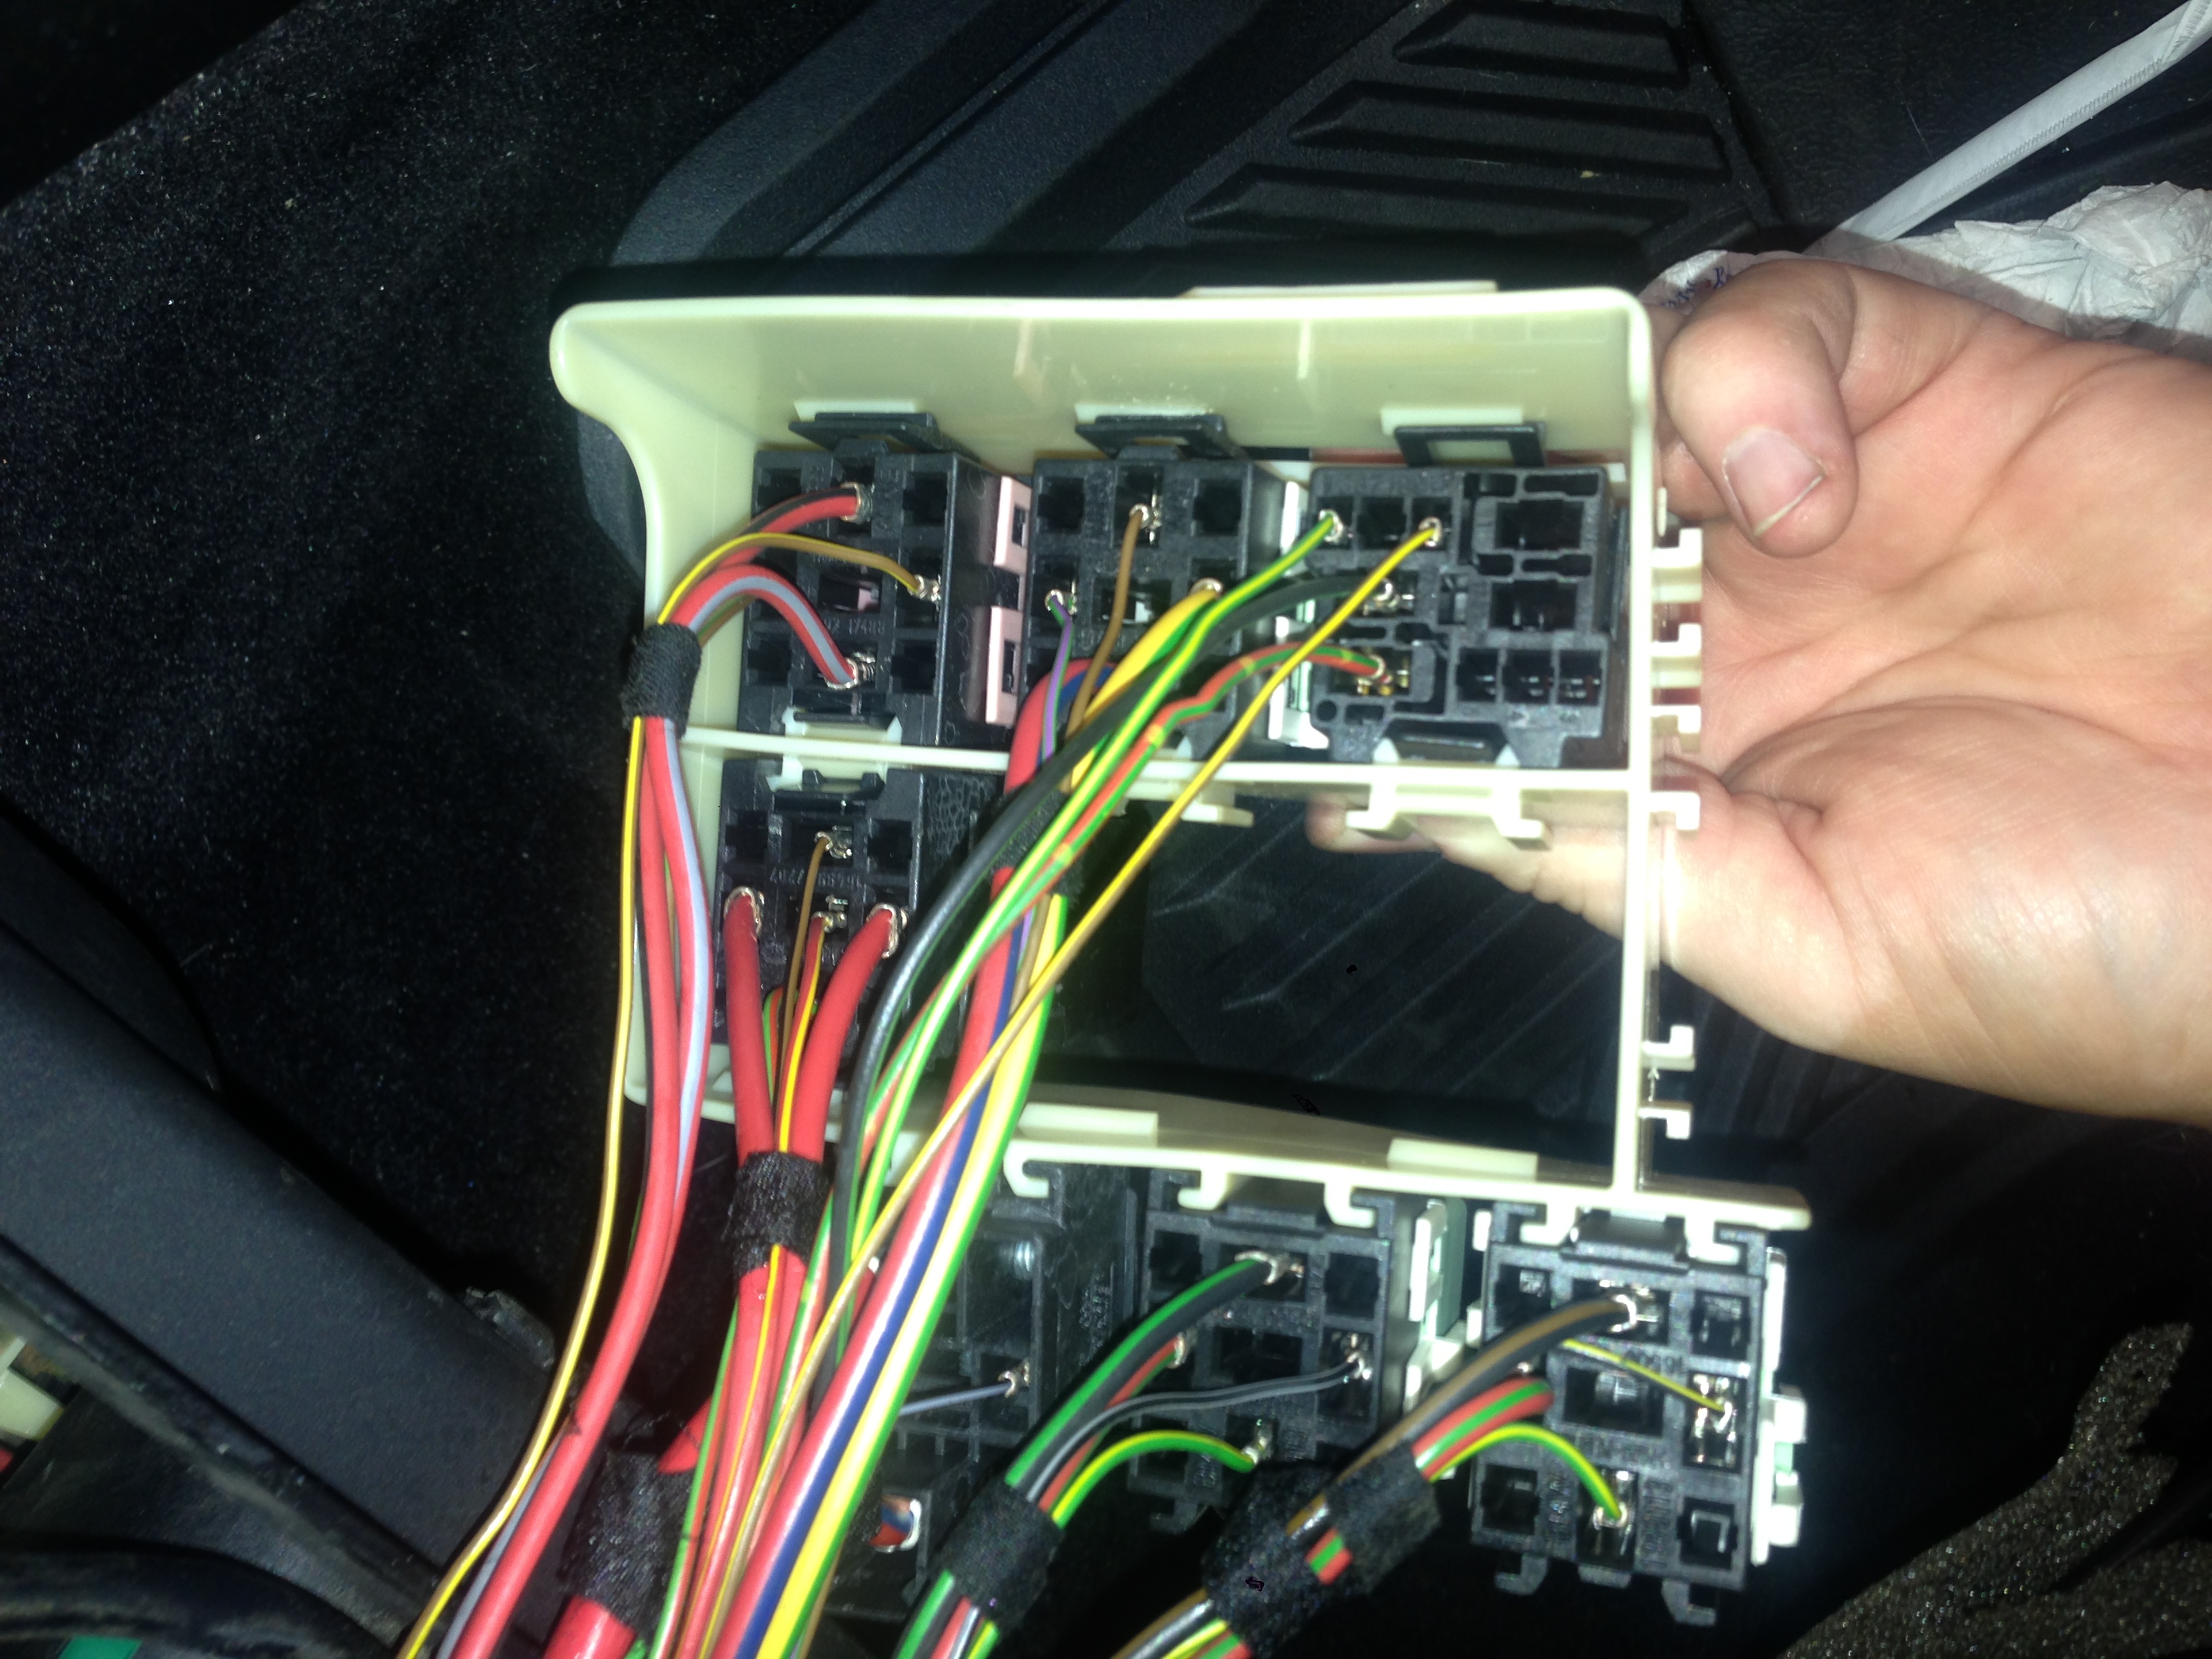
here is what mine looks like:
http://ultramod.net/car/e38frontgbrelays.jpg
http://ultramod.net/car/e38backgbrelays.jpg
Member
Okay so I read up on all the info mayo forwarded and even for some reason my relays look completely different then any of those pictures. I used the diagram and connector pins to locate it. So major thanks for your guys help. I took pictures to help anyone else that may have the same issues I had. I will also write the details I found to help me find the relay.
Details:
There are 9 pins but only four matter.
Pin 2 - wire color:red/blue - #30 connects to fuses/voltage
Pin 4 - wire color:green/purple - #86 connects to AC control module
Pin 6 - wire color:yellow/green - #87 connects to blower switch
Pin 8 - wire color:brown - #85 ground
This is basically a quick version of the k4 relay. I couldn't have done it without mayo's help thanks a bunch. I hope this helps others as well.

¿pǝpɹɐʇǝɹ noʎ ǝɹɐ
Welcome to the forum.
95 840Ci, Calypso Red/Silver, 83k - 99 740i, Black/Black, 185k, Alpina Mods - 01 740i, Titanium/Silver, 40k, Sport Pkg
Complete Turnkey Diagnostic/Programming systems available...PM for details.
http://www.8Coupe.com - Please register, spot, and help the project.
Moderator
Moderator
Thanks for the pics. That matches up with X58 info in my thread. I am going to reference your link if you plan to keep them on the supporting URL. Also, for future reference, which relay (color) is the blower relay (k4)? The WDS pic I posted of the relays does not break down by years which implies it is the same for all e38's. Would not be the first omission found there. Sorry if I am missing something obvious, but what are the numbers marked inside the relay on the WDS (30, 85, 86, 87), if you know. The pinout numbers are on the outside. Not sure if I noticed numbers like that but have not looked at too many relays.
- - - Updated - - -
Almost forgot to ask, did you find your problem?
- - - Updated - - -
Almost forgot to ask, did you find your problem?
Found the answer to my question. Those are standard schematic numbers for relays:
The electromagnet can be formed using either Alternating Current (AC) or Direct Current (DC). (For more information on AC and DC check out “Electrical Primer - Introduction to Electricity” at http://bricklin.org/TechCentral/TCArticle016.htm.) This means that the control signals can be either AC or DC current depending on the application. In a car, we (usually) have a 12V DC system, consequently we would need a 12V DC relay. If you were working on an appliance that uses 120V AC then you’d want to use a 120V AC relay. 3. Connections/pins to the relay. On the outside of the relay case are the connector pins that will allow the relay to be connected to the various wires of the circuits.
4. The case is used to cover the parts of the relay with the exception of the connection pins. These cases can be metal or plastic, and in some instances no case is used and may (or may not) have a mounting tap on it.
How they work: When a small current, also called the trigger current or control current is applied to a coil of wire a magnet is created which pulls the metal bar that holds the movable contact to contact the NO contact. When the trigger current is removed, the electromagnet becomes de-energized and the spring pulls the movable contact back to its NC position. The NC connection may or may not have a connection to the outside of the relay. If it does, then the relay is called a Single Pull Double Through (SPDT) because there are two positions. If there is not a connection for this NC contact then the relay is called a Single Pull Single Through (SPSD).
Schematic Symbol
Pin OutThe pin out for these Bosh type relays has become a standard. The electric schematic diagram shows the coil for the electromagnet is on Pins 85 and 86. This is the control circuit (or side) of the relay. It doesn’t make any difference which line you apply the +12V or the ground to, as long as it’s not the same pin. The high current side is comprised of Pins 30, 87A the Normally Closed (NC) contact, and pin 87 the Normally Open contact. To use the relay to turn something on, current will have to flow through the switch formed by pins 30 and 87. These 2 pins will only be connected when the trigger signal is applied to the coil.
Member
Iceman: thanks for the welcome. For my first thread I really do feel welcomed.
Mayor: lots of good info. I learned a lot of how to work with relays when I worked on this e30 I use to have. I learned basically that #85 is always ground, #86 the trigger, #30 the constant, #87 variable power. The only problem on that e30 was someone put a honda relay on the car (dme relay) and the 5 pins though they fit all the numbers were in different places. So the car wouldn't start. I don't know if there is a DIY on how to test a relay? If there isn't I can always write one up. It's really easy. All you need is a 12v power source and a multimeter.
Also thanks again for the info. The picture of the wire diagrams is what helped me find the relay. I had seen a couple of those pics on google but none had the color of the #30 and yours did. That was the easy indicator for me to find it cause all the wire colors matched up.
Unfortunately the bad news was my hunch was right. Blower or resistor but my money is on the blower. The AC used to work intermittently and squeal every now and then. But it died a few months ago which was fine in California considering the weather is pretty good all the time but it was boiling hot the last month or so.
Question: New or rebuild the blower, what's your opinion?
And has anyone tried ACM vs behr or has anyone had a different brand they prefer and why?
Last edited by Xtheloststarx; 08-02-2013 at 03:22 AM.
Moderator
Moderator
I have seen someone here fix/rebuild there blower motor but don't remember the specifics behind it. I was fortunate to have one from a parts car. Might check with a few of the 'part out' guys. I found a link that I had not seen before regarding the wiring on the facelift cars. Another error/omission in the WDS that I noted on my thread:
http://www.bimmerboard.com/forums/posts/823547
Member
Hey isn't everything a work in progress. I was think about buying a used one but taking the whole dash apart to maybe having to do it again is scary. I read and found a seller for a rebuild kit for the brushes but nothing for bearings. So I am a little skeptical about changing the brushes and then the bearings are or go out.
Moderator
Moderator
I was hesitant to put a used one in myself but it was just sitting in my garage... I have removed the dash on my car and the parts car and it's just not that difficult so decided it was worth the risk.
Member
That's comforting to know that it wasn't that hard. I heard it was long and tedious. I don't like to do those kind of jobs. Any good personal pointers on the dash/blower?
Moderator
Moderator
Just follow the DIY on e38.org. Not difficult, just time consuming the first time around.
http://www.bimmerboard.com/forums/posts/45351
Test the replacement after you get it in place BUT be sure to plug the airbag in before you reconnect the battery.
Member
Good to know, again thanks for all the help!
 Posting Permissions


 Reply With Quote


Bookmarks