
 Member
Will this tool work for e34 subframes?
WANTED: 18" BBS RCj's
Member
this sure would of been better then using the torch ... and if i knew about when i started my rear-end project which is turning into a rear end build thread ... god the smell of burning bushings ... and there like a candle they can burn longer then it takes to heat them and knock them out ...
i will try this next time ... ( please dont let it be my car ... lol )
Member
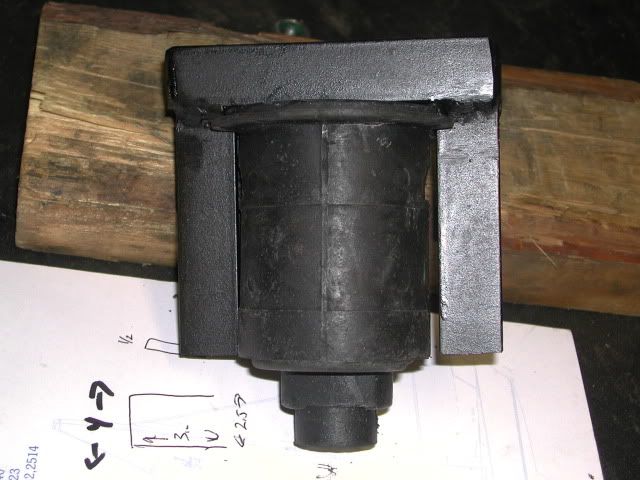
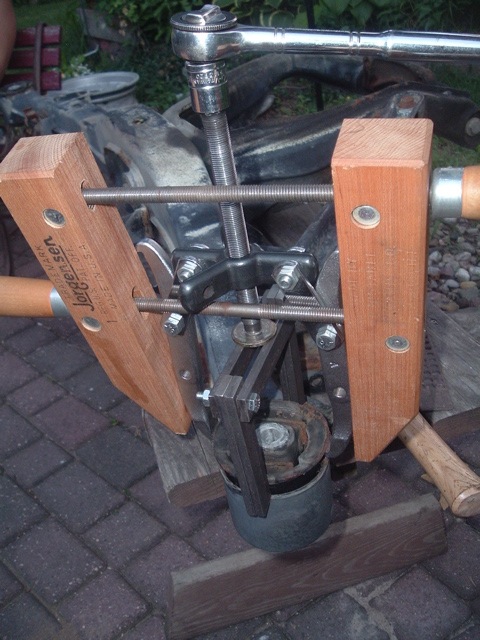
I plan to use this pull-on-the flange method to remove the bushings on my E24 ('86, E28 based). Went to HF today (we have three in San Diego) and got the pitman arm puller (on sale, but $9.99 this year). I also got an 8" three arm puller for $19.95 less 20%. The E24 bushing is a bit bigger than the E30, so the pitman puller is barely big enough to bridge it - and a lot of material needs to be removed! Luckily, I have access to a machine shop at work. After chopping off the inward fingers, I ground the insides of the legs to accommodate the bushing OD, I leaving them full width. The width across the bushing notches is greater than the bushing OD. Rather than cut further material from the puller to fit between the notches, I used a rotary file to widen and deepen the notches on the old bushings in the car. That way, the tool has a larger bearing area on the subframe. I plan to leave the bolts in the body, and use the notched pipe flange/ three arm puller method to install the new bushings.
I have two questions:
1. When pulling the old bushing, how do you get the bushing out far enough initially to fully engage the three puller fingers over the flange?
2. I'll freeze the bushings and heat the subframe, but is there a consensus on the best lubricant? I've heard Fairy Liquid from U.K. owners (or as in a Benny Hill mock advert, "Fairly Liquid") which I gleaned from Benny is dishwashing liquid soap. I've also heard of using KY jelly, or even hairspray. I was thinking of going to a local tire store and getting some of the lube they slop on tire beads when mounting tires. But then I'm thinking the KY might be less likely to dry out. I want to avoid the "halfway in and stuck" syndrome. Suggestions?
Thanks! If this works, I'd be happy to lend the the tools to other E24/ E28 owners.
Member
in the vid it looked like the weight of the car on the jackstand help eek it out that first little bit, he had jackstands under both the chassis and subframe though for safety.
Member
KY is my vote. His or Hers depending on how you see the car...")
Member
Very well done. I will DEFINITELY remember this thread when anyone talks about subframe bushings. You did a GREAT and ingenious job. Thanks for posting.
Jose
1987 M6
Livin the dream!
Member
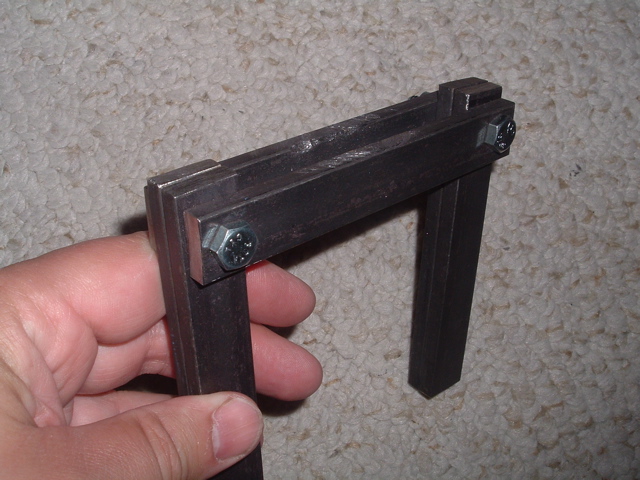
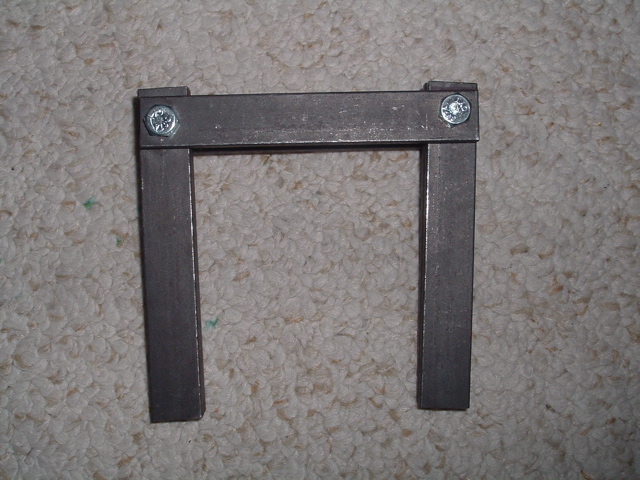
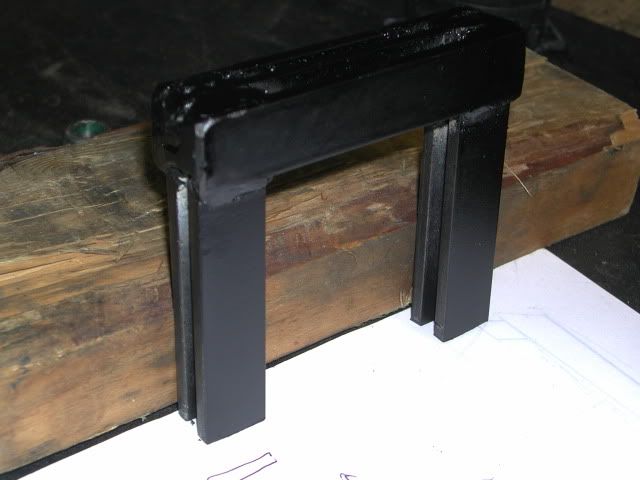
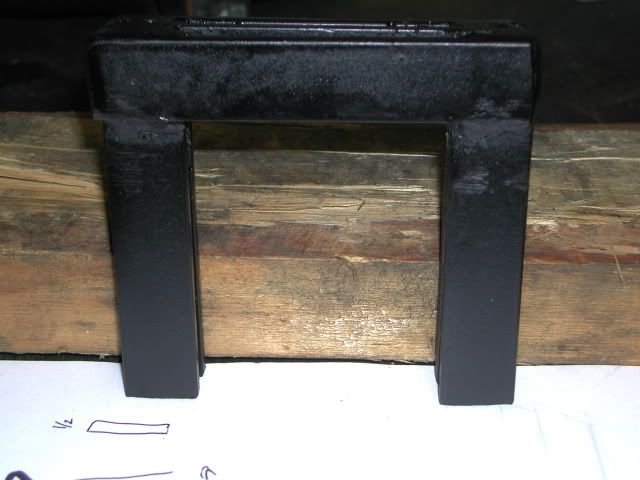
Just wanted to add a note of thanks for this idea; fantastic! After first reading about it I remembered a length of 1/4" x 1/2" steel bar stock I had in the shop from another project. I measured the bushing and subframe socket (e32) then cut two pieces an inch longer than the bushing is wide, then four more pieces about four inches long. Drilled holes at the end of all of them and bolted them together to make a U-shaped "bridge" to take the place of your modded pitman arm puller.
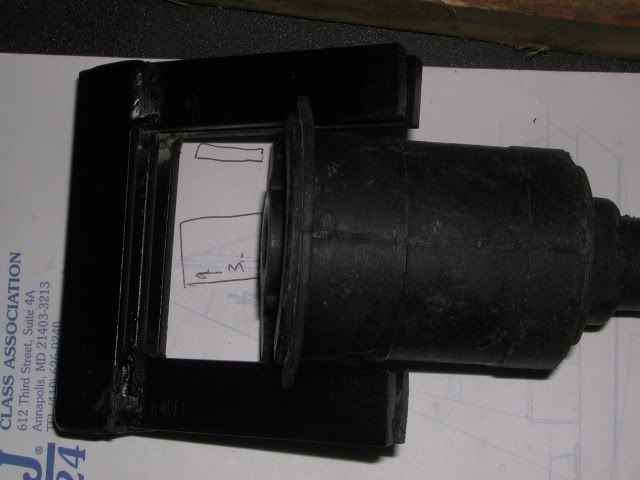
Despite some problems I had with the bridge wanting to shift sideways, I was able to get both bushings out pretty easily. I used a two/three arm puller from the Advance Auto loaner program; I was concerned that the puller wouldn't be able to grip the bushing well enough to get it started, but that was never a problem. I was also concerned that the feet of the bridge would have difficulty staying on the edge of the bushing socket on the subframe, but that was never an issue either. I'm really surprised the official BMW subframe bushing removal tool wasn't designed like this one; it's simple and effective, and the parts seem to have been designed to accommodate a removal tool like this.
The wooden clamp wasn't really necessary to keep the puller on the bushing, but it did work out well in keeping the puller in place the few times I had to remove the bridge and realign it. Welding the corners on the bridge would help keep that from happening, as would having something on the top of the bridge for the point of the puller to rotate against. Living and learning I guess!
Member
what happened to the video? i can't see it
Member
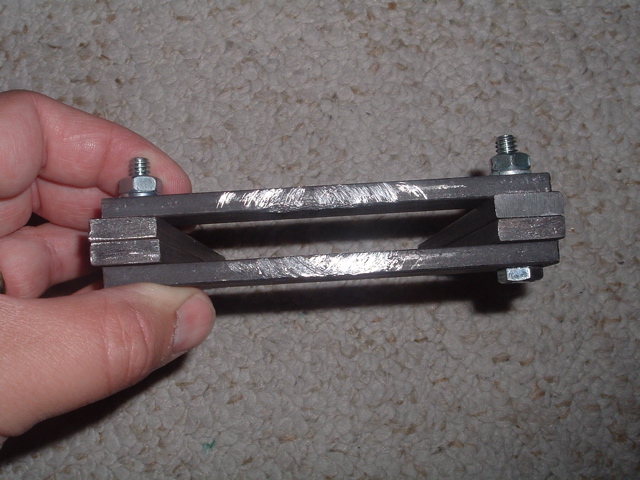
using the tips in this thread, i made a tool for this today. 7 four inch long pieces of 3/16th x3/4 steel bar i had and 10 minutes of welding. will try it out next weekend. all the nuts and bolts under the car are soaking in liquid wrench in anticipation..
Member
Nice job, Marshall! Did you put anything at the top/middle to keep the pin on the puller centered?
Member
good catch. i have two pullers, one has a flat that will sit on the three bars. if it turns out to be too short, i will drill a hole in a little piece of bar and weld that on top to capture the tip of the "normal" puller.
Member
Anyone have this tool already fabricated and would be willing to let a fellow e30 owner borrow it? I can PayPal the cost for shipping and a rental fee if wanted
Member
PM usOriginally Posted by Snou52

E30-LS1 Swap Guide and Kits, email us at e30ls1@gmail.com !!! or check our website e30ls1.wordpress.com
Member
why not buy the 300 dollar tool to save yall the trouble??
Member
Lesse... Car $1200; tool to change subframe bushing, $300; number of times I need to do this job on this car, 1. Nope; the math just don't work (at least not for me.)
Member
shitz i would just buy to collect
Member
Subscribed. Thanks for the documentation on how to build the tool.
Member
This tool worked like a charm! But i didnt see the need to cut off the screw from the pitman arm puller. The 8" 3 jaw puller i bought from harbor freight, along with the puller, had a wide enough point to just sit in the hole for the screw in the puller. Not to mention it has a wedge shape so it doesnt walk at all. Heating the surrounding area helped a lot as well. Took me about an hour to fabricate the bride and pull out both bushings. Thanks again man.
Member
There are enough questions about what to use for lube that I thought Id add this.
Its used for pulling all gauges of cable through conduit so has zero corrosive contents. Its also water soluble so you can refresh it if you want and it does eventually dry out leaving no noticeable residue behind.
Available at the HD and Ideal makes a full line of electrical tools so they should know how to make this.
WARNING...not for use with GF, BF or significant others :-)
87 Zinno Cabrio 98k Barn Find. Build thread http://www.r3vlimited.com/board/showthread.php?t=268987
87 Lachsilber ETA Time Capsule. bought w 125k from 87yo original owner
Cabrio deck lid & hinge struts (w sleeves) now for sale. See the link below for more info
New "made in Europe" seat shocks. PM for details
http://www.bimmerforums.com/forum/sh...ot-Seat-Shocks
Member
yet another successful pull thanks to djb2
I loved this... took me 20 minutes to do both after tool mods
Steve
Member
bought my bushing and pitman over a year ago and havnt done the swap only becuase of other priority on the car. but hope I can get to it this summer. Vote for STICKY!
Member
This is great, exactly what I need right now.
I'm installing new poly trailing arm bushings and rear subframe bushings and was hoping to confirm a couple of things:
1. Does the use of this tool allow me to change the subframe bushings without removing the subframe and the rear differential and muffler? I'd really like to avoid removing the rear diff and muffler if possible.
2. Will I be able to get the poly subframe bushings in if I do this without dropping the diff and subframe.
3. Will I be able to remove the trailing arms without dropping the diff and muffler.
Thanks!
2000 M5
2012 X5 35d
Member
applecran:
1. yes
2. yes
3. I think so. I just installed a refurbished subframe & trailing arms on my e32; if you leave the subframe in place there's no reason to remove the diff. When I was doing the work on the rear end the exhaust was still in place, but I had unhooked the hangers & had it drooping a bit to give more room to reinstall things. That made a big difference in getting the TAs back in after getting everything else in place.
You don't mention what car you're working on, but guessing from your sig line it's an e30, I'm fairly sure it's the same with your car.
Member
Awesome thanks.
It is for my e30. This should save me a bunch of time for sure.
2000 M5
2012 X5 35d
Member
Should be a sticky thread for e30; z3 and e36 hatchback!
I have done a "pitman clone" and extract these bushing on e36 hatchback.
20 minutes of hot air gun have been necessary; otherwise; the lips of the old bushings started to bend.
The new ones goes as "dad goes into mum" (french slang translation) with a jack and a liberal amount of dish soap
2 hours job after the tool was made. I cannot imagine the time saved thanks to this thread.
Many many thanks to Djb2 !
Last edited by ritchy31; 02-05-2013 at 07:24 PM.
 Posting Permissions


 Reply With Quote


Bookmarks