
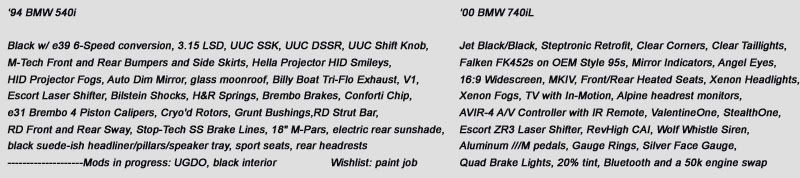
 Member
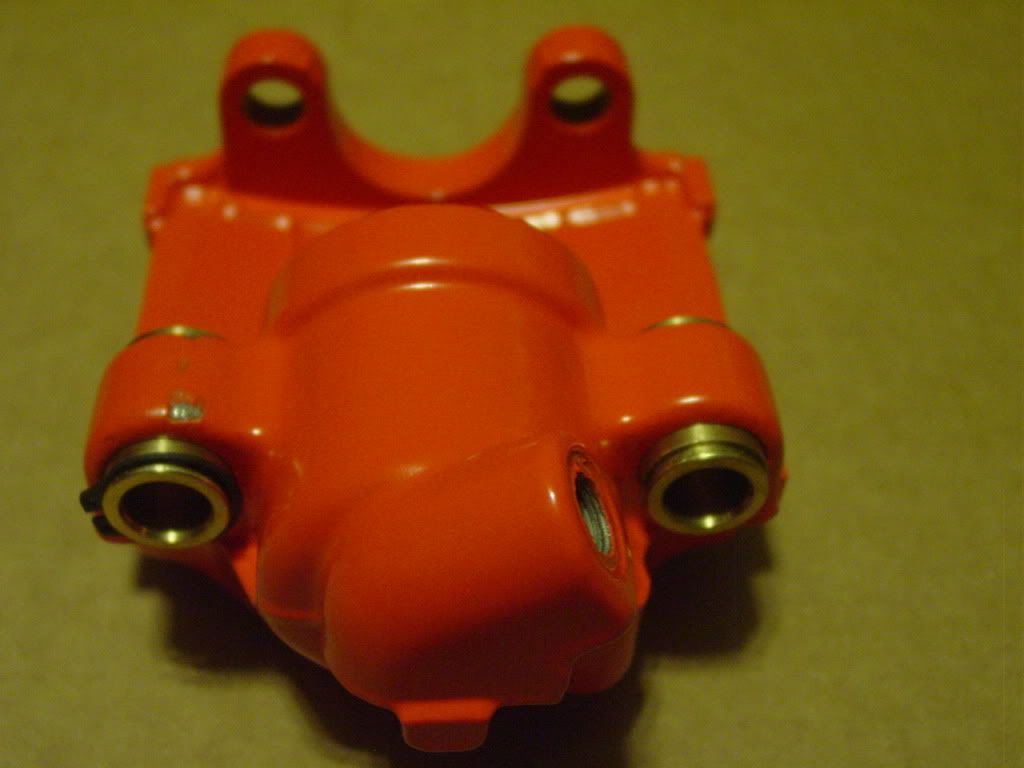
E34 540i Caliper Rebuild DIY
*******THE REBUILD PROCESS IS EXACTLY THE SAME FOR THE E34 FRONT CALIPER!! THE ONLY DIFFERENCE IS THE SIZE OF THE CALIPER. THIS DIY CAN BE USED FOR BOTH FRONT AND REAR CALIPER REBUILD. THANKS.*******
To start off this DIY, I must say that I recommend having some previous experience working on cars. While this is not difficult to do, a novice mechanic may struggle with some aspects of this rebuild. If you think you want to give it a shot however, its entirely up to you. This is a straight forward DIY with lots of pics and info. So best of luck to all of you.
I rebuilt my brakes completely, only reusing the base parts such as the caliper, piston, sliding bracket and rattle clip. There is no point to replace these parts unless your current ones are damaged. Everything else was replaced. Also, this is a good DIY for people who only want to upgrade to brass pin guides. If you also want to change your brake lines, now is a good time since the caliper and rotor will be off.
This DIY does not include the replacement of Parking Brake components. That will be in another DIY.
**********************DISCLAIMER****************** *******
I am not responsible for anything that you do to your car. While this is a very straight forward and detailed DIY, I am not to be held responsible for any mistakes that one could make. Work on your car at your own risk.
************************************************** ***********
This DIY may be too detailed for some members. The reason why I made it so detailed is because there are some members here who are just learning to work on cars and I wanted to eliminate any and all guess work.
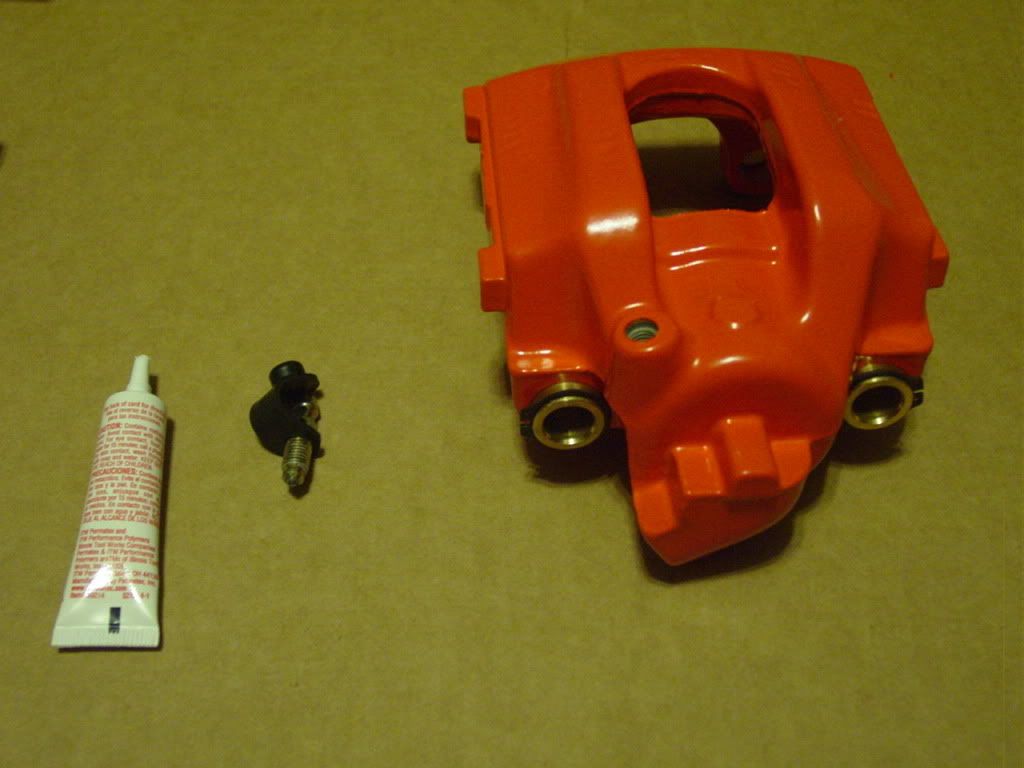
List of parts I replaced with part numbers(for e34 95 540i):
Bleeder Valves: 2 total (1 for RR and 1 for RL calipers) 34111153197 BavAuto
Pads: 1 set for rear (any brand you prefer).
Caliper Rebuild Kit: 2 total (1 for RR and 1 for RL calipers) - 34-21-1-158-578-M4 -Pelican
Caliper Bushings Kit: 1 total (1 kit upgrades both rear calipers, optional) CBUK BavAuto
Pad Wear Sensor: 1 total (installs on the RR caliper) 34351180432 BavAuto
SS Brake Lines Kit: 1 total (optional) BHK E36/28/34T BavAuto
Tools Required:
Jack
Jack Stand
15mm Socket
7mm Deep Socket
3/8 Ratchet
11mm Wrench (Flare wrench)- Optional (only required if youre doing the brake lines as well)
14mm Wrench (Flare wrench) - Optional (only required if youre doing the brake lines as well)
Air Compressor w/ Needle Nozzle- (the one which blows air if you squeeze the trigger)
Piece Of Wood
Anti Seize Compound Optional but recommended (only required if youre upgrading the bushings)
Synthetic Grease/ Regular Grease
Wire Brushes Optional (only required if you want to clean the outside of calipers)
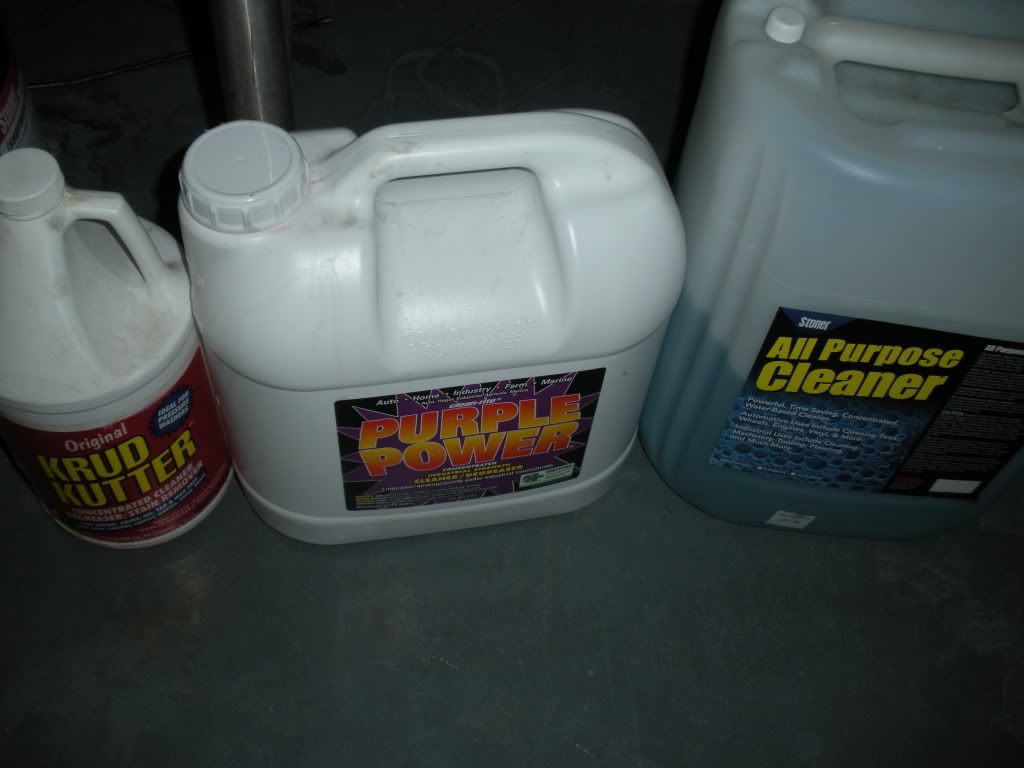
Degreaser - Optional (only required if you want to clean the outside of calipers)
Rubber Gloves Optional but very recommended.
Pan of some sort (to catch the brake fluid)
7mm Allen Socket or Key Optional (only required if youre upgrading the bushings; I highly recommend socket over key)
Tire Iron
Flat Head Screwdriver
Brake Tool
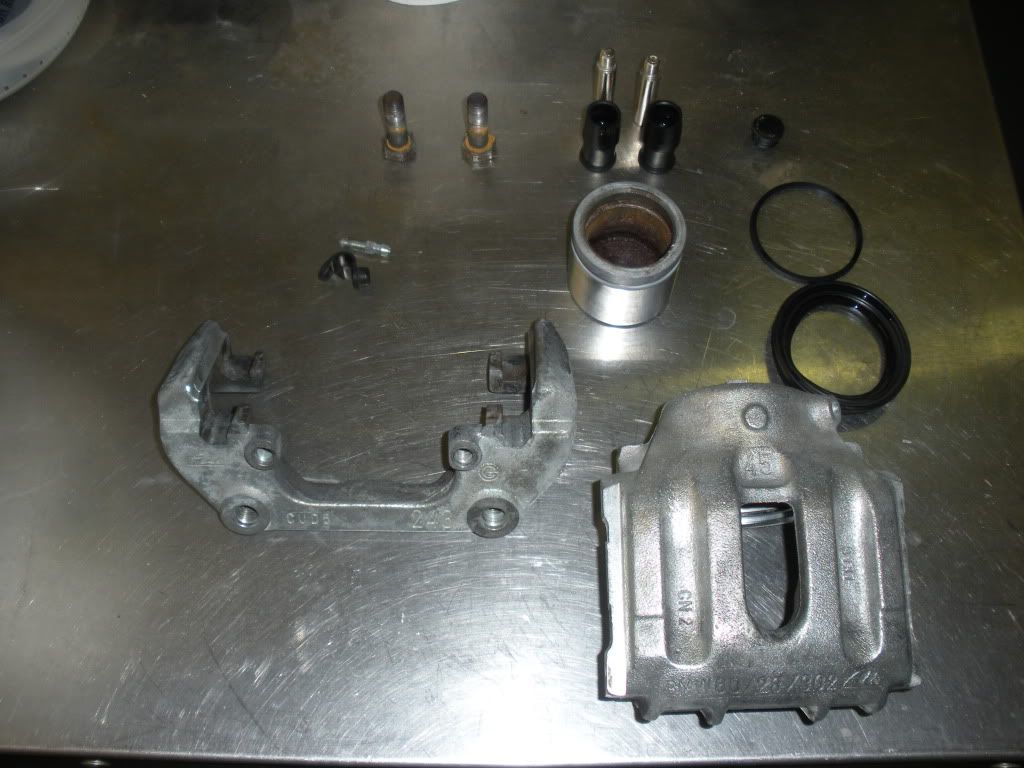
Step 1:
-Place the car in gear and pull up the hand brake.
-Break the lug nuts lose on the wheels.
-Using a jack, safely raise up the rear of the car.
-Once the car is raised up, place the jack stand in secure locations and lower the car onto it. Feel free to keep the jack in place for extra support or remove it if you need more room to work.
Step 2:
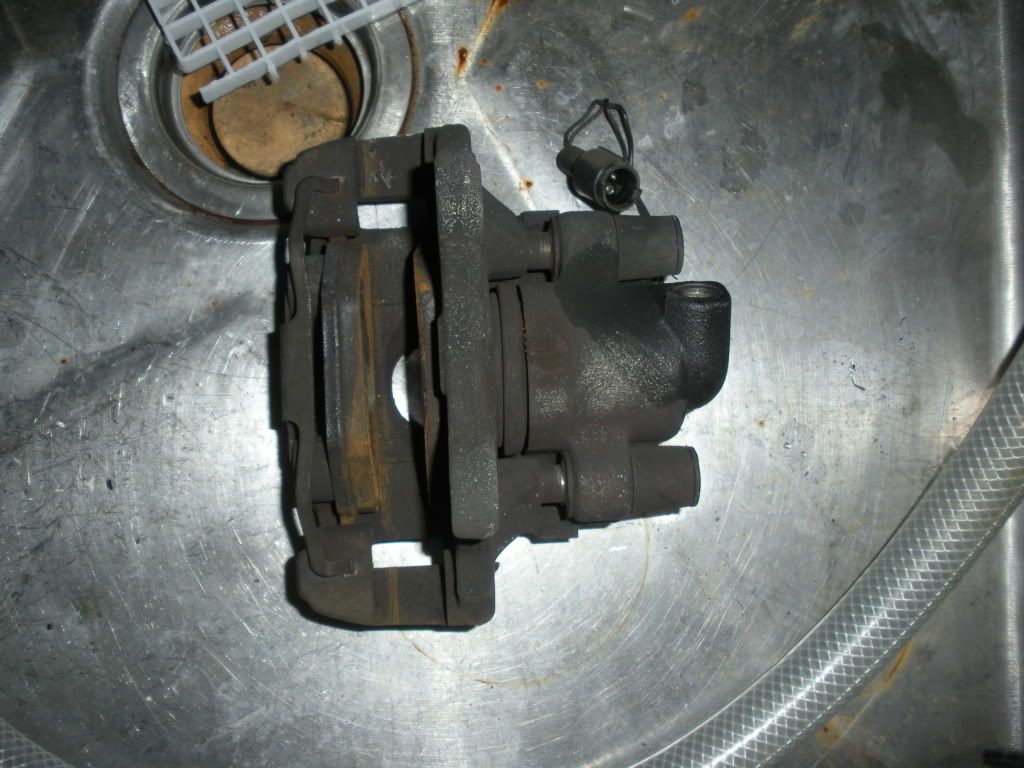
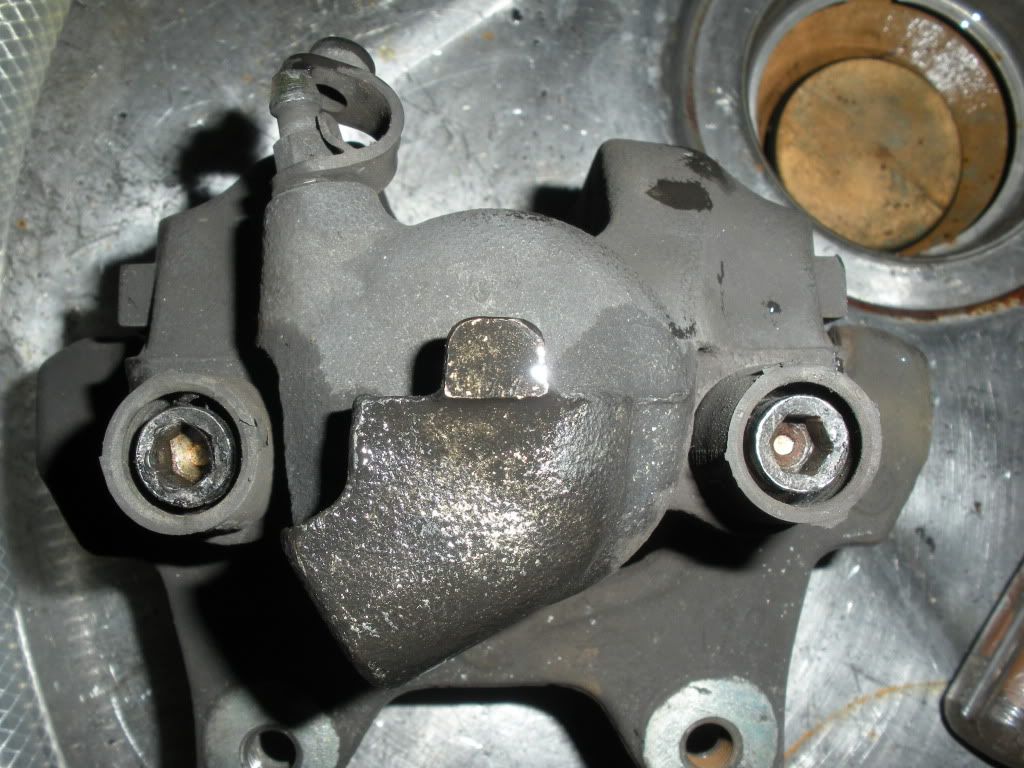
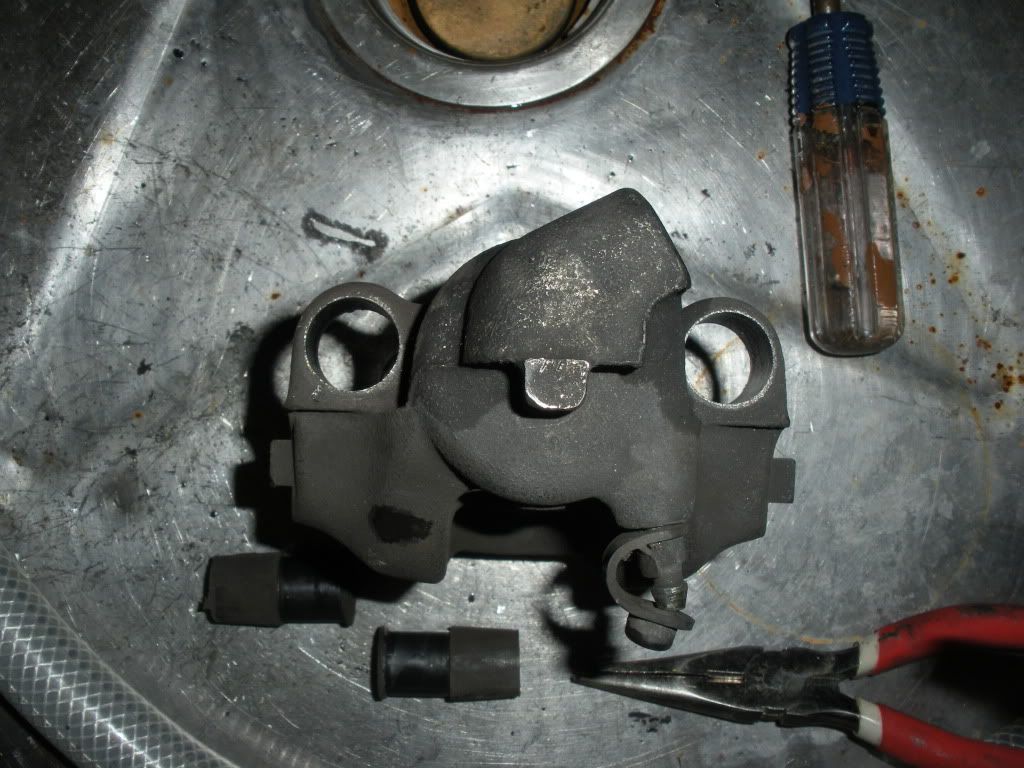
-Remove the lug nuts and take off the wheel. You will now be facing the rotor with the caliper installed.
***Some members say that it is easier to remove the guide pins with a 7mm allen socket while the caliper is still attached but that is not the route I went. Feel free to go your own route***
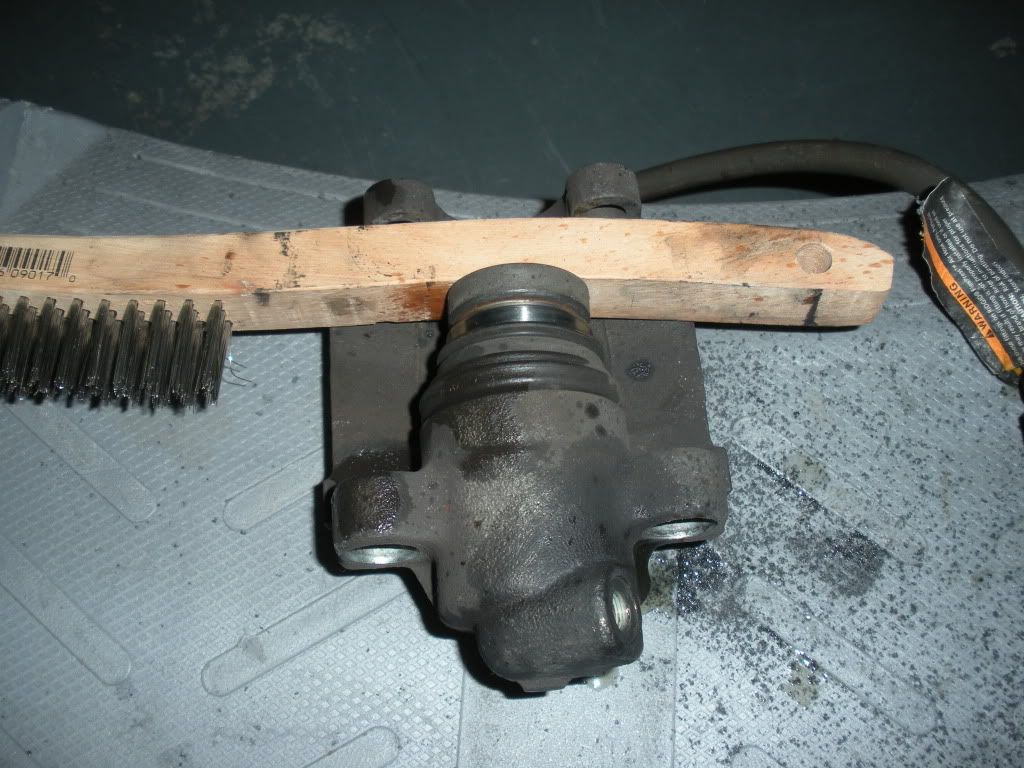
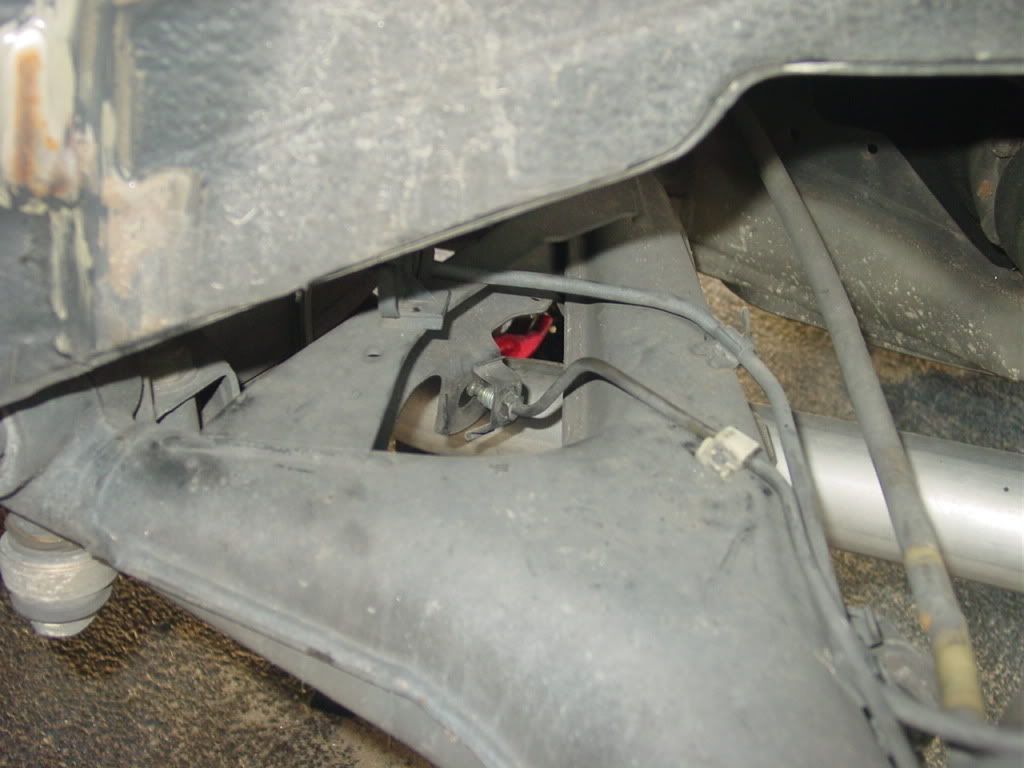
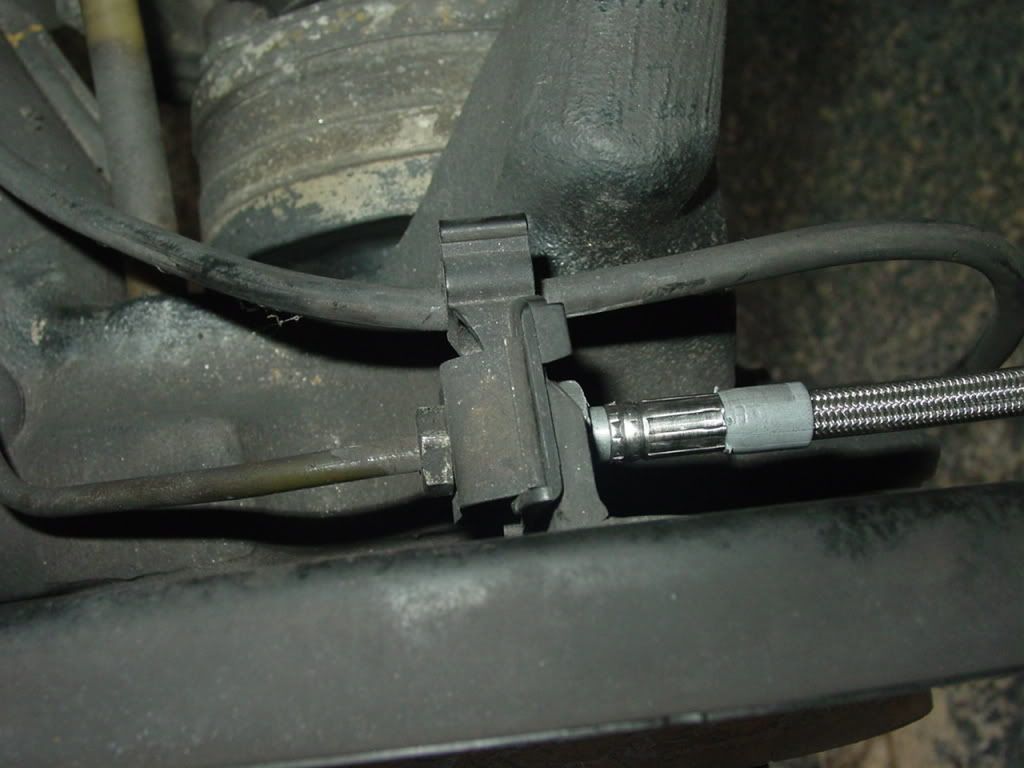
-Take the 15mm socket and ratchet. There are two bolts holding the caliper from inside of the car.
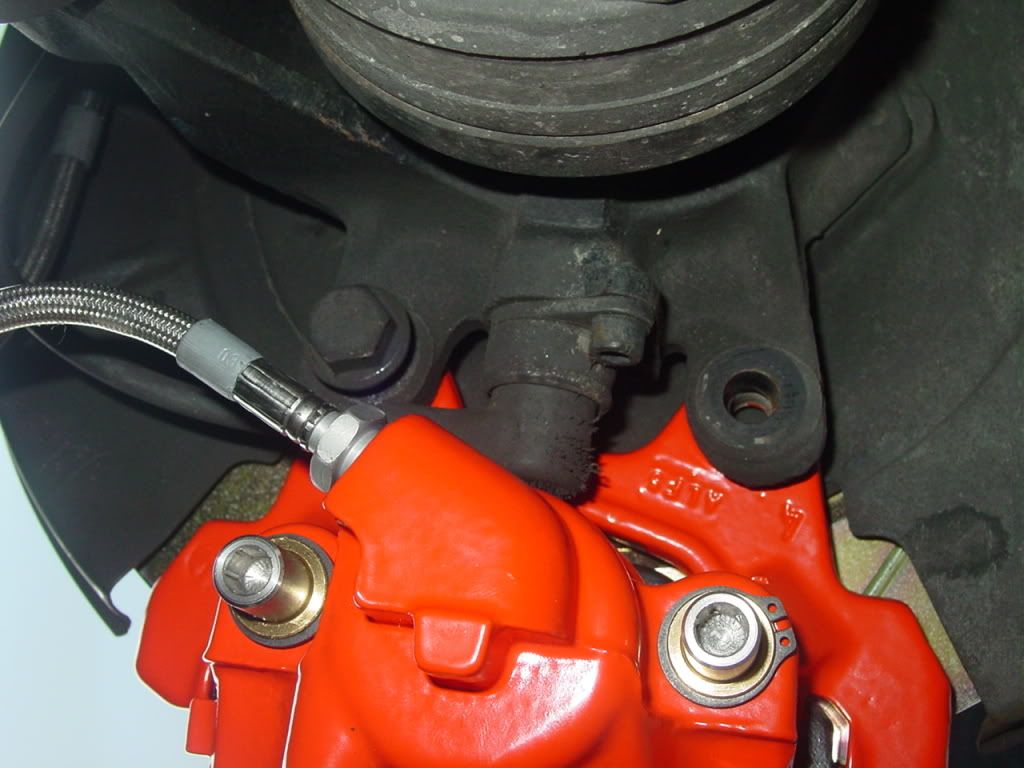
-Take off the bolts (2) which are holding the caliper and pull the caliper off the rotor.
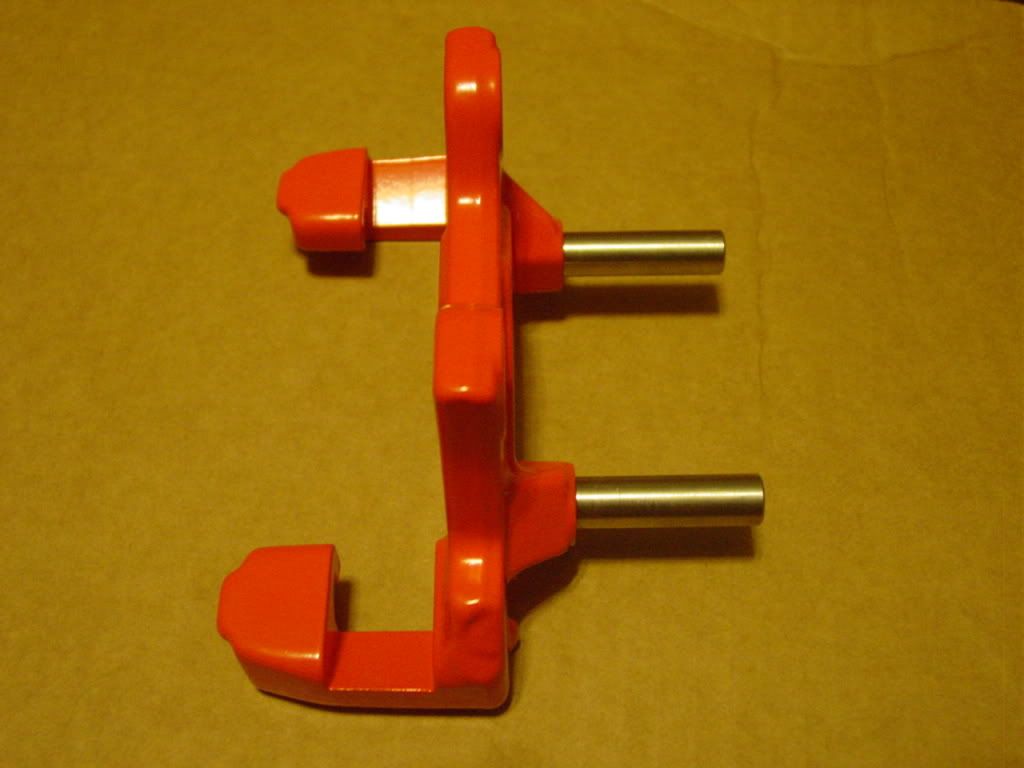
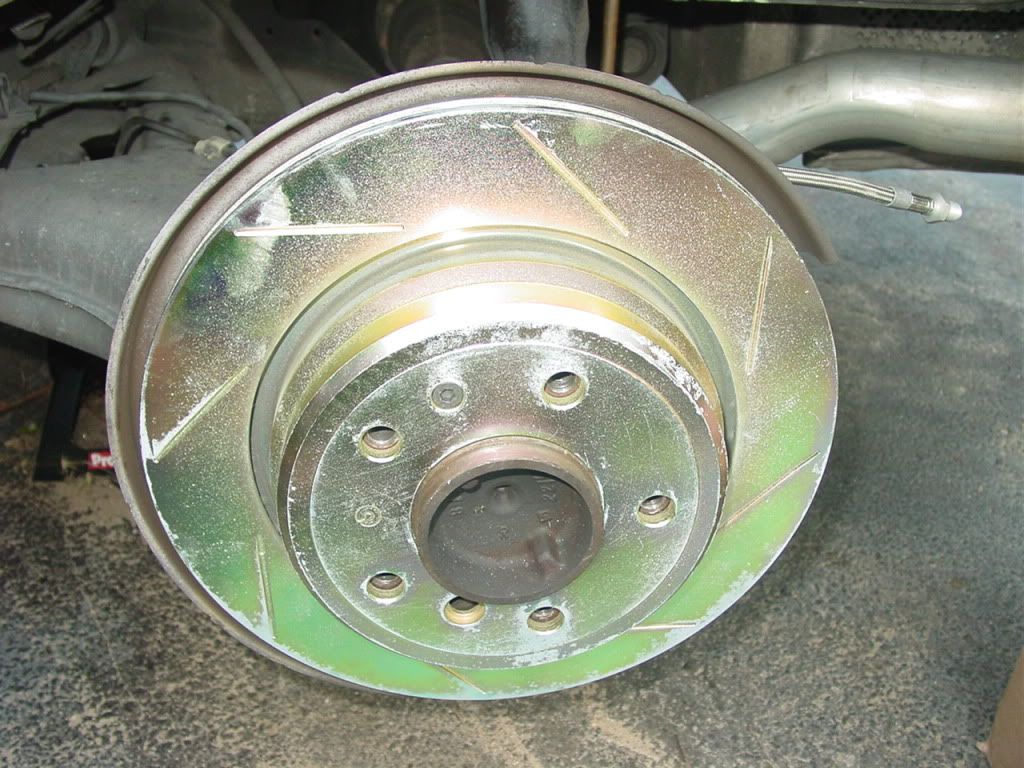
In this picture you can see the location of the two bolts:
Step 3:
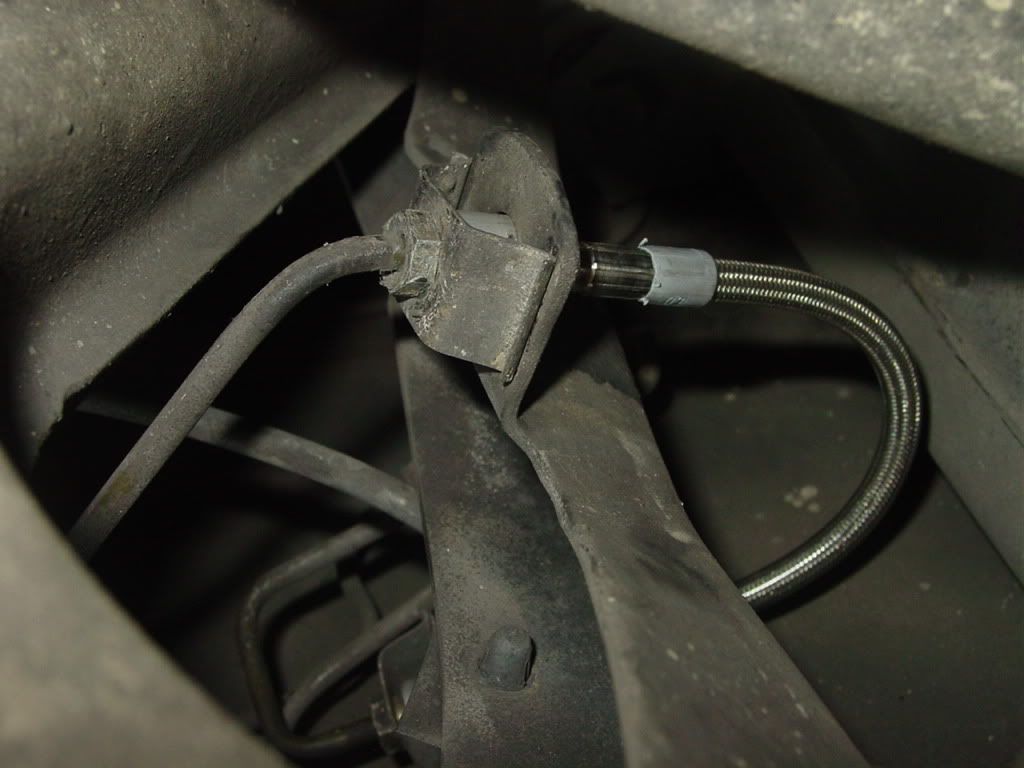
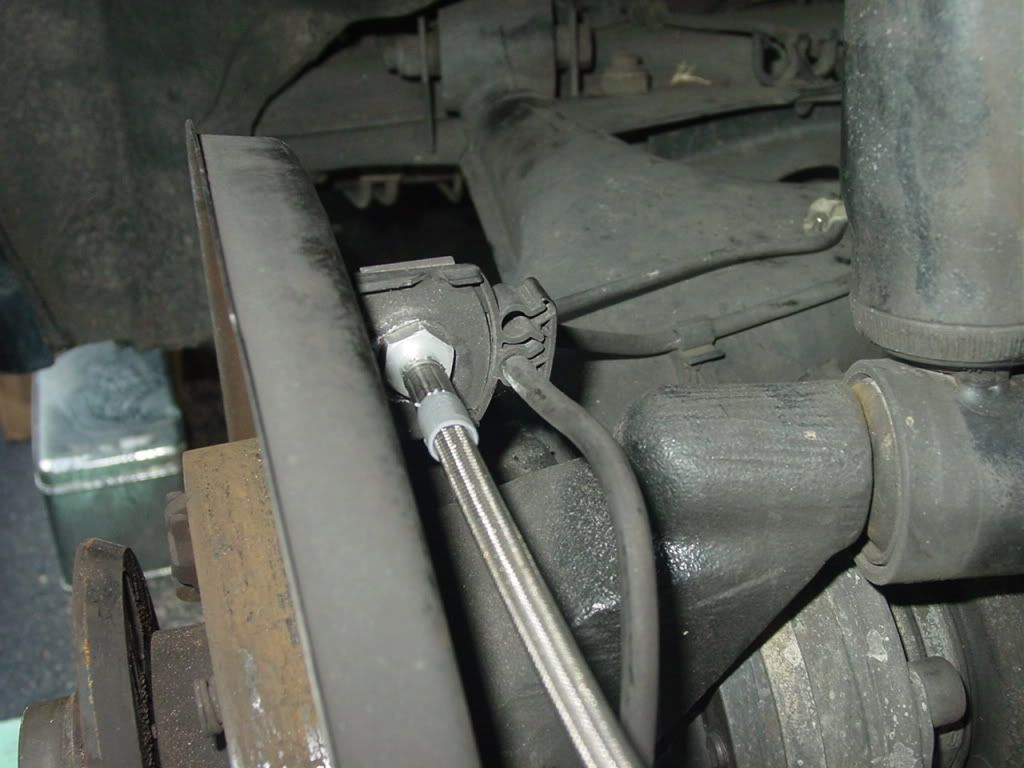
-While holding the caliper in your hand, take a 14mm wrench and undo the brake line which connects to the caliper.
-You will have to keep turning the caliper to the left until the brake lines male end completely comes out of the calipers female hole J
Step 4:
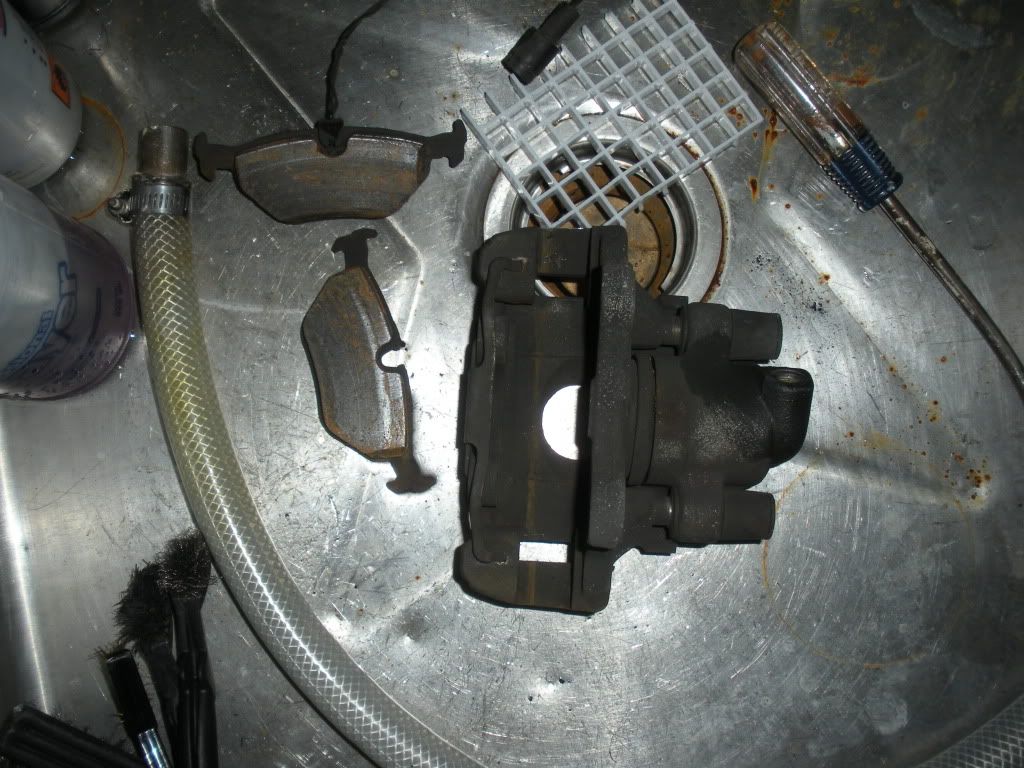
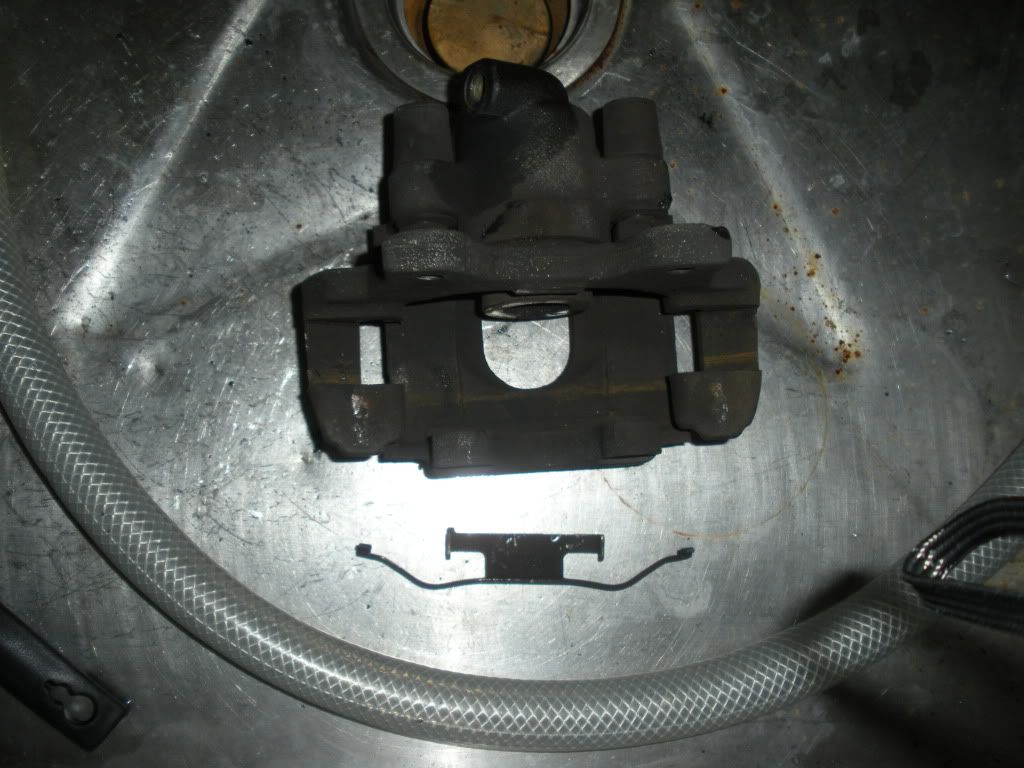
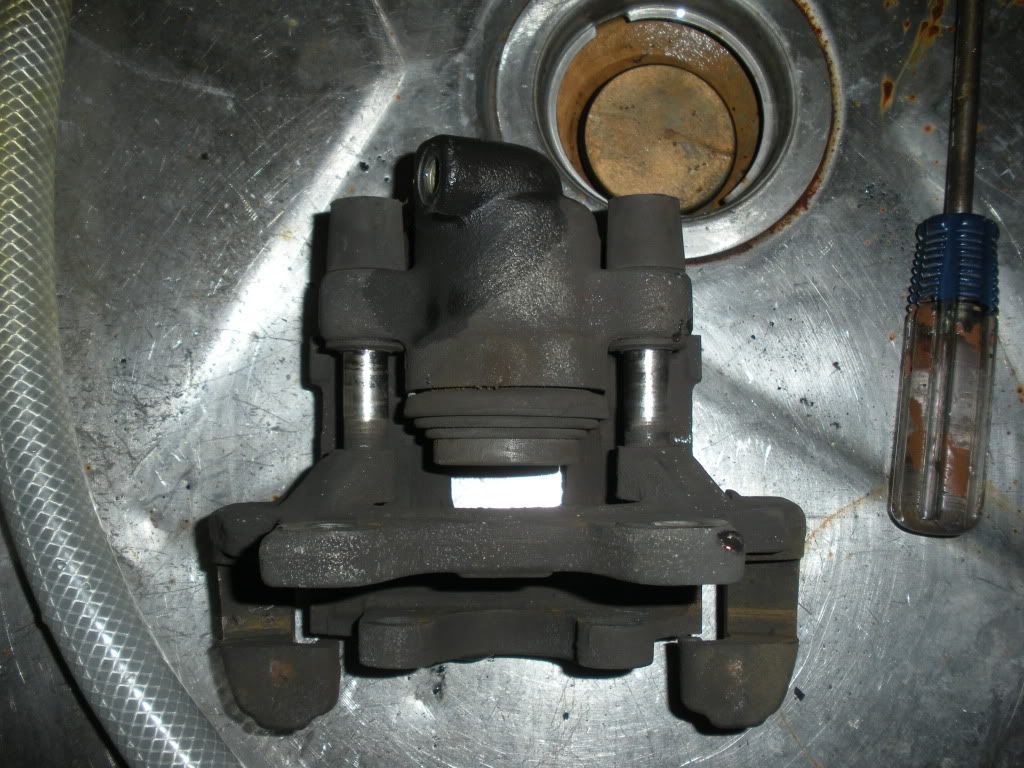
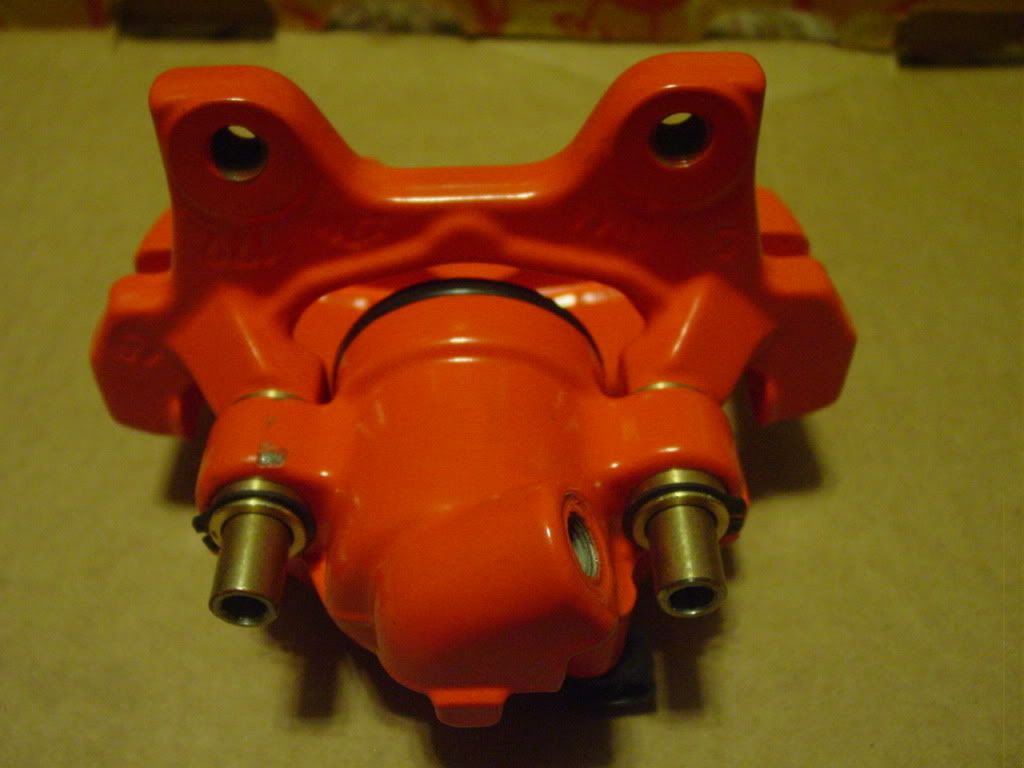
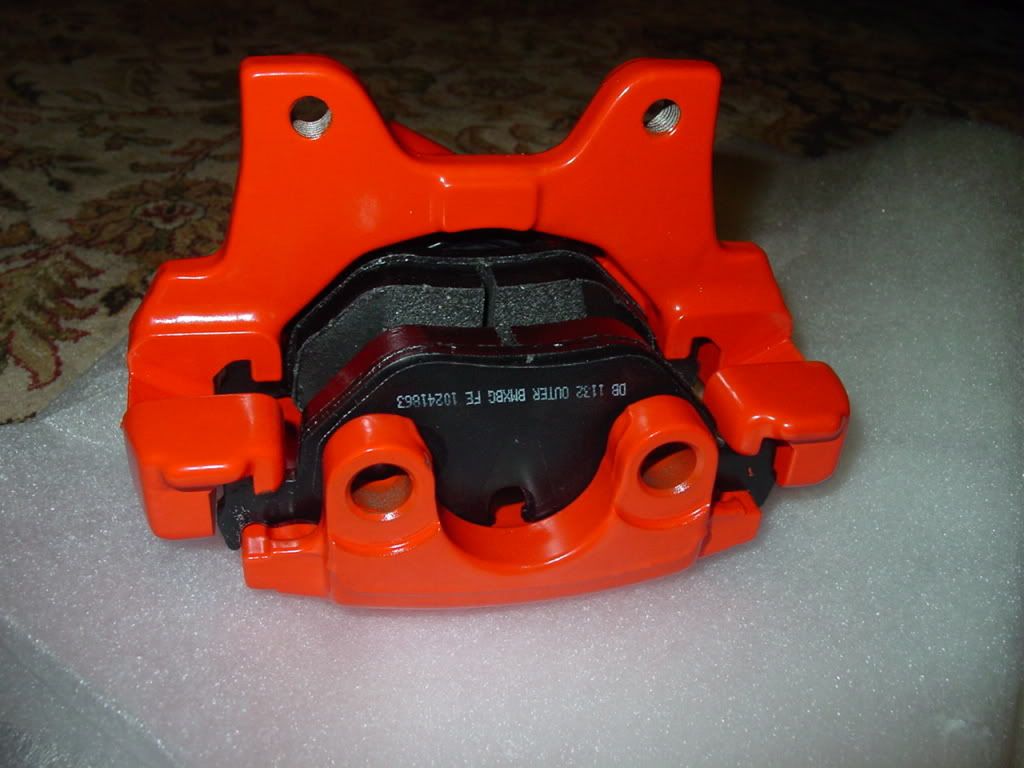
-Now you have the caliper detached from the car and you can begin rebuilding it.
-First, take off the brake pads:
-Then the rattle clip:
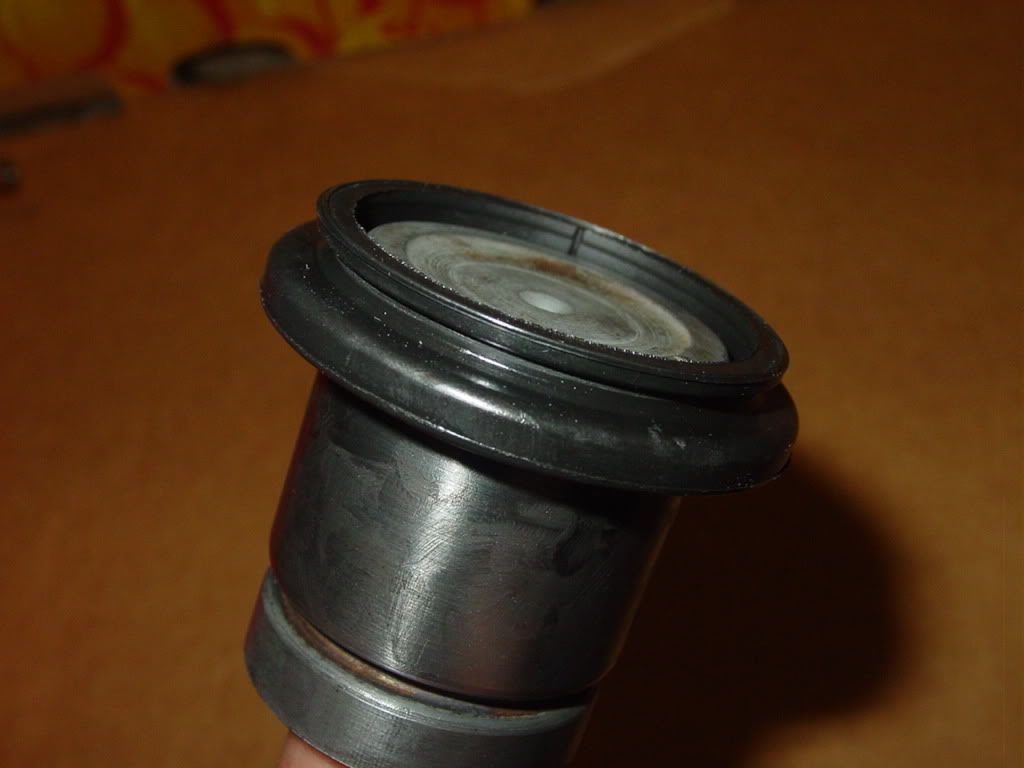
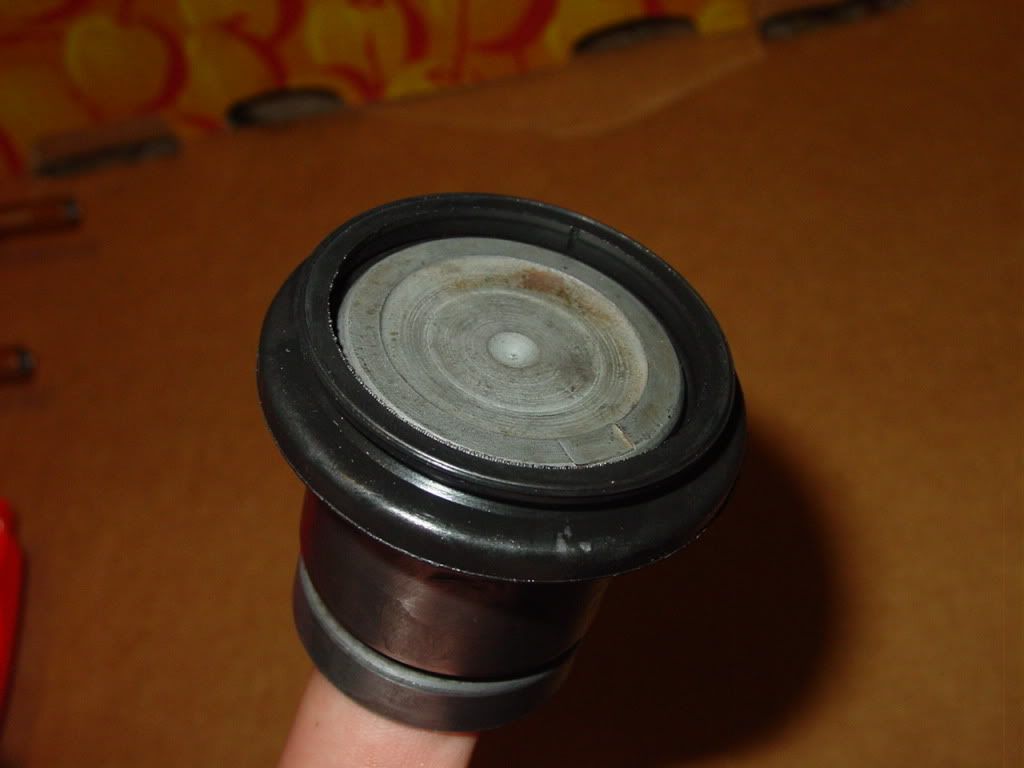
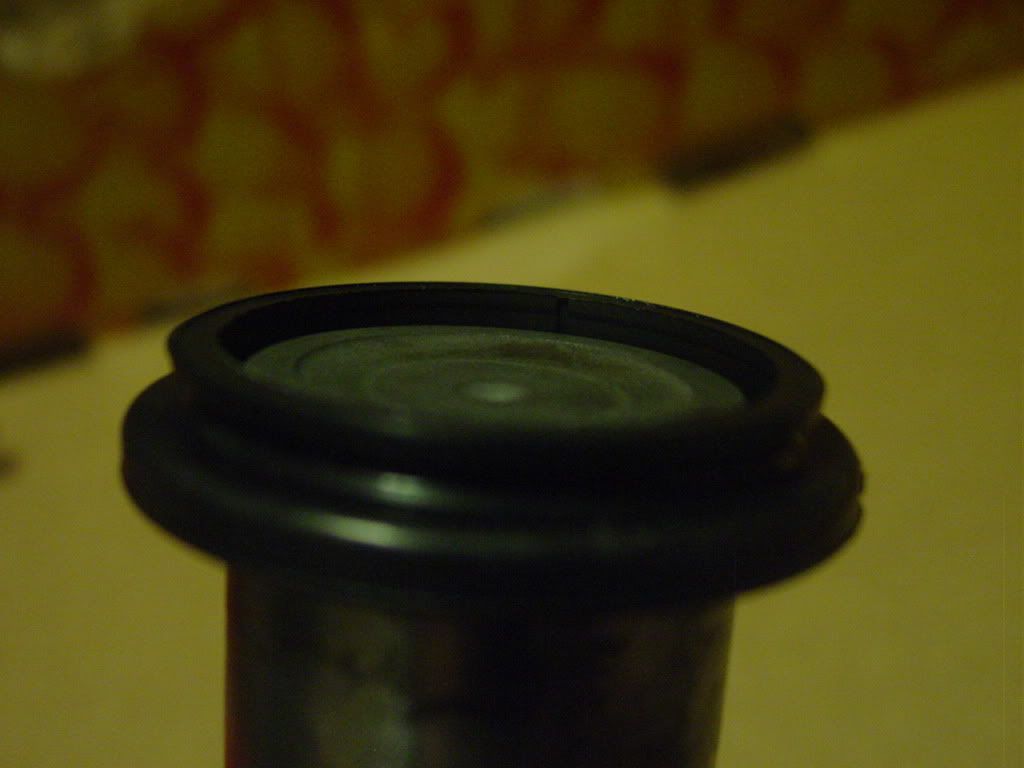
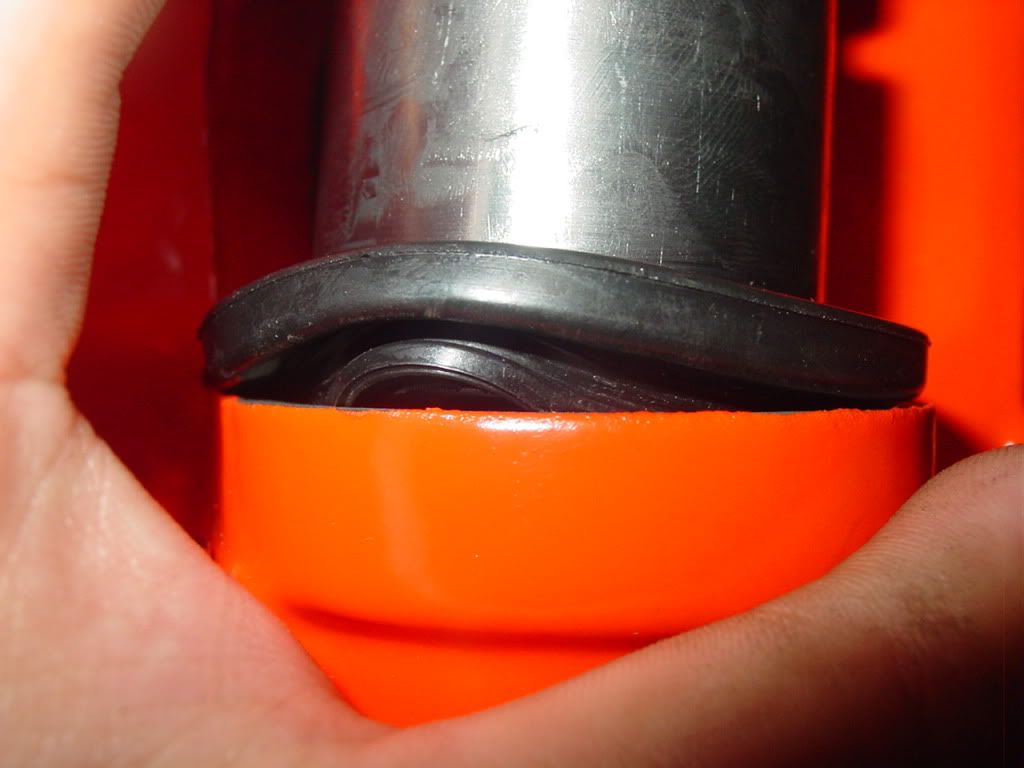
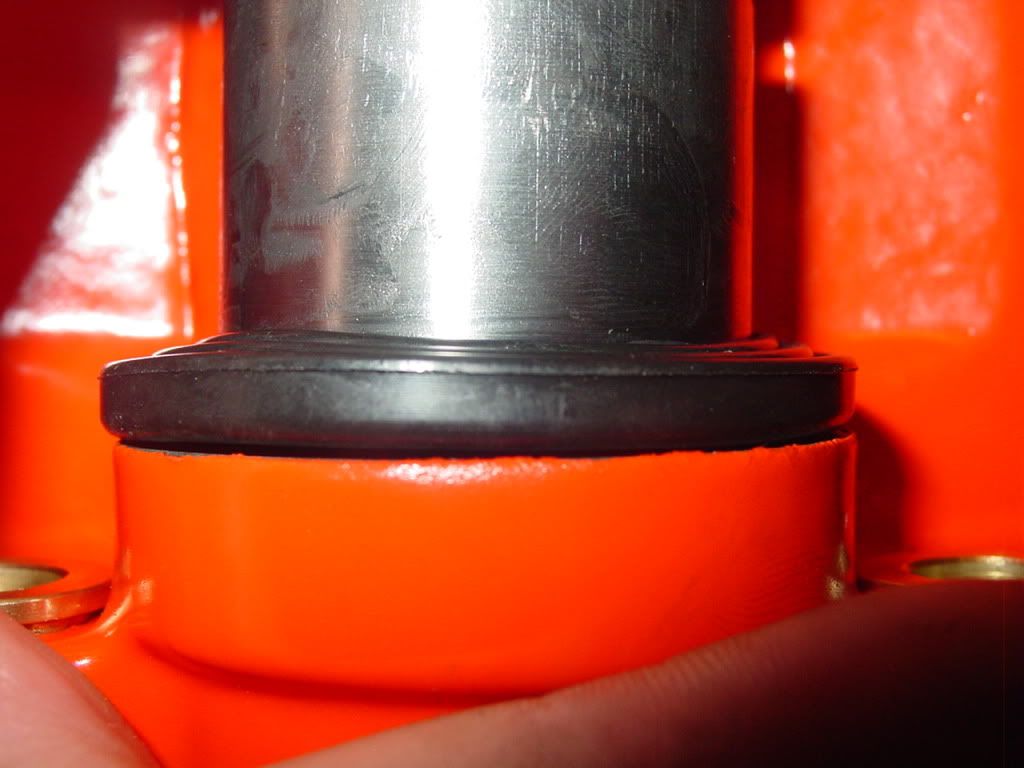
Step 5:
-Using a little knife or screwdriver, pry the plastic cap off the rubber guide pin housings:
-Second one:
Now you will expose the guide pins.
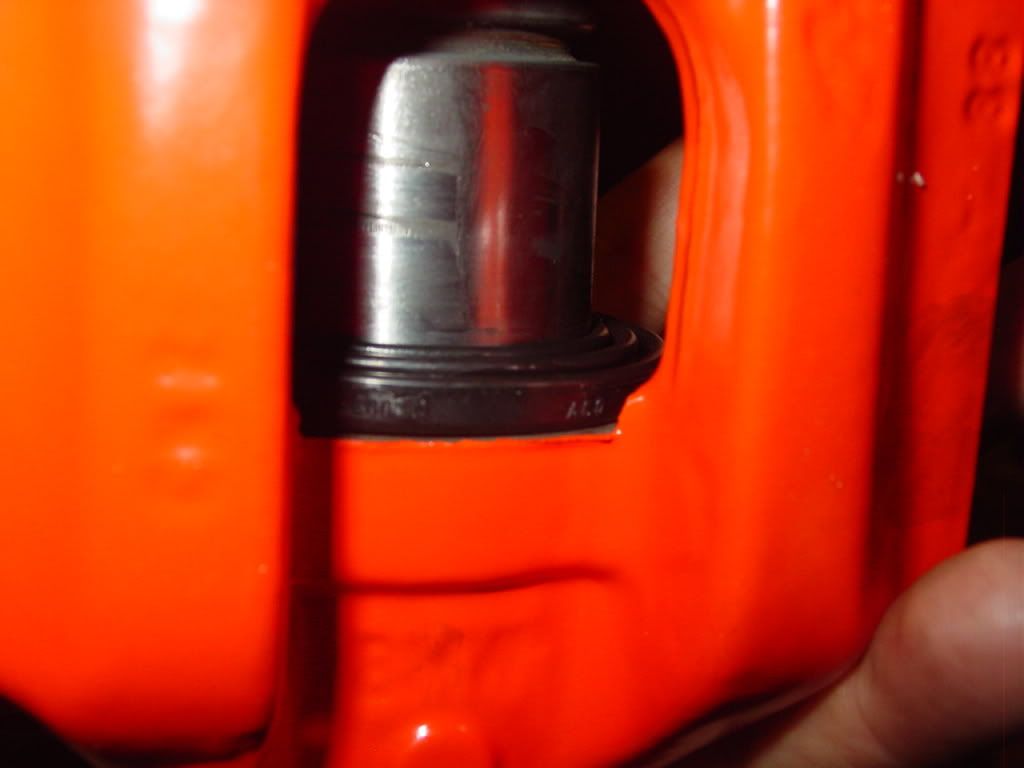
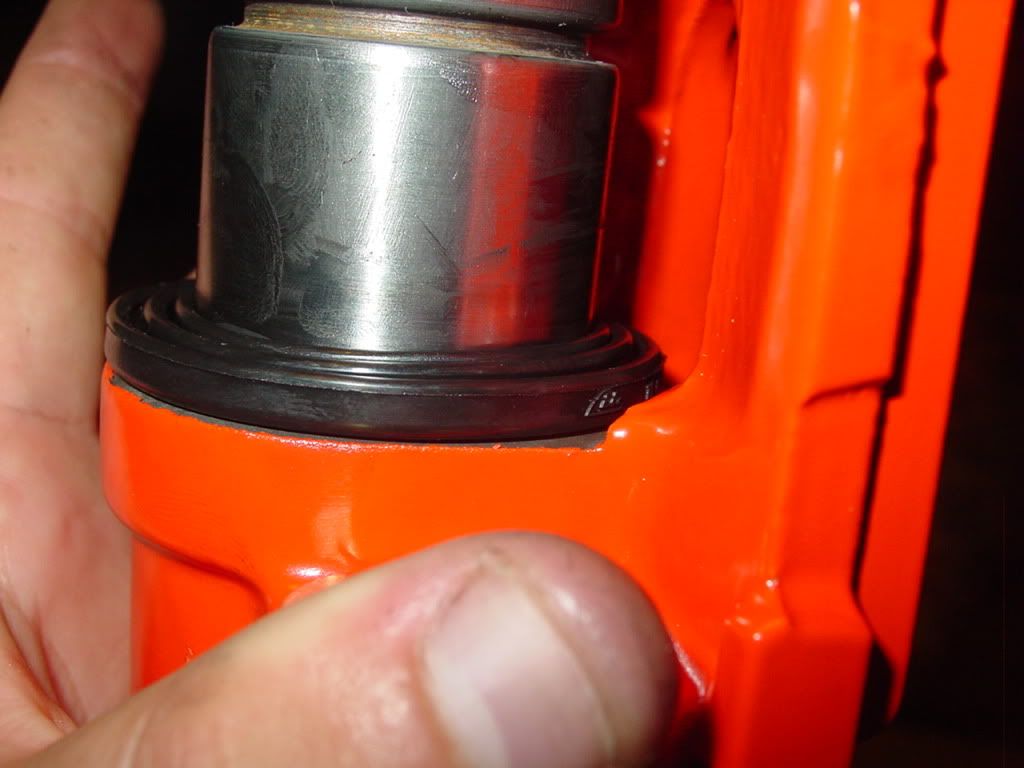
Step 6:
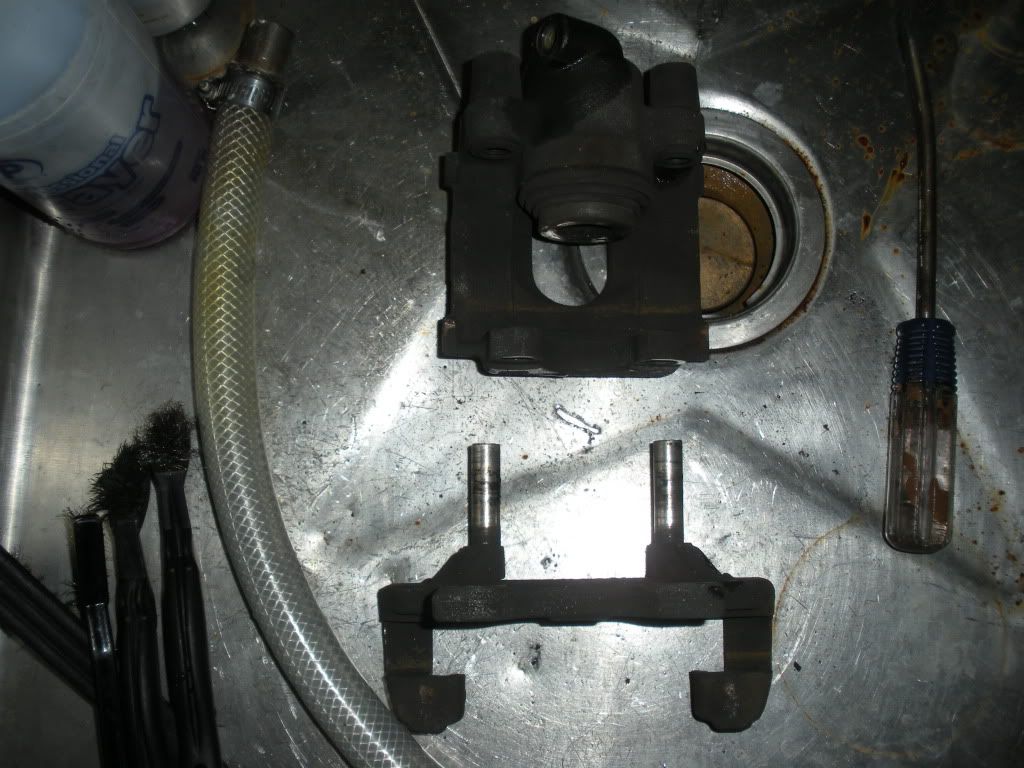
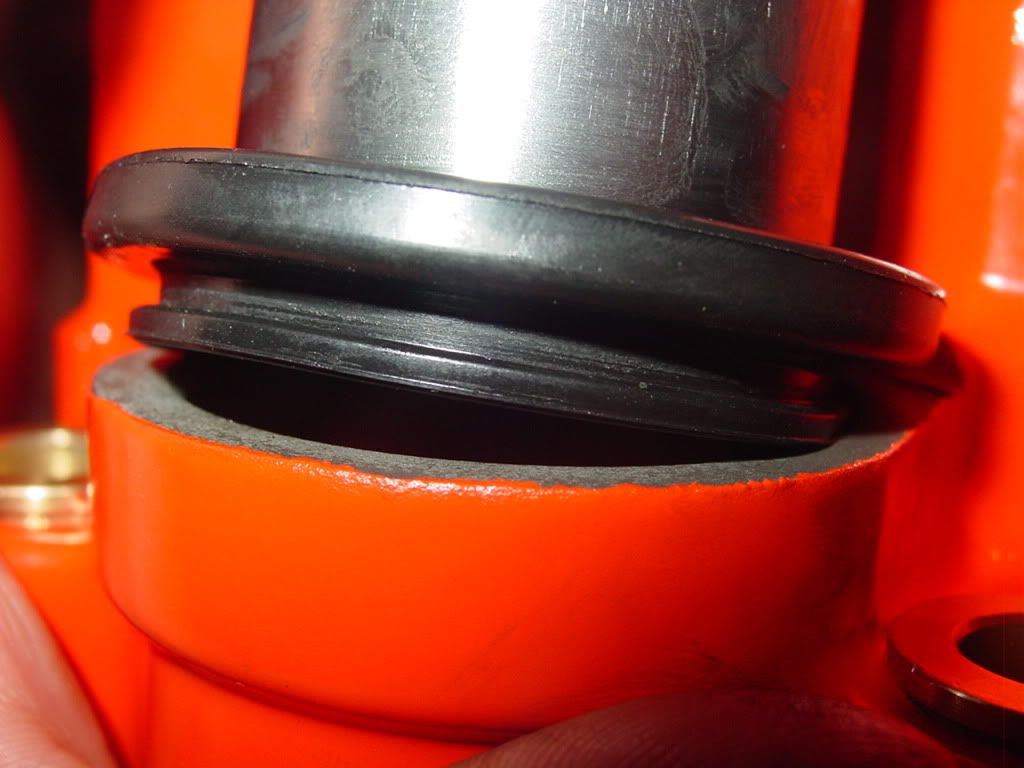
-Slide the guide pins out of the rubber housings while the pins are attached to the bracket:
-It will look like this:
-Now using pliers, Carefully pull the rubber guide pin housings:
Step 7:
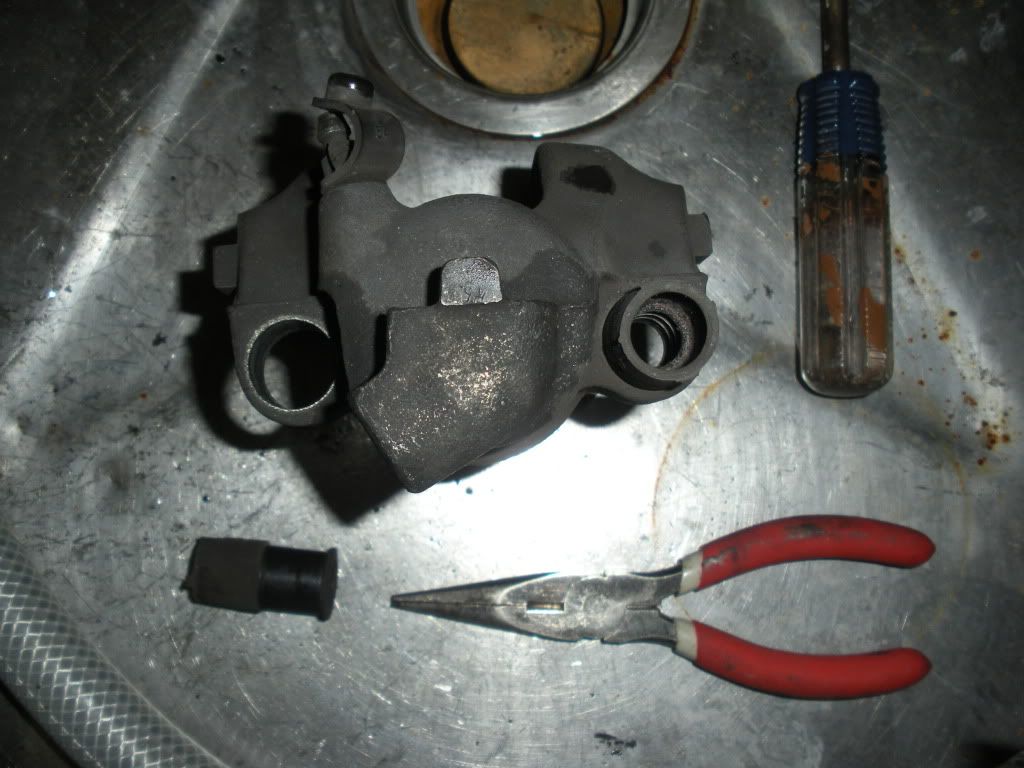
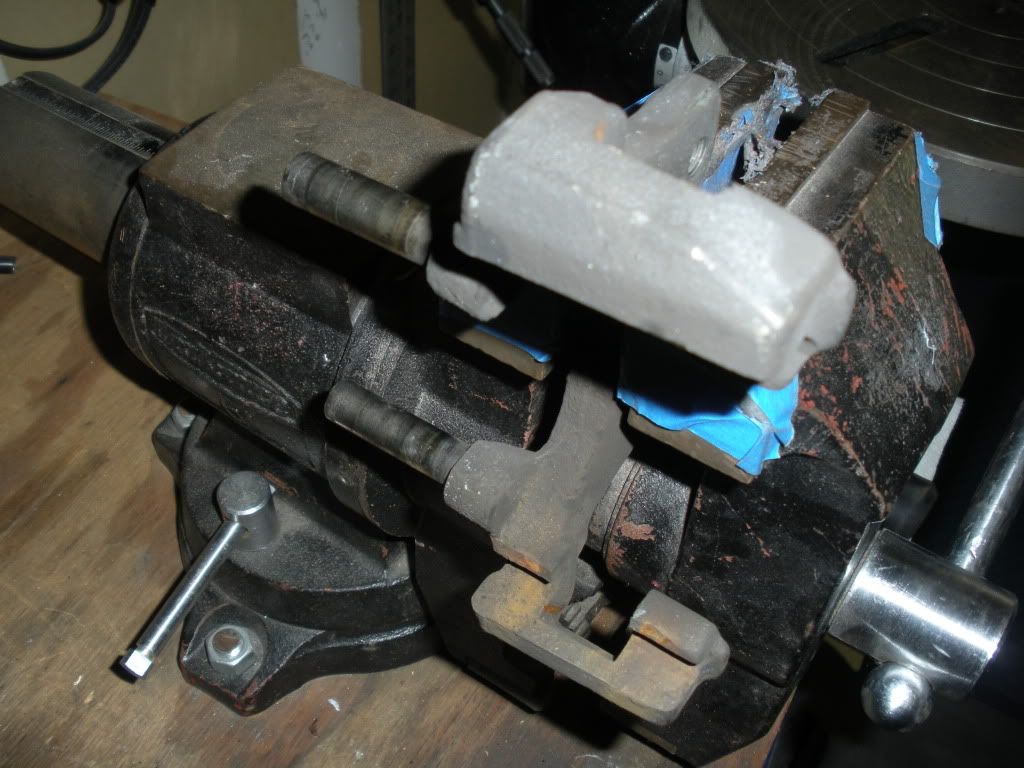
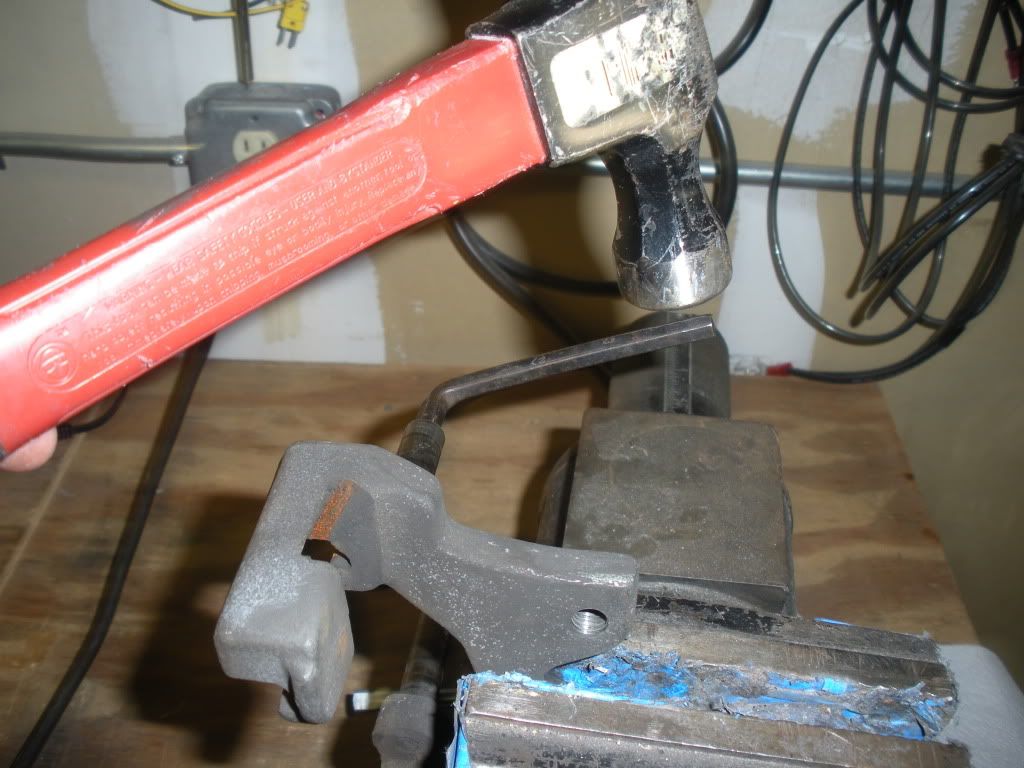
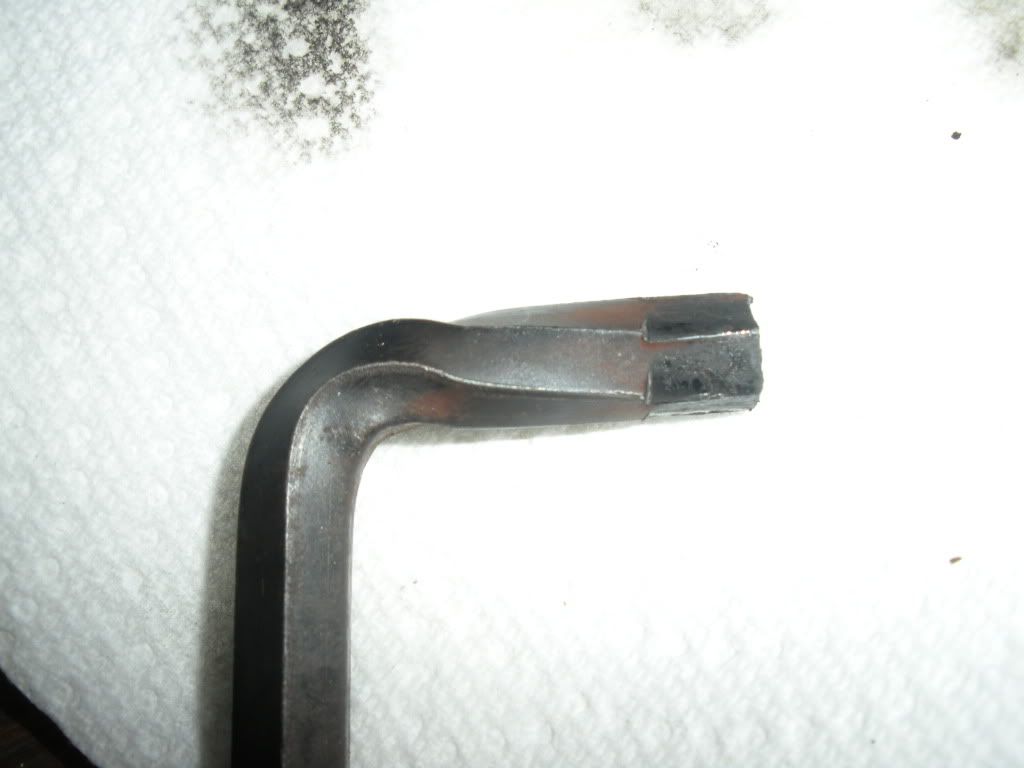
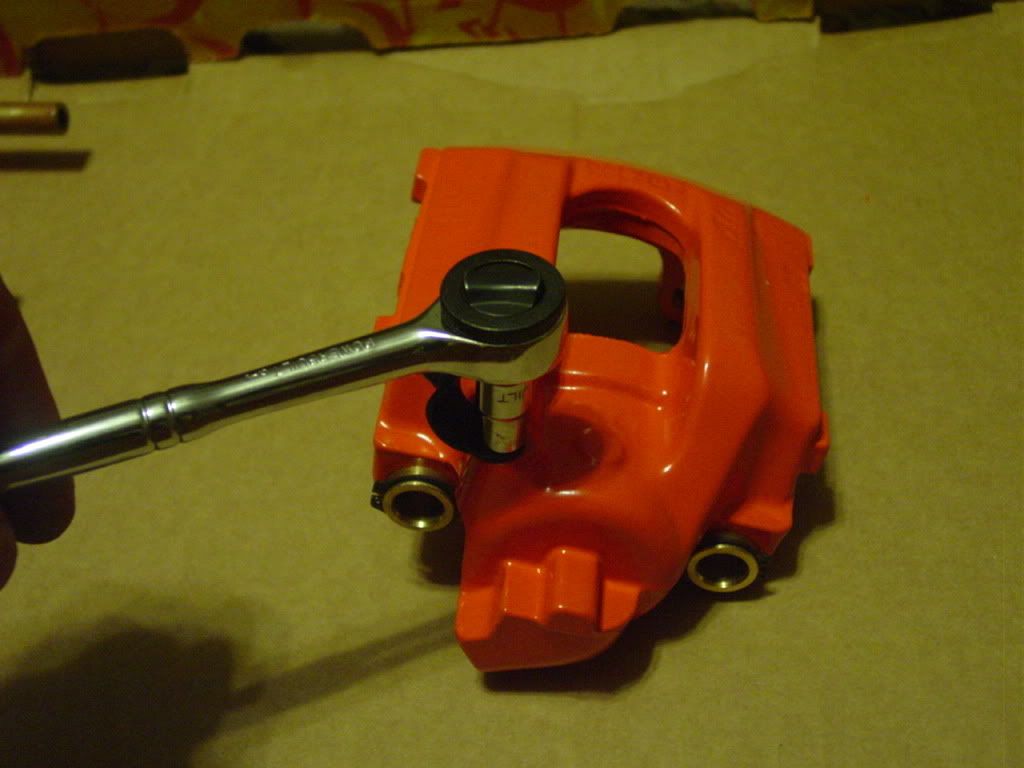
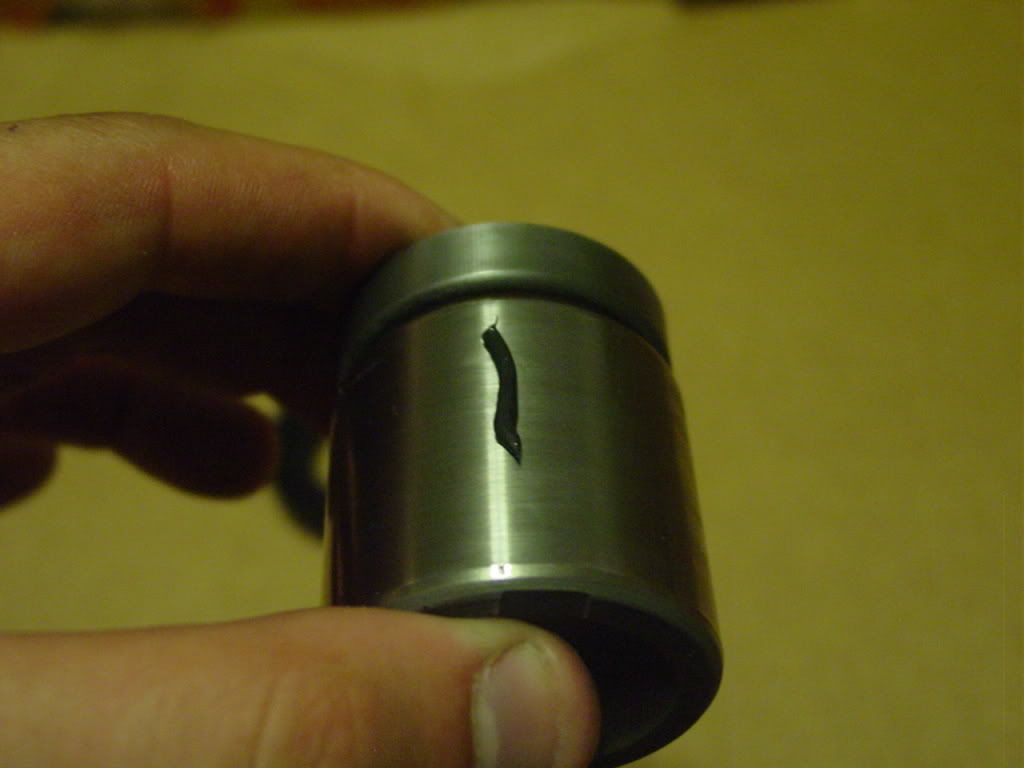
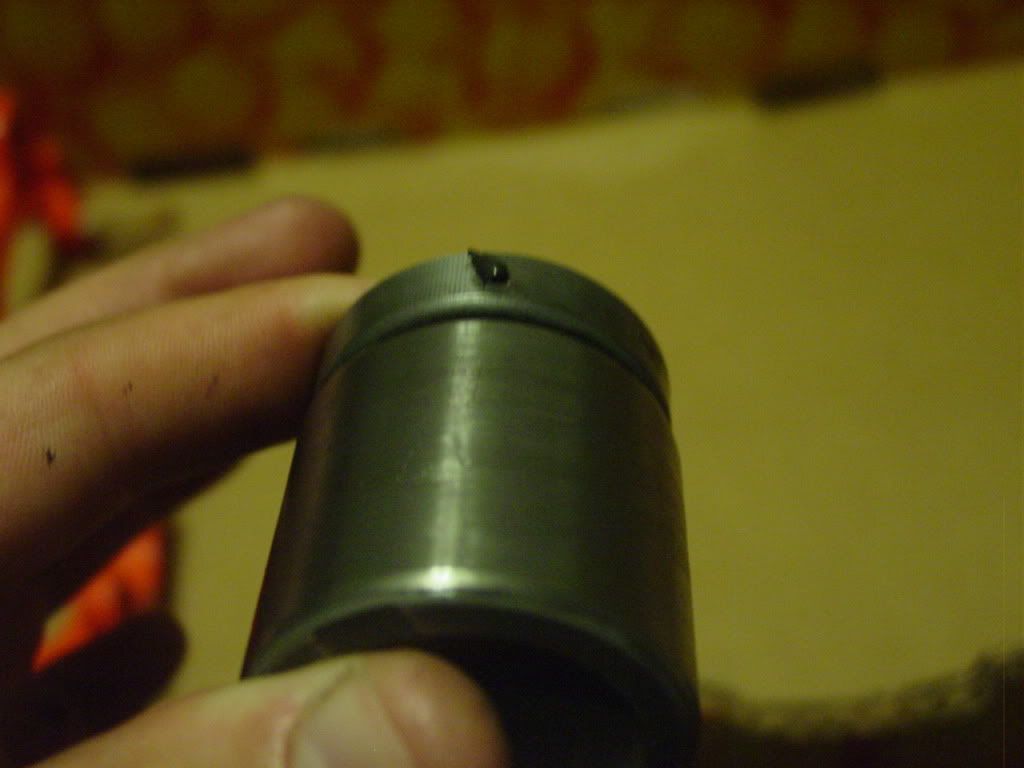
-Now take the bracket with the guide pins and a 7mm allen socket. Dont be lazy to go out and get it! Allen key will not work as I now know. Here are some pics for the laughs and giggles:
And then:
The result:
And the guide pin was still attached to the bracket
-Take the 7mm allen socket and a big ratchet. Undo the guide pins. I dont have a pic but with a socket they came off super easy, even after being in the oven for powdercoating.
Winners vs loser:
Last edited by acet; 10-01-2009 at 01:36 PM.
-Леха
Member
Step 8:
-Now you will need the compressor and the needle nose air nozzle. You will also need a small piece of wood.
-Place the wood between the piston and the caliper housing. No, morning wood will not workor maybe it will but damn, will it hurt…
-Place the nose of the nozzle into the female area where the brake line connected and squeeze the trigger:
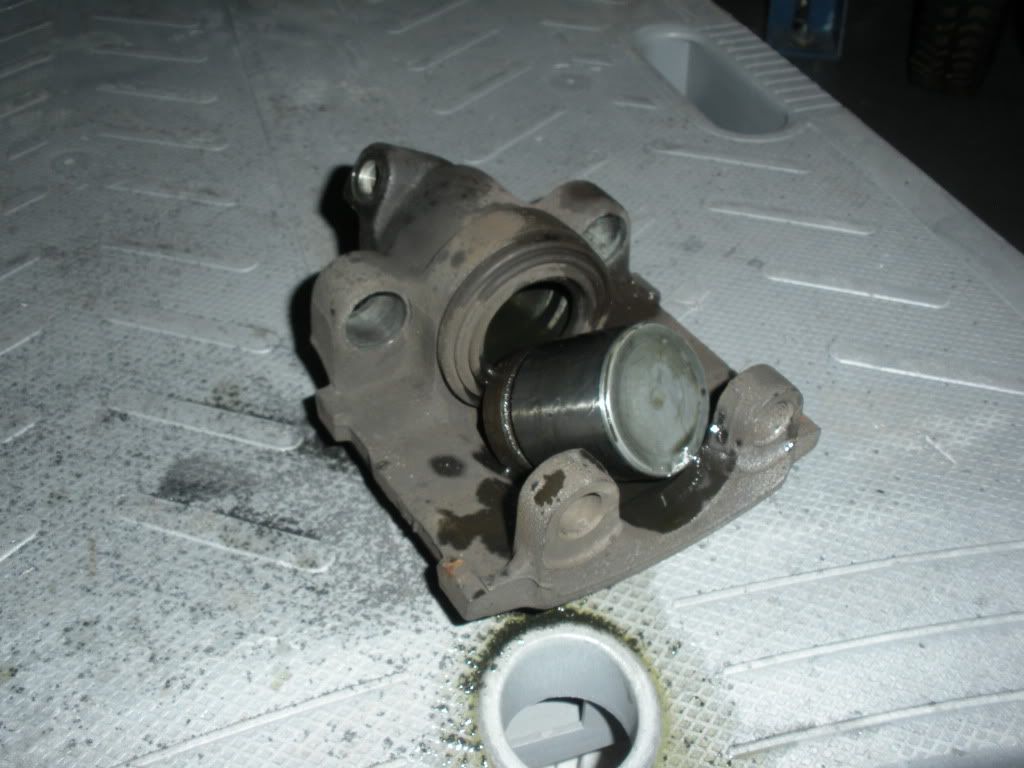
-After you squeeze and hold the trigger, the piston will begin to slide out:
-And in the end:
Step 9:
-Take a deep 7mm socket and a ratchet. Undo the bleed screw. I don’t have a picture but its pretty straight forward and easy.
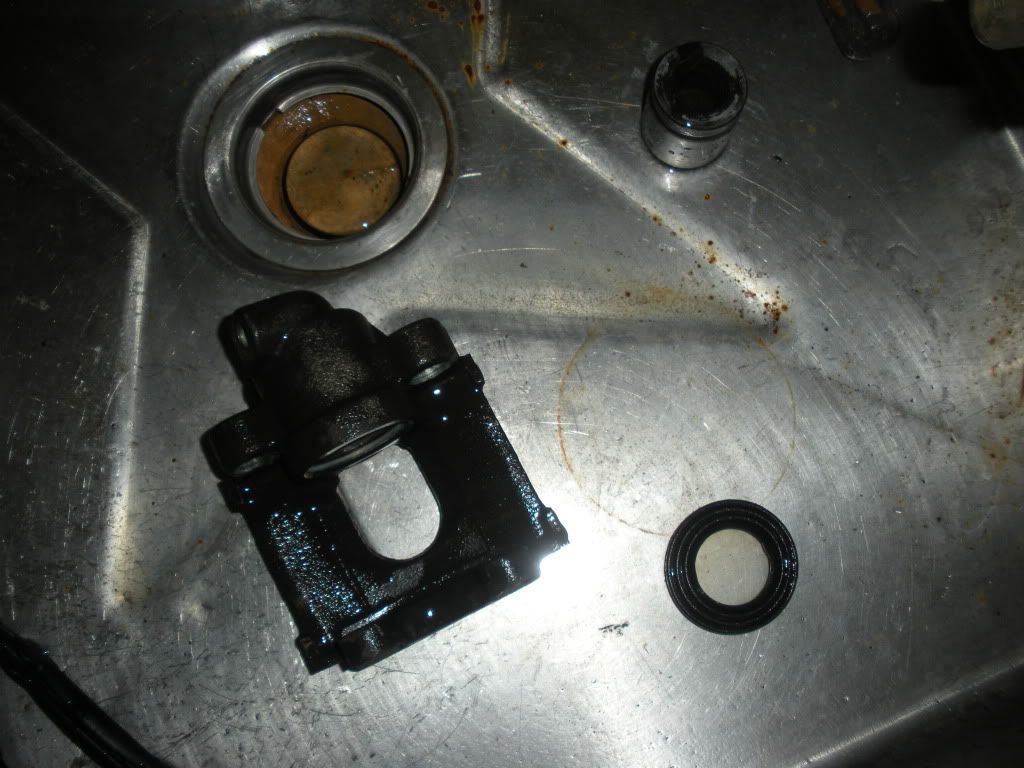
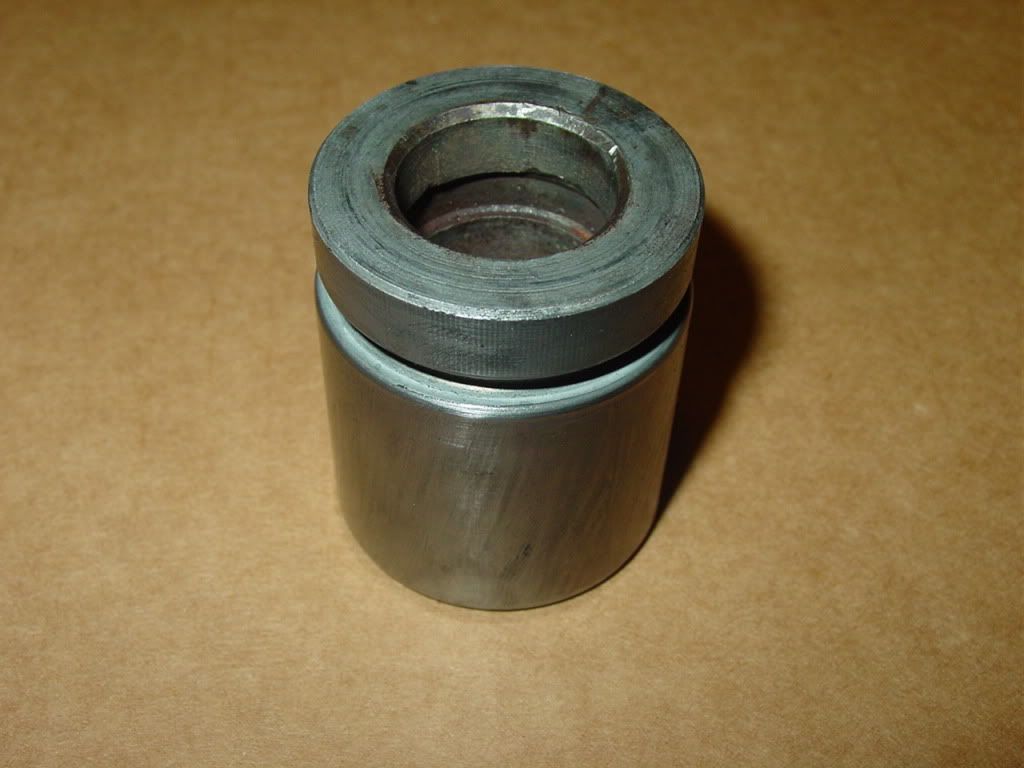
-Take the dust book off the piston and place it aside. We will NOT be reusing this dust boot again so if you want to, trash it. I personally kept ALL the parts from the rebuild just in case. Place the piston aside as well. Piston we will reuse.
-Using a small pocket knife, take the rubber seal out from the inside of the piston chamber:
-You can throw the seal away as well. We will not be reusing it.
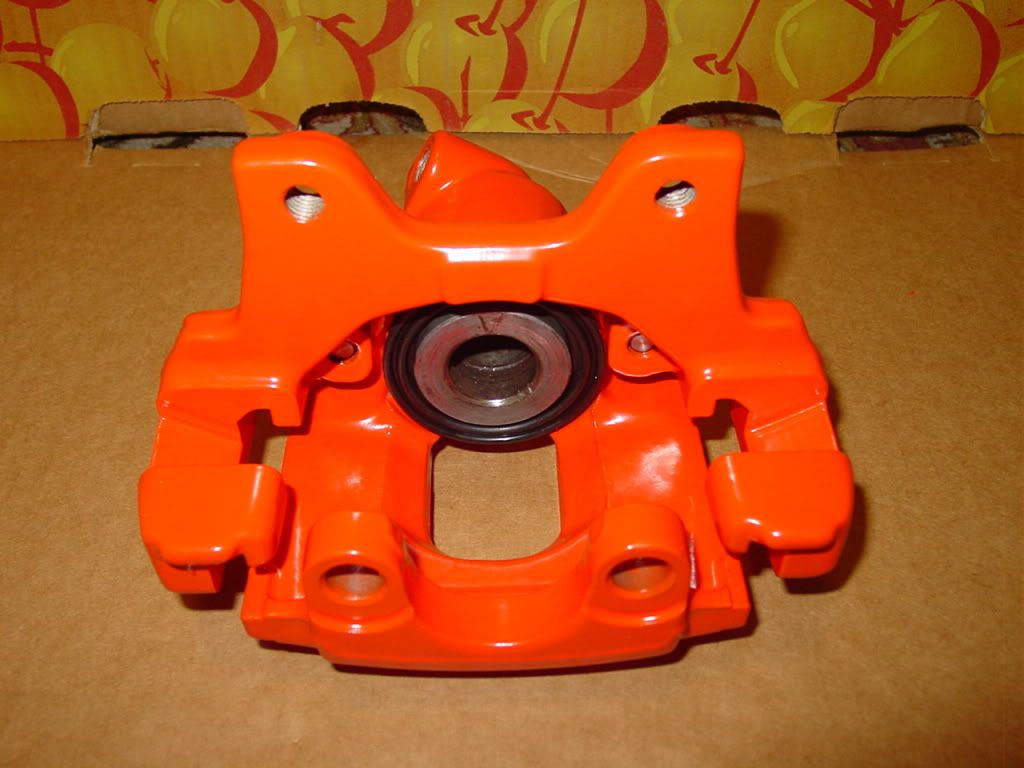
Step 10:
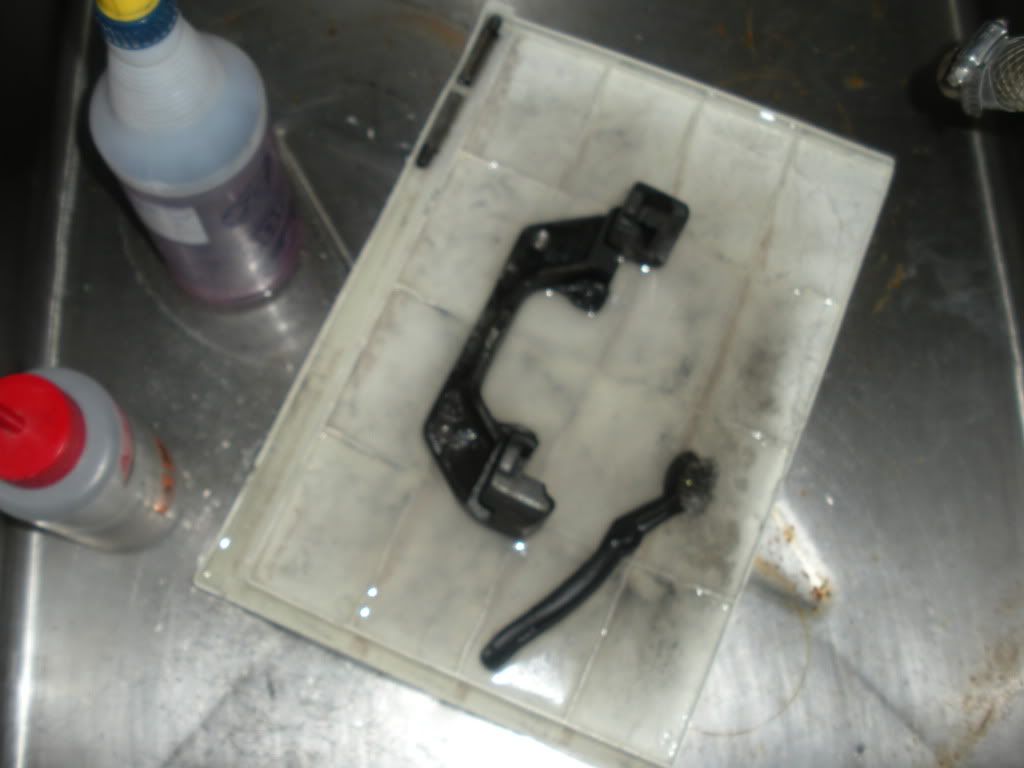
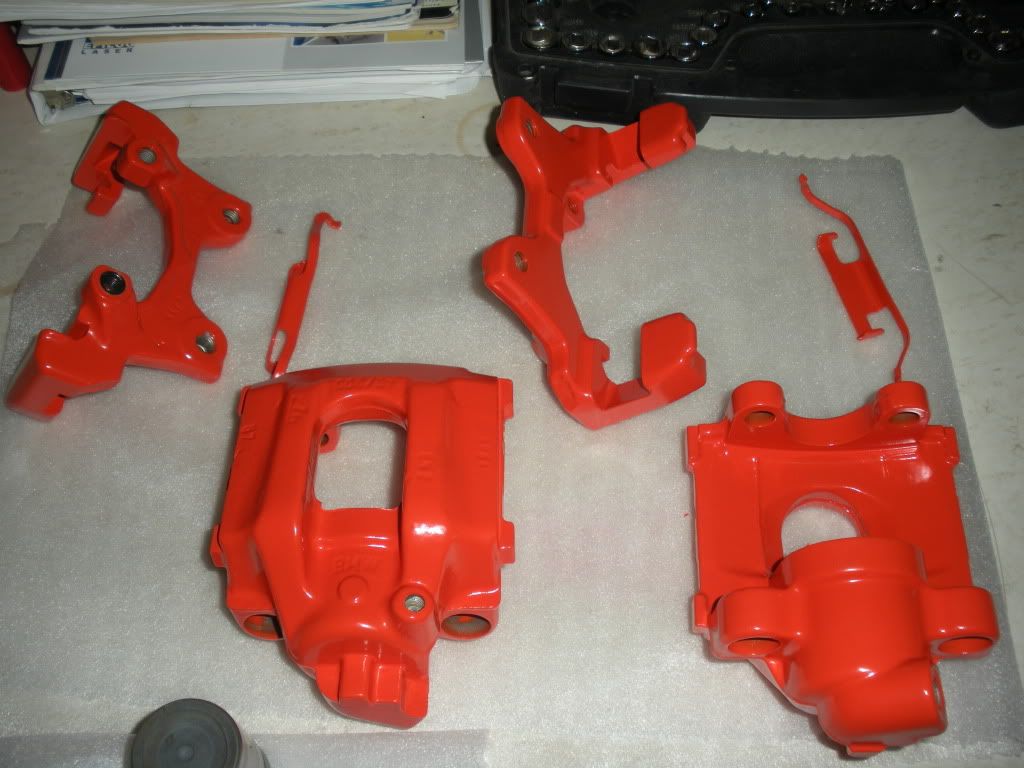
-At this point, you can go a few different ways. You can either just clean the caliper and reassemble it, you can get it powdercoated, or you can just assemble it without cleaning.
-At first I cleaned mine. Please be EXTRA carefull with the piston. Don’t scratch it. Let it sit in some soapy water and then clean it with a soft sponge. Pour some alcohol on it after cleaning and dry it with compressed air if possible. Everything else can get scrubbed hard with a metal brush.
Here are pics of the cleaning process:
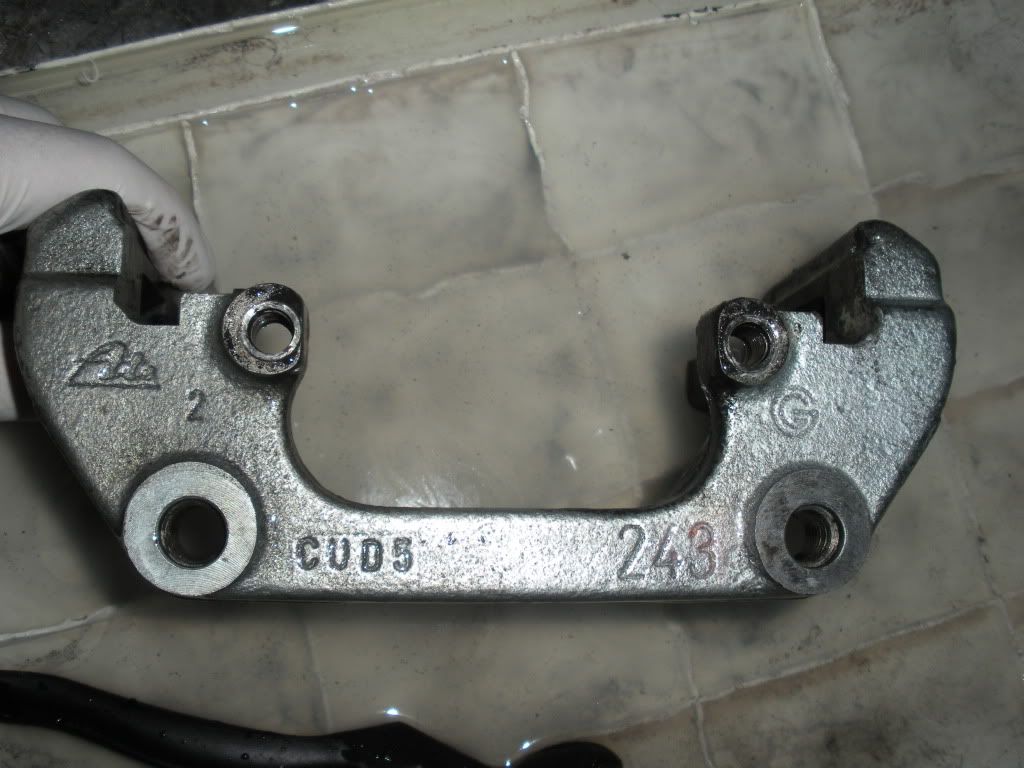
When I was done cleaning, it looked like this:
But then I got them powdercoated so they looked like this:
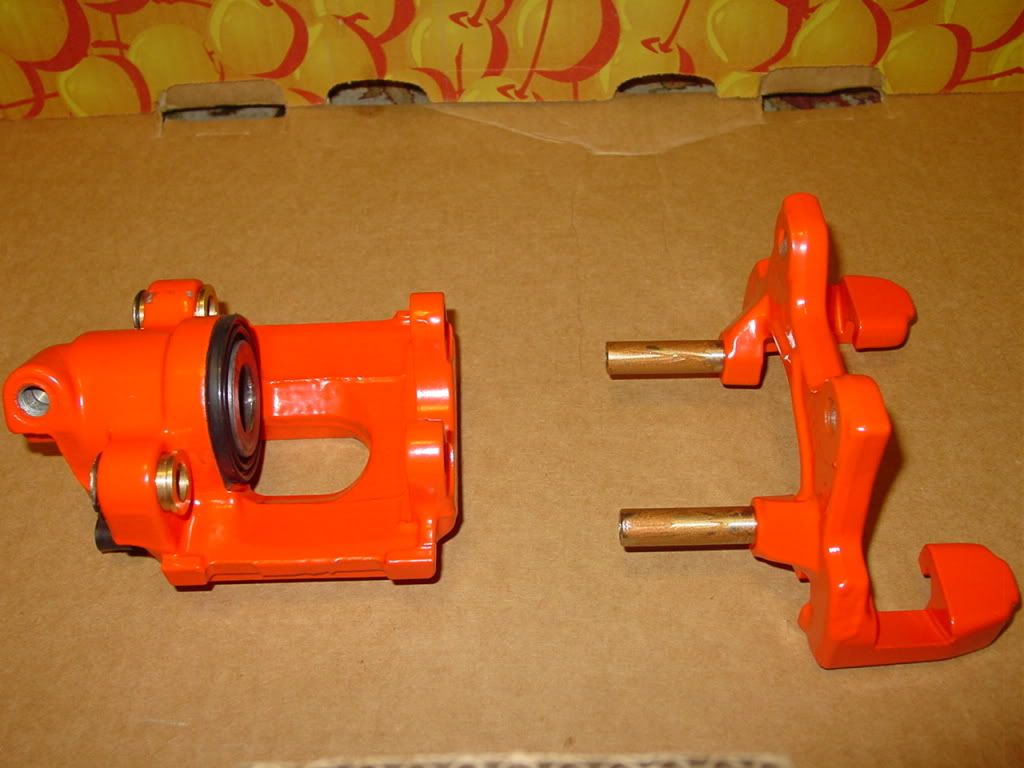
Rear Caliper Reassembly:
Step 11:
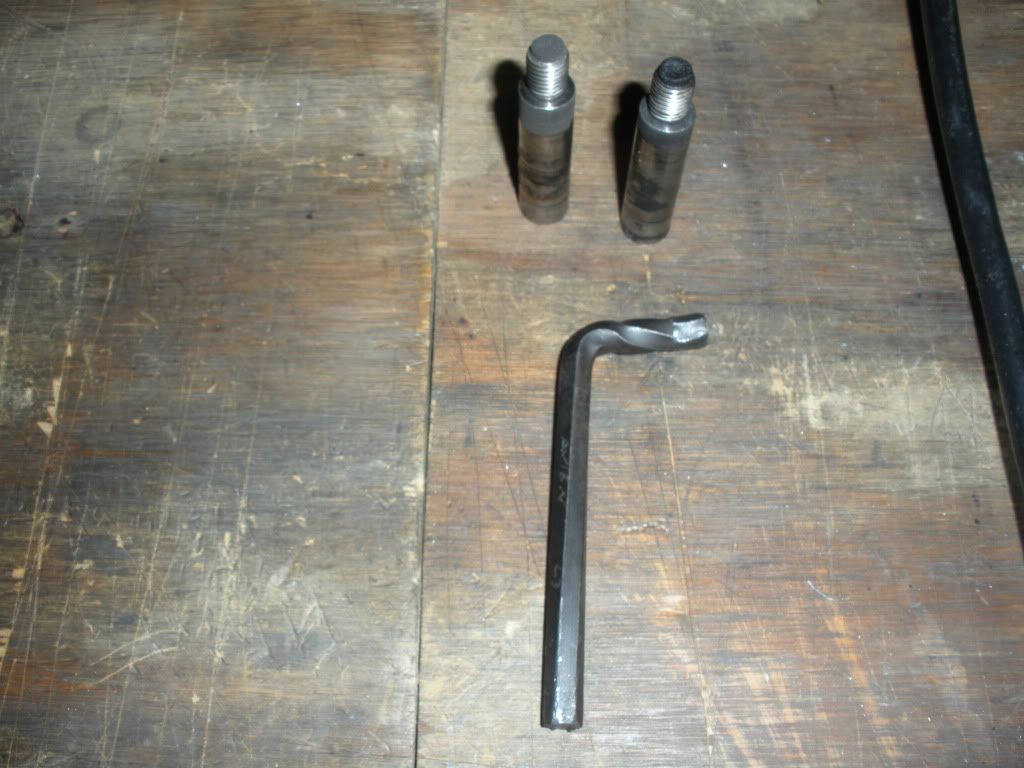
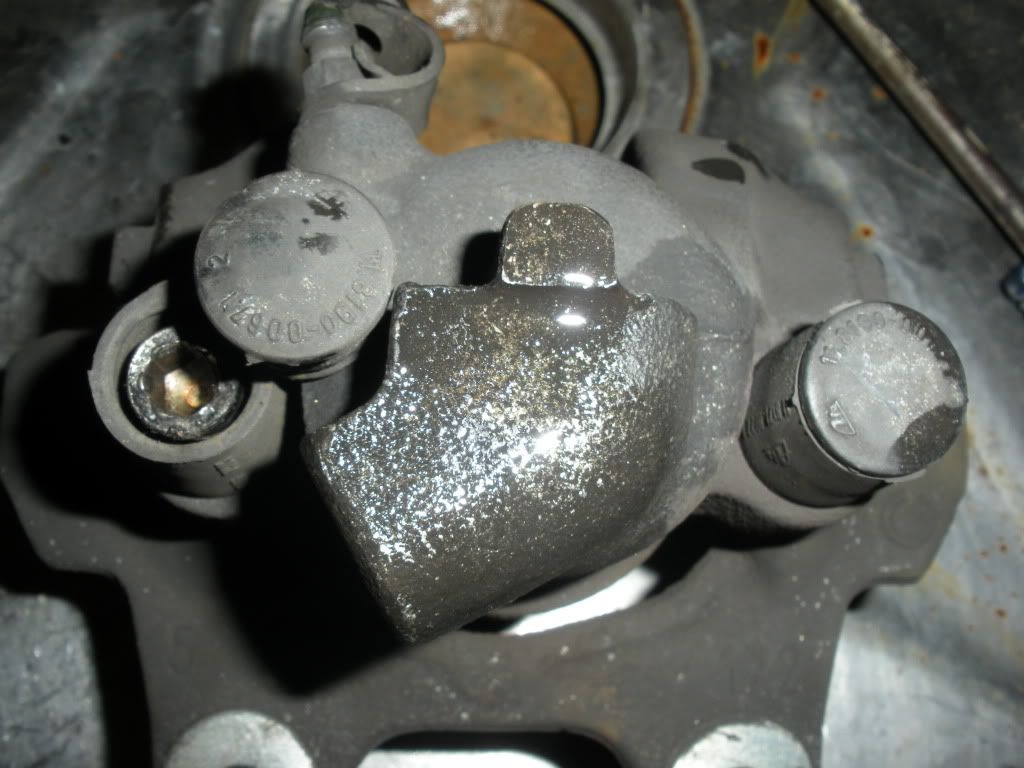
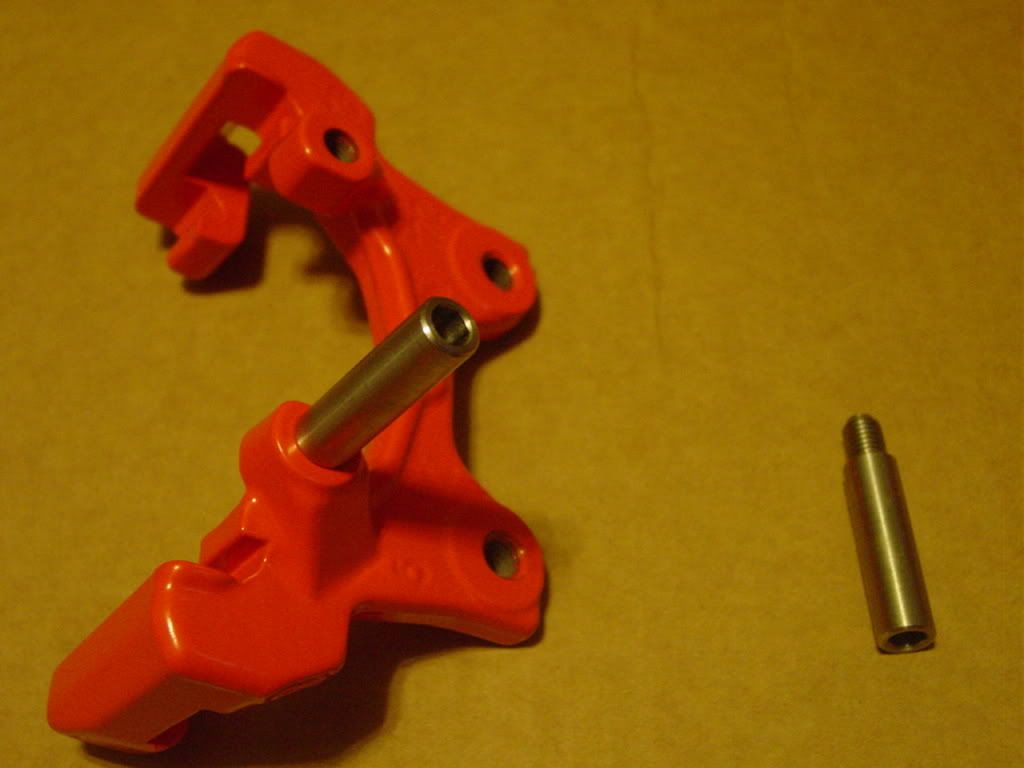
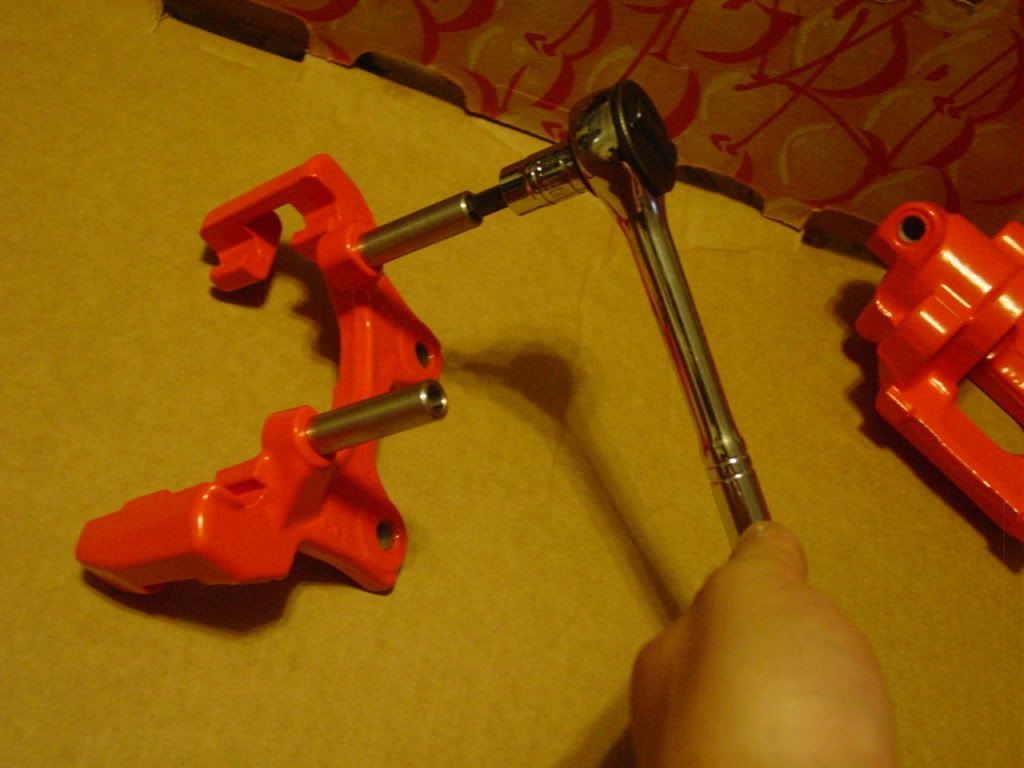
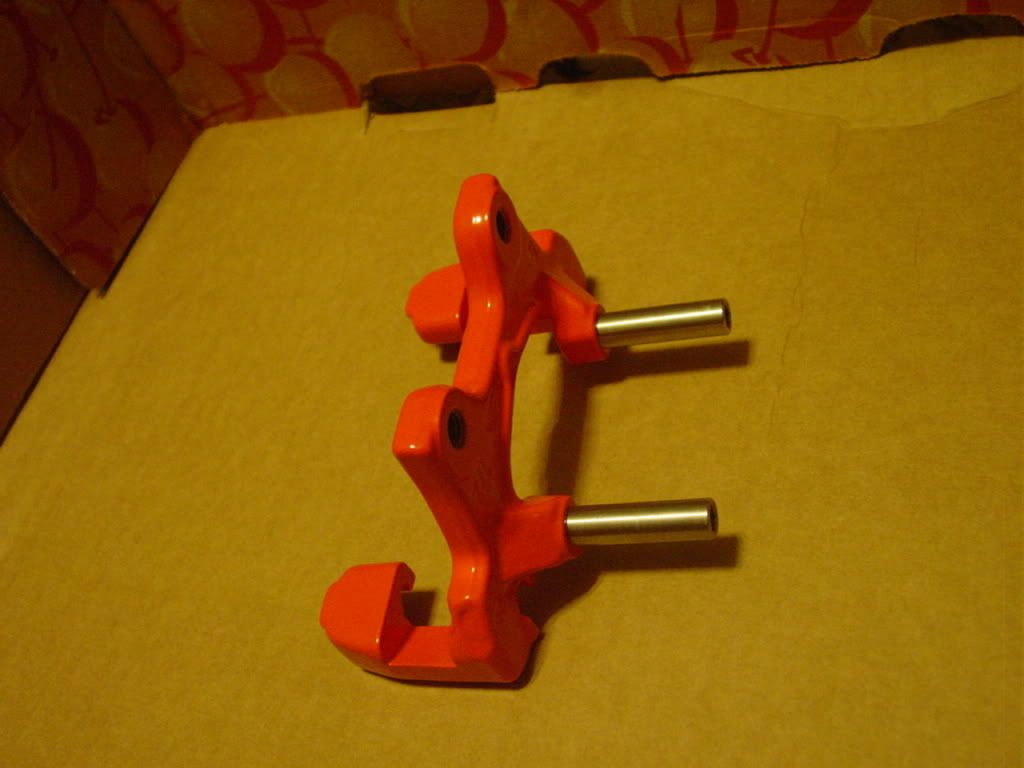
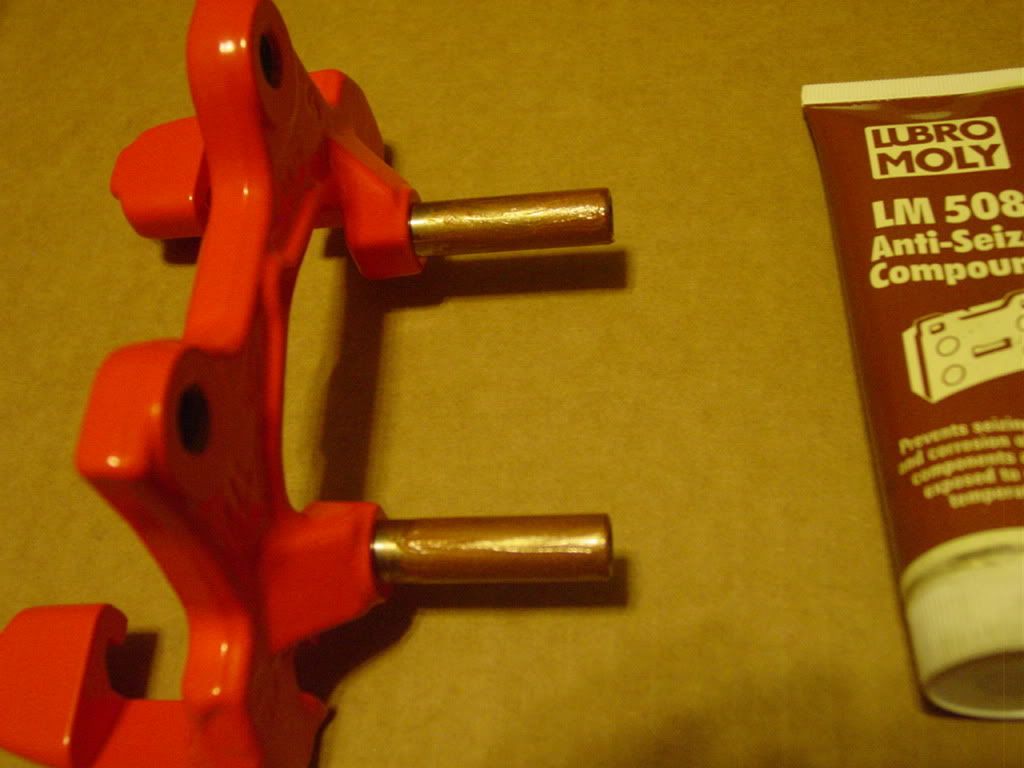
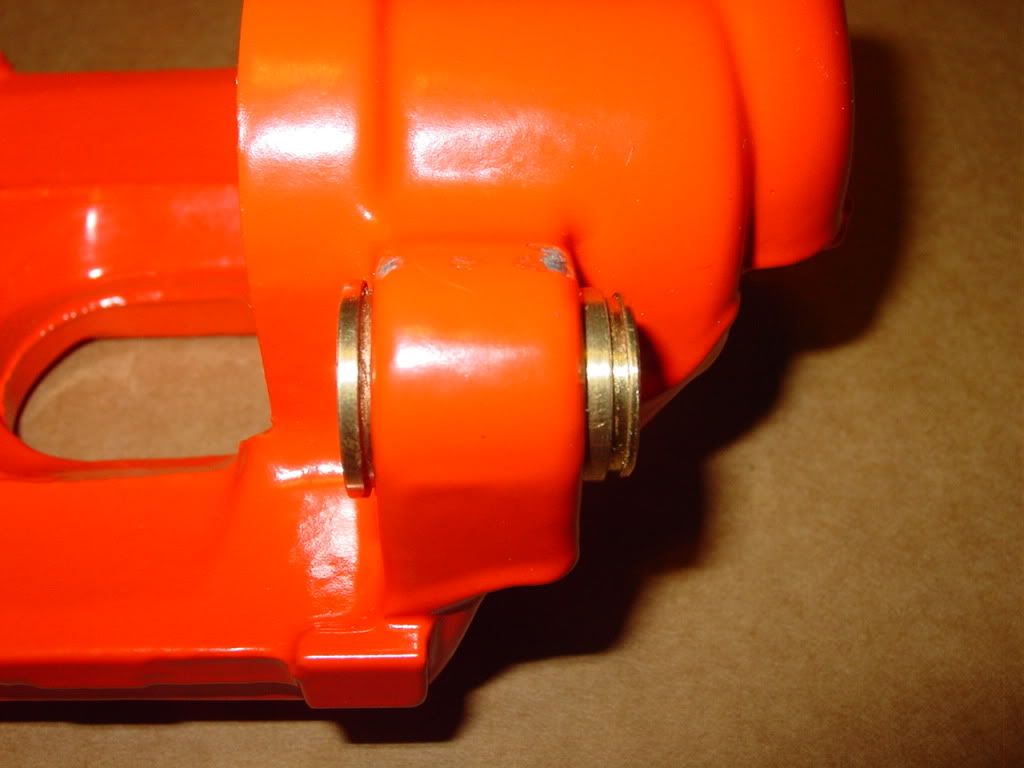
Take the bracket and two guide pins.
Screw the guide pins into the appropriate holesand tighten with a 7mm allen socket.
At the end of step 11, you will have something like this:
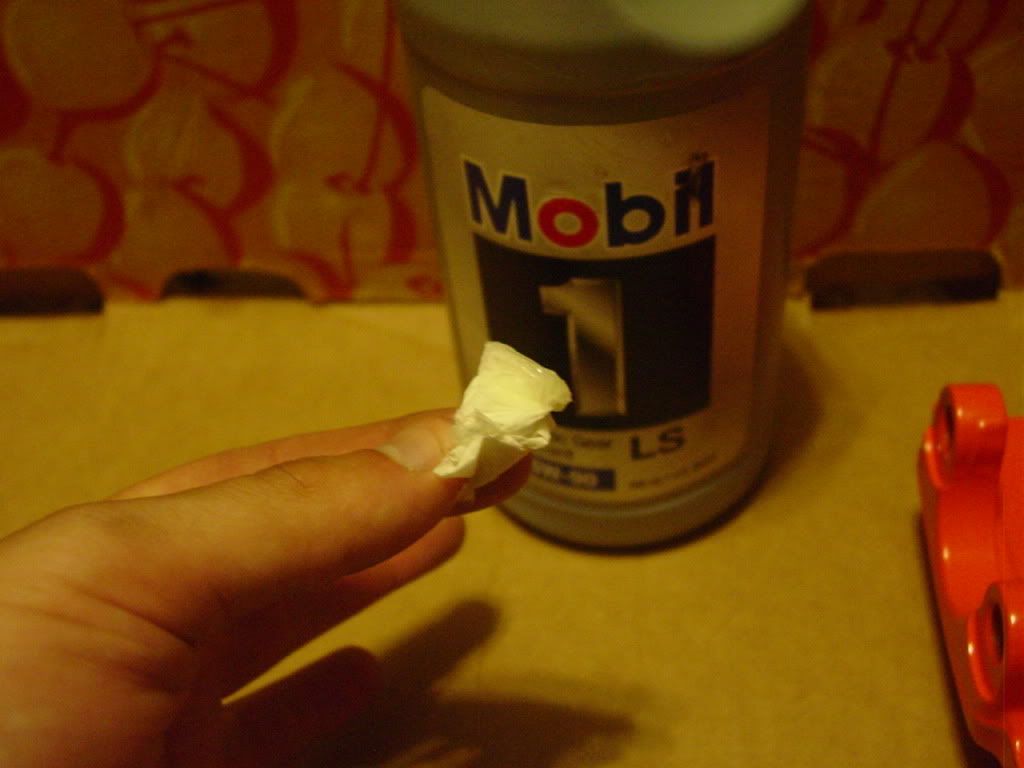
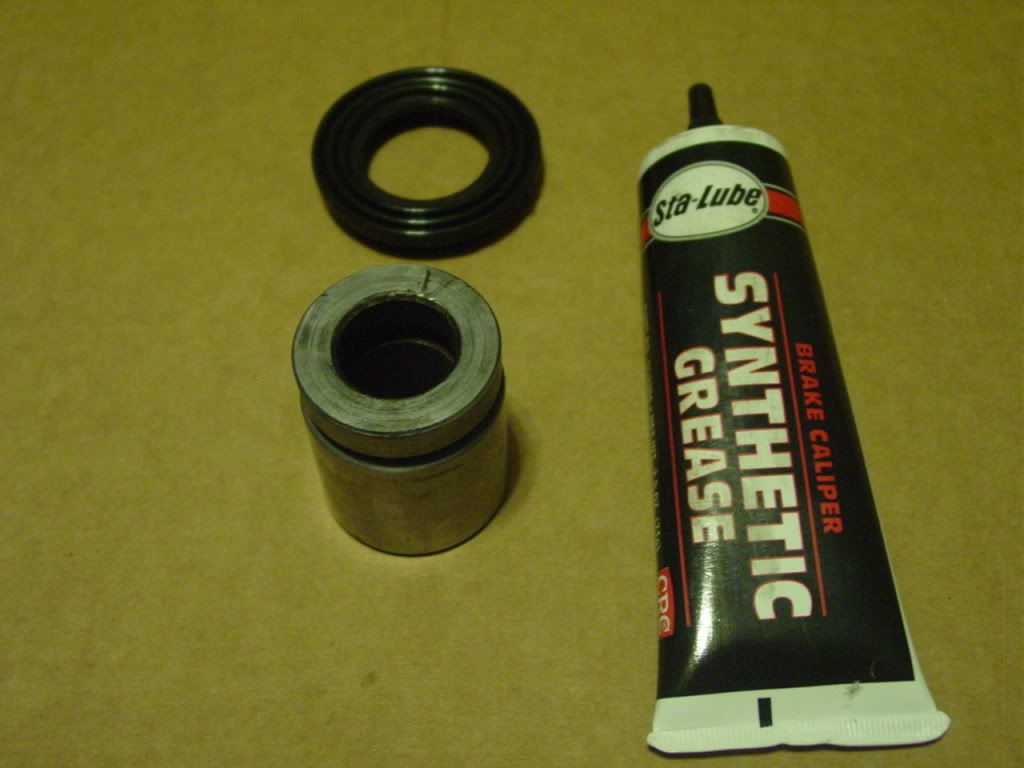
Step 12:
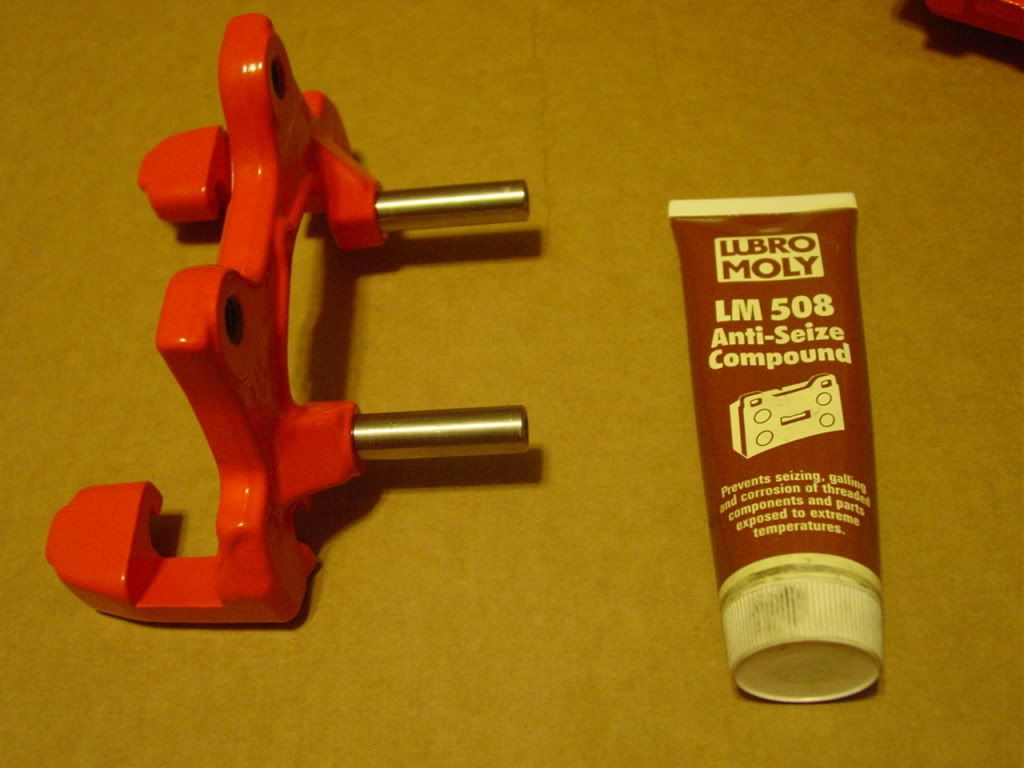
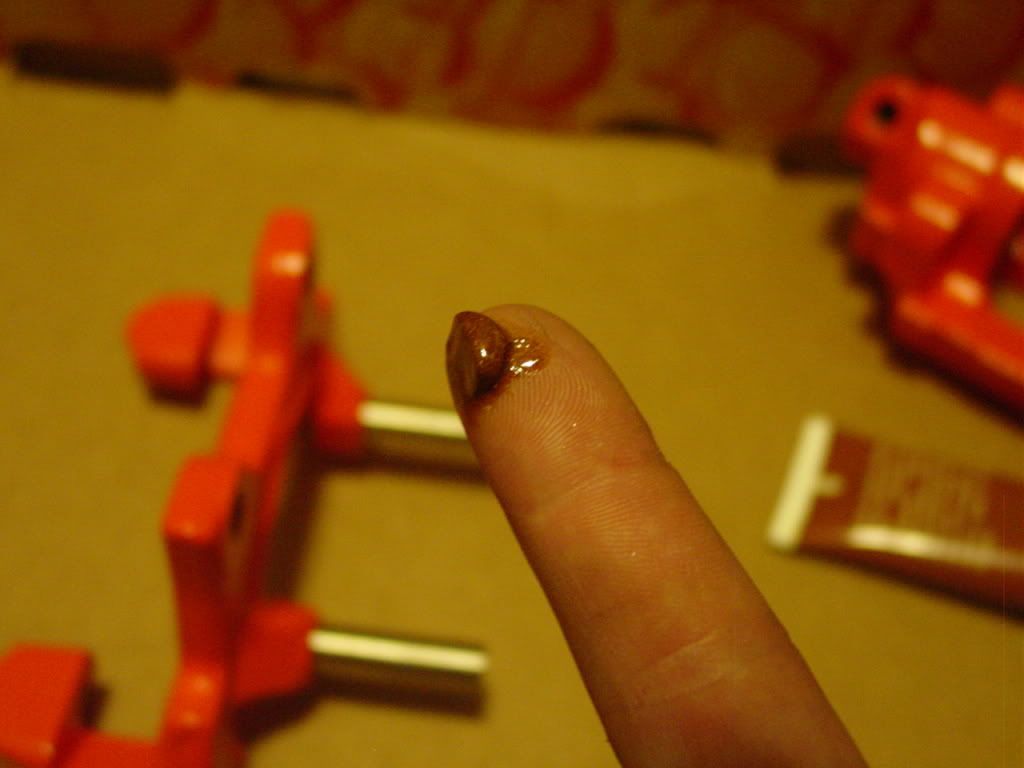
Take the lube/compound and squeeze some out on your finger. You'll need VERY little.
LIGHTLY apply the lube to the guide pins. At the end of step 12, you will have something like this:
Set this assembly aside for now.
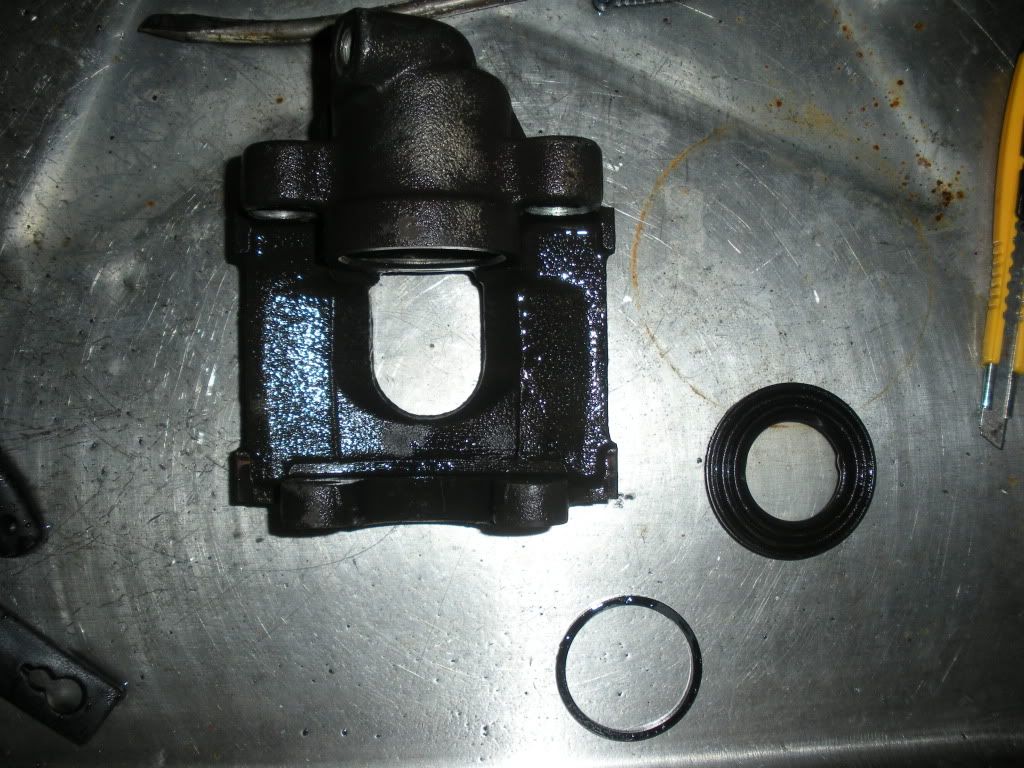
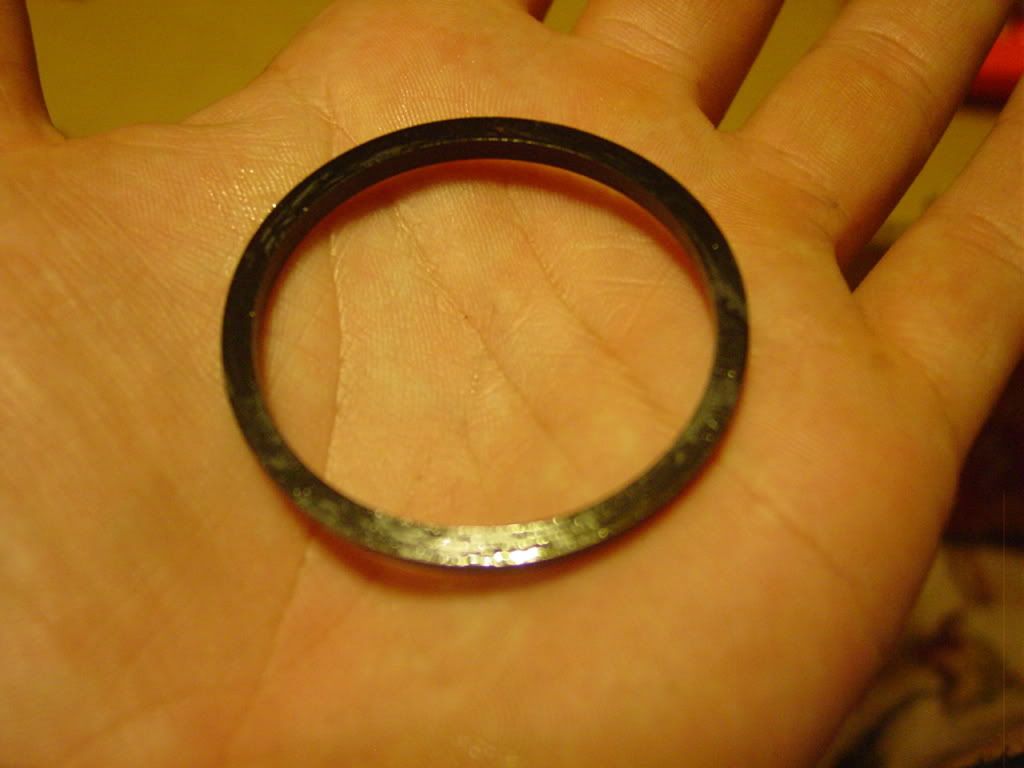
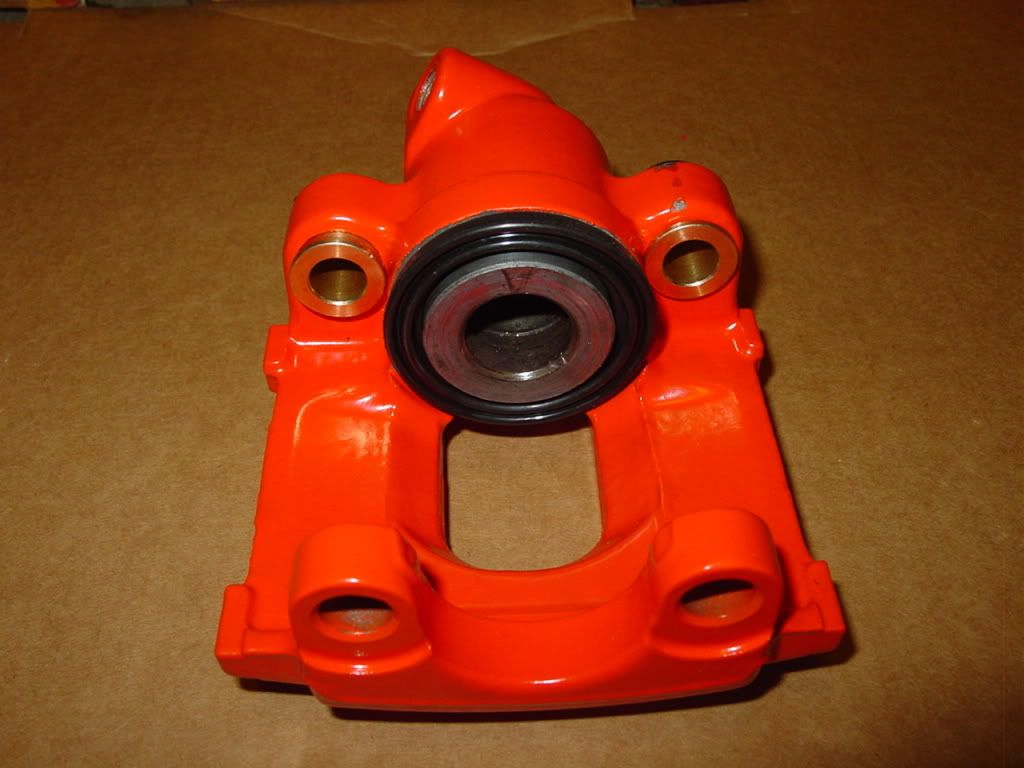
Step 13:
Take some Oil and the caliper seal. Dip a lint free napkin in the oil and wipe the entire seal with it.
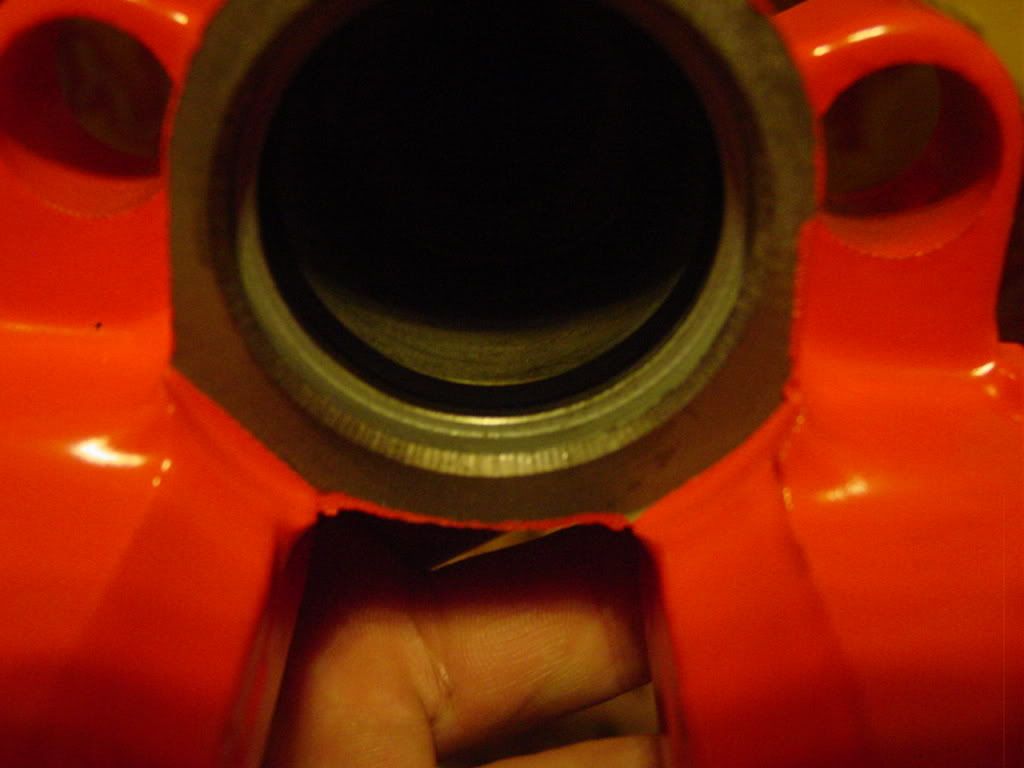
Step 14:
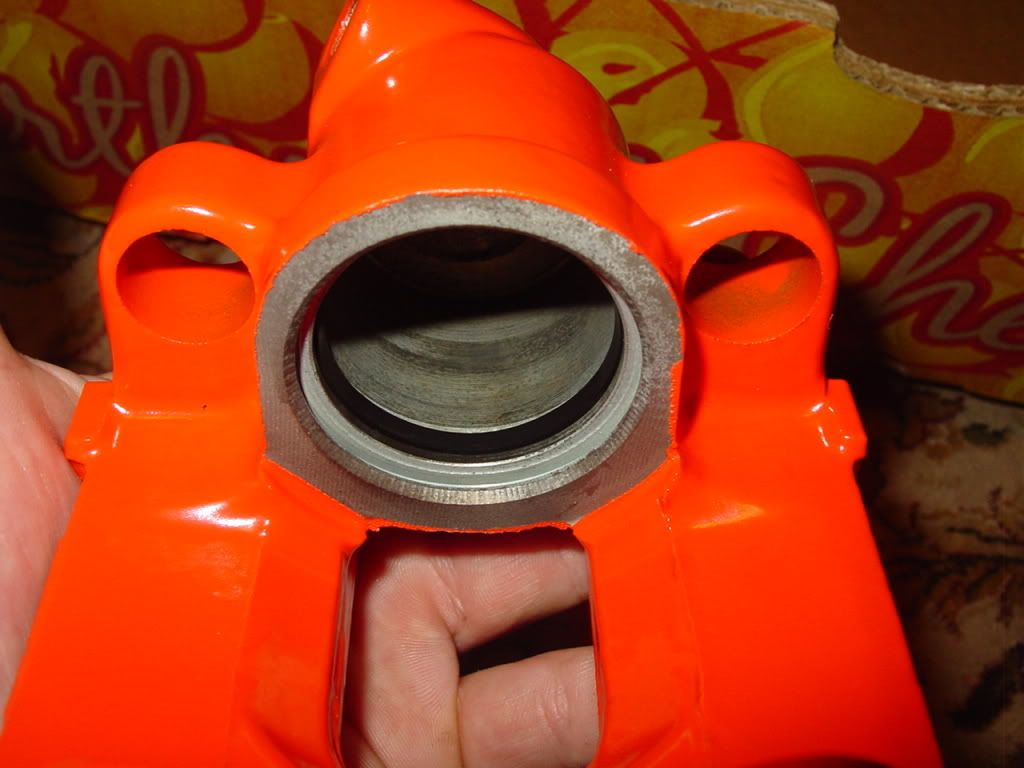
Take the caliper and carefully insert the seal into the inside groove.
Make sure that the seal is evenly sitting in the groove. Check all 360 degrees.
At the end of step 14, you will have something like this:
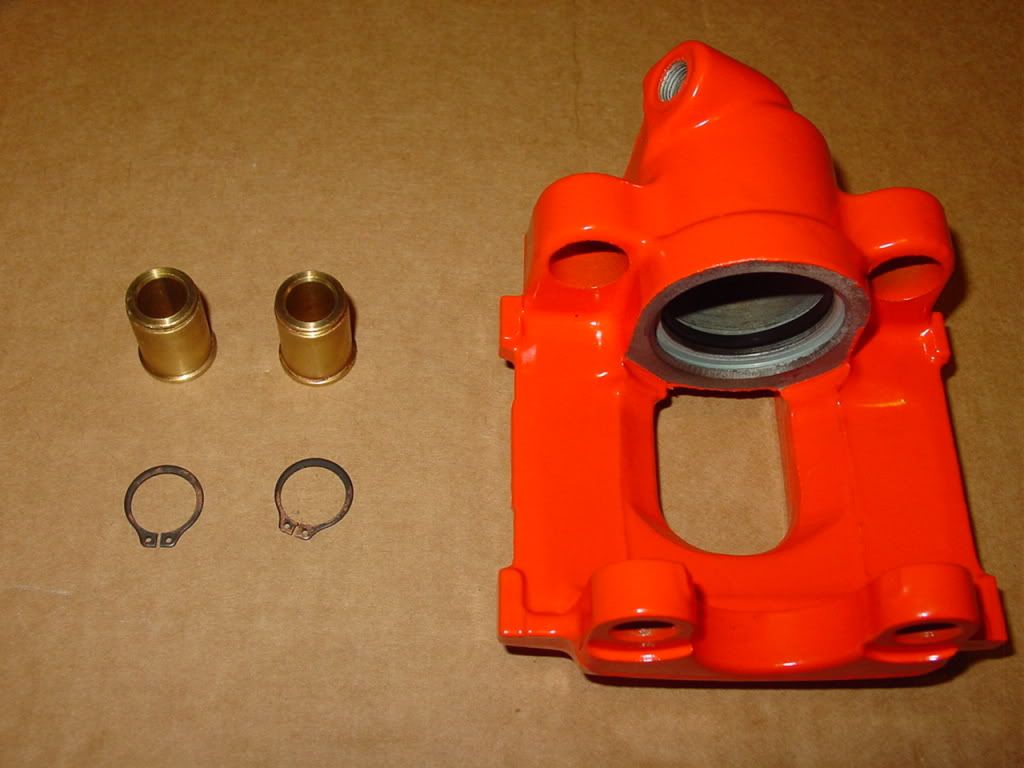
Step 15:
Take 2 bushings (Brass or Rubber) and circlips (only for brass).
**If you’re sticking with Rubber, I’d still recommend to get new ones. Should be around $25 for all 4 calipers**
Insert the bushings into the bushing housings. If you're doing brass bushings, make sure that the circlip ends are on the outside of the caliper (facing the end where the brake line and bleeder valve connect). If you're doing the rubber bushings, install them the same way. The long end of the rubber bushing without the groove will face the outside of the caliper.
Now install the circlips if you're using the brass bushings:
And now install the 2nd bushing. At the end of step 5, you will have something like this:
You're doing great!! Beer?
Last edited by acet; 08-04-2009 at 12:26 PM.
-Леха
Member
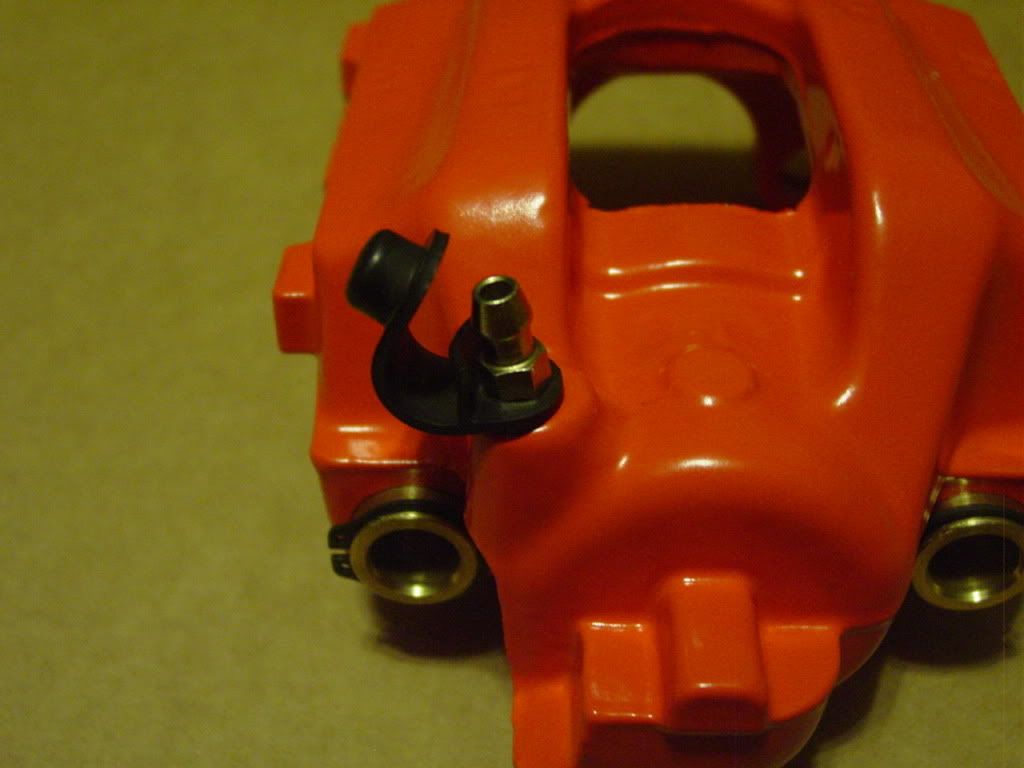
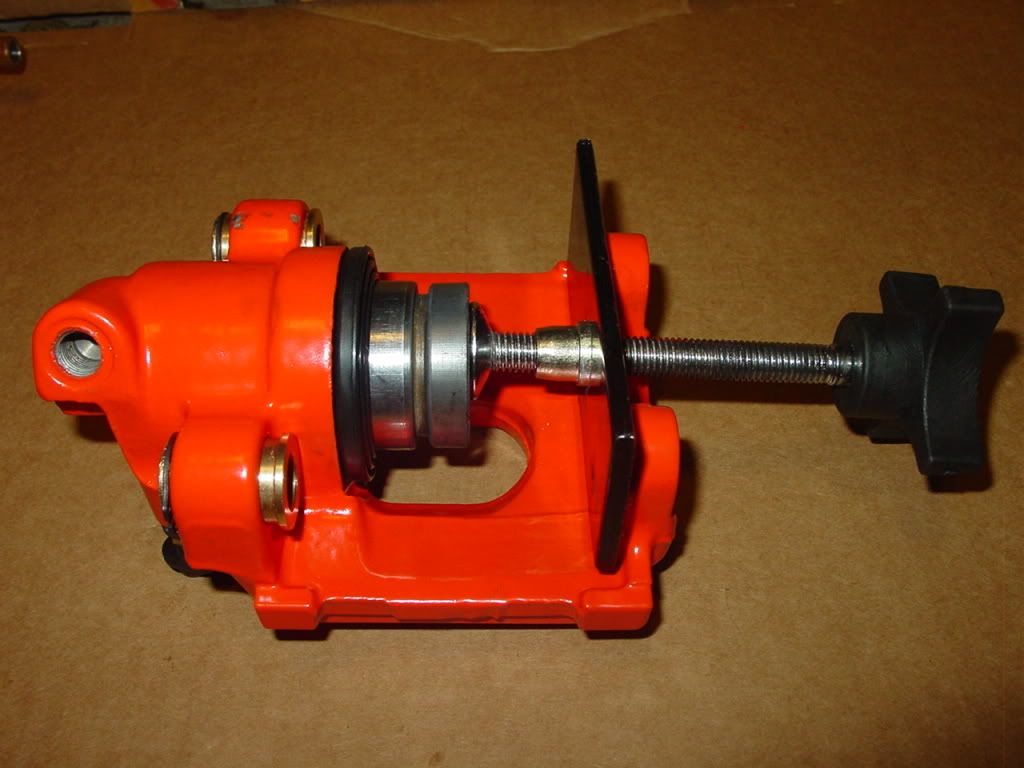
Step 16:
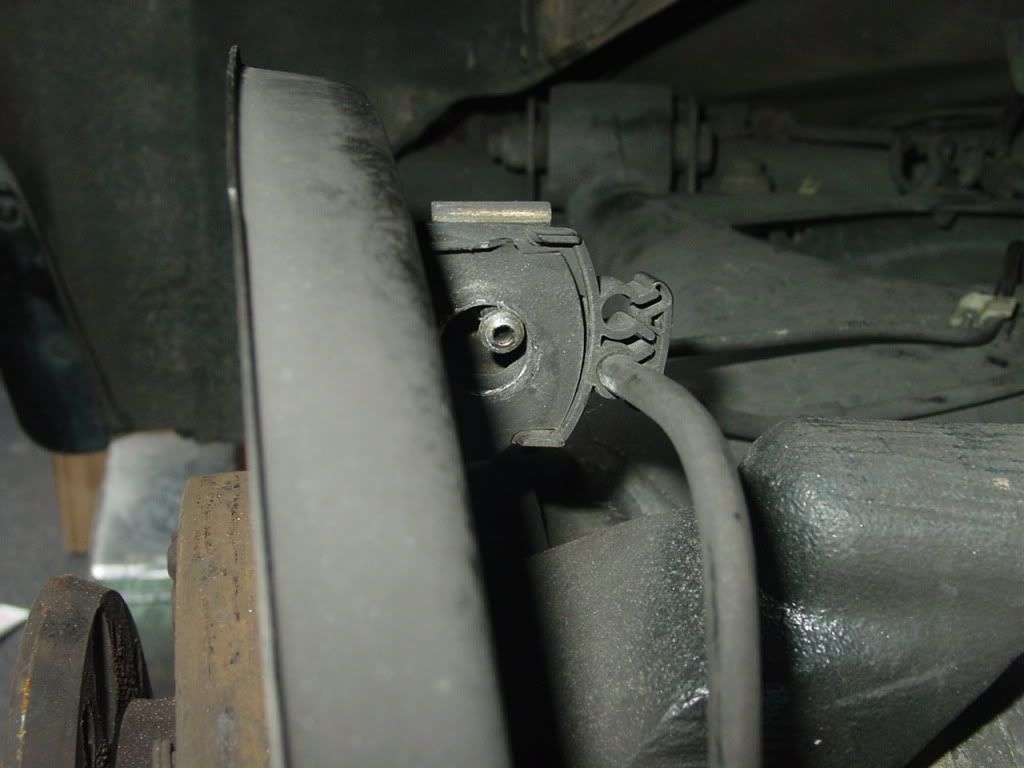
Now take the bleeder screw and a 7mm deep socket.
Now install the bleeder valve into the appropriate hole
Using a small ratchet and 7mm deep socket, tighten the bleeder valve. Don't over tighten it. Just hand tight is fine:
*** Some members firmly believe that it is NOT a good idea to install the bleed valve before inserting the piston. You may want to leave the bleed valve off until you install the piston. I personally didn't have an issue at all due to the fact that the brake line hole is much larger than the bleed valve hole but this is up to you.***
Step17:
Take the piston, synthetic grease, and the NEW dust boot:
Apply a LITTLE bit of the grease to the piston and spread it over the whole piston surface: ***Jon I know you're going to dig this!! Looks like a small snail
The lubed piston J
Take the dust boot, and carefully slide it on the bottom end of the piston:
Make sure to leave some of the dust boot off the piston so you can insert it into the piston chamber. Its hard to explain but here are pics:
See the end of the dust boot being off the piston? You want that:
Step 18:
-Take the piston and carefully insert ½ of the dust boot into the piston chamber:
-Using a flat head screwdriver, pry the dust boot inside:
-The little edge on the dust boot, should fall into the small grove on the inside of the piston chamber.
-Now take the brake tool, and push the piston into the chamber:
-End of step 18:
Now you can proudly yell all the improper words in your vocabulary. You deserve it! J
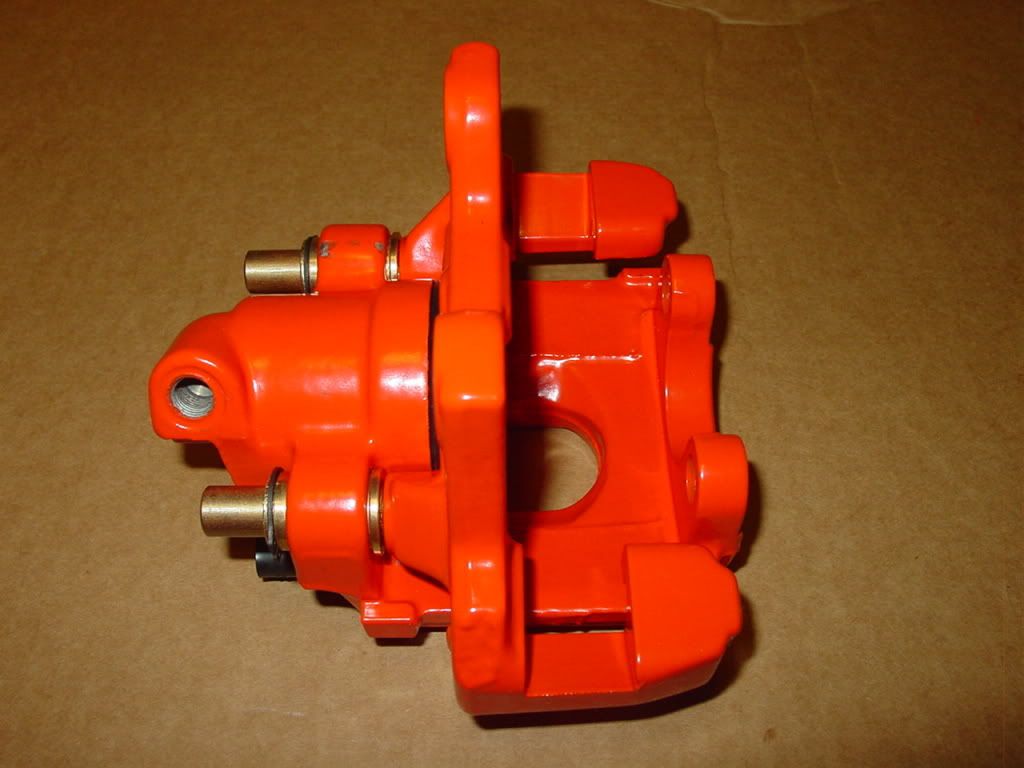
Step 19:
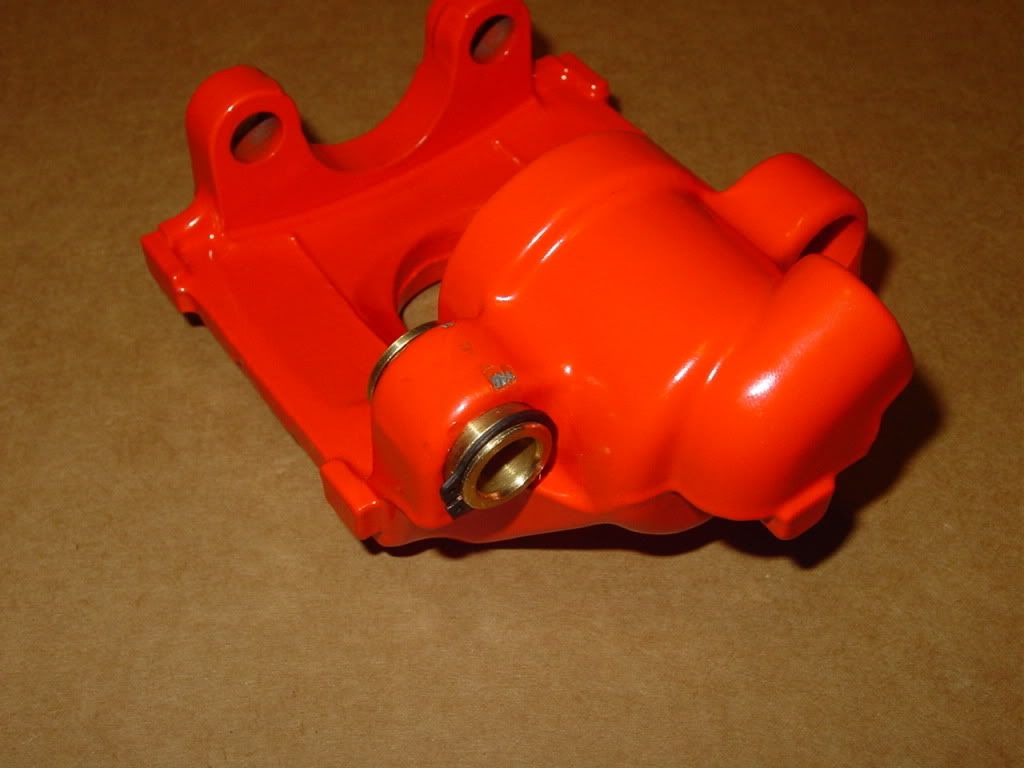
-Take the assembly from step 12.
-Slide the bracket with guide pins into the guide pin bushings:
-It will looking something like this:
Step 20:
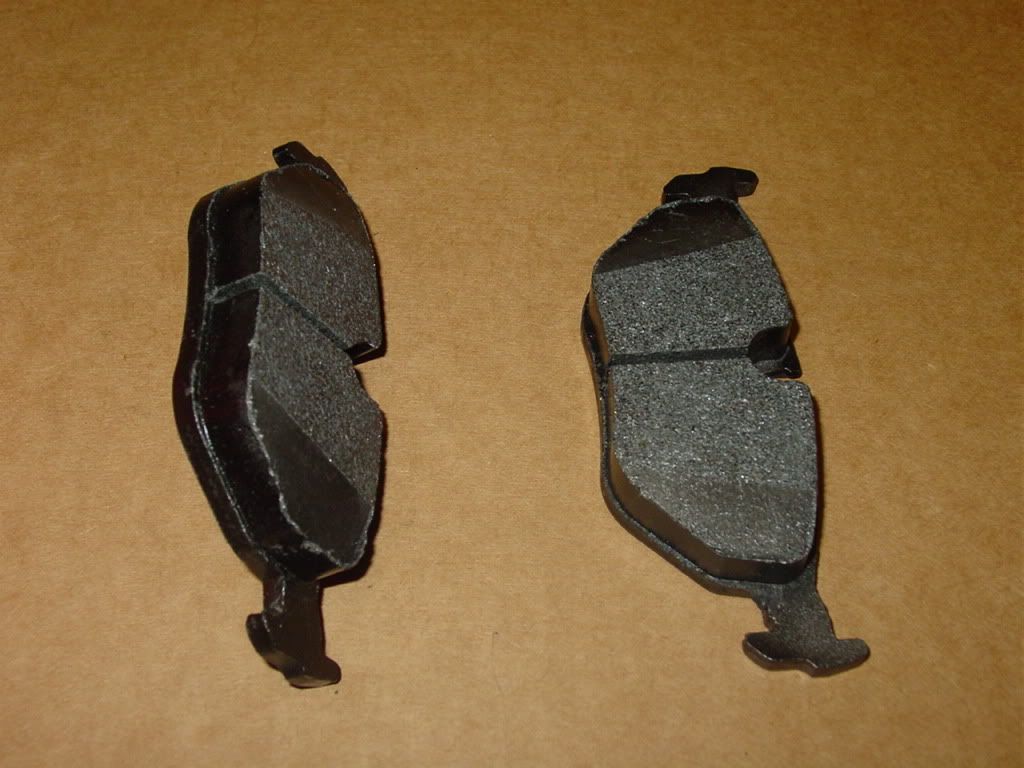
-Take the brake pads:
-Install them:
**If you’re doing the RR caliper, don’t forget to attach the sensor to the pad!!!**
At this point, here’s what you’ll have:
Last edited by acet; 08-05-2009 at 11:37 AM.
-Леха
Member
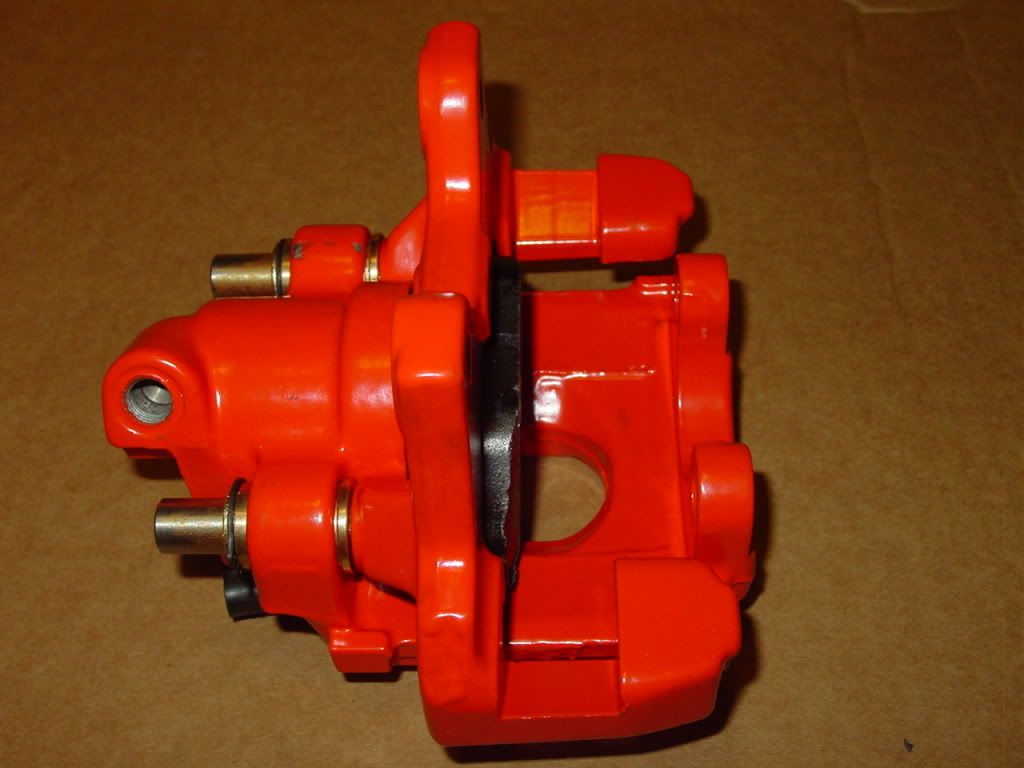
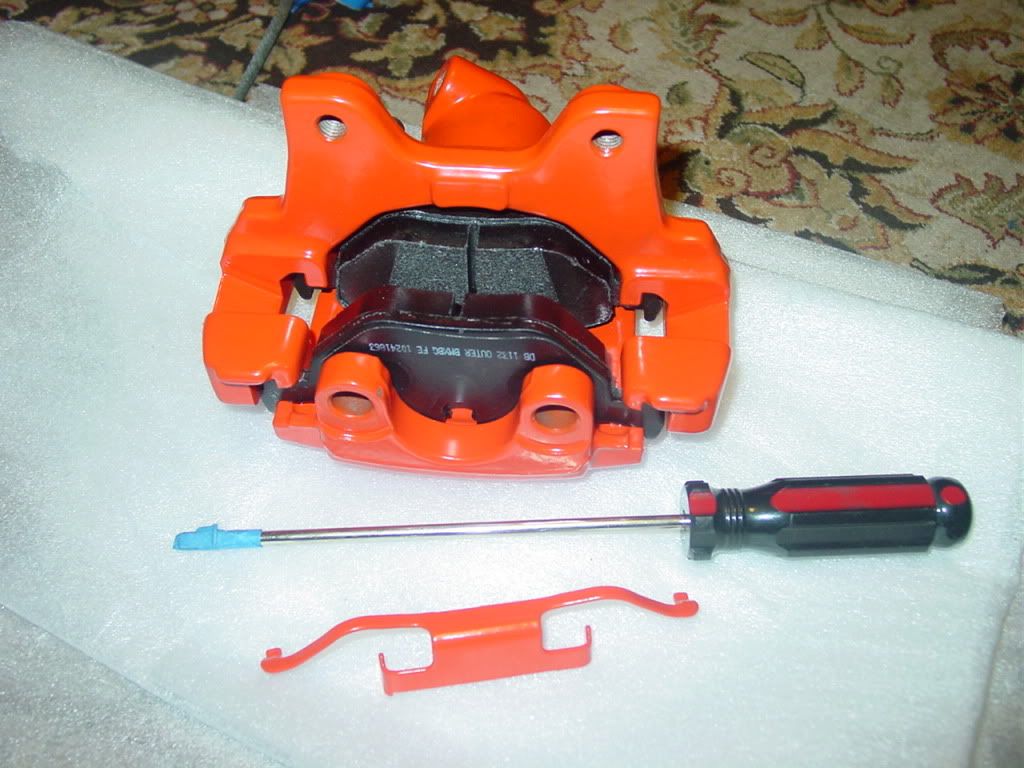
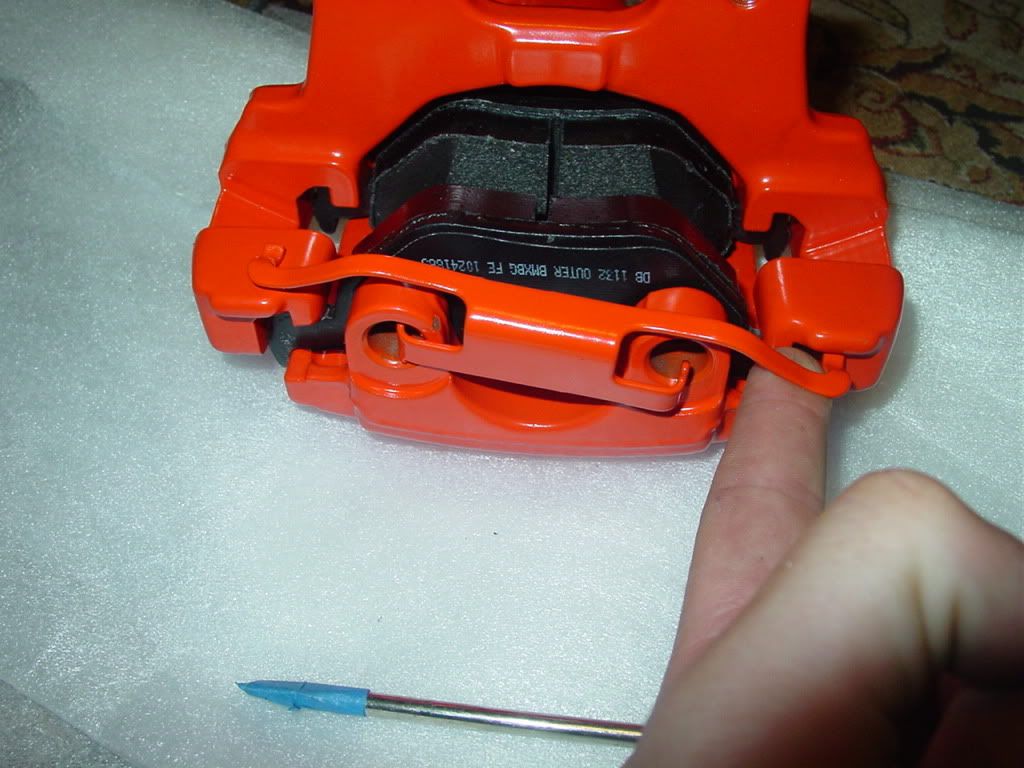
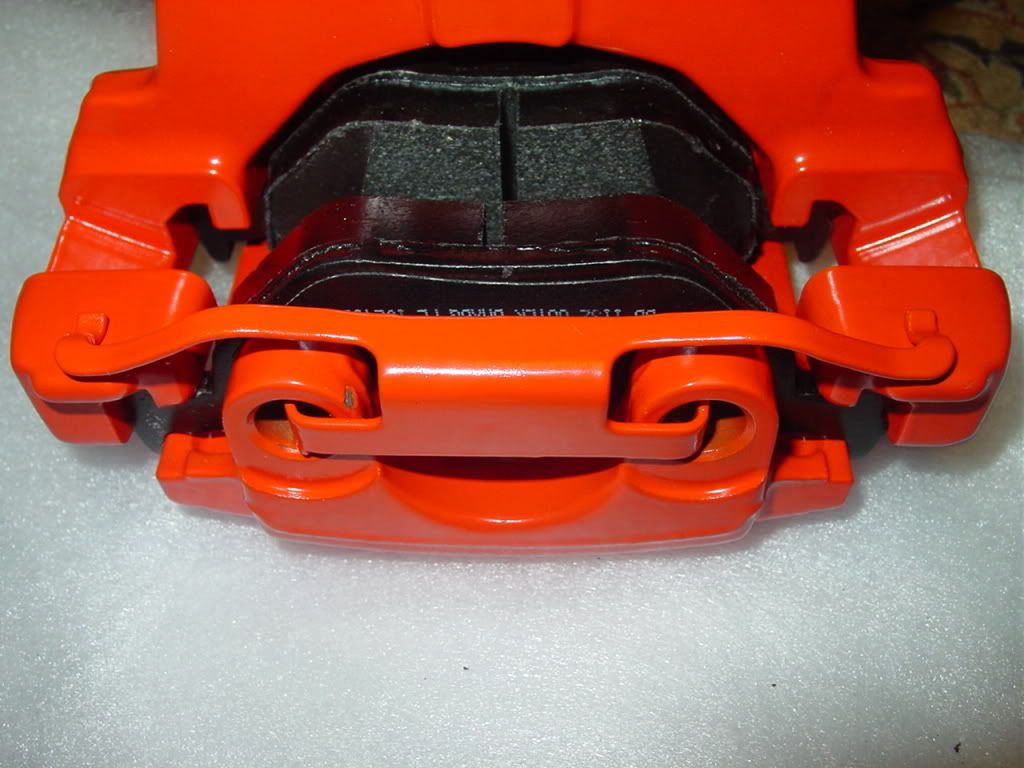
Step 21:
-Take the rattle clip and a flat head screw driver. I taped the end of mine because I didn’t want to scratch the powdercoat:
-Install the rattle clip:
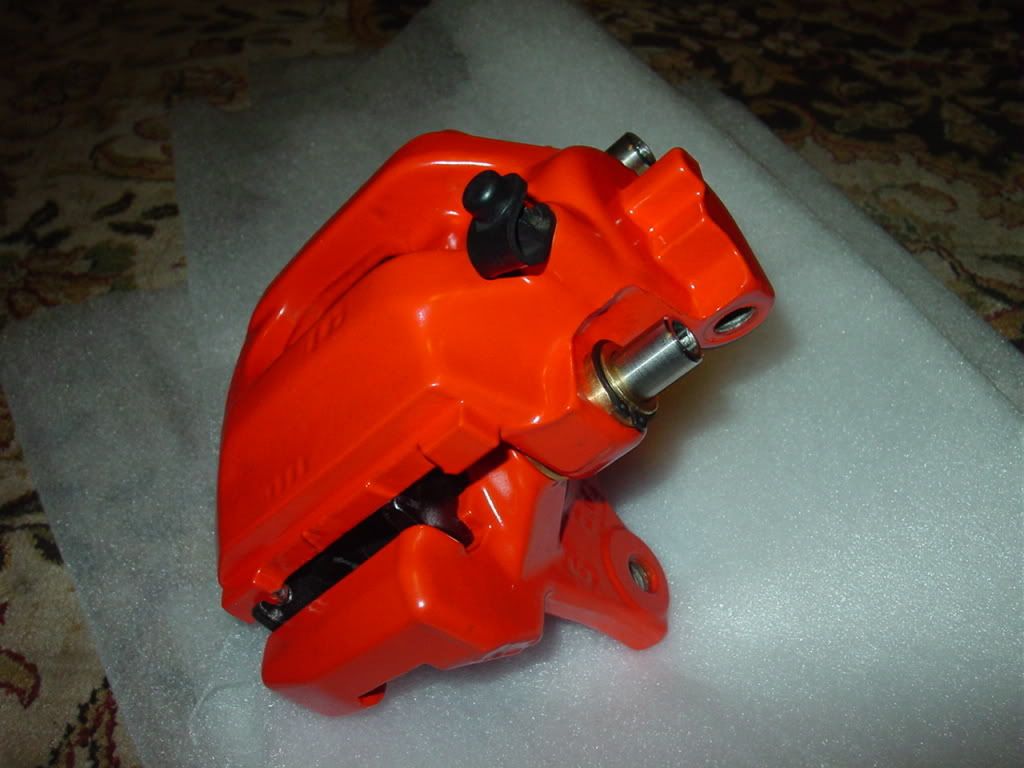
-Done:
Step 22:
IF YOU’RE NOT DOING BRAKE LINES, GO TO THE NEXT STEP.
-Now its time to reinstall the caliper. If you have new brake lines, now is a good time to install those. I don’t have pictures of the brake lines removal process but its pretty easy. The RUBBER lines have to come off. I do have the installation pics.
-Take the 2 rear brake lines for the side you’re working on. One will be female-female and one will be female-male.
-Locate the top metal brake line:
-Take the Fem-Fem line and attach it to the metal brake line. You will need 11MM and 14MM flare wrenches:
-Tighten the bolt. I don’t have specs but use common sense. Don’t over tighten or leave it lose:
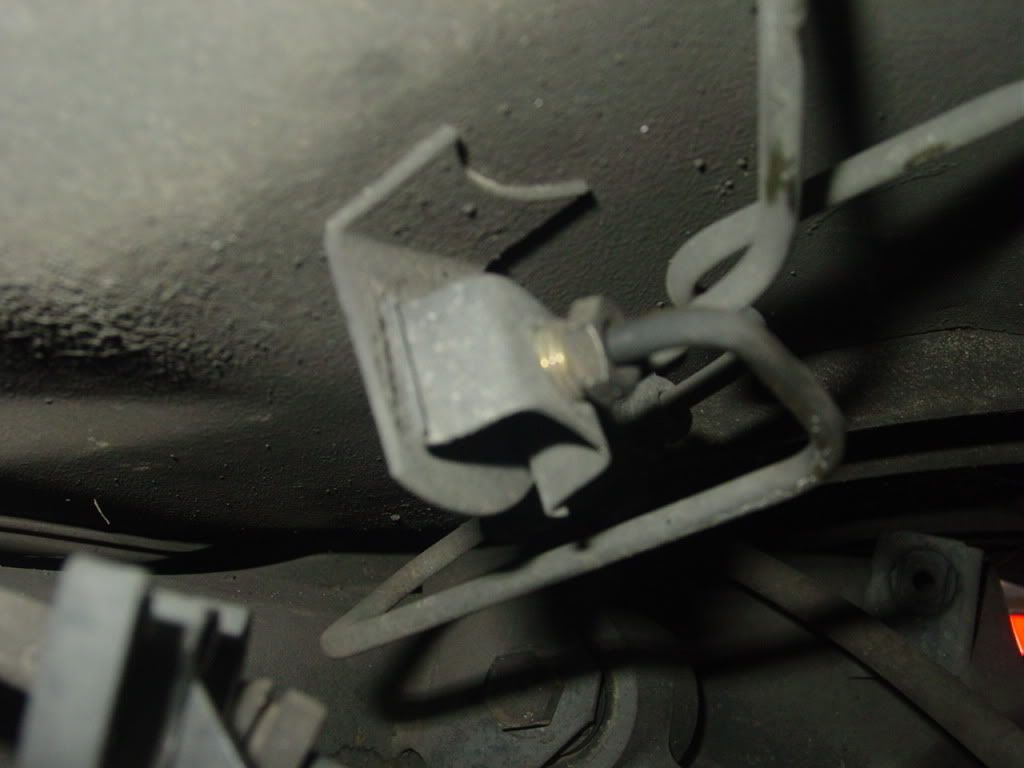
-Now locate the bottom metal brake line. It runs to the caliper area:
-Attach the second end of the fem-fem ss brake line to it and tighten:
Shot from UNDER the car:
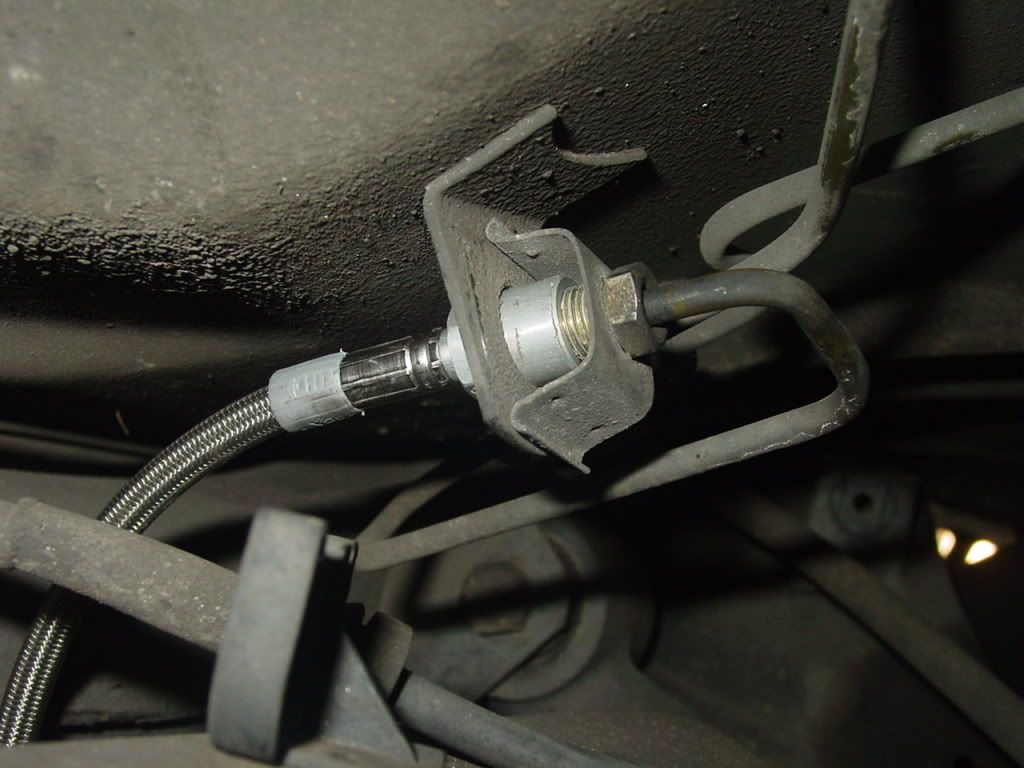
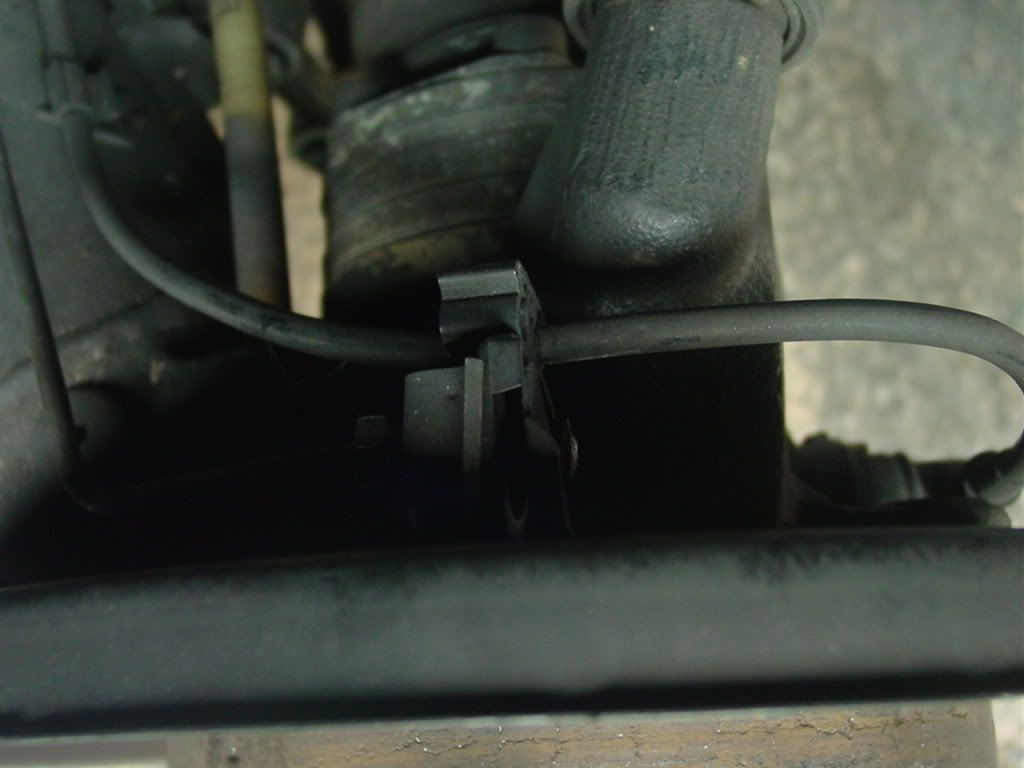
-Now look at the end of the metal brake line which runs to the caliper area:
Top view:
-Take the second SS brake line, fem-male and attach the female end to the metal brake line right behind the rotor:
The brake lines are done.
Step 23:
IF YOU’RE NOT DOING THE ROTORS, GO TO THE NEXT STEP.
*** So that some members can sleep good at night, I must say: clean the hub before installing the rotors! ***
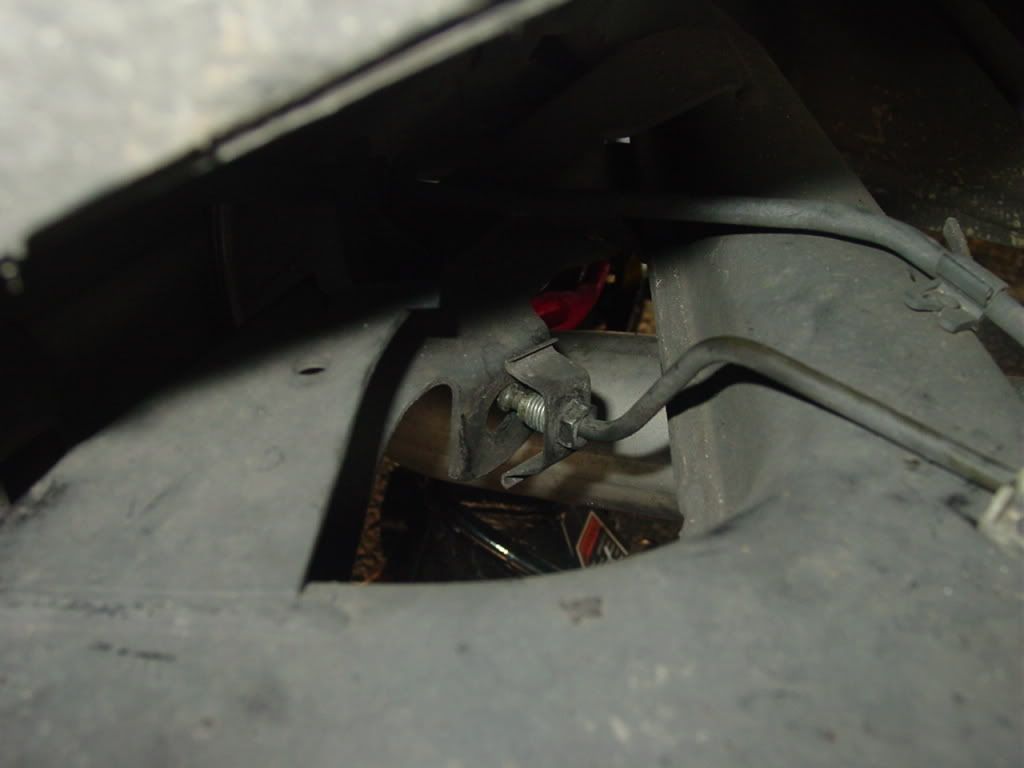
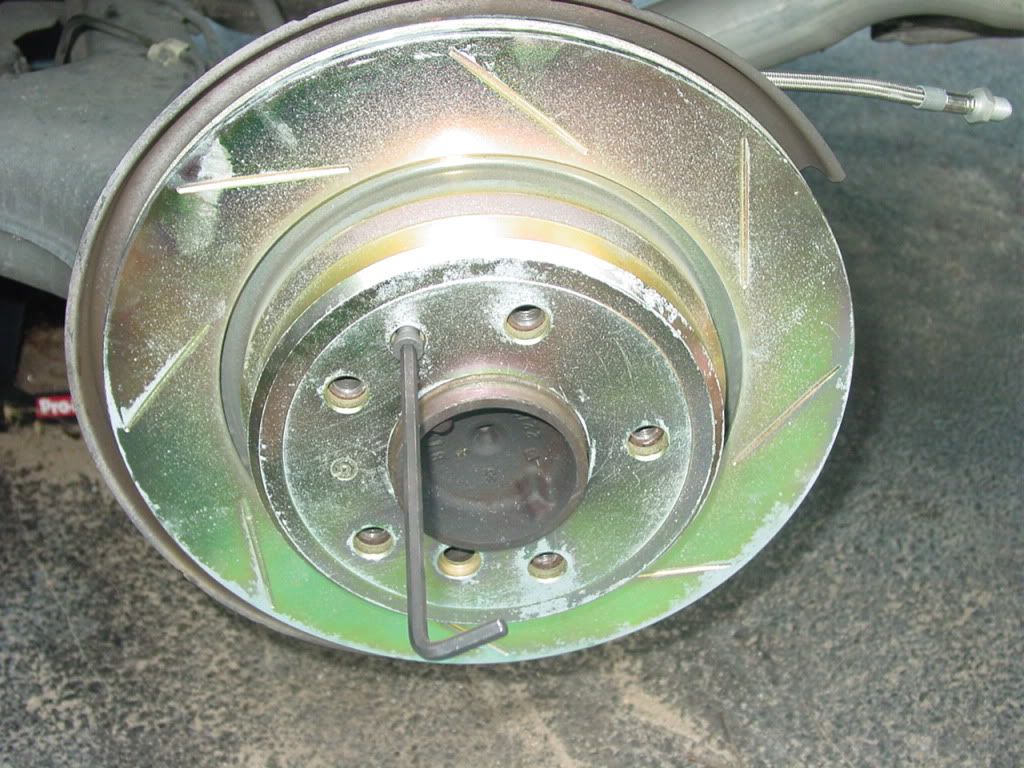
-If you’re doing the rotors, this is the bolt which holds the rotor attached:
-Take off the old rotor and install the new one:
Bingo!
Step 24:
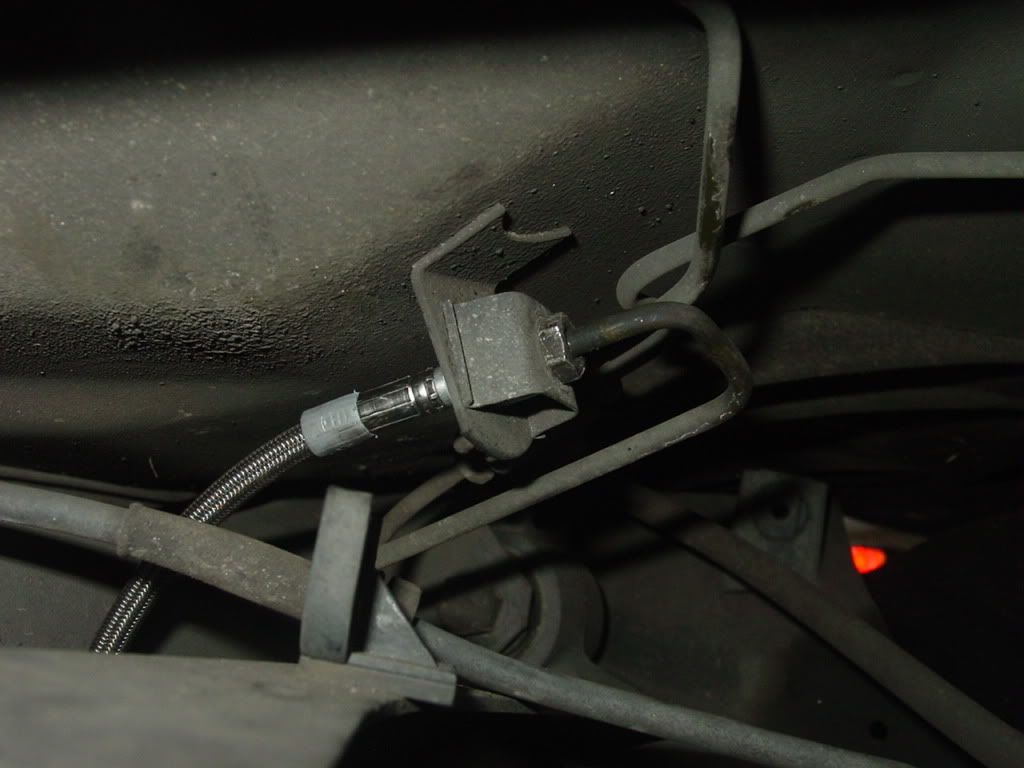
-Now take the caliper and bring it close to the male end of the ss brake line which you installed last:
-Insert the male end of the ss line into the caliper’s brake line hole and turn the entire caliper to the right to tighten it:
-When the brake line is on, take the 14mm flare wrench and tighten it. Not too hard.
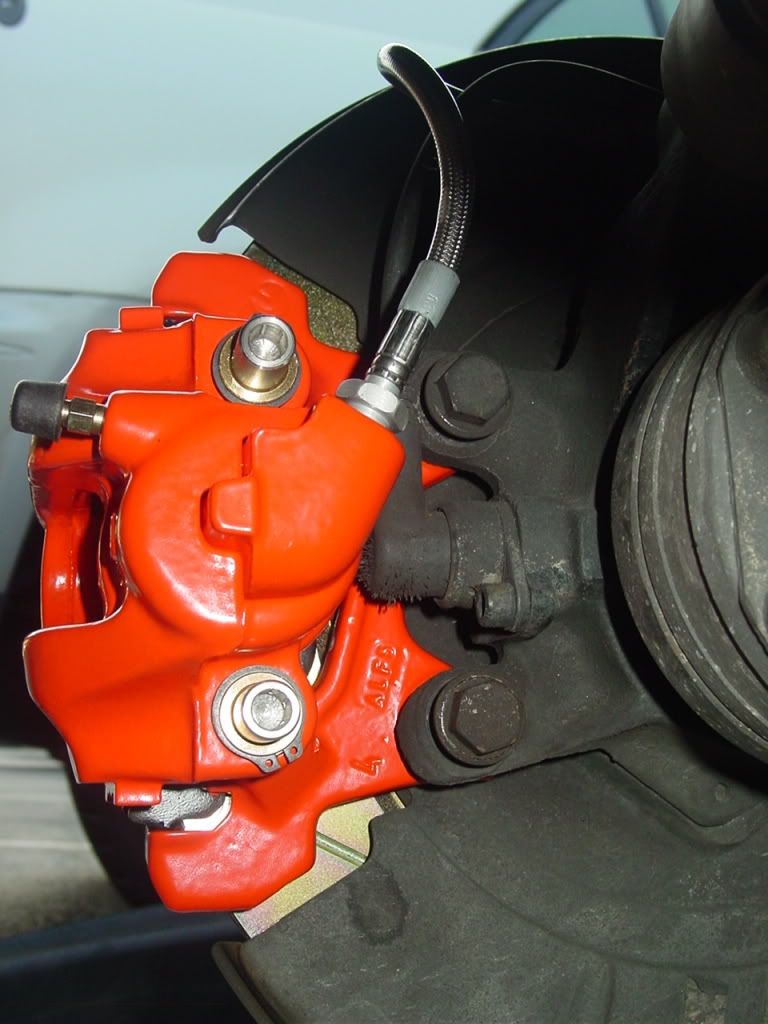
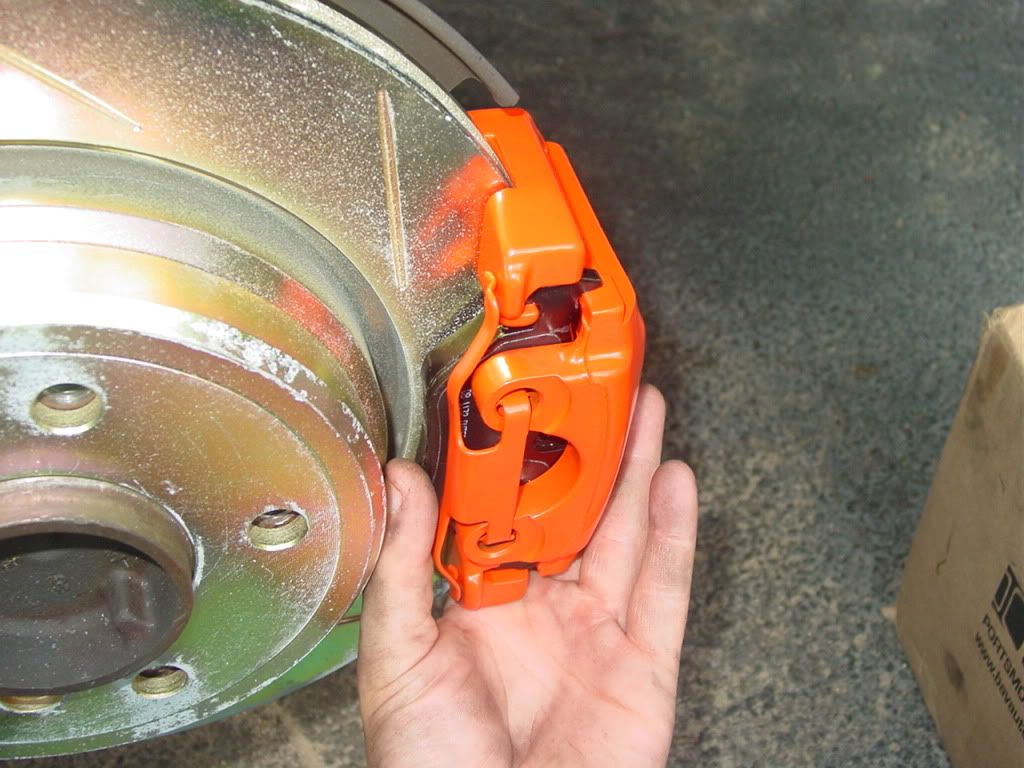
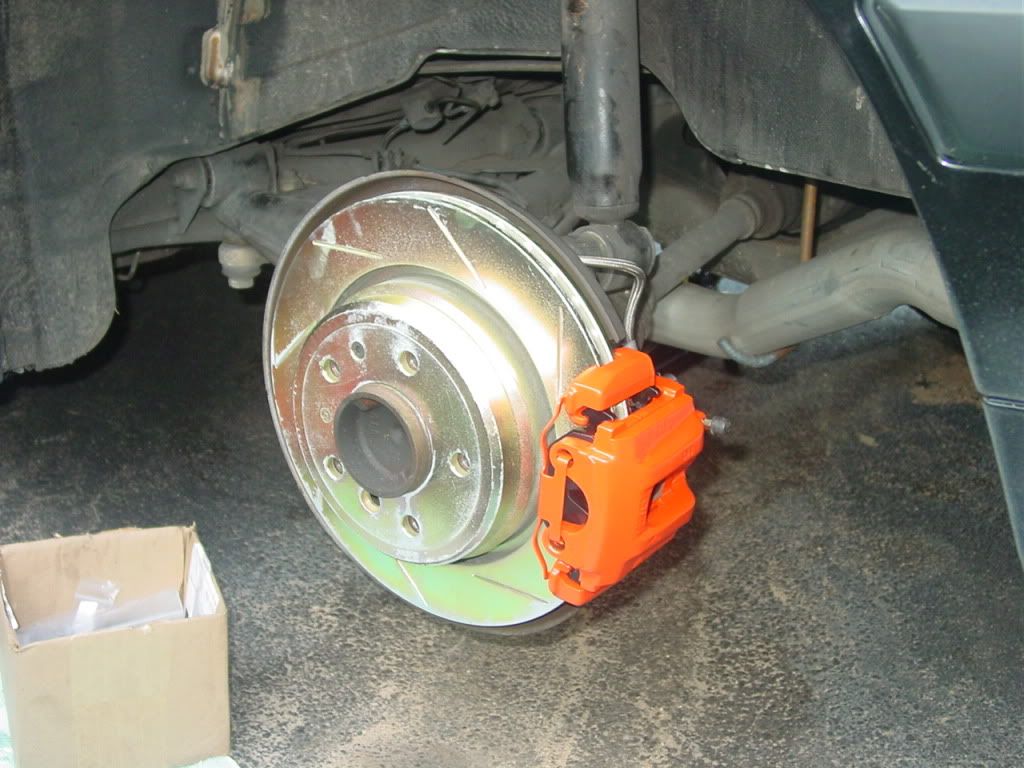
-Slide the caliper onto the rotor:
-While holding the caliper on the rotor, align the holes in the back of the rotor and using a 15mm socket, insert the bolts.
Side shot but you get the idea. One:
Two:
-Tighten the 2 bolts
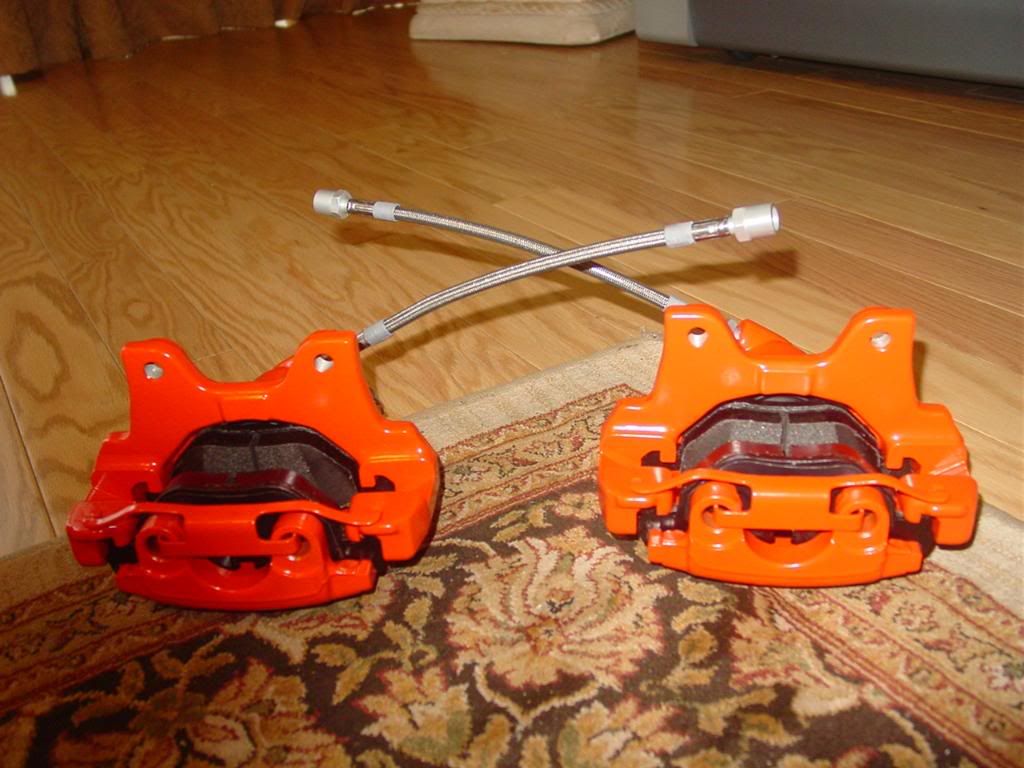
TADAAAAAH! You’re done with one caliper!
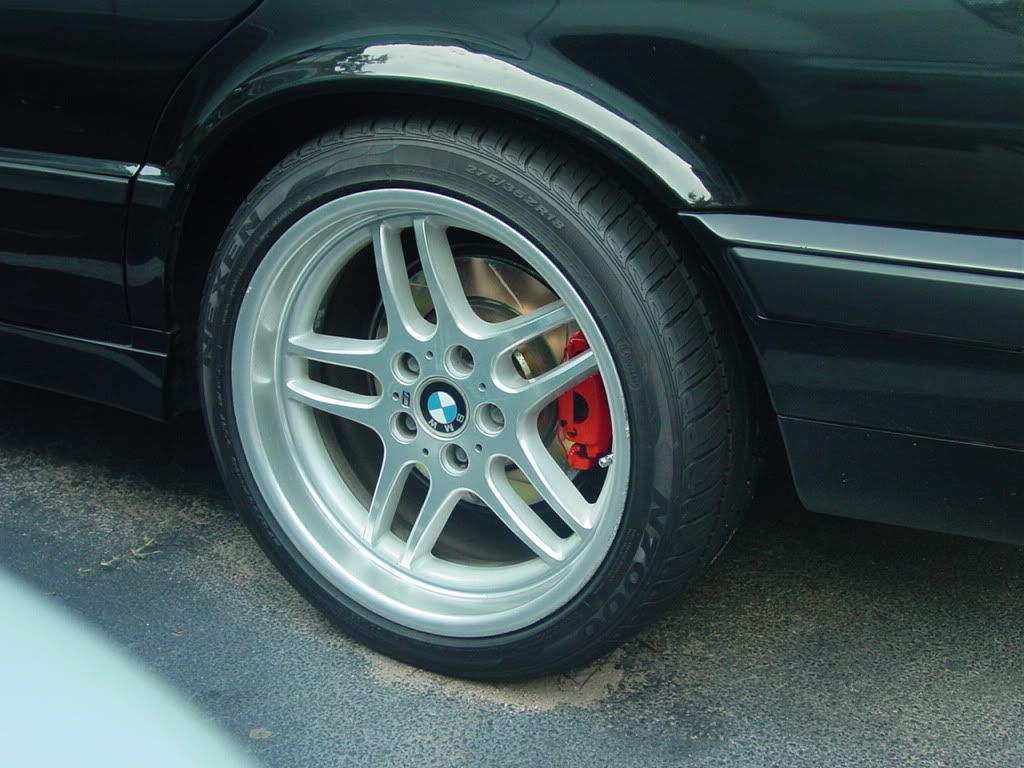
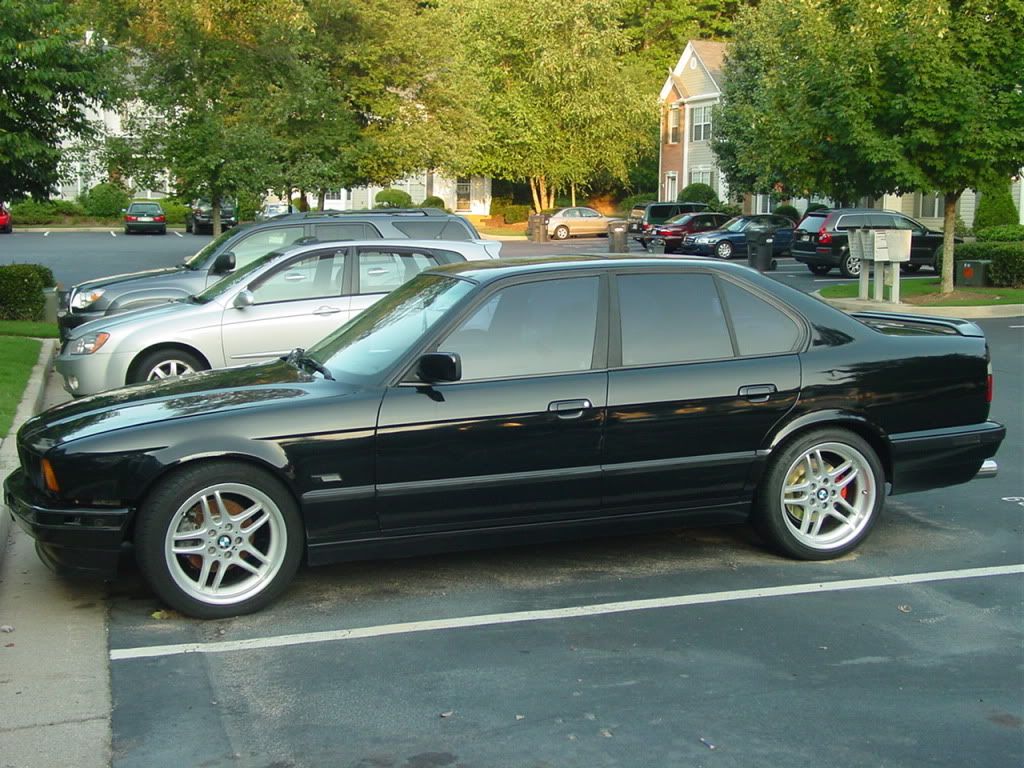
And some pics:
Last edited by acet; 08-05-2009 at 11:30 AM.
-Леха
Member
A+++ writeup!!
Has anyone really been far even as decided to use even go want to do look more like?
Wagonista
Great job, both on the brakes and the write up.
Member
This thread is unbelievably helpful!
Last edited by TouringGuy; 11-13-2012 at 10:49 AM.
Member
Thanks man!!Originally Posted by scyrusurcys

Thank you!


-Леха
Senile Member
BMW CCA Member
Wow, that's a great writeup! Very well done. A note you may consider that has helped with my writeups in the past (if you decide to take the extra steps) is to paste all that in to a word doc and create/attach a PDF to your writeup. It's helpful in the years to come if you pull your images for some reason.
I have to say.. I think our cars are extremely similar! Black, mpars, trunk spoiler, smileys, clear tails.. I see you have great taste! Now I just need to rebuild and pc my rear rotors.. if only I knew how!
Best recent quote: 'I got passed the other day by a 535. He was doing the speed limit. I was trying to do the speed limit.' -FieroZ34
Wheel whore & a BMW mech
Nice writeup, but you're doing some things wrong and is forgetting to write up stuf that is important when you do this kind of work.
First of all, those allen bolts is much much easier to just losen up BEFORE you even take of the caliper from the car. Atleast that is what i was teached when i worked at BMW a couple of years ago ;-) Secondly, never use a hammer like that, things kan brake/snap off if you use hit the wrong spot, luckily you just damaged your allen key and nothing else.
Second thing, why would you wanna change out the rubber housing to something that is solid? It's meant to be rubber and have those caps up above, it looks like you've done some own homework and put it all togheter without thinking of why the rubber is there from the beginning. Hehe.
Thirdly, don't forget to the tell the guys to losen up the 7mm bleeder valve AGAIN (or just skip part 16 of the guide and put in in AFTER you've put the piston back in, otherwise someone will probably hurt the caliper badly when using the tool that pushes the piston back in, as you describe you've already thigten the bleeder valve, it's recommended to not have it screwed on until you've got the piston back in place.
And last, when changing rotors, always make sure that the hub is clean, so i'd be glad if you adviced the others to clean of the hub before installing the new rotors, so it won't come dirt inbetween.
If you can listen to me and do this change in your thread, i know i can go to sleep at night without having people breaking things
Otherwise a great writeup!
Member
Everything is engineered for a purpose but they can always be re-engineered and designed better. These come from Bavauto and are described on their webpage:
http://www.bavauto.com/shop.asp
(Simple upgrade gives BMW brakes a better feel and more even pad wear. The stock caliper on most BMWs uses a rubber guide pin bushing that allows the caliper to twist when you brake. This upgrade a combination of precision guide pin and machined brass bushing eliminates twist and allows the caliper to squeeze more evenly. You get a better feel and longer pad wear. Set of four; one set required per axle).
I know one other that has done this upgraded and says that he can feel a little difference in braking, aka smoother/ even braking.
Great DIY/ write up Acet...I was expecting something good but this is awesome!
Last edited by AZDinanE34; 08-05-2009 at 06:17 AM. Reason: Automerged Doublepost
Member
Yes that is a great idea. I was actually wondering what I could do because all the pics in the photobucket are not organized and I can't move them to folders because it will break the links...
And yes!! Man the other day I was reading over your sig and thought to my self: "Wow this guy has his e34 modded the same way as I want to mod mine! Def looking fresh man!
You need to change out the rotors? That is actually rather easy. I can write a quick diy and pm it to you if you want. And I can pm you my number if you're having issues and want to ask something on the spot.
And thanks!
I don't agree that what I'm doing is wrong...maybe just different from your route...but I'm willing to take a look.
Maybe you're right but impossible is nothing as we can see from this diy...and hammer is my fav tool. What can I say, I like to hammer things?
Why do you own a 944 porsche if a geo metro can get you from place a to place b? Why add a turbo to a NA car? Why install carbon fiber parts? Obviously you don't think outside the box..."hehe"
While I see where you're coming from, I don't agree with you 100%. If you've ever observed the caliper, you can see that the hole where the brake lines attach is much larger than the bleeder screw and is plenty to install the piston...but so that you can sleep good at night, I added your "tips" to the diy.
I agree with you here.
Ok...I added them to the diy...now you can sleep good. Would you like me to get you some water and leave the night light on too?
Thanks!!
Amen brother. At least someone's on the same page with me because I was starting to wonder...haha
And thanks man!! I hope its useful for you! If you have any questions, feel free to pm!
Last edited by acet; 08-05-2009 at 12:06 PM.
-Леха
Wheel whore & a BMW mech
AZDinanE34, thanks for the answer
acet, don't take it so personally, i'm just trying to correct things here and i obviously got a little to much of those "wrongs" and got a little moody, because some times it's better to not teach others to do things when it can end up in more of a disaster than it helps, either you help and do it correctly all the way as doing incorrect in some steps may lead to a faulty car/brakes, and i don't think you want someone's life on your conscience? or you don't and don't care about others safety, so that's why. I hope you undertand my point of view here and why i sound so "serious" about it.
Member
Miche,
I had a pretty long day when I wrote this reply. You made a great point and I apologize if I came off as a asshole in my last reply. Thanks for the reply and thanks for the tips. As you can see, I did add them to the diy
Glad this thread didn't turn into another one of those argument battles. Looking forward to seeing you in the e34 section and welcome!!
-Леха
Wheel whore & a BMW mech
No problem dude
Everyone has a bad day sometimes and it's nothing wrong about that
I'm glad that you understod my pov! And i'm just here to help, learn and share my experiences and bring happiness to us all, as the last thing i want to do is starting silly arguments
Thanks! I think i'll enjoy the forums! (mostly here in the e34 section), even if i got e28's, e30's, e31, e32 and 3x e34's
Member
Lol... Yep.
Nice write up!
Member
I guess I'm not the only one...
"A guy walks up to a girl and says: 'Let's play carpenter. We'll get hammered and I'll nail you'"
Lol...
And thanks!!
-Леха
14/f/cali
Bumpage!
Those look hot dude. When I have some spare $ I'd love to do this. Is it the same for the front calipers?
Member
This is exactly how DIY threads should look like. Excellent post!
Member
awesome write up dude!!!! now do the front ones!
loooooooooking great!
Member
The front calipers are IDENTICAL but different size. Hense I think I'll just rename the thead to CALIPER REBUILD
Thanks. You know, I try!!
The front ones are done. The rebuild process is the same. The only difference is the caliper size. Here's a link to the thread with front brakes:
http://forums.bimmerforums.com/forum....php?t=1272733
-Леха
Member
AWESOME!
You are a true artist. You made my day. I was having problems putting the dust boot back on.
Member
Lakuss, glad I could help
-Леха
Y̝͎̘̍́ͣ̉͑̿̆Ō͎̼̺̬̒ͯ̃̇͗̂ U͈̖
Just rebuilt my rears. A couple questions...
Is it necessary to put grease on the piston? I just put some brake fluid around it and pressed it in.
And also, i wish i saw this thread. I put the dust boot on the hard way...after the piston was in. It was a pain in the ass getting the in and outside to seat in the grooves.
Member
Not necessary but I was told that is was a good idea.
Yeah I cant imagine how hard it would be to install the boot into a pressed caliper. It's like installing a battery from under the car with the hood closed. Possible, but a total PITA lol
but dont feel bad. I, too, have done thing the hard way only to learn that it was so easy and instead of 5 minutes, it took me 2 hours lol
-Леха
 Posting Permissions


")


Bookmarks