
 Member
Alrighty, so I decided to take on the task of fixing the heated seat elements. I took a bunch of pictures and will walk through how I did it so you can follow and hopefully save your self a bit of cash but most importantly stenghten that bond between you and machine that we all really care about. If anyone has questions you can PM me or post on here, I will do my best to get back to you but find that I don't get on here for days on end sometimes.
I will start by saying if you don't have practical experiance with fixing cars, soldering, and lots of patience then don't bother, spend the money for someone to just put in a new one. I think they are like $100 each so not too exspensive. I mainly did this because it was snowing and freezing rain and had nothing better to do after work.
You will want to check continuity of the seat padwhile the seat is in the car to make sure you need ot go through this prcoess. i fyou do have continuity obviously check other aspects of the system and also sit in the seat and see if you lose the connection, alot of heaters will be connected until the seat is sat in and wires are seperated.
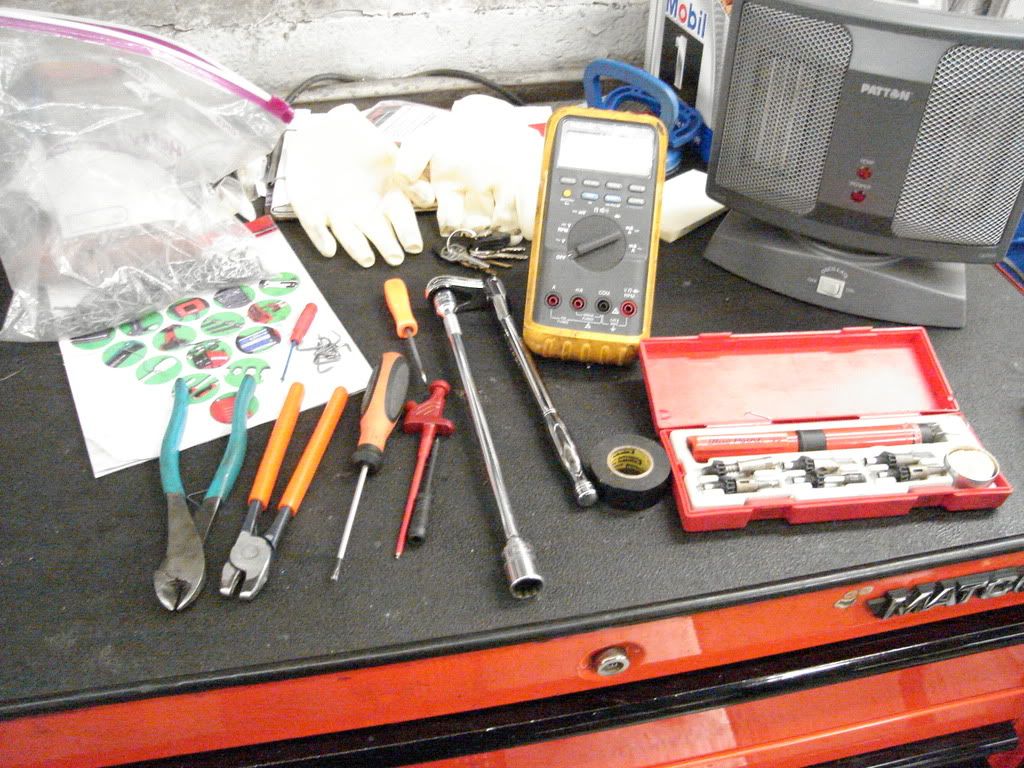
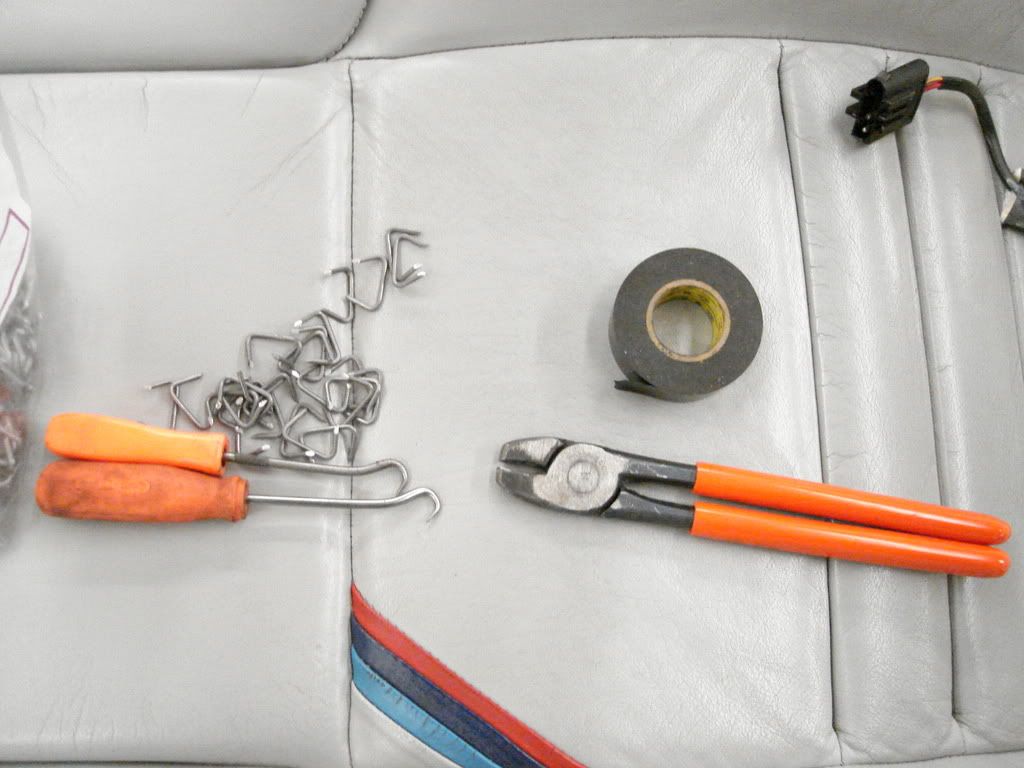
The tools I needed:
-16mm socket, extension, ratchet (to remove seat)
-#20 torx either bit or screw driver, I like the screw driver cause it's easier to manage.
-hooks for grabbing things
-multi meter
-good battery for testing purposes (you could use your own from the car)
-hog ring pliers and atleast 50 hog rings
-soldering kit
-solder (you want thin guage)
-wire cutters (you want some with good leverage to break the old hog rings)
So to start off with you want to remove the seat from your car, I added a link to another seat DIY that includes seat removal. I will give you the cliff notes for removing the seat:
http://forums.bimmerforums.com/forum...seat+cable+fix
-get a E36 M3 (mine came with vadars)
-disconnect battery
-Open drivers or passengers door (which ever is the problem side)
-Move seat fully forward and unbolt the 2 bolts at the rear of the frame, 16mm.
-slide seat back
-remove bolt covers on front
-remove the nuts, again 16mm
-tilt the seat back to access the wire connectors under seat
-unplug connectors
-set seat sitting up and tilt the top of the seat out the door, then lift the bottom to follow, be carefull to not damage plastic trim around door frame.
-congradulations! you have done the easiest part!
Alright to get to the more intricate stuff....
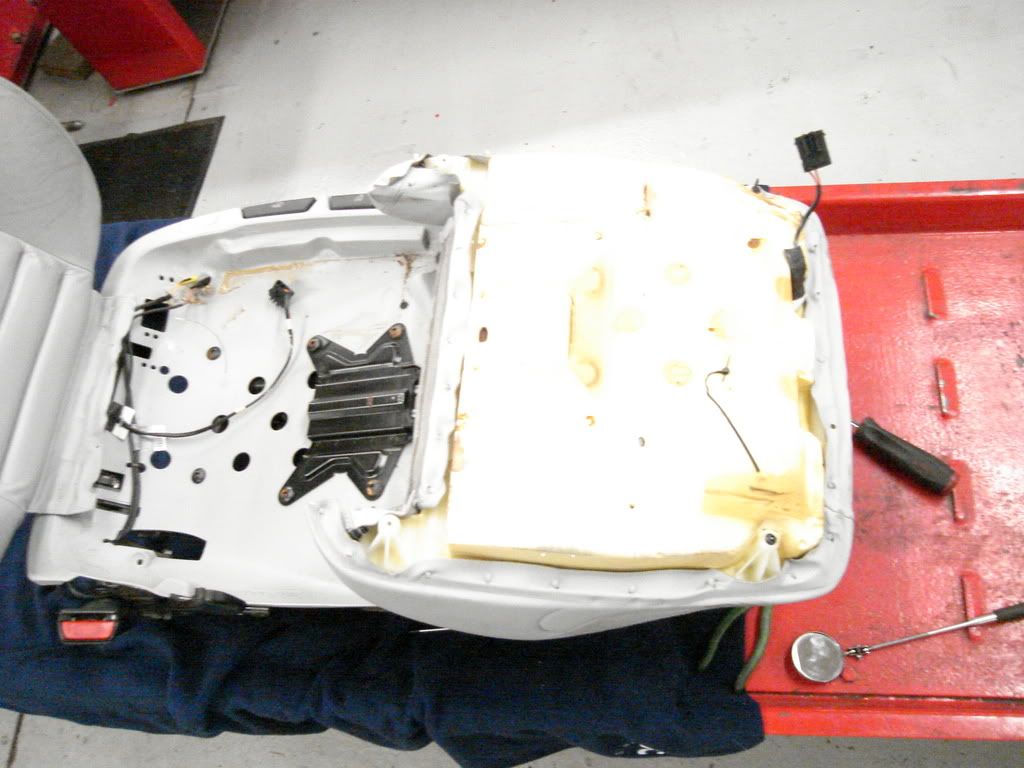
-Set seat face down on a blanket or something to protect the leather from damage.
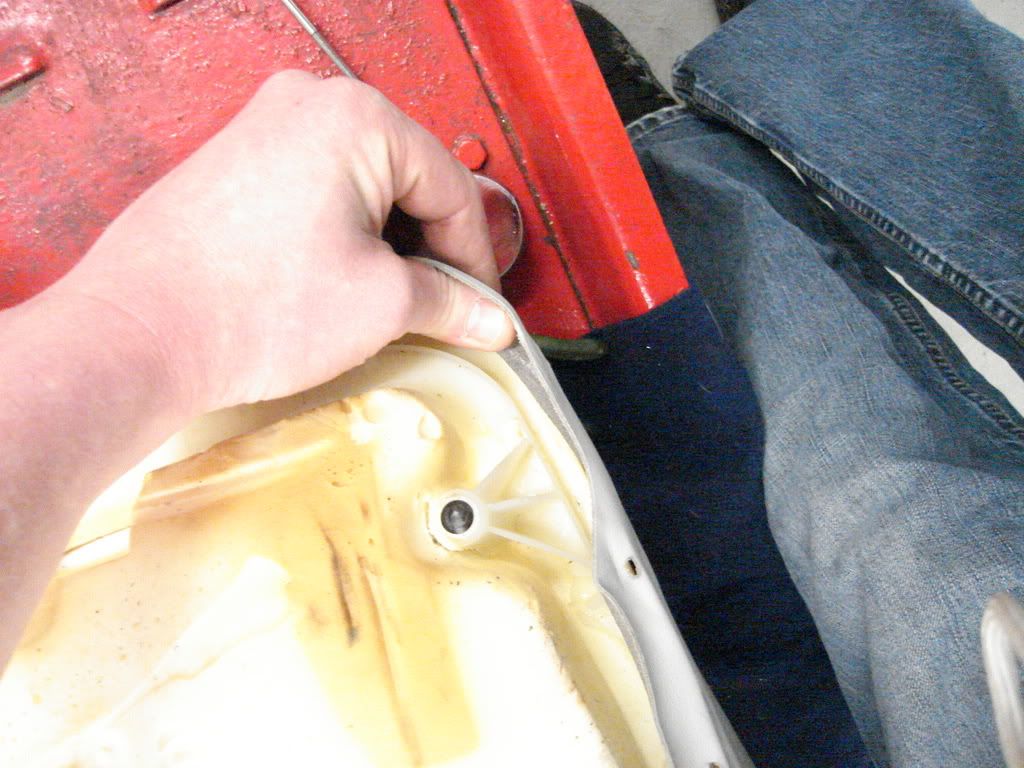
-On the seat bottom there are 2 clips close to the seat back, those will either need to be broken (mine would only break) or easily remove them to save the clip (good luck). Then remove the 2 #20 torx screws at the front 2 corners of the seat.
-The seat cushion will now be loose, be advised that the foam and leather may be suck to the plastic from age and never being moved so work it off carefully, don't pull hard at it cause you may tear material.
-Fold the bottom seat cushion forward over the leg support to access the hooks that hold the leather.
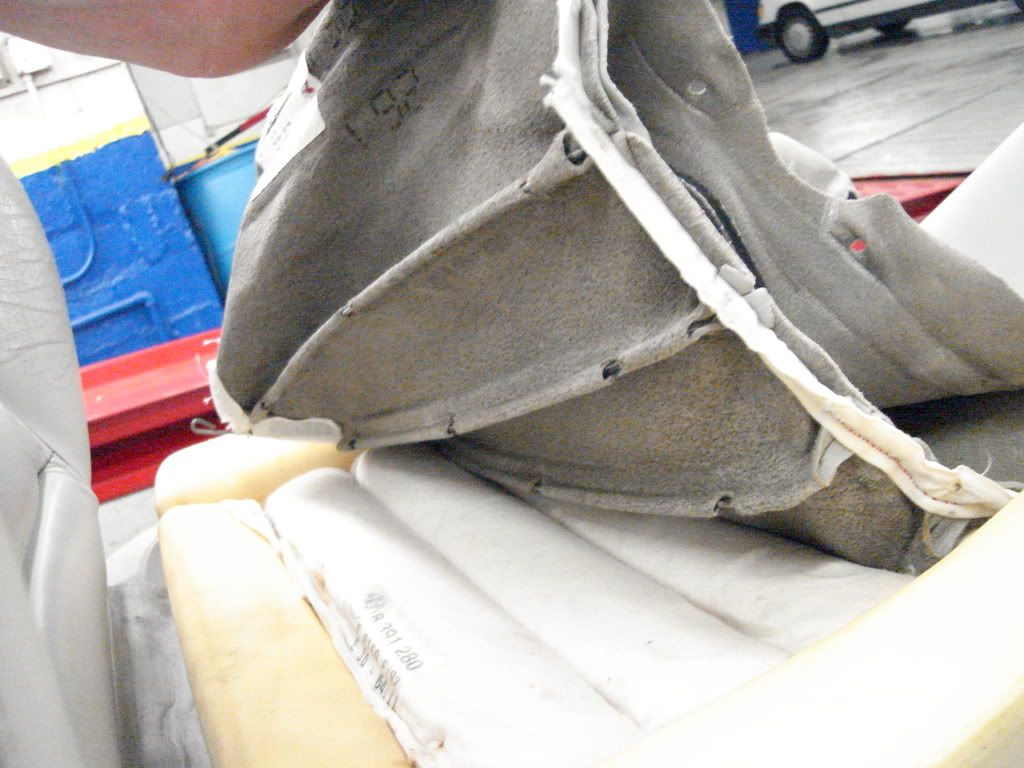
-Pull the leather toward the center of the seat to slide off the clips, the idea here is to not tear around the little holes so it will hold just as strong and not develop tears later down the road.
-After unclipping the leather and paying attention to the way pieces are folded over one another (refer to pictures if you forgot how they were during re-assembly) you will want to roll the edges over. Rolling it over allows the material to strech but also reduces the stress its put under so it will keep it from tearing.
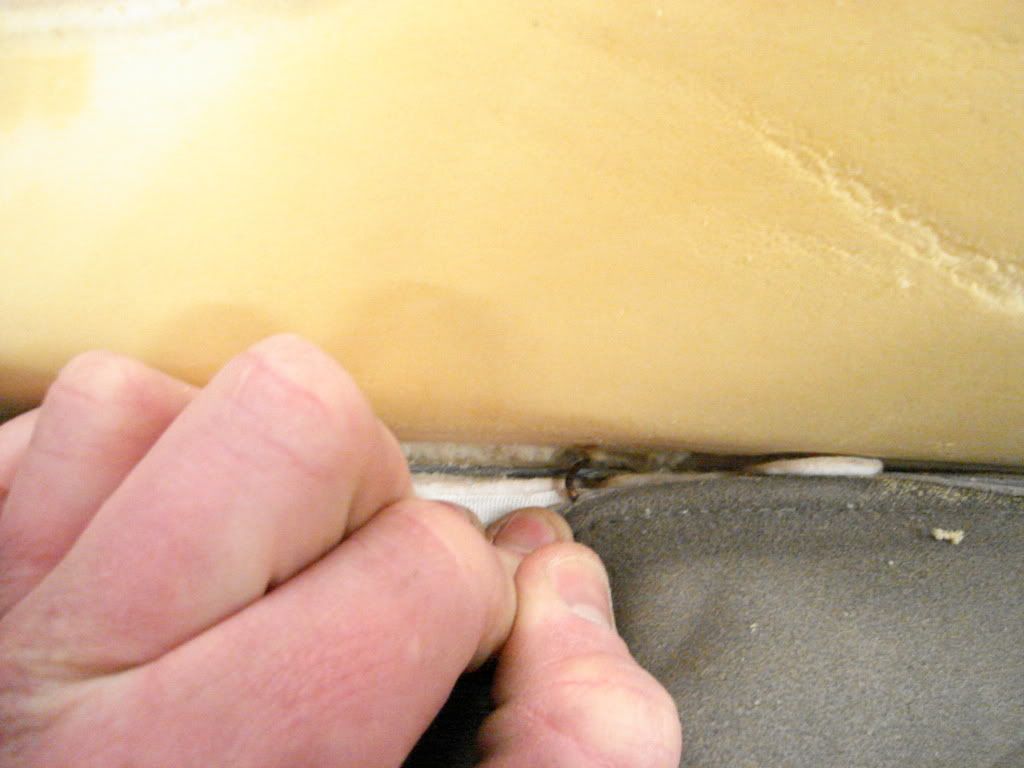
-Now you will want to work around the edges cutting the hog rings. I did the sides first then moved to the center, this was the best method I came up with for getting them off and on without risking damage. You may have to cut the same ring twice, I found that it felt like I cut it, but it was still connected.
-Once you have got the leather unclipped to the point the heater will come out you can stop, no need to unclip the entire cover if your just going to fix/replace the heater.
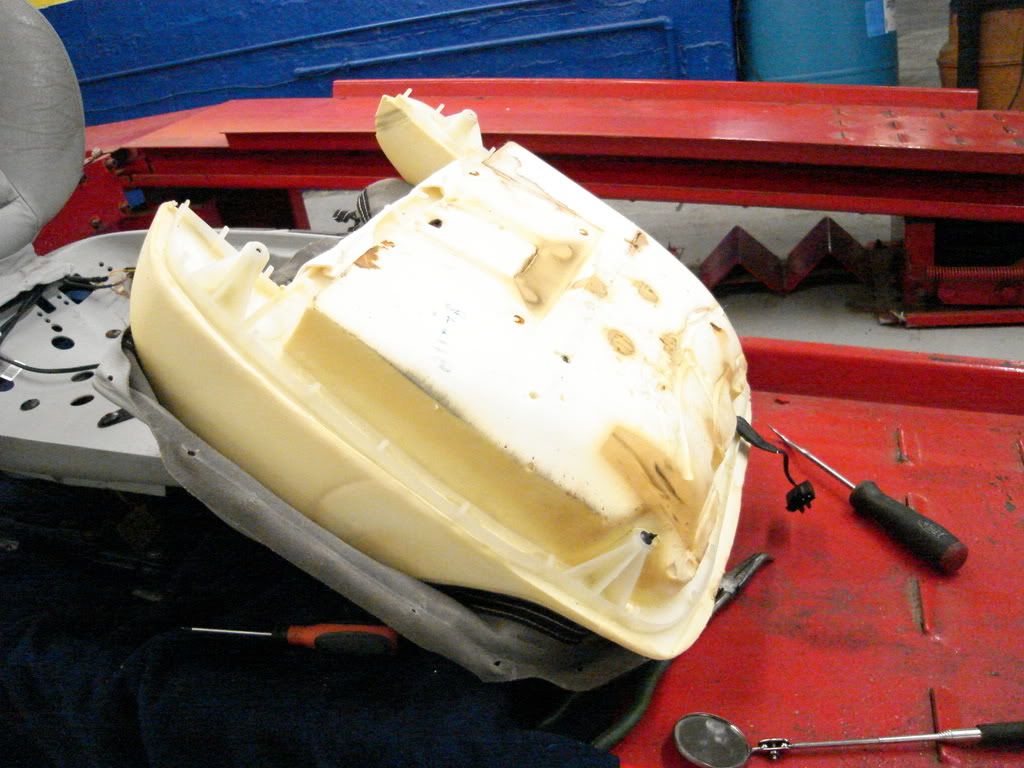
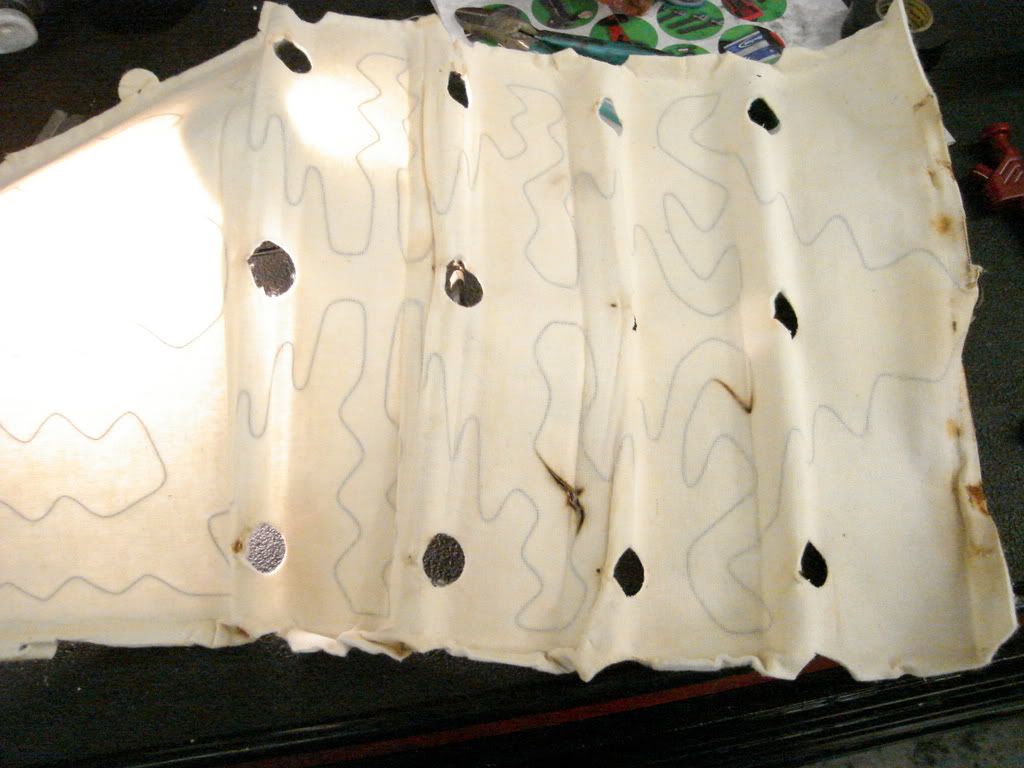
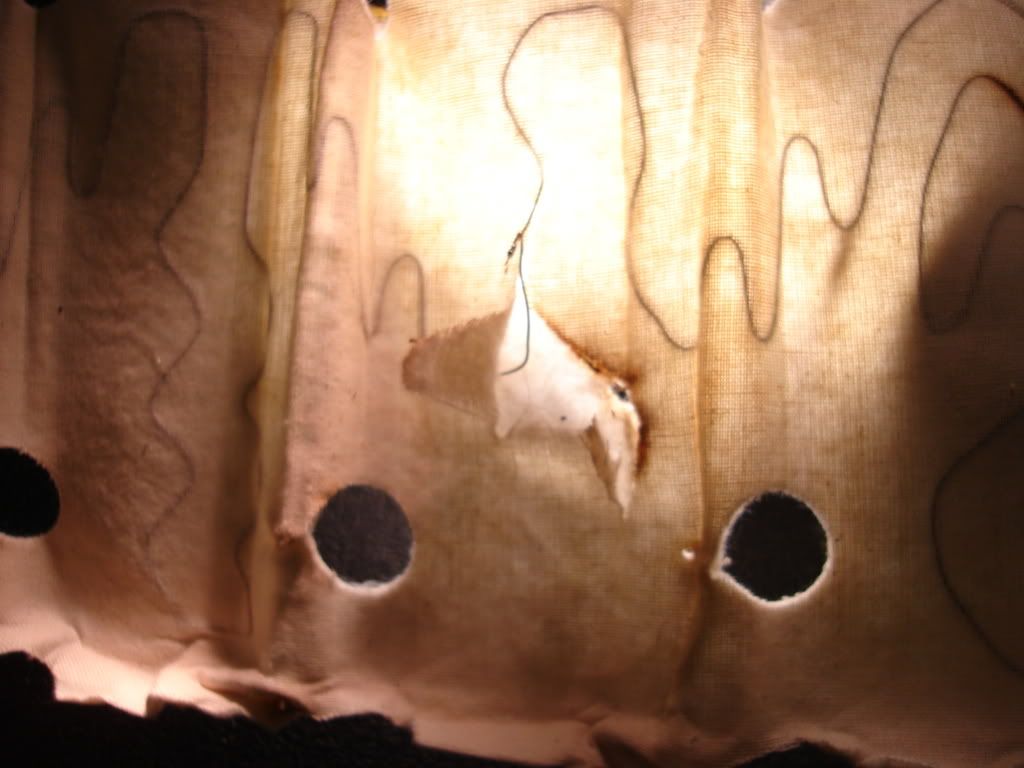
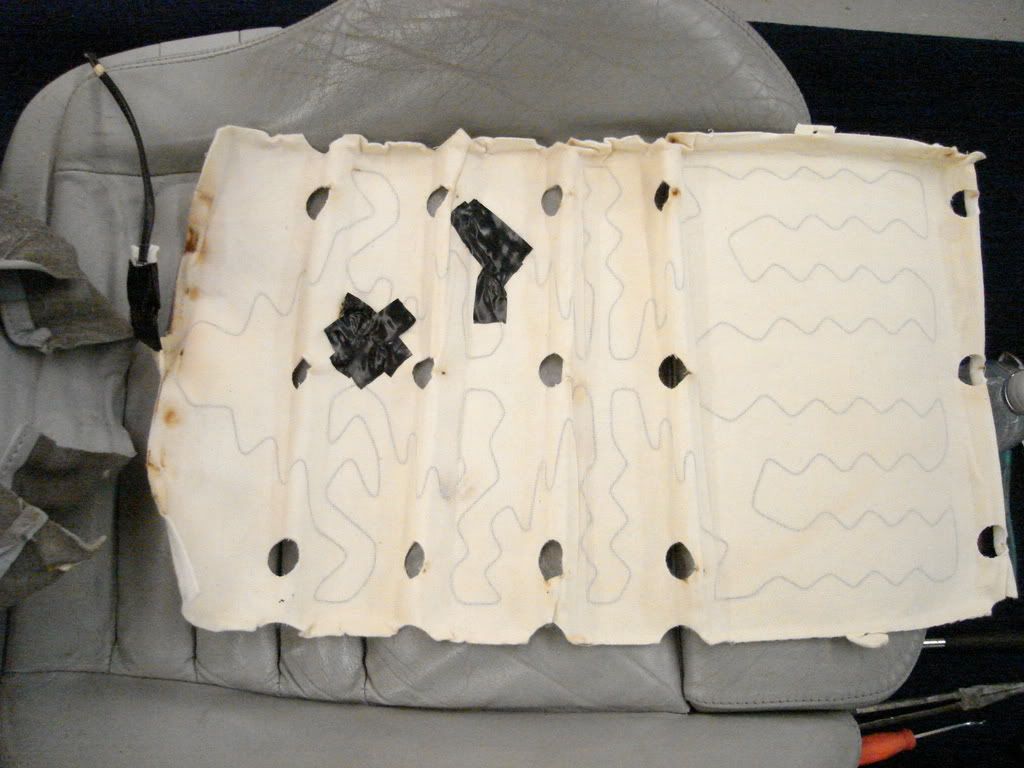
-With heater out you can look for noticable burn marks on the foam pad of the seat and on the heater itself, these will give you a good indication of where to check for breaks. I found that on my rear pad the wires were schorched causing them to not pass current. I had to pull sections of the wire and jump them, basically I lost some of the space the heating element works for to make a good connection.
-You now want to hook the multimeter up and check for continuity, if you have reached this step and do then you wasted alot of time and should have paid attention to checking the continuity before removing the seat from the car. If you did check and it had an open circuit and now has continuity you need ot move around the seat material while watching the meter to see if it breaks the circuit.
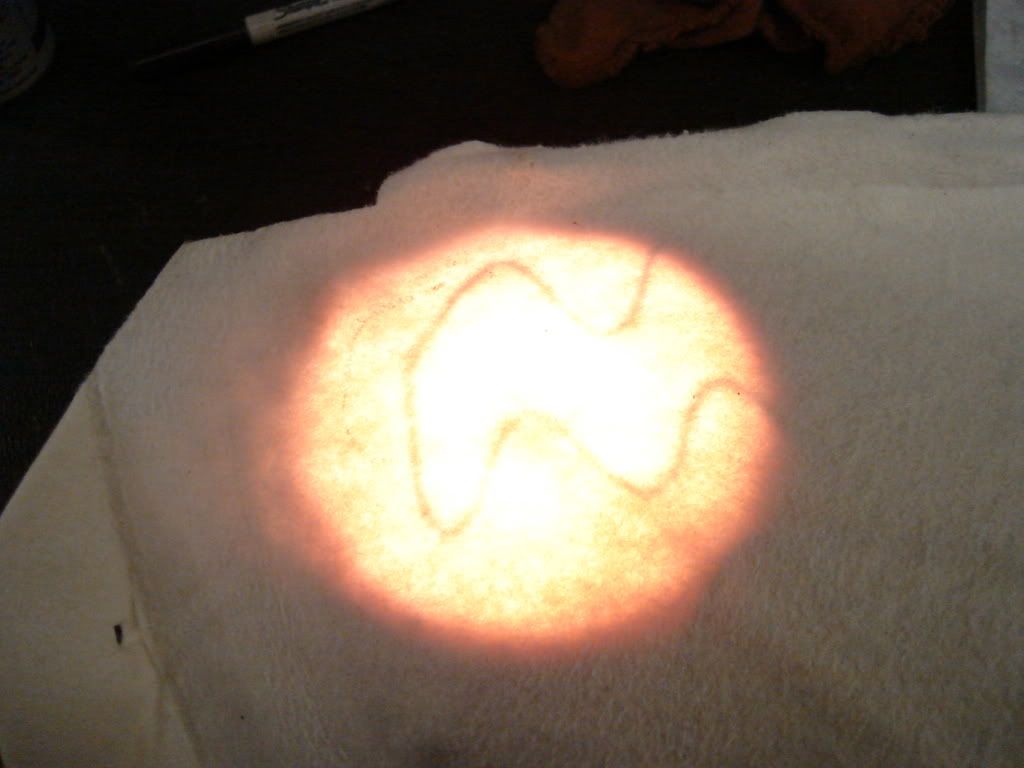
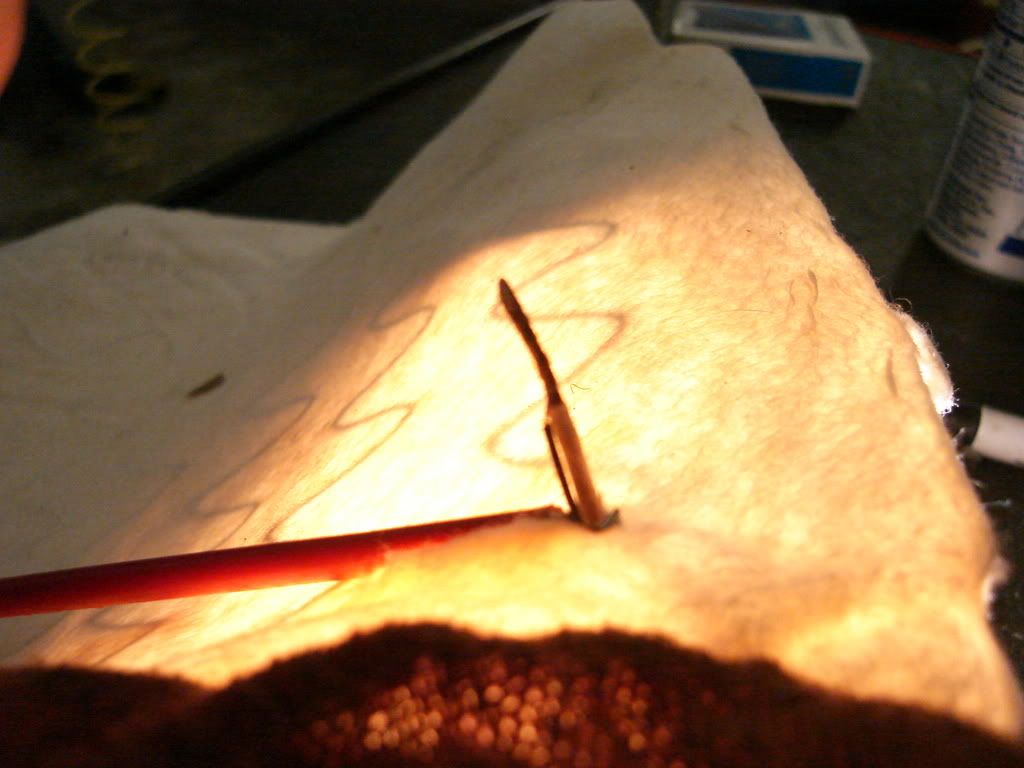
I found using a floresent light under the pad helps to see the wire patterns and can aid in finding a break but due to the material used ot insulate the wires it hard to see where a break is. I started by opening from the fleece side (up side) to access the connection points. Only cut where you need to. The materials are glued together so you can't just seperate the pad layers.
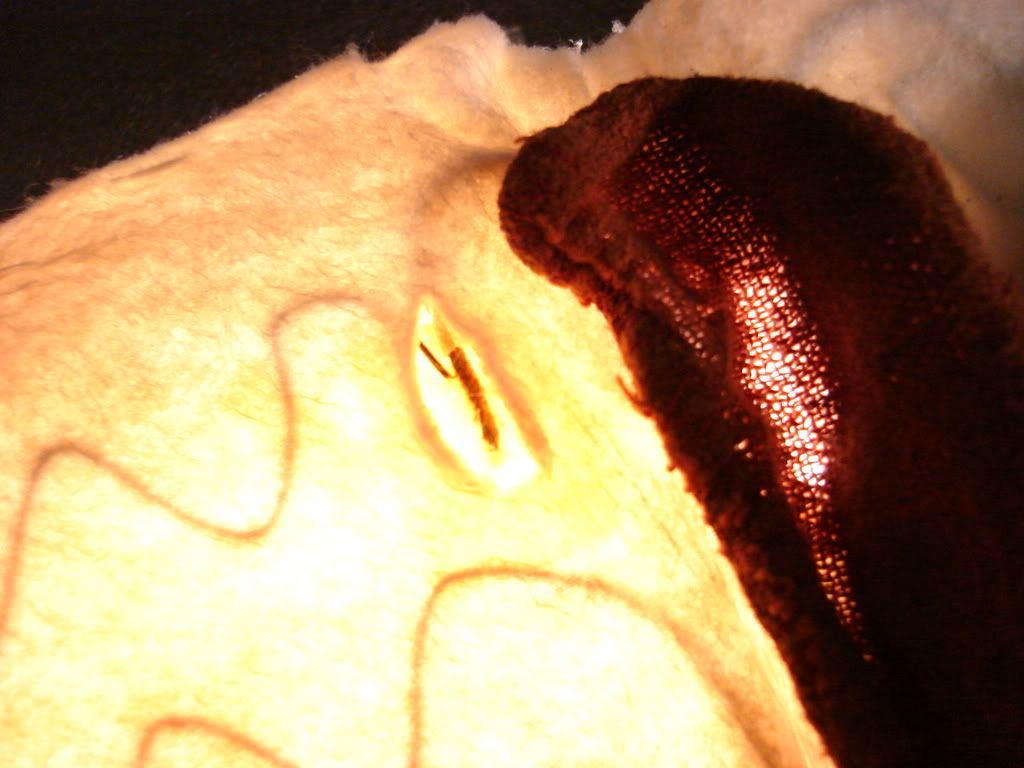
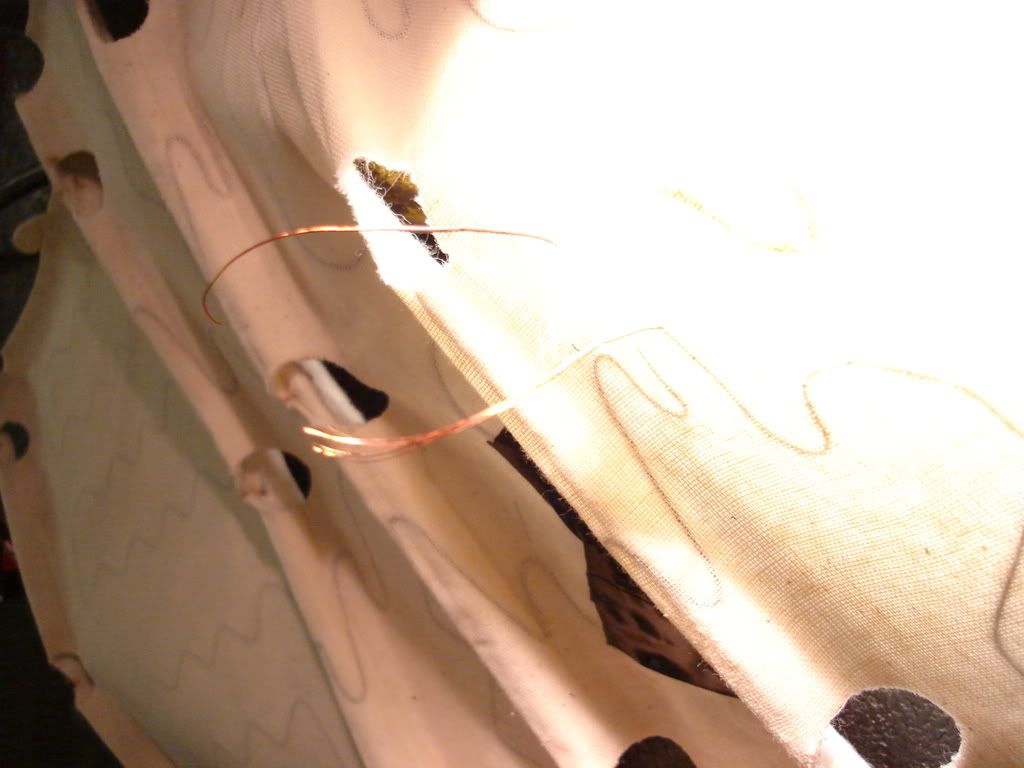
Once you have the solder points exposed you can check to make sure the small wire is properly attached to the big wire. What I did was open 2 sides that only have the 2 ends of the small wire (on seat bottom) and used the mutlimeter to check continuity between the 2 points to verify that section has a good connection. Work your way around until you find a problem area, repair, then check continuity through the connector (testing the whole pad). I found I had multiple points that were issues so many repairs were needed to gain continuity between the 2 connector pins. One the seat back it is one long small wire that requires a little more intricate work to figure out where the breaks are but if you have got this far you will be able to figure it out.
Once the repairs have been made make sure you protect the areas where the material was cut open. I used electrical tape since it was late and didn't have a drivers seat to go anywhere. I would assume this is going to work fine for the long haul.
Now the real fun begins...
Attaching the leather back to the seat takes the most patience out of this process because you want to make sure everything lines up to reduce wrinkling.
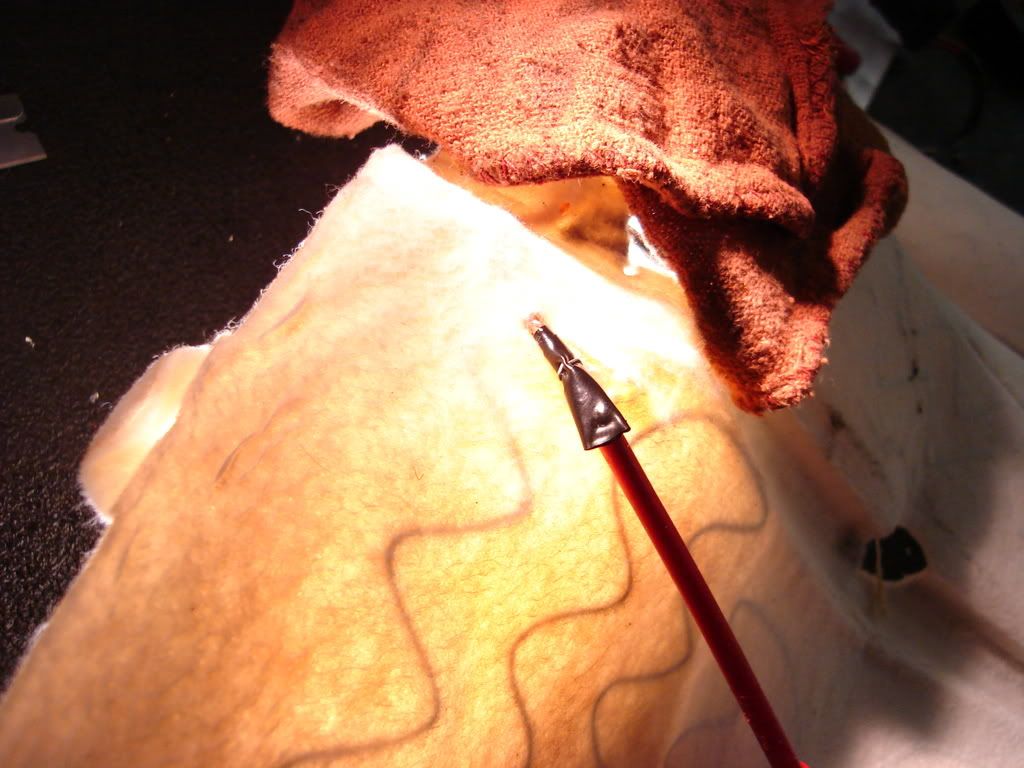
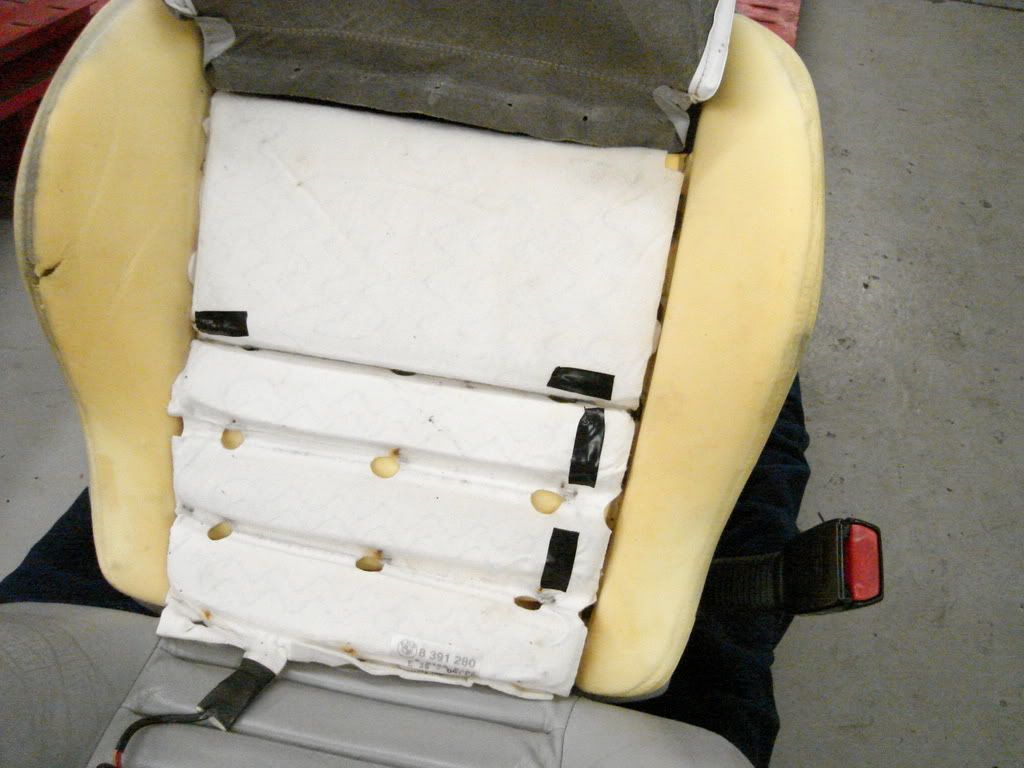
To start you want to mock up the heater element on the first block your going to attach, this means tucking the corners down in the seat foam and makeing sure its flat and even lined up.
To attach the hog rings I found using a hook to grab the bar in the foam to lift it up some to make the hog ring easier to put on the easiest way. You don't want to pull very hard on the bar mounted in the foam because the foam is the only thing holding it in place and will tear with that right amount of force.
You want to work your way from the deepest part out going from left to right or right to left attaching the hog rings. After you have the centers moounted then you can go and attach the side rings. This is the easiest way of doing it, trust me!
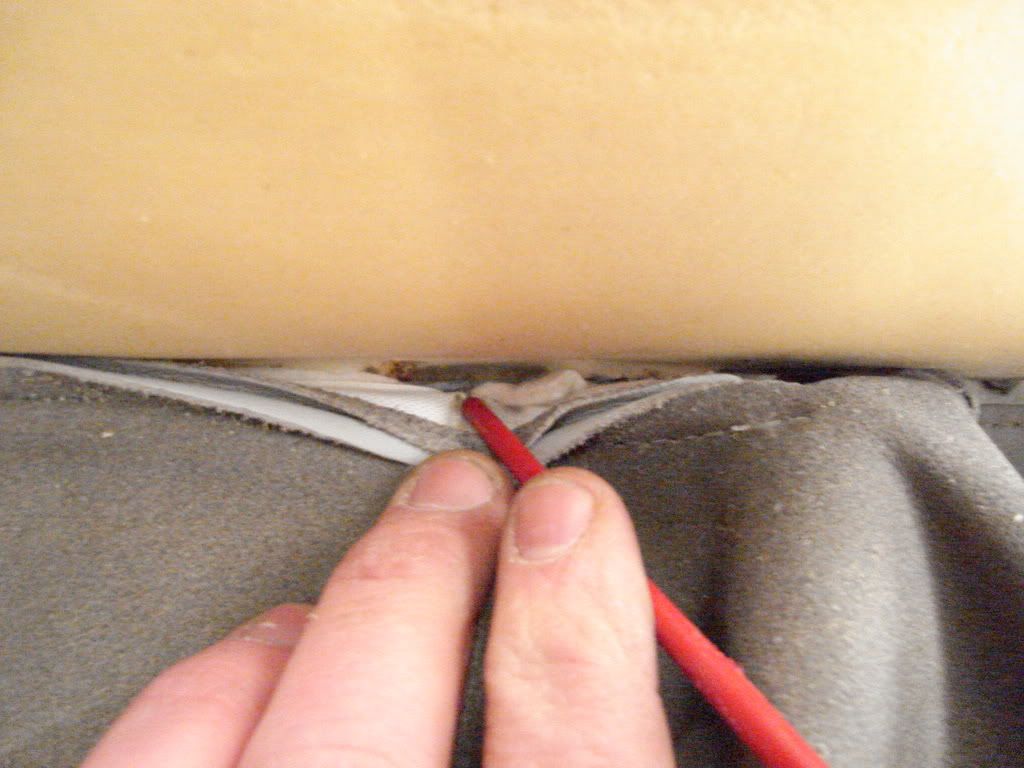
Once you have a side section attached you want to push the leather material into the slot where the 2 bars meet to ensure the stiched edges dont have bulges and will look just like they were before removal.
You then want to make any adjustments to the alignment of the hog rings and leather in the center portion prior to rolling material over the edges so that everyhting is centered and siting flush in the many nice cracks of the foam pad.
Then you roll material back over basically reverse of taking them off, you then will want to rub leather to smooth surface even smacking it helps to give it the final little adjustments needed to ensure a smooth surface with out streches or wrinkles.
Attach leater material on back side of seats using same hooks overlapping in the same manner it was taken apart, piece trim pieces back togethe ron seat and double check for continuity before re-installing seat in car (this could be done sooner if you want but the idea is once it's all buttoned up it should not shift much where while you are still attaching leather it could cause it to move around).
Put seat back in car and enjoy the pleasures of eated seats all over again!
If anyone has questions or needs specific help please PM or post message in this thread and I will help as much as possible.
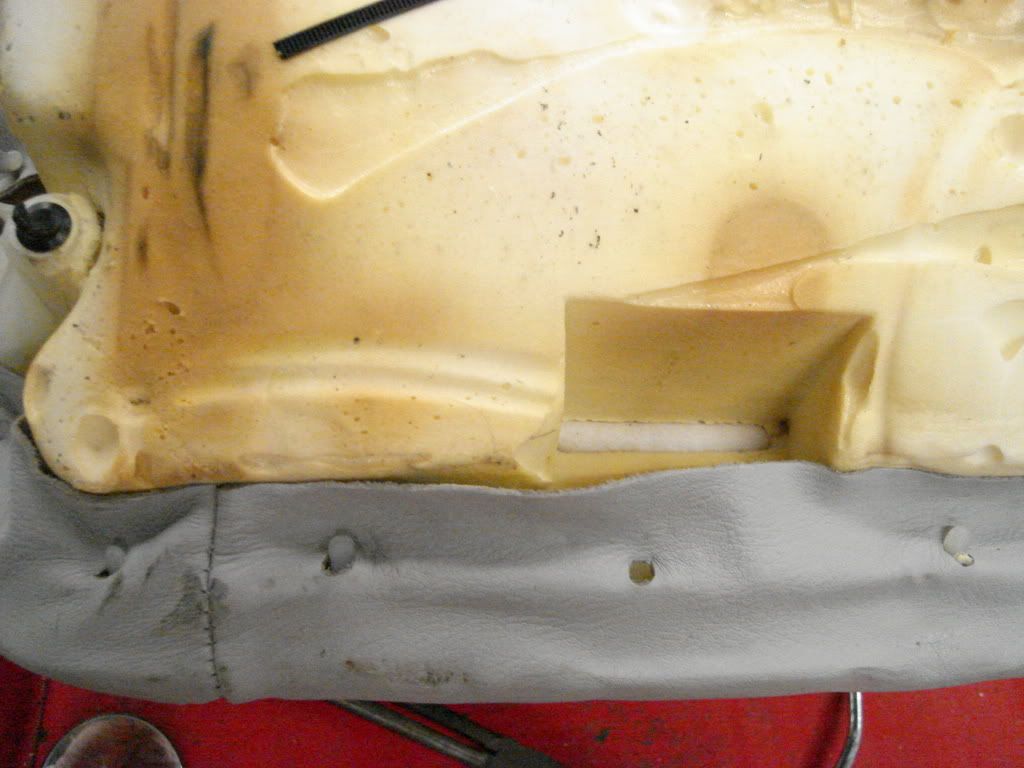
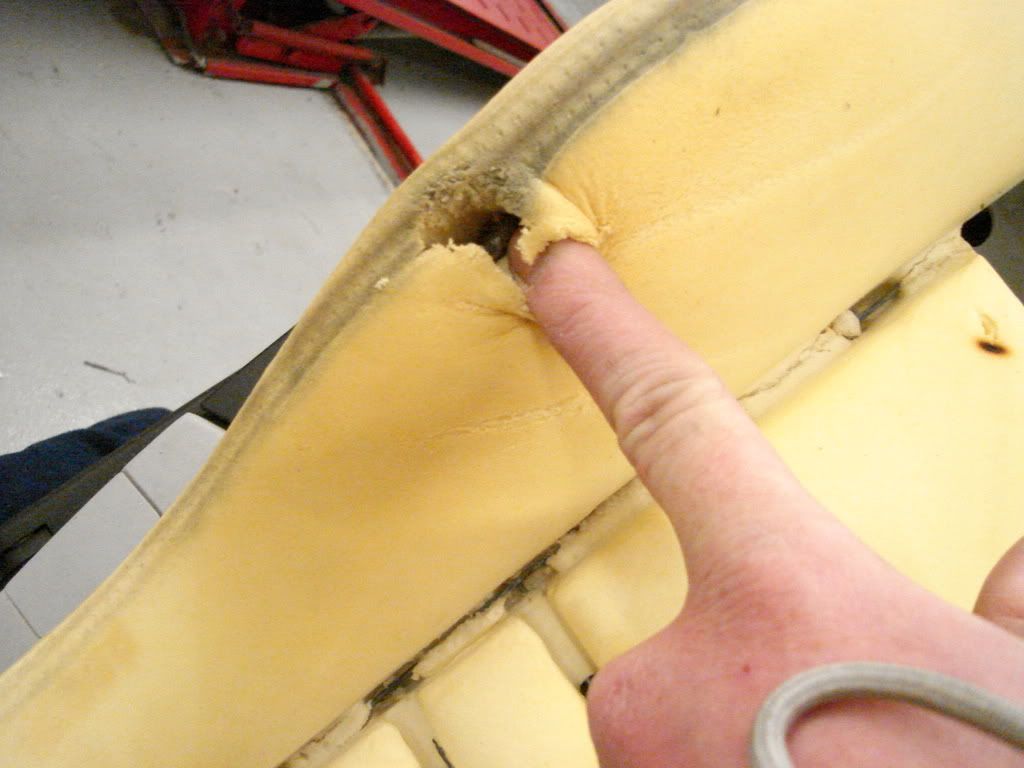
While I was in there I noticed the foam be degraded from getting in and out of the car, I used some adhesive foam for sealing truck caps or door seals at a house. I just put someover the exposed metal and fluffed the pad to make it as smooth as possible.
Hopefully that covers it guys, sorry for the mis spellings but my fingers are cold and I don't feel like spell checking today... maby I will update it later on.
*** Fiberglass cloth can be used as the "fire proof" material in the heater, from what I had seen when I had it apart it looks like that may be what was used. Just wanted to make sure the information is here for anyone wondering the same thing.
Last edited by joe91985; 02-05-2009 at 08:13 AM. Reason: Automerged Doublepost
OG Senior Member
nice write up, the last pic you posted with the foam padding, that is super common for that to wear and eventually results in a hole in the leather cover. Mine is worn and I can feel metal poking against the leather but luckily no hole yet so I went and ordered a new seat foam bottom, I'm also using the heating element from an e60 seat cover.
How long did this job take you?
Member
forgot to put working time in.... took bout 4 hours, alot of that was screwing around with the elements trying to find breaks. If I had to go back into it, I could ahve the elements say replaced with new ones in bout an hour. Obviously thats knowing what I'm doing now that I've been in there.
Yeah I put some one sided adhesive foam on the points it was wearing the most to save the leather from tearing open. I have a company in CA (GAHH) that makes seat covers and do a excellent job... despite what alot of others on the forum believe, but I plan on buying the front seat sets in the future and replacing them and the foam pads and all... just buying some time.
Do you happen to know a source that I could look up what materials to use to make a seat heater element? I wanna make a set for my rears. It's gonna have to be 8 squares that measure 14'' x 6''. So far everyone I find online has no sizes close to that and want about $75 per pad. From what I saw last night it's flame retardent cloth and wires? Works like a light bulb element I would say is the best relation to it. I tried doing some searches fo how to "build" one but no dice.
Member
this is the best write i've seen so far, and for better or worse i've decided not to tackle my passenger heating element. It's only the passengers, and well i'm just afraid it won't go back together quite like yours. Maybe as the car ages and I care less about it.....
Thanks for the write up, great job. your hard work is much appreciated!
Member
Wow, you are amazing. Now if anyone wants to add heated seats as well, they can follow this.
Definitely add this to the diy guide stickied at the top of the forum.
Member
Sweet street (forum) cred!!!! ha ha
Just for those intrested I'm gonna try to retro fit heated seats in the rear... working on sourcing stuff to make pads, everyone wants an arm and a leg for some wires in fabric... I will put that together when I do it and of course put it on the forum... I could even make pads and sellthem to people to retro fit in theres too... just a thought but I;m pretty sure I'm gonna do it since the rear seats are no where near as intricate as those front vadars!
Member
I also put an off switch on the seat bottom and the back heat feels good after a long day at work or on a long trip.MVC-001F.JPG
Member
so that turns off the bottom or both?
Member
Yes, just the bottom.
Member
BMW E36 M3 Expert
There's a reason why those elements are covered in fire retardant materials. Adding electrical tape was a very very bad idea.
I really advise against anyone doing what he did. The guide is great for getting to the elements, but for your own safety, REPLACE THEM.
Part Numbers for the heating pads
64118391281 - Backrest
64118391280 - Bottom
Last edited by Braymond141; 01-30-2009 at 02:38 PM.
Member
Just to save my reputation on this one, the wires were pushed under the material and the tape was strictly to keep it together. In my opinion it was done safely because the electrical tape is not between the element wires the leather, it's between the material off to the side and the tape as stated is to hold the material together instead of leaving it flapping around.
Thanks for pointing that out because you are very right about it.
I will say it is prob. much better to just replace them, you don't want to put it back together to find out you over looked a break or created a new one during install. If you do repair it I would suggest as your putting leather back on to check periodically with the ohm meter to make sure it dosen't break or another break show up.
Member
Be advised that those part #'s are good for vaders only. My original intention was to take the working heaters out of worn sports seats and put them in my vaders. Because of the different stiching pattern they are not interchangable between regular, sport , or vaders.
Member
You should pm a mod and have it towed to the DIY forum.....
John
'95 Hellrot M3 w/Dove
AA Euro HFM Stage II (w/21# Injectors & Software) W/Gen III Exhaust - URI Crank Pully - FDM w/3 Row M Coupe Rad - 3.23 LSD - Vogtland Club Spec/Koni SA - UUC Red w/Enforcers - TMS Shims/Rear Camber Bars w/QA1 inners/Sways - VMC F/TMS R End Links - X-Brace - Perf Ultimate/SS Brake Lines - GC Tower Mounts/RTAB Shims - ZKW's w/5000K Hid - Fog Delete - Alpine 9847/Pioneer TS-C130R Kevlar Components/Pioneer PRS-X340/Stealth Box's/Wired Zune 120GB - OE LTW CF Sills/Glove Box Plate - Staggered Black M-Spoke II's w/235/40 (front), 255/40 (Rear) Nitto NT05's - Rolled Fenders!
***Got a '95 M3? (actually pretty common on all years! Even happened to Racer Seth Thomas!) Check Your LSD! http://forums.bimmerforums.com/forum...d.php?t=390209
Member
BMW E36 M3 Expert
You should at least source an additional layer of fire proof fabric to add to this DIY. Whether or not the wires are tucked, the the tape doesn't belong there.Originally Posted by joe91985

Anyone who makes a DIY needs to keep in mind that other people are going to do this. That makes you indirectly responsible for their actions.
Member
Have been looking for the material, the only thing I can find so far says up to 1800 degrees C which I know is way too high, but better safe than sorry. Any one know where I could get material.... I'm working on making my own rear heaters for the rear seats since all pre made pads won't fit properly.
Member
Where are you getting the heater wire?
Member
Working on that one too, I have contacted a few people about what type of wire is needed to make this thing work. I will be posting information about it and probally making a DIY on how to do it once I have it together. I have also thought about making a second set along with a wiring harness so someone could buy it from me and install it, but of course I'm going to be testing mine and make sure it works properly before someone else puts it in.... don't need the rear seats catching on fire!
New development! So aparently you can use fiberglass cloth as a "fire proof" material, talked to a guy from a company that sells material made for 1800*C, he told me that fiberglass would be perfect for the temp that a seat heater would reach... One of the many solutions for my rear seat heater project. Just figured I would put the information in for anyone needing to refresh the material if they were making repairs to the seat heater.
Last edited by joe91985; 02-05-2009 at 08:11 AM. Reason: Automerged Doublepost
OG Senior Member
Just had mine done yesterday, we used a heating element from an
e83 X3. What a difference in the number of heating elements compared to the old e36 one, heats up much quicker and gets much hotter now.
We also used some of the heating element to cover the thigh support that pulls out, so now thats heated, woot....
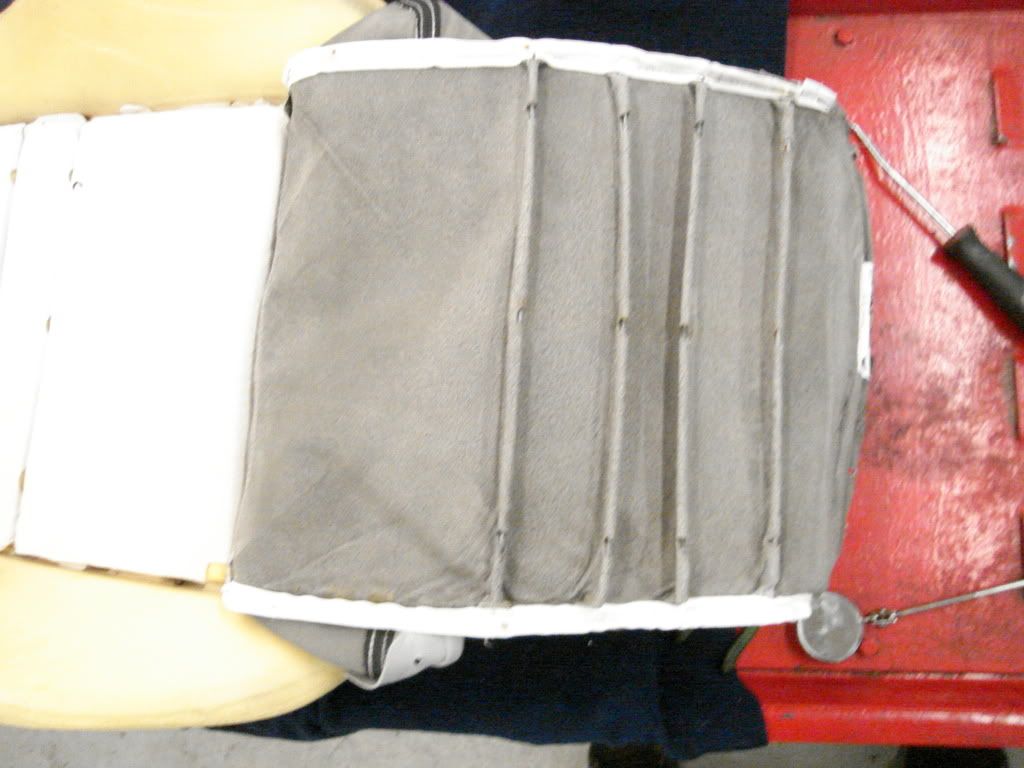
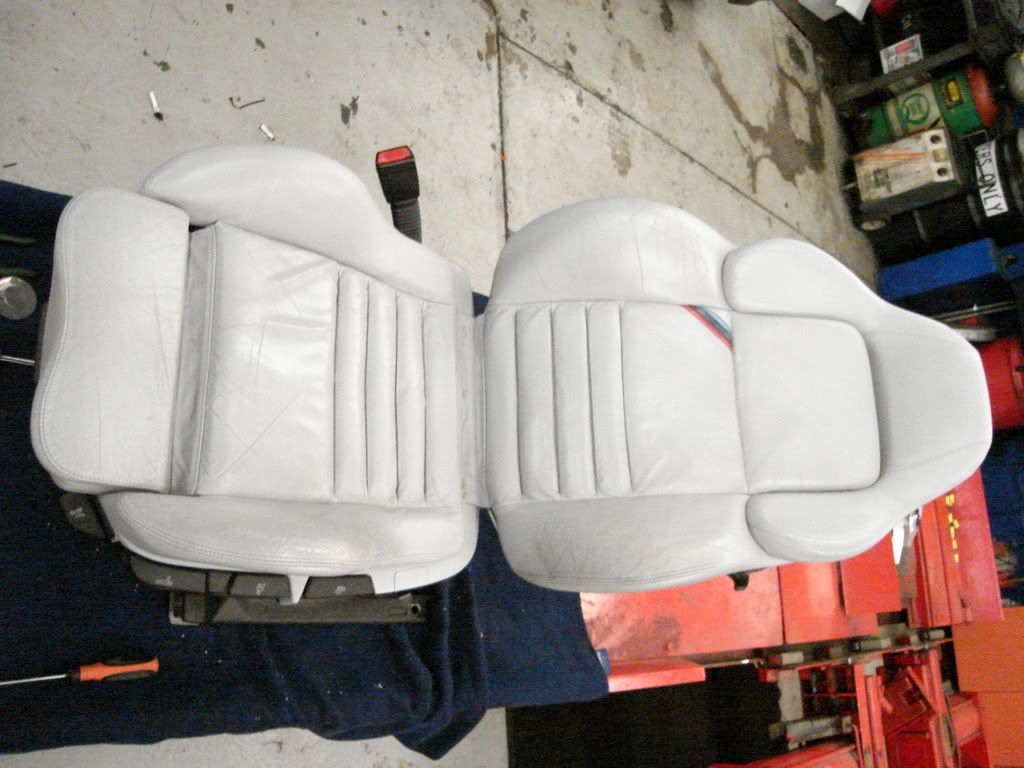
OP,you have pics of what the seat cover looks like now? My leather cover is stretched as tight as it can go w/o tearing it but still is baggy is some spots, we used a brand new seat foam bottom too. I assuming the leather is just old I'll just have to live with it.
Member
"OP,you have pics of what the seat cover looks like now? My leather cover is stretched as tight as it can go w/o tearing it but still is baggy is some spots, we used a brand new seat foam bottom too. I assuming the leather is just old I'll just have to live with it."
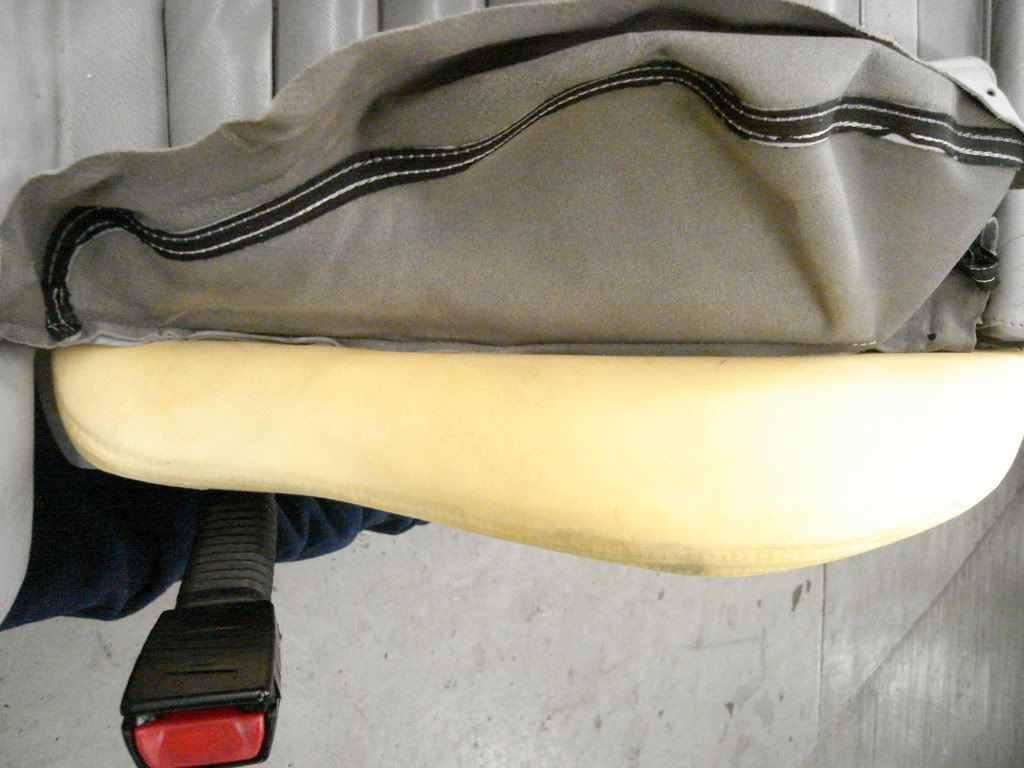
This is what the seat looked like after putting it all back together, I do have some looseness to the material but it was about the same as when I took it apart, I would say old leather that is worn is the reason. I didn't see too much that could be done to stretch the material to make it tighter.
OG Senior Member
Thats what I figured, how did you get the sides tucked down? Well, at least I have my heat again and that metal seat bolster frame doesn't dig into my leg anymore with the new seat foam.
Member
"Thats what I figured, how did you get the sides tucked down?"
Not exactly sure what your taking about when you say sides, maby copy on of my pics and circle in paint or something then pm me or post it on this thread. If you look at the 3rd and 2nd to last picture in my original post it shows tucking the material between the center of the seat and the side bolsters to get that defined line, maby thats what your talking about?
Member
very nice work and high quality post. yes, it would really take it to the next level for a tough job like this if the pics had some circles and arrows and lables drawn in them using microsoft paint that comes on the windows os in the accessories.
I'm an electrical engineer so i'm going to research some nichrome wire and other readily available high resistance wire that can be used to fabricate seat heaters. I've used fiberglass cloth for body repar that would work well to sandwich the wire between. Hi temperature tape is available also to tape the wire down to the cloth. if double sided tape is available, then it coiuld be used to fasten the two layers of cloth together. all this is a lot of work and messy. I've seen rubberized pad that has a uniform sheet of resitive metal film inside it. this material can be cut to any shape and you just attach wires to each end of the piece for to get a custom shape heater element. the seat back heater in my 95 318ic passenger side is the only element working in my car. it measures 6.2 ohms. this will draw 2.3 amps at 14.5 volts or 34 watts. so, it seems like 40 watts is the target heater element design. I'll keep you posted. jerry
Member
Did you need to cut the four Christmas tree clips to remove the seat covers? Do you have the part number of the clips?
E36 DICE MediaBridge BT and iPod support Photo location of the cabrio drain holes. Custom heated seats and lumbar support retrofit. Glovebox charging sockets and cupholders. E36 PDF Schematics UK Aftermarket E36 OBC bulbs Convert rear lights from non check-control to check-control DIY BMW E36 MFSW retrofit pictoral DIY All BMWs UK cheaper source for electrical connectors, Farnell, RS BMW INPA success E46/E39 onwards E36 vert mood lighting DIY BMW E36 puddle light and inner handle illumination DIY. E36 convertible flat bungee tension strap fix DIY BMW E36 PDF manualBMW E36 vert water in motor of tonneau area fix.
Member
Bump for part numbers
E36 DICE MediaBridge BT and iPod support Photo location of the cabrio drain holes. Custom heated seats and lumbar support retrofit. Glovebox charging sockets and cupholders. E36 PDF Schematics UK Aftermarket E36 OBC bulbs Convert rear lights from non check-control to check-control DIY BMW E36 MFSW retrofit pictoral DIY All BMWs UK cheaper source for electrical connectors, Farnell, RS BMW INPA success E46/E39 onwards E36 vert mood lighting DIY BMW E36 puddle light and inner handle illumination DIY. E36 convertible flat bungee tension strap fix DIY BMW E36 PDF manualBMW E36 vert water in motor of tonneau area fix.
Member
Part number for the hog rings is 52-10-1-945-543
 Posting Permissions


 Reply With Quote


Bookmarks